Pumpkin Chip Cookies

Here’s another pumpkin recipe for you.  And this one is a keeper.

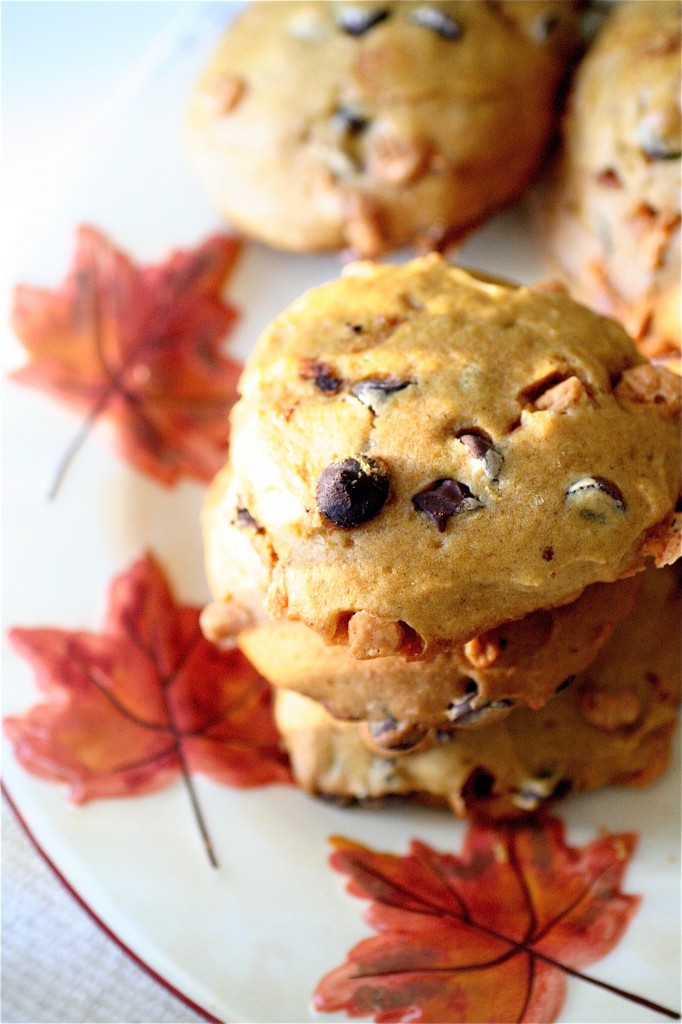
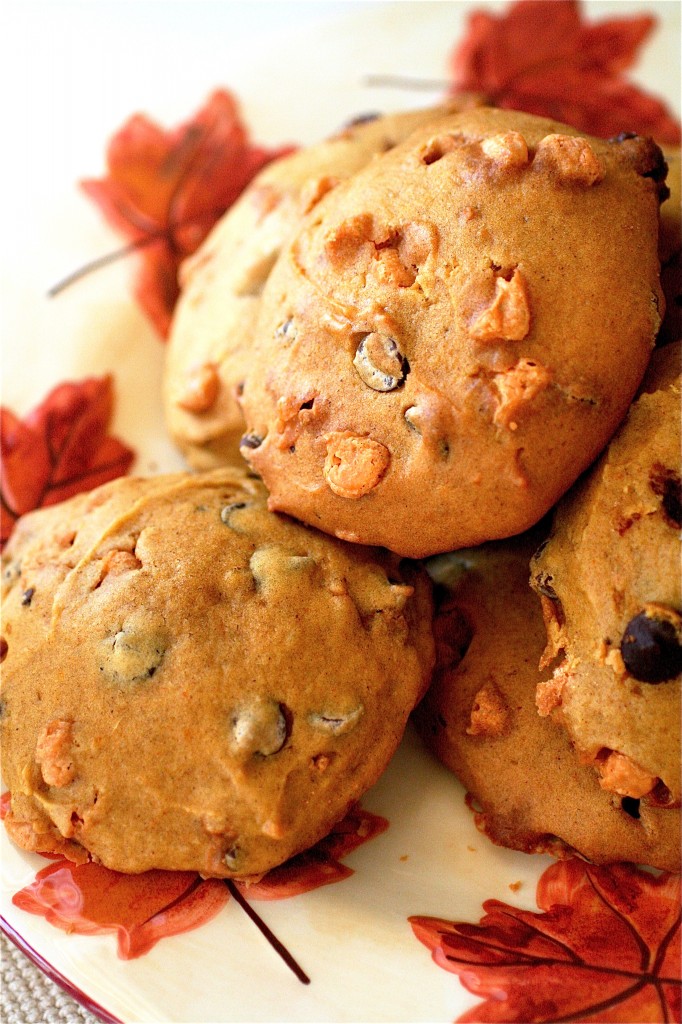
These are some of the softest, chewiest cookies I have ever made.  Pretty much like the top of a muffin (Seinfeld, anyone?).  Cake-like, if you will.  And pretty delicious, too, I might add.  I tend to shy away from any kind of dessert that calls for canola or corn oil in the recipe-I feel like sometimes the oil adds a little bit of an “off” flavor-but that’s definitely not the case with these cookies.  The addition of cinnamon adds a touch of that fantastic pumpkin pie flavor, too.  I added both butterscotch and chocolate chips to the batter; well, because I can, and I was in desperate need of some chocolate therapy one evening after coming home from work, so I figured it was a great idea.  I just happened to have open bags of both types of chips in my pantry (I may have sneaked small handfuls of the first halves of the bags on other occasions in desperate measures for chocolate comfort).  Use whatever kind of chip you have on hand.  I have a feeling white chocolate would be amazing, as well as other types of add-ins: raisins, nuts, or even some crystallized ginger.  That’s one of the best things about this particular cookie: even if you don’t put any kind of chip in it, the cookie is still great on its own (but, I will admit, the chocolate and butterscotch chips take it up a notch, in my humble opinion).


Pumpkin Chip Cookies

Servings: approximately 15 cookies (These are pretty big cookies, by the way. They spread and rise significantly during the baking time.)


Ingredients

2 cups all-purpose flour

1 and 1/2 teaspoons baking powder

1 teaspoon baking soda

1/2 teaspoon salt

1 teaspoon ground cinnamon

2 large eggs

1 cup granulated sugar

1/2 cup canola oil

1 cup canned pumpkin

1 teaspoon vanilla extract

1 cup butterscotch chips

1 cup semisweet chocolate chips
Instructions

1. Preheat the oven to 325 degrees.

2. Line two baking sheets with parchment paper and generously butter/grease the parchment.  ***I used cooking spray-which worked very well.

3. In a large bowl, combine the flour, baking powder, baking soda, salt and cinnamon together, mixing well.

4. In the bowl of your standing mixer fitted with the paddle attachment, beat the eggs and sugar on medium speed until light yellow and smooth, about 1-2 minutes.

5. Reduce the mixer speed to low and slowly add the oil, pumpkin, and vanilla, scraping down the sides of the bowl as necessary.

6. Add the flour mixture to the wet ingredients and mix until just combined.

7. With a rubber spatula, gently fold in the butterscotch and chocolate chips until incorporated.

8. Using a 1/4-cup measuring cup or an ice cream scoop, evenly distribute the dough on the parchment-lined baking sheets, spacing them about 2 and 1/2-inches apart.  Remember, these cookies spread and rise significantly during the baking time.

9. Bake the cookies (I baked mine one baking sheet at a time) until they are lightly golden around the edges, about 16 minutes.  Let cool for 5 minutes after baking.


Source: Adapted from Big Fat Cookies by Elinor Klivans.


October 7, 2011 - 10:19 am

Annie - I love the pumpkin + chocolate combination, I bet the butterscotch is great in there too!

October 7, 2011 - 12:30 pm

Paula @ Dishing the Divine - No fair stealing my thunder! I made pumpkin chocolate chip cookies last night to post soon. 🙂 Really, though, can you have too many pumpkin chocolate chip cookies? 🙂

October 7, 2011 - 1:13 pm

Jen of My Tiny Oven - I have been looking for a great pumpkin cookie recipe! Now I have one, these look amazing! Can’t wait to try them.
THanks!!

October 7, 2011 - 1:19 pm

Rachel - I love big caky cookies like this! Throw pumpkin and chocolate into the mix and you’ve instantly bumped these to the top of my cookies-to-bake list (yes, I have one of those lists specific to cookies!)

October 7, 2011 - 5:00 pm

Maria - Oh man, I <3 muffin tops!!!! *proceeds to make every single kind of muffin top possible*

October 8, 2011 - 6:02 am

Ali - The pumpkin and chocolate seems like a great combination. Bet the cookies are delicious. Nice post.

October 10, 2011 - 10:37 am

Melissa - I just made these cookies this weekend – SO good! My friends gobbled them up. :)Thanks for sharing!

October 16, 2011 - 7:31 pm

Jennifer - I just made these- they are delicious! I made them for all of my house mates and they are devouring them. For me, this recipe made about 2 dozen, and the cookies still came out huge!

October 16, 2011 - 10:24 pm

Josie - Top of the muffin TO YOU!! 🙂

October 18, 2011 - 1:00 am

Ruth - These cookies look SO GOOD! I have to try them.

December 16, 2011 - 6:21 pm

Day 349: I Like Baking. I Hate No-Baking. « Photographic Rhodes - […] an hour, I had no choice but to make something new with ingredients I had on hand. I decided to try this pumpkin chip cookie recipe. Since I’d already ate too much batter I didn’t try one of these cookies last night, […]

October 28, 2012 - 7:46 pm

PinLaVie... Make your pins come true – Pumpkin Chip Cookies - […] http://www.thecurvycarrot.com No Comments.   « Devil’s Food Cake with F…Almond and […]

November 17, 2012 - 3:26 pm

Pam - I am getting ready to make these to take to dinner party with friends tonight. They sound yummy!

October 27, 2013 - 4:40 pm

Pumpkin Toffee Chocolate Chip Cookies | CATHERINE DUB - […] Adapted from The Curvy Carrot. […]

November 5, 2013 - 2:12 pm

Pumpkin Chocolate Chip Cookies | Our Blog - […] saw this recipe on Pinterest (my go-to for deliciousness), “pinned” it, and then wrote it down to add to the recipe […]

November 12, 2014 - 7:56 pm

Naadiya - I absolutely LOVE how cakey they are!

Baked Ziti


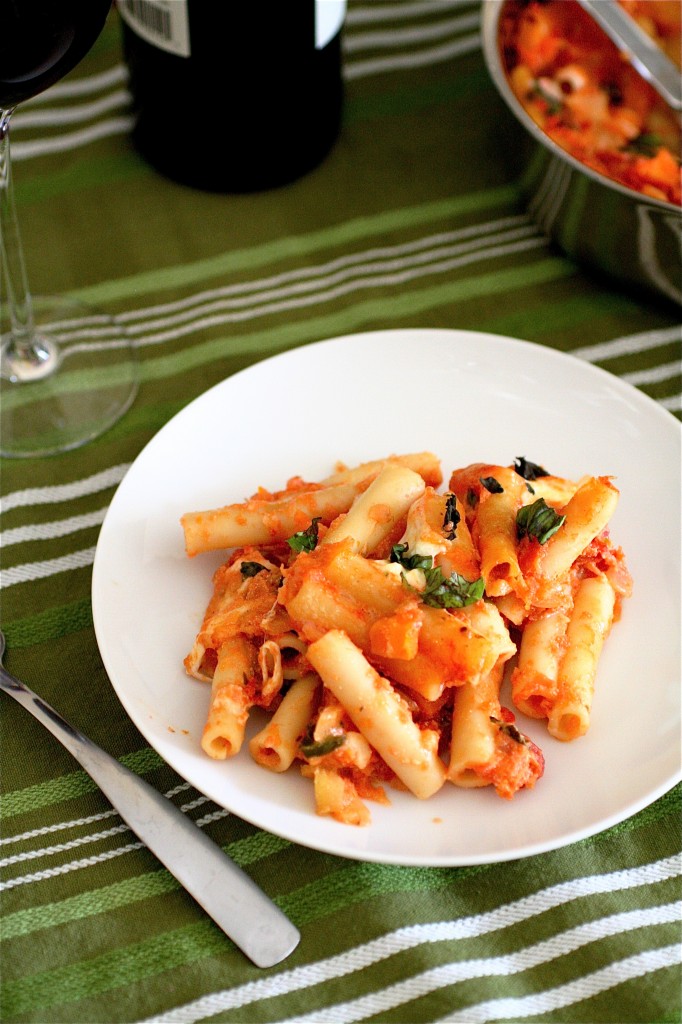
I’ve also been meaning to post this recipe for a while.  This recipe is a reader’s request (this one is for you, Christina!)  I’m actually really excited to hear from all of you-especially ideas for “vegetarianizing” or “veganizing” recipes (and, yes, I think I just made those words up).  I had been wanting to make a really easy baked casserole type of dish, knowing that I would be having a pretty intense work of week ahead of me.  One of the best feelings is coming home after a long day and realizing that an awesome dinner is only minutes away.  I think I ate this baked ziti for about 5 days straight.  The recipe makes a lot of servings, so feel free to cut it in half.

I loved this recipe for one (of many) reasons.  It has three different types of cheese in it. It’s a snap to throw together, it smells fantastic while it’s baking, and it’s amazing with some good wine and bread.  Feel free to up the health factor here by using whole wheat ziti, add in some more vegetables (I would cook them separately and mix them into the ricotta mixture-I’m thinking onions, mushrooms, and maybe some spinach!), and use low-fat or vegan cheese substitutes.

As far as freezing goes, assemble the dish as directed and then simply freeze right before the baking step (freeze up to two months).  Get one of those handy aluminum baking tins to freeze it in so later you can just pop it in the oven.  Nothing beats pasta and cheese, right?

Baked Ziti

Servings: at least 4 large main course servings

Ingredients

Extra-virgin olive oil, to coat the baking dish

3/4 cup ricotta cheese

1 egg yolk

1 cup Parmesan cheese, grated

Pinch of nutmeg, freshly grated

1/4 cup parsley leaves, coarsely chopped

Salt and pepper, to taste

1 pound of ziti

4 cups tomato sauce, heated

1/2 pound fresh mozzarella cheese, cubed

Fresh basil, torn, for garnish, optional


Instructions

1. Preheat the oven to 425 degrees.

2. Lightly coat a 10 x 12-inch baking dish (or a lasagna pan) with the extra-virgin olive oil.

3. Bring a large pot of  lightly salted water to a boil.

4. In a large bowl, combine the ricotta, egg yolk, 1/2 cup of the Parmesan cheese, nutmeg, and parsley, mixing well.

5. Season the mixture with salt and pepper, to taste.

6. Meanwhile, cook the pasta as directed on the package until al dente.  Drain well.

7. Very carefully, add the cooked pasta to the ricotta mixture and stir until thoroughly combined.

8. Add the heated tomato sauce and mozzarella, mixing well.

9. Pour the pasta mixture into the prepared baking dish and smooth the top with a rubber spatula.

10. Sprinkle the top of the pasta with the remaining Parmesan cheese.

11.  Bake, uncovered, until lightly browned, about 20 minutes or so.

12.  Let cool slightly, sprinkle with fresh basil (if desired), and enjoy.


Source: Barely adapted from Williams Sonoma’s Pasta.

October 5, 2011 - 5:31 am

Tasha - Hi, I just found your blog by chance and I am so excited to try out your recipes, they all look fantastic! This one especially so I will try it first.

I did a brief look but I did not see a printable version option. is it available, or is that an upcoming option?

October 5, 2011 - 7:13 am

srlacy - Hi Tasha-

Thank you for the kind words.

I am actually in the beginning steps of having the website entirely re-designed, and this will be an option that I will be excited to include when this happens. I will also be adding a nice email subscribe feature.

Shanon

October 5, 2011 - 10:31 am

Annie - When I was in high school the family I baby-sat for always had a pan of baked ziti ready for me to pop in the oven when the kids were hungry and I loved it! I’m not sure why I’ve never made it for myself before, but I’ll definitely be trying this recipe soon!

October 5, 2011 - 6:12 pm

Susan - The print option is way down in the bottom left hand corner. I just printed this recipe to try SOON!

October 5, 2011 - 6:46 pm

Lauren @ hey, who cut the cheese? - Looks great! I love to order baked ziti when I’m out at an Italian restaurant, but for one reason or another, have never tried to make it myself. That will have to change =). Thanks for sharing!

October 5, 2011 - 9:18 pm

Deborah - You had me at 3 kinds of cheese!!

October 17, 2011 - 1:32 pm

Barbara - This was so good! I did mine in large ramekins for individual servings. Also, you said “tomato sauce” and I thought you meant something like prepared pasta sauce. That’s what I used. Anyway . . . great recipe. So yummy.

March 16, 2012 - 12:27 pm

Samir - Enjoyed making this and my wife and son (and me) loved it! Thanks for sharing!

Basic Tomato Sauce

The last few fresh tomatoes of the season are quickly disappearing in my area.  And I still couldn’t stop myself from over-buying some on one of my recent trips to the market. So, what to do with a few last tomatoes?  Tomato sauce, of course. Something basic that could be used in almost any type of pasta dish-fancy or not.  I looked at a few recipes, and while some promised the convenience of only a few ingredients or a short amount of preparation time, I knew I had a whole sunny afternoon in the kitchen at my disposal.  This recipe was actually ready in about 45 minutes-once I had cleaned and prepped my veggies, which was nice. I wanted to find a sauce that I could develop a strong flavor during the cooking time.  Enter this recipe.  I liked the fact that it has a few other vegetables in it which add a little bit of texture (and extra vitamins!) and flavor to the sauce.  I also liked the fact that I got to pull out my immersion mixer on this one (one of my favorite kitchen gadgets-if you don’t have one, carefully puree the sauce in a blender instead.)  I kept some on hand for weeknight pasta dishes, but I used the majority of this sauce in a fantastic baked ziti (recipe soon to follow).  I did not try freezing any, but I believe that this sauce will freeze well if stored properly.

Basic Tomato Sauce

Servings: about 4-5 cups sauce

Ingredients

1/4 cup extra-virgin olive oil

1/2 large Vidalia onion, finely diced

1 carrot, peeled and finely diced

1 celery stalk, finely diced

3 cloves garlic, sliced thinly

4 fresh tomatoes (variety of your choice), peeled and seeded, then diced***To easily peel a tomato, cut a shallow “x” on the bottom of each tomato.  Drop each one into a pot of boiling water for about 15-30 seconds.  Immediately plunge each tomato into a bowl of ice water (to stop them from cooking). The skins should easily peel once cooled.

One 28-ounce can of chopped tomatoes, with juice

1 bay leaf

2 or 3 sprigs of fresh thyme

Salt and pepper, to taste

Fresh basil, optional

Instructions

1. In a large and deep sauté pan (or saucepot) over medium heat, heat the olive oil until shimmering.

2. Add the onion, carrot, and celery and cook, stirring occasionally, until soft and lightly golden, about 8 minutes.

3. Add the garlic and stir until fragrant, about 1 minute.

4. Add the fresh and canned tomatoes, bay leaf, and thyme sprigs, and mix well.

5. Season to taste with the salt and pepper.

6. Cook, uncovered, until slightly thickened, about 20 minutes or so.  Make sure to stir occasionally!

7. Remove the sprigs of thyme and bay leaf.

8. Very carefully, using your immersion mixer (or a blender in batches), blend the sauce to your desired consistency.

9. Garnish as desired with fresh basil.


Source: Adapted from Williams-Sonoma’s Pasta.

October 3, 2011 - 7:20 am

Blog is the New Black - I love when sauces call for additional veggies… love the crunch and love that it ups the nutrition! Sneaky, sneaky.

October 3, 2011 - 7:10 pm

Julia - I bet it would freeze wonderfully. Looks delicious, and I love that you added some extra veggies!

October 3, 2011 - 7:23 pm

peach - Shanon I love the pictures! Love homemade pasta sauce, I will have to try this!

October 4, 2011 - 9:34 am

Anna - Thanks for this recipe. Tomato sauce is a staple for everyone’s kitchen. Creating your own homemade-tomato sauce is a plus! I love that you have included a dash of tips here and there…

October 5, 2011 - 5:01 am

The Curvy Carrot » Baked Ziti - […] cups tomato sauce, […]

April 2, 2012 - 7:45 pm

Spring Recipe Round Up « Modern Alice - […] Basic Tomato Sauce from The Curvy Carrot as a cheaper way to fulfill my obsession with Dave’s Organic Tomato Sauce […]

June 11, 2012 - 7:22 pm

Summer Recipe Round-up « Ranjita's Baking Blog! - […] Basic Tomato Sauce from The Curvy Carrot as a cheaper way to fulfill my obsession with Dave’s Organic Tomato Sauce. […]