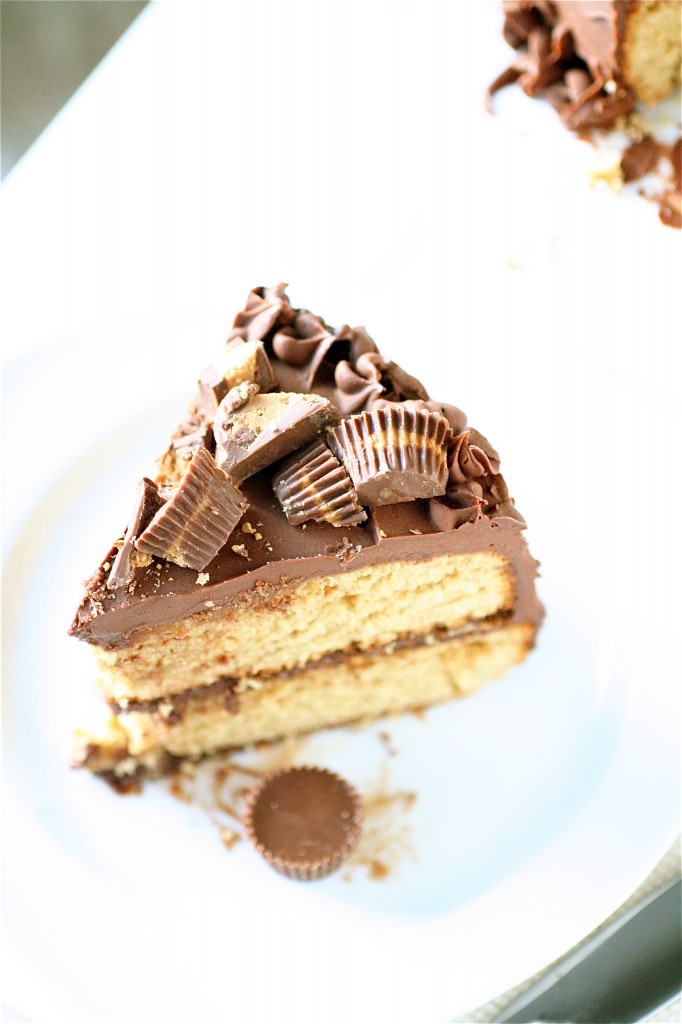
Peanut Butter Cup Cake


Today is my birthday.  Another year has gone by.  And this year?  It’s going to be even better than the one before it.

I have to take a moment to reflect here, so please excuse my digression.  I think about what has happened in the past year…and I have to say I am mighty proud of where I stand now.  I’ve completed my residency training, taken and successfully passed my boards, moved 1,000 miles from my friends and family, started a fellowship in the field of my dreams, and now I am in the process of looking for a job…after being in training/school since the age of 4…28 years later….here I am.  The best (and my proudest) part about this whole process is that I have done this on my own…without anyone holding me back or trying to keep me down.  I’ve had the support and love from so many friends and family, and this year I am celebrating how much love is in my life.  There’s a lot of love around me.  This blog is just one of the ways that I am celebrating this year: in the coming weeks, I will be completely redesigning the website with a fantastic web designer, and I am hoping to continue growing my experiences and opportunities in the food blogging world (along with that, I will try to decrease the number of kitchen failures that I still have).

Right now, I am traveling to the opposite side of the country to attend a national conference in my field.  I’ve giving a presentation, visiting with old friends, and exploring a new city that I have never been to (but always wanted to). Talk about a way to spend a birthday!  I am so happy to be celebrating in this particular way this year.

I actually did not make this cake for my birthday.  I made this a couple of months ago for a party, but I never posted it.  I haven’t had a lot of time lately to play around in the kitchen, and to be completely honest with you, I couldn’t decide what kind of birthday cake I wanted to make for myself this year.  I have plenty of ideas jotted down, but none of them came to fruition.  But, let me tell you, there are some pretty awesome and inspirational sources out there for birthday cakes.  And, with the way I want to spend this year, I have a feeling that I will be doing plenty of celebrating, even if it isn’t my birthday.  So get ready.

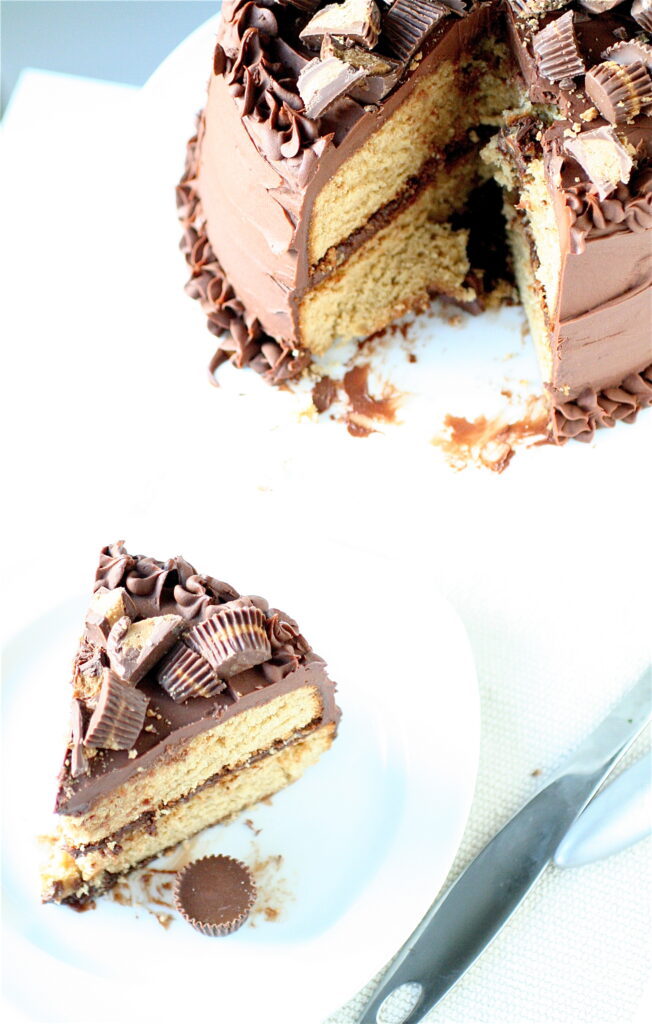
This cake is a chocolate/peanut butter lover’s dream.  A peanut butter cake with a creamy peanut butter frosting…all topped with a rich chocolate frosting and peanut butter cups.  I’ve been on a chocolate peanut butter roll  lately, but, apparently, you all are, too.
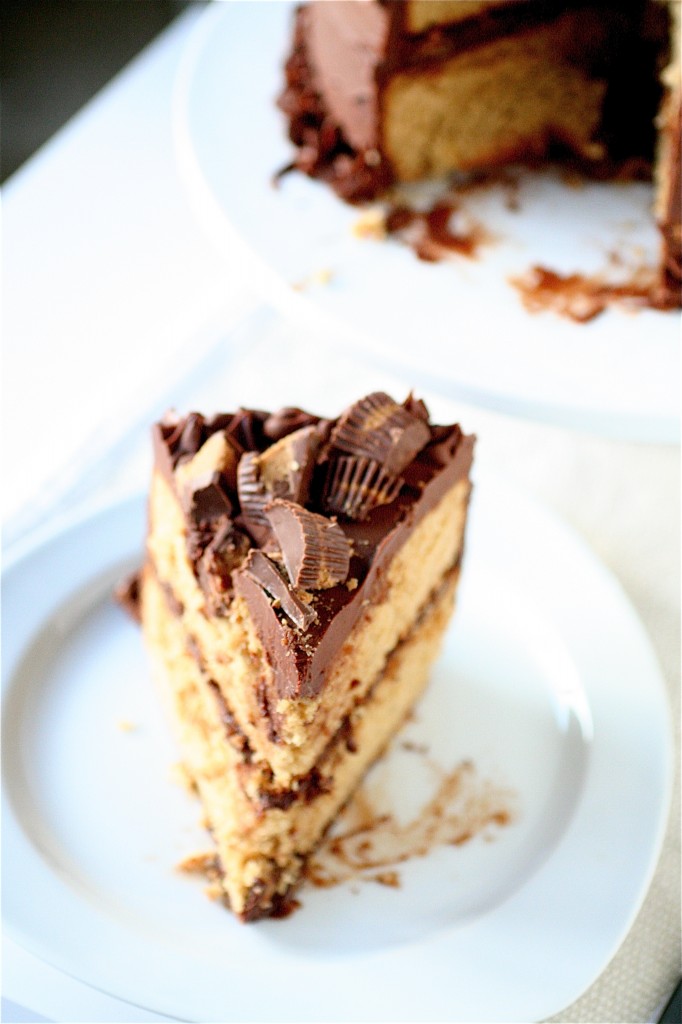
Peanut Butter Cup Cake

Servings: One 2-layered cake (you may have enough batter to make a 3rd layer, but I stuck with 2)


Ingredients

For the cake:

2 and 1/2 cups flour

1 teaspoon baking powder

1 teaspoon baking soda

1/2 teaspoon salt

10 tablespoons (1 and 1/4 sticks) unsalted butter, at room temperature

1/2 cup creamy peanut butter

1 pound bag of light brown sugar

4 eggs

1 teaspoon vanilla

1 cup buttermilk

For the filling:

2 and 1/4 cups whipping cream

1/2 cup light brown sugar

12 ounces bittersweet chocolate chips

1/2 cup creamy peanut butter

For the chocolate frosting:

20 tablespoons unsalted butter, softened

1 cup confectioners’ sugar

3/4 cup Dutch-processed cocoa

Pinch salt

3/4 cup light corn syrup

1 teaspoon vanilla extract

8 ounces milk chocolate, melted and cooled slightly

3 cups chocolate peanut butter cups, coarsely chopped
Instructions

1. For the cake: Preheat the oven to 350 degrees.

2. Butter and flour two 9-inch cake pans.

3. In a large bowl, whisk together the flour, baking powder, baking soda, and salt.

4. In the bowl of your standing mixer fitted with the paddle attachment, cream the butter and peanut butter together on medium-high speed until smooth, about 2 minutes.

5. Reduce the mixer speed to medium and add the brown sugar.

6. Add the eggs, one at a time, mixing well after each addition.

7. Add the vanilla, mixing well.

8. Reduce the mixer speed to low, and alternately add the flour mixture and the buttermilk, mixing until just incorporated.

9. Divide the batter between your prepared cake pans and bake until a cake tester inserted into the center comes out clean, about 25 minutes.

10. Let the cakes cool completely before frosting.

11. For the filling: In a medium saucepan over medium heat, bring the cream and brown sugar to a simmer, stirring until sugar is dissolved.

12. Remove the saucepan from the heat.

13. Add the bittersweet chocolate chips to the saucepan and let stand for one minute.

14. Whisk in the creamy peanut butter until smooth.  Chill the filling until ready to assemble the cake.

15. For the frosting: Using your food processor, combine the butter, sugar, cocoa, and salt.  Mix the ingredients together until smooth.

16. Using the feed tube with the processor running, slowly add the corn syrup and vanilla, mixing until smooth.

17. Add the melted chocolate to the mixture, scraping down the sides of the bowl as necessary, until the mixture is creamy and thoroughly combined.

18. To assemble the cake: I covered the outside and middle of the cake with the filling mixture, chilled the entire cake, and then I frosted it with the chocolate frosting, topping it with the chopped peanut butter cups.

Sources:  Cake and filling slightly adapted from Bon Appétit, frosting directly from Cook’s Illustrated.


October 19, 2011 - 8:03 am

Blog is the New Black - Happy birthday, Shannon!!!!!!!!!! Congrats on another successful, although tough, year! And this cake… THIS CAKE!!!!!!!!!!!! WANT!

October 19, 2011 - 11:23 am

Robyn {Planet Byn} - happy happy birthday! hope you have a fantastic day! i’m looking forward to the re-design!

October 19, 2011 - 11:59 am

DessertForTwo - Happy Birthday!

I’ve always been drawn to your blog for all the reasons you described in your first paragraph. Us strong, independent, driven women have to stick together!

I truly hope you savor all of your accomplishments. You deserve them.

Have a great trip, Shanon 🙂

October 19, 2011 - 12:14 pm

Mollie - Happy Birthday! I just want to say that I love your blog – keep up the good work, and best wishes for the coming year! 🙂

October 19, 2011 - 12:43 pm

Paula @ Dishing the Divine - Happy birthday! You really HAVE done a lot this year! You have a right to be so proud and excited. 🙂 This cake looks absolutely gorgeous. Some day, I will learn to decorate such pretty cakes. Some day… 🙂

October 19, 2011 - 12:57 pm

Lauren@LittleYellowKitchen - Happy birthday!! And this cake…I need it. My favorite candy, on a cake, does it get any better? YUM

October 19, 2011 - 1:00 pm

Bianca @ Sweet Dreaming - This looks incredible 🙂 Happy birthday! I love your blog so much!

October 19, 2011 - 2:22 pm

Jen of My Tiny Oven - Firstly, Happy Birthday!! I hope you have a great one!
Secondly, WOW that cake looks AMAZING! I love anything with peanut butter and chocolate.

October 19, 2011 - 5:50 pm

Kelley - Happy Birthday! Your cake looks delicious.

October 19, 2011 - 8:36 pm

Tracey - Happy Birthday!! 🙂 What a decadent cake, I know about 10 people who would love to be surprised with this on their special day.

October 19, 2011 - 9:46 pm

Happy When Not Hungry - Happy Birthday!!!!!!!! This cake looks absolutely amazing!

October 20, 2011 - 7:53 am

Lauren at Keep It Sweet - Happy Belated Birthday!!! And that cake is perfect:-)

October 21, 2011 - 11:25 am

Kelsey - Happy birthday and congratulations on all your success. It sounds like this past year was pretty amazing. This year is going to be incredible!

October 22, 2011 - 8:36 am

Lindsay - Happy Birthday Shanon! I found your blog through Annie’s Eats and love it! Congrats on all your success and all the best to you in your future endeavors. You are an inspiration!

October 22, 2011 - 10:13 am

Lori - Shannon, Congratulations and best wishes as you turn another year “awesomer”. Wow, what an accomplishment with passing your boards and completing your residency. My son, a high school senior will hopefully be starting the first rung of the journey this coming September. Thanks for all you do and the wonderful recipes and anecdotes you continually share with your cyber friends.

Right now I am up at the Head of the Charles. My son is rowing with for his HS. This is exciting stuff. I love Boston

October 24, 2011 - 6:01 pm

Sandi M - Happy Belated. This cake looks amazing! I’m pinning it so I can find it when I’m ready to make one for any event of my daughter’s that comes up.

October 25, 2011 - 3:01 pm

Meredith - Happy belated birthday!

Might I say-whoa-my mouth is watering looking at this cake. I’m a self-professed peanut butter lover…it’s my favorite food. Anything pb flavored is a win and I’m definitely trying this recipe!!

Thanks for sharing!!

–Meredith

October 28, 2011 - 1:41 pm

Jenny - When I saw this cake – I knew I had to make it. I decided to make it for a group of co-workers all celbrating their birthdays in October.
I have to say – this cake is wonderful – super rich and oh the compliments I got – actually I have been hired to make this cake again for someone’s family function.
But I have to say – in your instructions for the frosting – you asay to use the food processor. Is that correct? I did do this – but the frosting did not come together properly at all – I ended up takign everything and putting it into my stand mixer and using the paddle attachment – gave it a good beat and it turned out perfect – what frosting is suppose to look like. Made me think maybe that was a typo? Or did I do something wrong.

Anyway – it turned out great – my pictures are no where near as good as yours – but the cake was delish and like I said – everyone loved it!

Thank you!

October 28, 2011 - 7:53 pm

danellesdish - My husband loves peanut butter cups…he would love this recipe. Thank you so much for sharing, this may be his next special cake I make him.

October 29, 2011 - 11:39 am

Maryanna - My mouth is watering right now!

October 29, 2011 - 3:49 pm

srlacy - Hi Jenny-

I actually thought the same thing when I made it, but using the food processor for me was fine. You can certainly use a stand mixer instead.

October 30, 2011 - 6:51 am

Medeja - I absolutely adore this combination!

October 30, 2011 - 4:04 pm

Vanessa - Wowza. Looks amazing. Great photos too. =)

October 31, 2011 - 12:46 pm

Elizabeth - Holy Smokes! This is too much! I need to have this immediately. Thank you for sharing. It is absolutely gorgeous!

October 31, 2011 - 6:46 pm

Amanda Garbutt - This recipe looks so decadent and delicious! I think you will enjoy my recipe for my molten chocolate peanut butter lava cakes… you can find the recipe here: http://bit.ly/moltenchoccake

Thanks!

November 1, 2011 - 2:07 am

Rachel @ Bakerita - Happy birthday!
This looks absolutely sinful. Reese’s are my favorite so a Reese’s flavored cake? My heaven. Can’t wait to try this!

November 1, 2011 - 3:14 pm

Maria - Happy Birthday to you! The cake looks wonderful!

November 2, 2011 - 1:43 pm

Kathy - Panini Happy - Happy birthday to you! And what an incredible cake! 🙂

November 3, 2011 - 11:57 am

marla - Totally pinned & stumbled. This looks amazing!

November 5, 2011 - 11:41 am

Peanut Butter Cup Cake « i FinD Recipes Online - […] Recipe Link Share this:ShareFacebookTwitterDiggEmailPrintLike this:LikeBe the first to like this post. […]

November 24, 2011 - 11:59 am

melanie - I was just looking for a recipe for a peanut butter cup cake when I stumbled on your blog, very engaging think I might follow. Also cannot wait to make this cake 🙂

January 26, 2012 - 8:16 pm

Robyn - I made this cake but cut the ingredients in half. It did not turn out well at all! Can’t wait to try it again with the full recipe though – hopefully it turns out better.

Just wanted to add that I love this blog. So witty and I love hearing the personal stories and anecdotes that accompany each recipe!

January 26, 2012 - 8:24 pm

srlacy - Hi Robyn-

Sorry it didn’t turn out for you. It’s always a little testy when decreasing the proportions of ingredients. Hope it works better next time!

April 19, 2012 - 4:38 pm

Hannah - I want to make a chocolate and peanut butter checkerboard cake and was thinking of using this recipe for the peanut butter part. Does it make a thick or thin batter? I think I will need the chocolate cake batter and the peanut butter cake batter to be about the some for it to bake correctly. Thanks!

April 19, 2012 - 5:19 pm

srlacy - Hi Hannah-

From what I remember, it was more of a medium consistency. Nothing special about it. It definitely was not thin.

June 14, 2012 - 6:48 pm

Madison - Do you really put a whole pound of brown sugar in the cake batter?? I’m making this for my father in law and just want to make sure it wasn’t a typo 🙂 I’ve never used that much brown sugar before! Haha

June 18, 2012 - 8:23 am

srlacy - Hi Madison-
The recipe is correct as written. I know it sounds like a lot, but it turns out really well!

April 28, 2013 - 8:27 pm

Peanut Butter Cup Cake - Precious Photography - […] Read all the details about the recipe on:  thecurvycarrot.com […]

Cheddar Sriracha Swirl Bread

Sriracha.  Otherwise known as “that spicy rooster sauce.”  Are you familiar?  You can find it in a lot of late night diners and the hot sauce aisle of your local grocery store.  If you are not familiar with it, no, it’s not really made of roosters (or any animals, for that matter), but there just so happens to be a cartoon rooster on the packaging.  It’s a spicy, almost earthy sauce that is pretty tasty on a lot of different foods (believe me, I use it on a lot of stuff).  A little goes a long way, and it’s a great sauce to have on hand for those days when you need to add a little boost to your meal.

I saw a different version of this recipe and was immediately sold.  I’m not a huge bread person.  I rarely eat things like sandwiches, but this bread would be amazing with almost any kind of savory sandwich.  Or grilled cheese.  Or even warm, on its own, with some plain old butter.

I went back to my family tree here and used my grandmother’s recipe for plain old white bread here.  It’s one of the best bread recipes in the whole world, and the varieties of renditions of this bread are endless (up next…cinnamon swirl).  Making the bread itself is relatively easy, and the swirl part is simple.  Just flatten out the dough, spread some Sriracha on it, sprinkle on some cheese, and roll up the dough tightly, tucking under the ends (all of this before the second rise).  And do you see those air spaces where the cheese is?  When I took the bread out of the oven, I let it cool slightly before I could resist slicing myself a piece.  I let it cool completely before taking the pictures, but, please understand, where those spaces are now where warm pockets of ooey gooey cheddar cheese.  Awwww, yeah.

Cheddar Sriracha Swirl Bread

Servings: 1 loaf (The original recipe calls for two loaves, but I only have one bread pan.  What I have posted here is for one loaf, which is why the ingredient amounts might seem a little strange.)


Ingredients

2 and 1/4 teaspoons active dry yeast

1/4 cup plus 1/8 cup warm water

1/8 cup granulated sugar

1/2 tablespoon salt

1 and 1/2 tablespoons unsalted butter, at room temperature

1 and 1/3 cups warm water

4 and 1/2 cups all-purpose flour

1/4 cup Sriracha sauce

1 cup cheddar cheese, shredded


Instructions

1. In the bowl of your standing mixer fitted with the paddle attachment, combine the yeast and 1/4 cup plus 1/8 cup of warm water.  Let stand for 5 minutes until slightly foamy.

2. With the mixer on low speed, add the sugar, salt butter, 1 and 1/3 cups warm water, and the flour (one cup at a time), until thoroughly mixed.

3. Switch to the dough hook attachment, and gently (on low speed!) knead the dough until it pulls away from the sides of the bowl, about 10 minutes.

4. Place the dough in a well-oiled bowl, cover with a tea cloth, and let sit in a warm place until doubled in size, about 1 hour.

5. Once risen, punch down the dough and gently knead it on a lightly floured and clean surface.

6. Using a rolling pin (or your hands), gently roll or flatten the dough out into a 12-inch by 12-inch square.

7. Evenly spread the Sriracha sauce over the dough with a silicone brush.

8. Sprinkle the cheddar cheese evenly over the sauce.

9. Starting with one end, tightly roll the dough over itself until it forms a cylindrical shape, pinching the ends together so that no sauce leaks out.

10.  Tuck the ends of the dough under and pinch the seams well.

11. Place the dough in a well-greased bread pan (I used a 9-inch pan), cover with a tea cloth, and let sit in a warm place until doubled again in size, about another hour.

12. Meanwhile, preheat the oven to 425 degrees.

13. Once risen, bake the bread, uncovered, for 15 minutes.

14. Remove the bread from the oven and lightly tent with aluminum foil to prevent overbrowning.

15. Bake the covered bread for another 15 minutes.  Brush with melted butter (if desired-I skipped this step, and it was fine).  Let cool.


Source:  Rosebud’s Butter-Topped White Bread and inspired by The Sriracha Cookbook: 50 “Rooster Sauce” Recipes That Pack a Punch via Epicurious.


October 17, 2011 - 5:25 am

Lora - This is such a fun flavor idea. I made a herb swirl bread a few months ago that was a complete disaster. You’ve inspired me to try again.

October 17, 2011 - 8:06 am

Tina@flourtrader - The choice of flavors here is awesome! I will definitely need to make this spicy savory bread, no doubt delicious. Glad you shared this one-your pictures are tempting. Yum!

October 17, 2011 - 4:14 pm

Jamie (Thrifty Veggie Mama) - This sounds so good! My husband and I love Sriracha! Putting this on the to try list!

October 17, 2011 - 6:52 pm

Aunt Shawn - This looks amazing.
You need to make Grandma’s walnut bread some time. That was my absolute favorite, growing up! Let mw know if you need the recipe! Toasted with butter mmmmmmmm heavenly heavenly heavenly!

October 18, 2011 - 12:17 am

Juls - I love the flavour idea here! Sriracha is a lovely sauce and, in this, has also added a really nice colour with the cheese against the white! I really like this recipe – thanks for sharing 🙂

October 18, 2011 - 6:34 am

easyfoodsmith - Lovely bread!!

October 18, 2011 - 9:40 am

natalie (the sweets life) - oh YES! I’m thinking this bread would make great paninis!!!

October 18, 2011 - 12:25 pm

Kelsey - I’ve had this recipe bookmarked for a while and have never gotten around to it. Now I’m inspired. It looks delicious!

October 18, 2011 - 2:13 pm

Ellen - Ooooh, I love Sriracha! All of my friends love that great tasting rooster sauce so I am super excited to have a big baking day this Sunday to make them this wonderful recipe! I never thought in a million years to combine it with bread!!! Wonderful picture!

October 18, 2011 - 6:02 pm

Kelli H (Made in Sonoma) - My boyfriend would probably faint if he saw this!

October 18, 2011 - 7:46 pm

Erika - The Teenage Taste - Sriracha Swirl Bread – what a great idea! I put sriracha on everything – BEST HOT SAUCE EVER!

October 31, 2011 - 6:06 am

Cheddar Sriracha Swirl Bread « Recipes Remembered - […] Bread 101 adapted from The King Arthur Flour Baker’s Companion, Cheddar Sriracha Swirl from The Curvy Carrot Share this:TwitterFacebookLike this:LikeBe the first to like this […]

November 8, 2011 - 12:39 am

anna maria - This was AMAZING. What a fantastic combo – I love it toasted when the cheddar gets a little melted again. So good. Will be making it again soon 🙂

November 21, 2011 - 3:54 pm

Zippy - I don’t know how I missed this in my feed, but this looks AWESOME. Sriracha, cheese, and bread… how much more wonderful could this be?

January 6, 2012 - 9:34 am

An ode to my newfound love for Sriracha | The Tummy Train - […] from The Curvy Carrot | Makes one 9-inch […]

June 3, 2012 - 2:53 pm

Theresa Sea - Made this today…SO AMAZING! The hubster is obsessed with Rooser sauce, so I knew this would have to be a weekend project in the near future. 🙂 Thanks for posting the recipe!

Banana Bread Cupcakes with Caramel Cream Cheese Frosting

Many of my friends are pregnant right now.  In fact, I would say that several of my friends have either just had, or are going to have, babies in the past month.  This has been a fun and exciting time to witness some of my favorite people in the whole world transition from that girl from “way back when” to the world of motherhood.  While being a mother myself is not anywhere on my radar, I can only imagine the transformations, both external and internal, that occur when one learns that she is going to be a mother to someone.  Admittedly, I had originally gone to medical school, wanting to be an OB-GYN.  During college, I had worked for an amazing and brilliant OB-GYN in my college town, and my favorite visits where from those patients who were going to have babies.  There’s just something about a pregnant belly that makes me happy: a reminder of the constant miracle of life that happens all around us all the time.  Now, granted, I can attest from my friends’ and my sister’s pregnancy experiences that it’s not always sunshine and roses, but, to me, it’s kind of a beautiful thing (as I watch from afar….like, very afar.)  🙂

My friend, Litchia, is going to have a baby boy in less than a month.  A week ago, she had a baby shower, and I was honored to be among the guests.  I made some cupcakes to celebrate the occasion (I mean, seriously, what else would I make?).  But there was one problem.  What kind of cupcake do you make for a mom-to-be who doesn’t have a sweet tooth?  I may or may not have drilled Litchia to find out what kind of cupcake (hypothetically, of course, because at this point I wasn’t sure if the shower was a surprise or not) she would like, if she ever desired to actually eat something sweet, like a cupcake.  Finally, she told me she loves banana bread.  Bingo. Done and done.  A banana bread cupcake…which was actually perfect because it was a morning/brunch baby shower, and I thought that a banana bread cupcake would fit right in with the other (delicious) breads and brunch items at the shower.  So I decided to top them with a caramel cream cheese frosting because, well, duh.   I think we are all in agreement that cream cheese makes anything better…even swollen ankles, back pain, and little baby kicks waking you up in the middle of the night.

Banana Bread Cupcakes with Caramel Cream Cheese Frosting

Servings: 12 cupcakes


Ingredients

For the cupcakes:

1 and 1/4 cups all purpose flour

1 and 1/2 teaspoons baking powder

1/2 teaspoon baking soda

1/4 teaspoon salt

2 large ripe bananas, peeled

1/2 cup sour cream (I used low-fat, and they turned out great!)

1 and 1/2 teaspoons vanilla extract

3/4 cup sugar

1/2 cup (1 stick) unsalted butter, at room temperature

1 large egg

1 large egg yolk

For the caramel cream cheese frosting:

1 pound confectioners’ sugar

1/2 cup plus 1 tablespoons whipping cream

1 teaspoon vanilla extract

1/4 teaspoon salt

1 8-ounce package of cream cheese, at room temperature

1/4 cup (4 tablespoons, or 1/2-stick) unsalted butter, at room temperature


Instructions

1. For the cupcakes: Preheat the oven to 350 degrees.

2. Line a cupcake pan with the liners of your choice.

3. In a large bowl, whisk together the flour, baking powder, baking soda, and salt.

4. In a small bowl, using a potato masher or fork, mash the bananas until smooth.

5. Add the sour cream and the vanilla to the mashed bananas, mixing well.

6. In the bowl of your standing mixer fitted with the paddle attachment, cream the butter and sugar together at medium-high speed, until light and fluffy, about 2-3 minutes.

7. Reduce the mixer speed to medium-low and add the egg and egg yolk, mixing until thoroughly combined.

8. Reduce the mixer speed to low and alternately add the flour and sour cream/banana mixture in two additions, mixing until just combined.

9. Divide the batter evenly among the prepared lined baking cups and bake until a tester inserted into the center comes out clean, about 20 minutes.

10. Remove from the oven and let cool completely before frosting.

11. For the caramel cream cheese frosting:  In a nonstick skillet over medium heat, melt (without stirring!) 1/2 cup cup of the confectioners’ sugar (this shouldn’t take too long-watch the sugar carefully because once it starts turning into liquid, it goes very quickly!)

12. Continue cooking the sugar until it turns a golden amber color (about 1-2 minutes more), stirring occasionally.

13. Very carefully (it will bubble up vigorously, so please be careful!), add 1/2 cup whipping cream, the vanilla, and the salt, mixing well until smooth.

14. Add the remaining 1 tablespoon whipping cream and mix well.

15. Strain the hot caramel sauce over a bowl and let cool to room temperature.

16. In the bowl of your standing mixer fitted with the paddle attachment, cream the butter and cream cheese on medium speed until thoroughly mixed and smooth, about 2 minutes.

17. Reduce the mixer speed to low (unless you want powdered sugar everywhere, including in your lungs….), and slowly add the confectioners’ sugar into the mixture until smooth.

18. Add the cooled caramel to the frosting and mix well to thoroughly incorporate.

19. Pipe as desired (I used my Wilton 1M tip…as per usual) onto the cooled cupcakes.  Refrigerate until ready to serve.

Sources:  Cupcakes and frosting from Bon Appétit via Epicurious.


October 15, 2011 - 6:24 am

Jennifer - beautiful cupcakes, beautiful photos! especially love the caramel frosting…

October 15, 2011 - 7:24 am

Lauren Ochoa - What a wonderful idea! They look delicious and I have a friend who is pregnant right now (just found out she’s having twins!) who also states she just doesn’t feel like eating anything super sweet right now. Next time we have a playdate, I will definitely be giving these a try. I lost my sweet tooth for the first trimester of both my pregnancies but it was always back in full swing for the second and third trimesters!

October 15, 2011 - 10:30 am

Annie @ Annie's Cooking Lab - Those sound great! I love the combination of caramel and banana- yum!

October 15, 2011 - 10:32 am

Laurel @ Lolly's Sweet Treats - These cupcakes are so pretty. I have some old bananas sitting in my kitchen and I may have to whip these up this weekend. The caramel cream cheese frosting sounds heavenly.

October 15, 2011 - 11:08 am

Tessa - I have so many bananas that are too brown right now. This would be a great solution tot that problem!

October 15, 2011 - 6:30 pm

The Farmers Wife - That is such a great post! It does seem to be baby season as everyone we know is either pregnant or just had babies. These sound delightful! I craved things like this all the time when pregnant with my son! Great recipe!

October 16, 2011 - 5:21 pm

Maria - Love everything about this cupcake!

October 16, 2011 - 10:24 pm

Anna @ Food Fitness Frolicking - Gosh, these look ah-mazing.

I’ll be making these ASAP.

October 17, 2011 - 6:27 am

Lauren at Keep It Sweet - I love the sound of caramel cream cheese frosting- it combines two of my favorite things!

October 17, 2011 - 5:17 pm

Christin - The caramel sauce sounds a little intimidating but I’m sure it’s wonderful

October 19, 2011 - 10:40 pm

jen - AWW…loved the little baby kicks…now I have a SUPER busy baby girl who kicks her little legs constantly…kinda glad they are on the outside now!! Being a mom is wonderful-but it wasn’t on my radar at ALL! Funny how life goes…

October 22, 2011 - 1:40 am

banana cupcakes with caramel cream cheese frosting « gennev - […] webbie: http://www.thecurvycarrot.com/2011/10/15/banana-bread-cupcakes-with-caramel-cream-cheese-frosting/ […]

October 23, 2011 - 2:15 pm

The Joy of Banana Bread Cupcakes | The Joy of Shooking - […] banana baking was in order. And foodgawker had plenty of pretty banana recipe pictures, including banana bread cupcakes. Who doesn’t love banana bread or […]

April 17, 2012 - 10:31 am

Homemade Peanut Butter Cups | DB and Jelly - […] 1 – At Katie’s house we whipped up a delicious Rainbow Cake with Caramel Cream Cheese frosting. The vanilla cake recipe comes from Sweetapolita, but we decided to be creative and make the layers […]

September 6, 2012 - 10:23 am

Annie - So I made these last night and they are to die for. However, I would make the caramel part of the icing before doing anything else since it takes a while for it too cool to room temperature.

I got to anxious and put the hot caramel in the butter/cream cheese/sugar mixture and it made the icing a little runny