Ranch Dressing

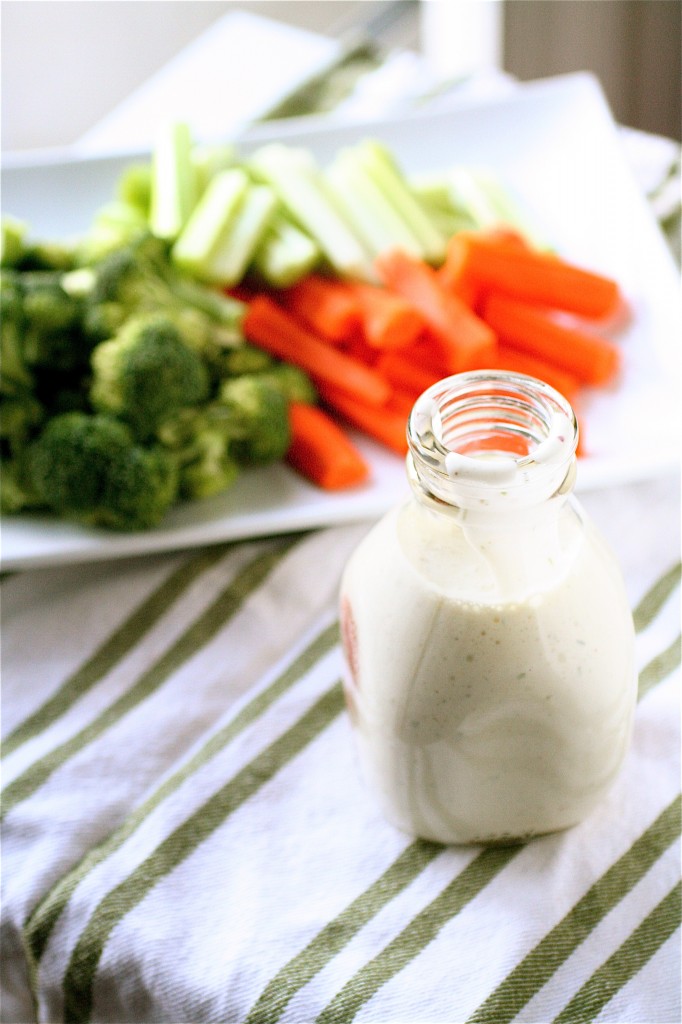
So, I am a big believer in Ranch dressing.  If you know me well, you know that I pretty much order it every time I am at a restaurant, regardless of my chosen meal.  I order it with pizza (thanks to the watery, super salty Ranch dressing that I must have consumed gallons of from a pizza delivery place in my college days), with French fries or baked potatoes, or even with chips and salsa.  True, while it may not be the most healthy salad dressing (or dipping sauce) of choice, it’s one of those constant food comforts in my life that always gives me a little gustatory joy.  I’ve tried just about every bottled version out there (I have three different kinds in my fridge right now), but none of them are what I consider “good Ranch dressing.”  (I will go to certain restaurants solely because they have good Ranch.  If they don’t have good Ranch, I have an aversion.  As I am writing this, I realize that this might be a little obsessive-compulsive.  Please excuse me.)  And honestly?  My favorite kind of “pre-made” Ranch dressing is the powdery stuff that you mix with buttermilk and sour cream (I always add more buttermilk and less sour cream, because I like the consistency to be a little watery.)

I have made this recipe before.  And I love it. I love the versatility of it.  I love the fact that it calls for parsley (a traditional Ranch dressing ingredient), but since I don’t like the flavor of parsley (ew), I can omit it and play around with the rest of the flavors (besides, since I don’t like parsley all that much, it’s a major pet peeve of mine to buy a bunch of parsley, only to use a few sprigs.  And then I will inevitably find it three weeks later in my vegetable drawer all soggy and gross……).  Play around with this recipe.  I added more garlic, some red pepper flakes, and some extra celery salt to the mix this time.  I’m excited to hear how you make yours.


Ranch Dressing

Servings: approximately 2 cups of dressing

Ingredients

3/4 cups mayonnaise-I used low-fat mayo.

3/4 cup sour cream-again, I used low-fat.

1 tablespoon extra-virgin olive oil

1 tablespoon lemon juice

1/2 cup buttermilk

Handful of chives, chopped, to taste

2 cloves garlic, minced

Salt and pepper, to taste

Red pepper flakes, to taste

1 teaspoon celery salt, or to taste
Instructions

1. Combine all the ingredients in a food processor or blender and process until thoroughly mixed and smooth.

2. Cover tightly and refrigerate for at least 20 minutes (to help the flavors blend a little).


Source: Adapted from Confections of a Foodie Bride, originally adapted from the Gourmet Cookbook (2004).

November 10, 2011 - 12:35 pm

Nicola @ unhip squirrel - Oh man. I am SO excited to try this! I LOVE ranch dressing but I don’t do bottle dressings (except, once in a blue moon to get my ranch fix). I never even thought that ranch was something you could create outside of a factory. Sad!! Well, now I get to try. Ridiculously excited about this. Thanks!

November 10, 2011 - 2:04 pm

Stephanie - Shanon, I can’t wait to give this a try. I too love ranch on everything. I also prefer mine to be runny=) It seems so strange that nothing in a bottle even comes close to a good ranch at a restaurant or pizza place.

December 12, 2011 - 12:06 pm

Laura - This looks SO GOOD. How long do you think it would keep in the refrigerator? I never use things like this up very quickly.

December 12, 2011 - 12:08 pm

srlacy - Hi Laura- good question bc I have often wondered that myself. I always go by the date on the buttermilk bc it always seems to be the first ingredient that would expire. 🙂

March 24, 2012 - 3:44 am

Maja - This is actually great, I will try it definitely 🙂

April 15, 2014 - 5:00 am

“BLT” Ranch Deviled Eggs » The Curvy Carrot - […] if you want, you can substitute in the real thing for the bacon).  I used a combination of ranch dressing (make your own sometime if you have the time….way better than store-bought, as I’ve […]

May 22, 2014 - 3:35 pm

Amy - Oh my goodness, I can’t wait to try this! I too, have an obsession with finding places that have “the good ranch”, and I’ve been looking through several recipe sites to find a recipe for it! Yours looks like the closest thing, and I can’t wait to try it! Thanks for sharing. 🙂

May 22, 2014 - 4:44 pm

Amy - Okay, so I had to give you some feedback now that I’ve made this. Congratulations! You nailed “the good ranch”!!! Thank you so much, now I can have it (and tweak it) whenever I want! This is perfect. 🙂

Cream Biscuits

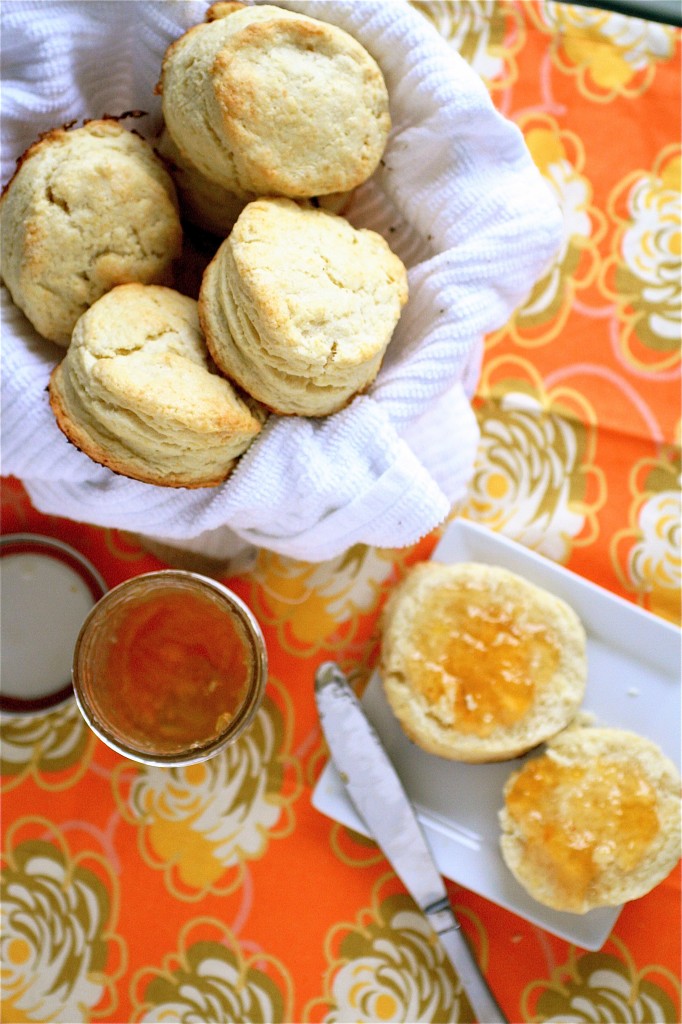
Let me tell you a little bit about biscuits.  When they are done correctly, they can be the best things on earth.  But if done poorly, then, you can end up in a world of crumbly flour chunks, stiff dough, and bland doughy tastes, and this is certainly not a good place to be.

I’ve been on a hunt lately for a good, simple biscuit recipe.  No flavors, no add-ins, no limitations on what I could pair these little guys with when I come home from work and decide to pull one out from the freezer.  I wanted a biscuit with a little bit of sweetness to go well with jams and honey to have with tea on the weekends, but I also wanted a solid biscuit that could hold its own as a side to a gravy or savory soup.  Enter the cream biscuit.  Now, I know I have posted a variation on the cream biscuit before, but this one, while simple, is not a Plain Jane by any means.  This one has substance, that hint of sweetness, and is able to go with anything I pair it with: egg and cheese biscuit sandwiches, cinnamon and sugar, or even biscuits and gravy (vegetarian-style, by the way…post coming soon.)

So, if you have a little time to spare and some extra cream on hand, these little guys are worth the short amount of time it takes to make them.  Three cheers for biscuit versatility!


And, P.S. On a personal note, I just wanted to wish my parents, Rick and Georgia, a Happy Anniversary!  Congratulations on 36 years of marriage.  Love you both!

Cream Biscuits

Servings: approximately 12 biscuits (using a 2-inch biscuit cutter)

Ingredients

4 cups all-purpose flour

2 tablespoons sugar

1 and 1/2 tablespoons baking powder

1 tablespoon sea salt

1/2 cup (1 stick) chilled butter, cut into 1-inch pieces

1 and 1/2 cups heavy whipping cream, plus more for brushing the tops of the biscuits

Instructions

1. Preheat the oven to 375 degrees.

2. Line two rimmed baking sheets with parchment paper; set aside.

3. In a large bowl, whisk together the flour, sugar, baking powder, and salt, mixing thoroughly.

4. Using your fingers, gently blend the butter pieces into the flour mixture, squeezing each piece of butter until you have several pea-sized pieces.

5. Add the 1 and 1/2 cups of cream to the dough, and, using a wooden spoon, stir until the dough comes together in a cohesive ball, adding more cream if necessary.

6. Transfer the dough to a cleaned and lightly floured surface and, using a rolling pin, roll the dough to a thickness of 3/4″.

7. Using a biscuit cutter (or the open end of a glass cup, like my grandma used to), cut the dough into biscuit rounds, re-forming and re-rolling the dough as necessary.

8. Brush each biscuit generously with cream.

9. Bake the biscuits until golden brown, about 25-30 minutes.


Source: Directly from Bon Appétit, November 2011 via Epicurious.


November 8, 2011 - 5:52 am

Hannah - These look great. Do you freeze these before or after you bake them?

November 8, 2011 - 6:15 am

Blog is the New Black - These look perfect, and not terribly complicated to make. I love a good biscuit!

November 8, 2011 - 6:43 am

srlacy - Hi Hannah- I froze them after they baked. I haven’t tried the other way, though. 🙂

November 8, 2011 - 7:13 pm

Ann P. - This is a great staple recipe to modify into a hundred different biscuits! These plain ones look delicious 🙂

November 9, 2011 - 7:19 am

Medeja - Hm.. now I not sure if i should try them if I would be able to make them right 🙂 But yours looks really great!

November 9, 2011 - 8:53 am

Christin - Your biscuits look perfect. I don’t know why, but I struggle with making biscuits more than anything else.

November 9, 2011 - 10:01 pm

Mrs. Measurement - These do look amazing. I’ll admit I’m a Pillsbury Biscuit type of girl – but that may change after I try this recipe out.

November 10, 2011 - 8:35 am

Melissa @ Kids in the Sink - My mom makes wonderful biscuits but I can’t get her to nail down a recipe for them so I’ve never been able to make them. These look delicious so maybe I’ll be able to attempt them.

November 11, 2011 - 11:29 am

brandi - i love homemade biscuits. my father in law is a biscuit master and has been teaching me the last couple of years, but we haven’t made a cream biscuit yet. putting this on our “to try” menu for THanksgiving!

November 12, 2011 - 12:39 pm

Quimicococinero - Wonderful recipe and photo. That delicious!

November 14, 2011 - 5:02 am

The Curvy Carrot » Biscuits and Gravy - […] Cream biscuits […]

December 11, 2011 - 6:25 pm

Lisa @ TheFatLossAuthority.com - Mmmm – these were really good! They came out just perfect! Everyone loved them and I can see many meals these could be used with. I like to have some kind of bread or biscuit with our meals, so this will definitely be one that I will be making regularly.

March 29, 2012 - 4:52 pm

Cream biscuits | Aslanphotograp - […] The Curvy Carrot » Cream BiscuitsNov 8, 2011 … Enter the cream biscuit. Now, I know I have posted a variation on the cream biscuit before, but this one, while simple, is not a Plain Jane by any … […]

April 27, 2014 - 6:51 pm

krystal - Good and fluffy. I liked everything except the fact that the bottoms burned on the batch I basted in cream. The few I didn’t baste in cream didn’t burn on the bottoms otherwise these were delicious.

Peanut Butter M&M Cookies

This is just one of those recipes that you need to have in your back pocket at all times.  Everyone has a favorite chocolate chip/M&M cookies recipe, and everyone seems to have a favorite peanut butter cookie recipe.  I needed one with both ingredients…in pure and simple heavenly cookie form.  I looked through several recipes, but I found the winner over at Pennies on a Platter.  I opted for a thinner cookie (I used butter as the main fat in the cookie as opposed to shortening), and they still were soft, chewy, and completely tasty.  We were in the midst of the first major snow storm up here in New England, and I was headed over to a friend’s house later that night to watch some movies.  I knew these cookies would be a big hit, and they were.   They were still warm from the oven when I took them over….and seriously, is there anything better than a cookie still warm from the oven?  Especially one with M&M’s and peanut butter in them?  You could add in pretty much any other kind of candy or nut in these cookies as well-the cookie dough holds up really well.  Did I mention they taste fantastic?  😉


Peanut Butter M&M Cookies

Servings: about 24 cookies

Ingredients

1 and 3/4 cups all-purpose flour

1/2 teaspoon salt

1 teaspoon baking soda

1/2 cup (1 stick) unsalted butter, at room temperature

1/2 cup granulated sugar

1/2 cup brown sugar

1/2 cup creamy peanut butter

1 egg

1 teaspoon vanilla

2 tablespoons milk

1 and 1/2 cups M&M’s

Instructions

1. Preheat the oven to 350 degrees.

2. Line two rimmed baking sheets with parchment paper; set aside.

3. In a large bowl, combine the flour, salt, and baking soda, whisking until combined.  Set aside.

4. In the bowl of your stand mixer fitted with the paddle attachment, cream the butter on medium high speed until smooth, about 1 minute.

5. Add the sugars and peanut butter, mixing until smooth, about 2-3 minutes.

6. Reduce the mixer speed and add the egg, vanilla, and milk, mixing until completely combined.

7. Using a rubber spatula, gently stir in the M&M’s.

8. Drop the cookie dough by rounded tablespoons onto the prepared baking sheets and bake the cookies until lightly golden around the edges, about 10 minutes.  Let cool completely.


Source:  Directly from Pennies on a Platter, originally adapted from Baking Junkie.


November 6, 2011 - 5:32 pm

Ann P. - MMm, peanut butter and m&m cookies always remind me of being a kid! This is a great recipe every mom/future mom/kid-at-heart should have in her arsenal 🙂

November 7, 2011 - 11:25 am

Maria - Maan this makes me think of preschool when we had to bring in snacks for everyone ^-^

November 7, 2011 - 6:07 pm

Happy When Not Hungry - These look so delicious! Love the peanut butter and M&M combo too!

November 8, 2011 - 1:00 am

Maggie @ A Bitchin' Kitchen - These look delicious! I love m&ms in cookies…gives them a bit more texture as opposed to just chocolate chips!

November 8, 2011 - 4:55 am

Anna - It is the colors that I can’t say no to. This is another item in my “bonding times with my daughter paraphernalia” she is learning colors and this sure is a nice way to review. learning while munching on this splendid treats is the way to go. Thanks for the post!

November 8, 2011 - 5:33 pm

Jesica @ Pencil Kitchen - M&M and peanut butter! the best of both worlds :p

November 9, 2011 - 7:32 pm

Jenn - I made these this morning and I’ve almost eaten them all…so damn good!

November 10, 2011 - 2:08 pm

natalie (the sweets life) - perfect–I have M&Ms I need to use up!!

November 11, 2011 - 3:56 pm

Nikki - I can’t let Ben see my computer screen right now, or he’ll beg me to make these cookies again! 🙂 Glad you enjoyed them, and you’re right, everyone needs to have this in their back pocket. They are THAT good!

November 14, 2011 - 12:53 am

Jenn@eatcakefordinner - I have been wanting to try this recipe. Good to know you really like them too.

December 18, 2011 - 1:07 pm

Peanut Butter M&M Cookies « Laurie's Kitchen - […] Original Recipe GA_googleAddAttr("AdOpt", "1"); GA_googleAddAttr("Origin", "other"); GA_googleAddAttr("theme_bg", "ffffff"); GA_googleAddAttr("theme_text", "4f402a"); GA_googleAddAttr("theme_link", "97c000"); GA_googleAddAttr("theme_border", "503f2b"); GA_googleAddAttr("theme_url", "346ba4"); GA_googleAddAttr("LangId", "1"); GA_googleAddAttr("Autotag", "recipes"); GA_googleAddAttr("Autotag", "food"); GA_googleAddAttr("Autotag", "cooking"); GA_googleFillSlot("wpcom_sharethrough"); Like this:LikeBe the first to like this post.   Leave a Comment […]

December 21, 2011 - 6:11 pm

Tara - Just made these tonight, and they came out awesome! Thanks for sharing 🙂

April 29, 2012 - 7:13 pm

Emily Christine - These cookies were delicious!!! I seriously whipped them up in a matter of minutes. I used peanut butter made out of soy beans for my son who has Mastocytosis, and you could not tell the difference between them and real peanut butter cookies:) Thank you for sharing this recipe, they were chewy and amazing and I will definitely make them again!!!

April 28, 2013 - 8:29 pm

Peanut Butter M&M Cookies - Precious Photography - […] Read all the details about the recipe on:  thecurvycarrot.com […]

July 10, 2013 - 11:09 pm

Trisha Lira Medina - So Yummy! At hit with my little ones! Will be baking these again soon.

February 16, 2014 - 8:21 am

b - I wasnt sure after i cooked the first batch at 10 minutes as directed. They were not soft and chewy like i like them. Out second batch in for 7 minutes an let them rest on the tray and they were perfect!! Will save this recipe thank.you very much. Oh and i used chunky peanut butter cause that was all i.had and it was still.perfect.

November 21, 2014 - 11:11 pm

78678 » Peanut Butter M&M Cookies for St. Patty’s Day - […] and easy to pull-off; a classic wet ingredients/dry ingredients cookie recipe that I adapted from TheCurvyCarrot, which they had adapted from someone else, who had adapted it from someone else, who probably […]

December 4, 2014 - 8:06 pm

D Bran - The recipe never tells you to mix in the dry ingredients; they are just set aside at the start. 🙂

March 1, 2015 - 6:15 pm

Peanut Butter M&M Cookies for St. Patty’s Day – Finally, A Kitchen! - […] and easy to pull-off; a classic wet ingredients/dry ingredients cookie recipe that I adapted from TheCurvyCarrot, which they had adapted from someone else, who had adapted it from someone else, who probably […]