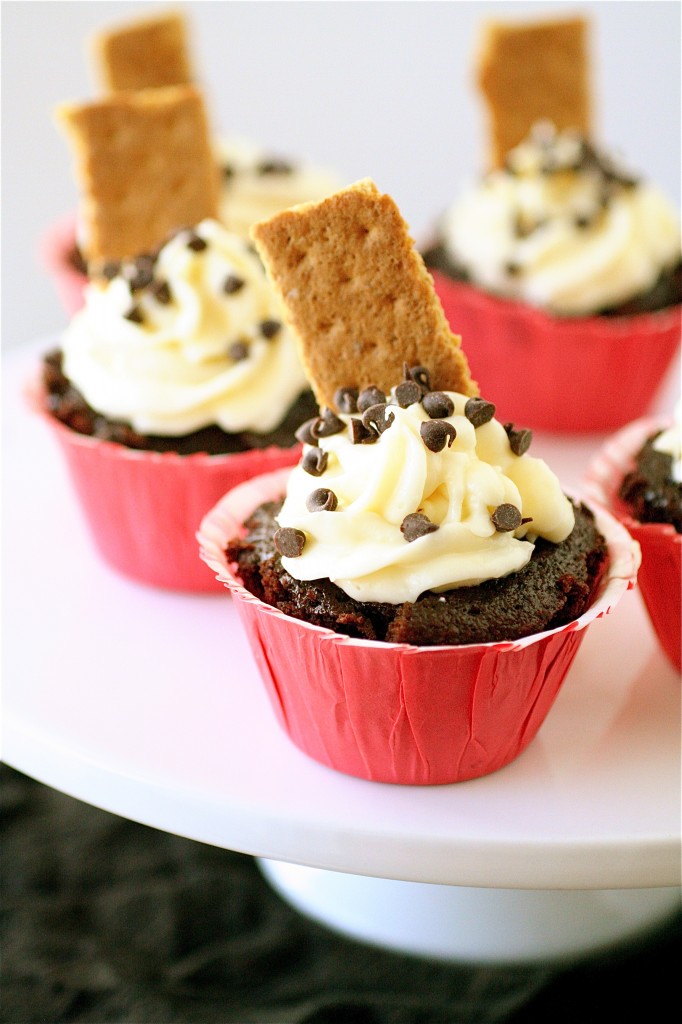
Chocolate Chip Cheesecake Cupcakes


I promise I will get back to some healthy stuff after the holidays.  Pinky swear.  But, for the time being, there’s a whole lot of sweetness coming your way from me.  I hope everyone out there is enjoying the holiday season….and enjoying all that holiday food.

This was another cupcake for one of my co-workers.  And this one ranks right up there with an “almost completely offensive” cupcake.  A cupcake with a multiple personality disorder.  It  can’t decide if it wants to be a cheesecake, a cupcake, or a little of both rolled up into one fantastic dessert.

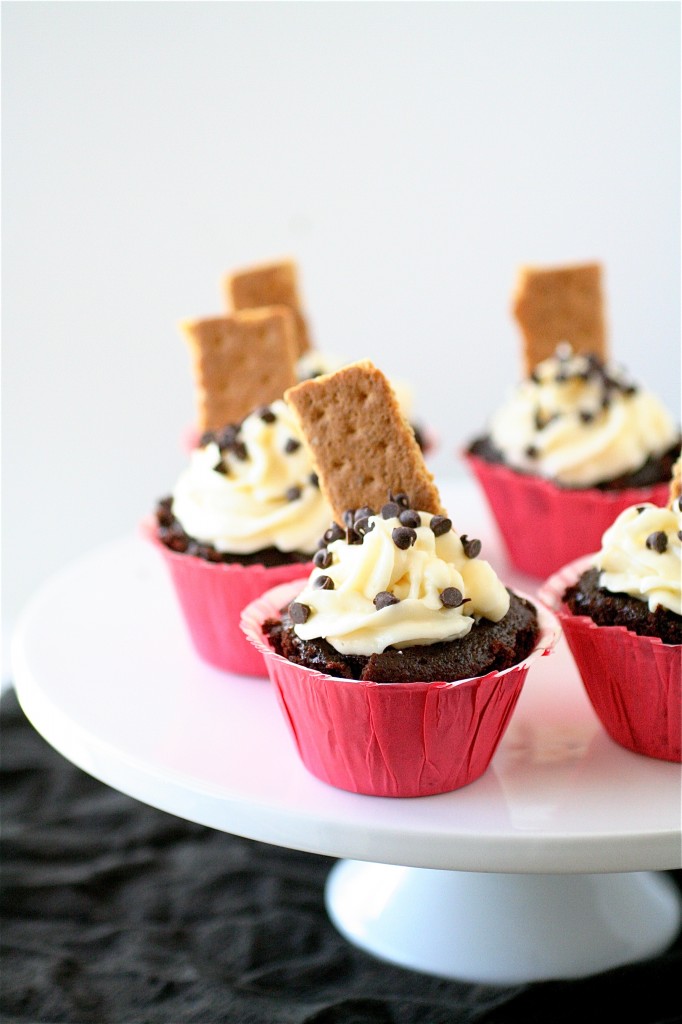
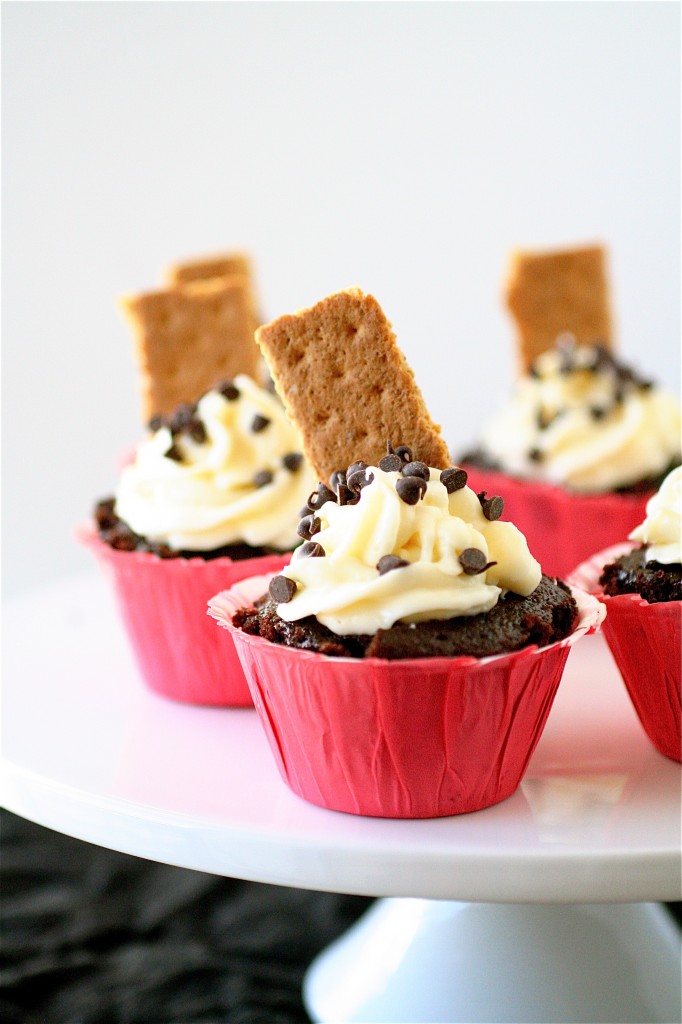
Amazingly enough, these cupcakes look much harder to put together than they really are.  The cheesecake is actually baked right into the cupcake, saving a lot of time in the assembly department (the usual coring out the cupcake and then filling it with some sort of semisolid goodness in the middle can be a little time consuming…not to mention a little dirty).  And, again, anything topped with a velvety cream cheese buttercream gets a gold star in my book.  I topped a few of the cupcakes with some graham crackers, just to add a little dimension and height, but they really aren’t that necessary.  Next time I might crush some graham crackers up and sprinkle them on top of the cupcake.  I was told by several people who have sampled several of the cupcake flavors this year that this one takes the cake (pardon my pun).

I mean, seriously.  Chocolate + cheesecake + buttercream frosting?  This might be the perfect dessert trio.
Chocolate Cheesecake Cupcakes

Servings: approximately 18 cupcakes

For the cupcakes: (again, this batter makes a lot-feel free to make extra plain cupcakes)

3 ounces semisweet chocolate chips

1 and 1/2 cups hot brewed coffee

3 cups sugar

2 and 1/2 cups flour

1 and 1/2 cup cocoa powder

2 teaspoons baking soda

3/4 teaspoons baking powder

1 and 1/4 teaspoons salt

3 eggs

3/4 cup vegetable oil

1 and 1/2 cups buttermilk

3/4 teaspoon vanilla

For the cheesecake filling:

1 8-ounce package of cream cheese, at room temperature

1 large egg

1/3 cup granulated sugar

1/8 teaspoon salt

1/2 teaspoon vanilla extract

6 ounces miniature chocolate chips (I used semisweet).

For the frosting:

2 8-ounce packages cream cheese, at room temperature

1/2 cup (1 stick) unsalted butter, at room temperature

2 cups powdered sugar

1 teaspoon vanilla extract

Chocolate  chips and graham cracker squares, for garnish
 

Instructions

1. For the cupcakes: Preheat the oven to 350 degrees.

2. Line cupcakes pans with the liners of your choice.

3. Place the chocolate chips in a medium bowl and carefully pour the hot coffee over the chocolate; let sit for about 1 minute.  Whisk until smooth; set aside.

4. In a large bowl, whisk together the sugar, flour, cocoa powder, basking soda, baking powder, and salt.

5. In the bowl of your standing mixer fitted with the paddle attachment, beat the eggs on medium-high speed until smooth, about 2 minutes.

6. Reduce the speed to medium-low and slowly add the vegetable oil, buttermilk, vanilla, and melted chocolate.

7. Reduce the mixer speed to low and add the dry ingredients, mixing until combined, scraping down the sides of the bowl as necessary.

8. For the cheesecake filling: In a large bowl (using your stand mixer or an electric mixer), combine the cream cheese, egg, sugar, salt, and vanilla, mixing until smooth.

9. Using a rubber spatula, add the miniature chocolate chips by hand and mix until well incorporated.

10. To assemble the cupcakes: Place about 1 tablespoon of chocolate cupcake batter into each baking cup.  On top of this layer, add about 1 teaspoon or so of the cheesecake filling.  Cover the cheesecake filling with the remaining chocolate cupcake batter, filling each cupcake liner about 3/4’s of the way full.

11. Bake the cupcakes until a tester inserted into the center comes out clean, about 18-20 minutes.

12. For the frosting:  In a large bowl (using your stand mixer or your electric hand mixer), combine the cream cheese, butter, powdered sugar and vanilla extract, mixing until smooth.  Once the cupcakes have completely cooled, pipe as desired onto each cupcake and garnish.

Sources: Cupcake base from Annies Eats (adapted from Smitten Kitchen, originally from Gourmet.).  Cheesecake filling from Bakergirl.  Frosting adapted from Martha Stewart.


December 27, 2011 - 2:16 am

MyFudo - I pinky swear I will be making these…I love the brewed coffee added. My morning will be complete after a cupcake or two. Thanks!

December 27, 2011 - 3:56 am

Ann P. - exactly–perfect dessert trio! my mouth is watering!!

December 27, 2011 - 9:59 am

purabi naha - Oh, wow!! These look so gorgeous and I loved the photographs! The recipe sounds very interesting!!

December 27, 2011 - 3:31 pm

brighteyedbaker - The cupcakes look so pretty! I have a cupcake recipe I love that has coffee in it too. The cheesecake filling sounds pretty darn good 🙂

December 30, 2011 - 2:30 pm

Russell at Chasing Delicious - These cupcakes look soo good! And so many great flavors/ingredients. Yum.

December 31, 2011 - 9:53 pm

Haley - The proportions of everything seem to be a little bit off. I made 28 cupcakes with cheesecake in the middle (normal size) and another 6 without any cheesecake (ran out), so 18 is definitely a little conservative. The chocolate batter would easily make 50 or so, so definitely cut that in half, I had to throw so much away! They are very very very rich, so keep that in mind for how many you want to make (I made almost 30 for 4 people…insane! haha), no one wanted more than one!). The chocolate cake recipe however is probably one of the best I’ve ever tried!

February 4, 2012 - 7:46 pm

Shar - Chocolate and cheesecake. My two favorite things!! I am going to love trying this recipe out!!! Thanks so much for this!!!

June 23, 2012 - 9:31 pm

Carrie - These are my new favorite cupcakes. Though I did play around a bit with the proportions. I can get 5 dozen cakes out of the batter so I doubled the filling and the frosting. But otherwise, all of my friends RAVE about these cupcakes!

December 9, 2012 - 12:25 am

Bethany - I am officially not much of a baker, but these cupcakes looked like the perfect thing to bring to a cupcake wars Christmas party I was invited to. They were easy to bake and were AMAZINGLY delicious. Thanks for the recipe and easy to follow directions.

February 13, 2013 - 10:44 am

Emily - The proportions are waaaaay off. I had enough chocolate batter to fill two 9 inch cake pans after filling 24 cupcakes, but barely enough cheesecake filling for 24 cupcakes. I recommend either cutting the cake batter in half or doubling the cheesecake filling if you’re cooking for an army.

March 15, 2013 - 1:14 pm
December 22, 2013 - 8:14 am

Hala - Can I skip the brewed coffee and replace for hot water? I am not a fan of any type of coffee. thanks

December 22, 2013 - 12:27 pm

srlacy - Hi Hala-

You should be ok with hot water, although the coffee really helps accent the chocolate flavor.

January 4, 2014 - 8:31 am

Food Inspirations This Week | MommyDoctorDanne - […] Chocolate Chip Cheesecake Cupcakes from here […]

Chocolate Peanut Toffee


Yes, here’s another last minute holiday treat idea.  Another one which seemed to be a big hit in the holiday goodie bags this year.  If you have a fear of candy thermometers and making candy in general, this might be a good recipe to  practice with.  It’s pretty straight forward, uses simple ingredients, and is ready in a relatively short amount of time.

But, first, a few things about this recipe.  I made enough for three whole batches, which was enough for 45 people to have a relatively decent-sized piece of bark in their goodie bags.  And, while I mixed the ingredients well and made sure that it reached the appropriate temperature, I noticed that when I poured the bark out onto the prepared baking sheets, there was a solid rim of melted butter around the edges…which, after freezing, seemed a little unappetizing to me.  I was a little nervous, thinking that maybe the condensation of butter around the edges meant that it didn’t mix well, and I would have a disaster on my hands.  I went ahead and trimmed off the excess butter around the edges and went to work on breaking apart the mid-portion of the poured and chilled bark.  It tasted fabulous!   I’m anxious to see if any of you out there have similar results.

So, if you are a peanut/toffee/chocolate fan, this recipe is one you should certainly try.


Happy Holidays!


Chocolate Peanut Toffee

Servings:  approximately 2 large rimmed baking sheets (again, I was serving several people.  What I have posted is enough for at least two batches.  Please feel free to cut this recipe in half.)


Ingredients

12 sticks unsalted butter (yes, I am fully aware of how much butter this is.)

6 cups granulated sugar

3/4 teaspoon salt

9 cups lightly salted whole peanuts, plus about 2 more cups peanuts, chopped

24 ounces bittersweet chocolate, chopped


Instructions

1. In a large Dutch oven or sauce pot over medium-high heat, melt the butter. Meanwhile, line two rimmed baking sheets with aluminum foil and generously butter the foil.

2. Add the sugar and salt, mixing well.

3. Bring the mixture to a boil and cook until a candy thermometer inserted into the mixture reaches 300 degrees. (about 15-20 minutes)

4. Remove the mixture from the heat and (very carefully) add the peanuts, stirring until completely combined.

5. Carefully pour the mixture onto the rimmed baking sheets, smoothing gently with a spatula.

6.  Let the mixture stand and cool slightly, about 2 minutes or so.

7. Sprinkle the bark with the chopped chocolate and let stand for about 5 minutes.  Smooth the chocolate over the bark with a spatula.

8. Sprinkle the chopped peanuts evenly over the bark.

9. Freeze the bark until firm, about 30 minutes.  Once firm, break the bark apart into pieces.


Source:  Gourmet, via Epicurious.


December 24, 2011 - 9:40 am

Salad in a Jar - I would be one of those people who is afraid of making real candy. But that first picture makes me wan to try it….again. Gorgeous!

April 28, 2013 - 8:36 pm

Chocolate Peanut Toffee - Precious Photography - […] Read all the details about the recipe on:  thecurvycarrot.com […]

Crunchy Peanut Butter Truffles


Recently the dermatology residents and I got together to make holiday gift packages for the 45 physicians, nurses, techs, and employees of the dermatology department. It was a little bit of a daunting task, trying to organize the packaging, the list of what treats we wanted to include, and all those ingredients (mostly consisting of peanut butter, butter, and sugar…but, hey, it’s the holiday season, right?)  I started a couple of weeks in advance, selectively going through my lists of to-do treats from other blogs and from my recipe books, trying to come up with economical and somewhat straightforward holiday goodies to include in each bag.  And, knowing that I have a kitchen that lacks in organization and counter space, I knew I had to make the best use of my time and space by preparing as much in advance as possible.  I have been out of town for about 50% of this month so far, interviewing at jobs all over the country, so my life lately has been nothing short of hectic and stressful.

This was one of my favorite bits from the holiday goodie bags this year.  It’s like the traditional buckeye candy, but with the additional crunch of cornflake cereal (Rice Krispies would be ok in this as well).  I simply threw everything together in a big bowl, gently rolled each ball, and refrigerated them overnight.  The rest was simple.  This past weekend, several of the residents came over and worked in assembly-line form to roll the chilled peanut butter balls in melted chocolate.  Then Aelayna got crazy with some melted white chocolate and added the  cute decorative swirls on top.  I popped them back in the fridge, and then added them last minute into the goodie bags the night before we distributed them.  They seemed to be a big hit.

If you are a chocolate and peanut butter fan, this is the holiday treat for you.


Crunchy Peanut Butter Truffles

Servings: approximately 60 1.5-inch truffles (I had extra leftovers-please feel free to cut this recipe in half.  What I have listed here is for a large batch of 60)

Ingredients

2 sticks unsalted butter, at room temperature

4 cups cornflakes cereal, crushed

4 cups creamy peanut butter

4 cups dry milk

4 cups powdered sugar

2 lb milk chocolate (I used Merckens Milk Chocolate Bar from King Arthur Flour…this was incredible.)


Instructions

1. Line a rimmed baking sheet with aluminum foil.

2. In a medium saucepan over low heat, melt the butter and set aside.

3. In a large bowl, combine the cornflakes, peanut butter, dry milk, and powdered sugar, mixing well.

4. Add the melted butter to the ingredients and mix well (feel free to use your hands at this point.)

5. Moisten your hands with water and, one at a time, roll the mixture into 1-inch to 1.5-inch balls and place on the baking sheet.

6. Chill overnight or until firm.

7. In a heatproof bowl set over simmering water, melt the chocolate.

8. Using a fork, lightly dip and roll each truffle back onto the baking sheet.

9. Chill until ready to serve.


Source: Bon Appétit, via Epicurious.


December 21, 2011 - 8:43 am

Blog is the New Black - THese look great! I love anything in truffle form… or with peanut butter… 😉

December 21, 2011 - 3:37 pm

Ann P. - I am pretty amazed that you made all those lovely treats for that many people! These peanut butter truffles look so delicious, and I’m seriously craving some now 🙂

December 22, 2011 - 4:59 am

Alpakka - Can I substitute the dry milk?

December 22, 2011 - 6:31 am

srlacy - Sorry Alpakka-
I’m not sure what a proper substitute would be.

December 22, 2011 - 9:20 pm

torviewtoronto - happy holidays truffles look wonderful

January 17, 2012 - 12:27 pm

Sara - Did you happen to freeze any of these? How were they when you took them out of the freezer? I’d like to make/freeze some, but I’m concerned that the crunch might disappear in the freezer. Thanks!!

January 17, 2012 - 2:48 pm

srlacy - Hi Sara-

I actually didn’t freeze any of these. I think the crunch would probably hold up, though! Good luck!

April 28, 2013 - 8:35 pm

Crunchy Peanut Butter Truffles - Precious Photography - […] Read all the details about the recipe on:  thecurvycarrot.com […]

April 8, 2014 - 8:48 am

Katie - Hey! Great recipe, I think I’ll make it for my boyfriend. We are, however, in lil’ ole England. We can use cups and lbs, even though we usually use grams for our measurements. I was wondering how much a stick of butter is? Is that a standard size? Here a block of butter is usually 250g – does that mean anything to you?! Any help appreciated! Thanks very much. LOVE THIS BLOG.

Katie xxx

April 8, 2014 - 9:53 am

srlacy - Hi Katie-
Thanks for the sweet words. I found a link that might help you out when you convert the recipe:

http://wiki.answers.com/Q/How_many_grams_in_1_stick_of_butter#slide=1&article=How_many_grams_in_1_stick_of_butter

Good luck!
Shanon