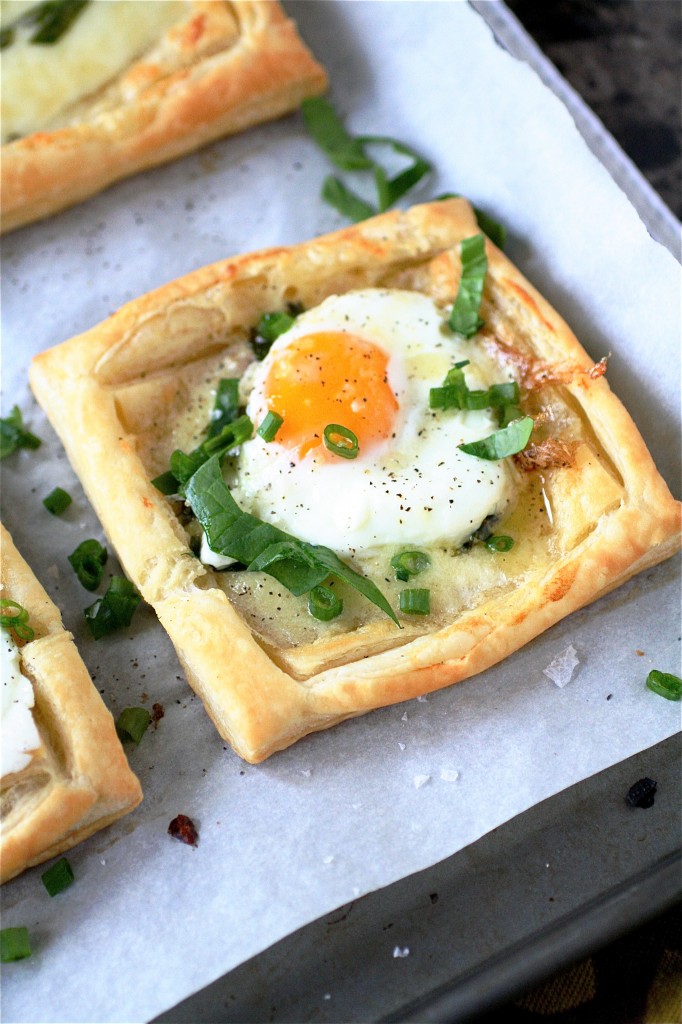
Egg and Cheese Tartlets


New Year’s Eve had me running a temperature and fending off the worst head cold I have had in a very long time.  Which I attribute to a mix of traveling on icky airplanes, overcrowded airports, holiday stress, and a lack of sleep.  I rarely get sick, but this time, I was, unfortunately, knocked back down from thinking, “It’s awesome I never get sick” to “Oh, wow.  I definitely need my pajamas, some miso soup, and some tea.  Immediately.” (Oh, and the fact that at 31 years old, I desperately wanted my mom to come and tuck me in at night and make me feel better.)  My evening plans quickly went from wondering what kind of sparkly top I would wear to dinner with friends to what temperature on my electric blanket would not overheat my fever.  Yuck.

The good news is that, after a 14 hour bender of solid (well, almost solid, considering Scout had to go out a couple times in the interim…and she was an understanding dog.  I think she knew I wasn’t feeling all that great..) deep (albeit night-time cold medicine enhanced) sleep, on New Year’s Day I was feeling up to eating something savory, easy, and relatively straightforward to make.  I had stocked up with groceries when I had returned back home from my travels earlier in the week, and, amazingly, had a box of puff pastry dough in my freezer (seriously, it’s serendipity.  I never have all the ingredients on hand, it seems.)  After a quick thaw in my fridge, the puff pastry was ready, and I was in need to feed my cold.  Wait, what is it?  Feed a cold, starve a fever?  Or is it the other way around?  I can’t remember.  All I know is that these little tartlettes brought some savory goodness to my taste buds (and, hallejuhah! I can taste something again!).  I promptly ate two, and then headed back to bed for a long marathon of book reading, trashy girly TV shows, my happy family consisting of two fat cats and one adventurous dog, and Words with Friends. All right, maybe I couldn’t have my mom there with me.  But, after a full belly consisting of this meal, I did feel a lot better already.

Hope your 2012 is going well so far.
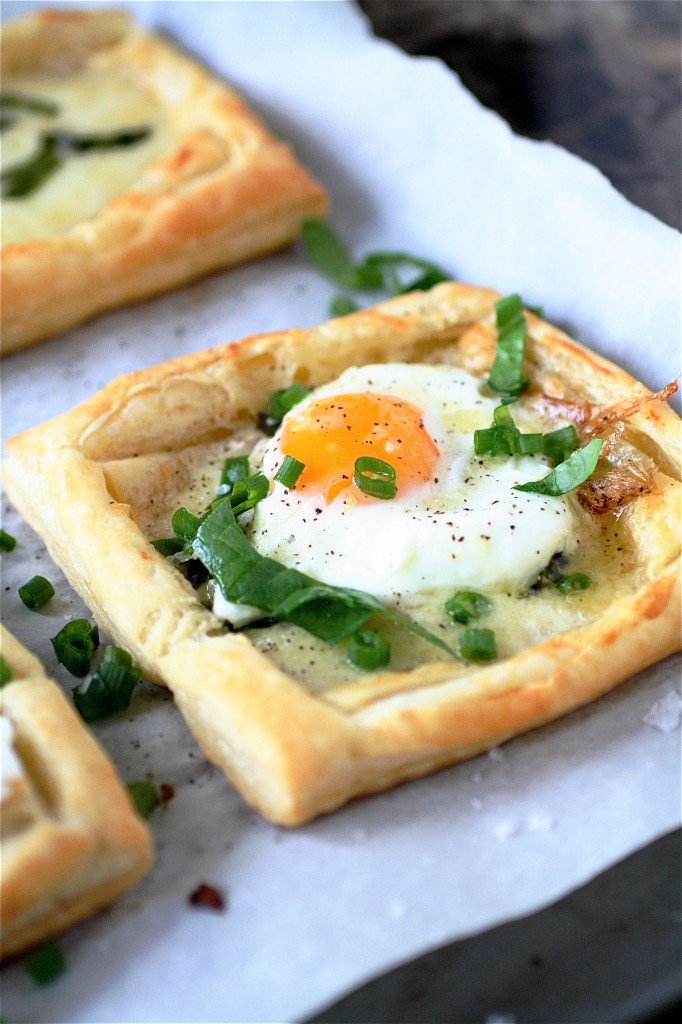
Egg and Cheese Tartlettes

Servings: 4 tarts

Ingredients

1 sheet thawed puff pastry dough (I used store-bought, pre-made Pepperidge Farm brand.  Nope.  I don’t have time to make my own.  Yet.)

1/2 cup white cheddar cheese, grated

1/2 cup Gruyere cheese, grated**Or use a mixture of whatever cheeses you have on hand.

1/3 cup crème fraîche (or sour cream…or Greek yogurt)

1/4 cup fresh spinach, chopped

1 tablespoon shallot, finely chopped

4 eggs

Butter or vegetable oil, for frying the eggs

Salt and pepper, to taste

Scallions, chopped, for garnish, if desired


Instructions

1. Preheat the oven to 400 degrees.

2. Line a baking sheet with parchment paper; set aside.

3. On a flat and clean surface, gently flatten out the puff pastry.

4. Using a pizza cutter, cut the puff pastry into four equal squares.

5. Using a sharp paring knife, very carefully cut a line (don’t cut all the way through the dough…you want to create a little break in the surface so that a ridge forms while the tarts bake…) about half an inch inside the edge of each square.

6. Using a fork, prick the inside of this new square several times.

7. Place each puff pastry square on the baking sheet.

8. In a medium bowl, combine the crème fraîche and cheeses, mixing until well combined.

9. Gently place and spread about 1-2 tablespoons of the cheese mixture onto the center of each puff pastry square.

10. Sprinkle the cheese with the chopped spinach and shallots (as much or as little as you desire.)

11. Bake until the pastry is lightly puffed and golden, about 15 minutes.

12. Meanwhile, melt the butter or oil in a frying pan over medium heat.

13. Cook your eggs, sunny side up, as desired (I find that cooking the eggs in a deep-bottomed fry pan and then covering them for about a minute or so while frying helps cook them evenly-I have a severe dislike for runny whites. I personally have the most success this way.)

14. Top each tart with a fried egg, garnish with scallions and salt and pepper, to taste.  Serve immediately.


Source:  Adapted from Williams-Sonoma.


January 4, 2012 - 6:25 am

Blog is the New Black - Sorry your 2012 started off sick. These look great- love that they are shaped in a square! 🙂

January 4, 2012 - 10:05 am

Leona Raisin - All I can say is “Mmmmmm”. And since you play “Words With Friends” you might like to visit my blog to try my TV trivia anagram game. Unscrambling letters to make words is good practice for WWF.
Leona

January 4, 2012 - 10:23 am

Josie - These look great – so simple and tasty. I’m glad you’re feeling better. Happy New Year, Shanon!

January 4, 2012 - 10:34 am

Robyn {Planet Byn} - trashy girly tv shows are the key to a speedy recovery!!! glad you’re feeling better!

January 4, 2012 - 2:59 pm

Ann P. - Yay, I’m glad you’ve healed since New Year’s! So sorry about that cold… being sick is never fun, especially on the holidays 🙁 On the other hand, these tarts look beautiful! They look so simple, nutritious, and yummy! Great idea 🙂

January 4, 2012 - 3:16 pm

Alice - Wow, what a yummy and gorgeous treat!

January 5, 2012 - 12:30 pm

Allie - i absolutely love this! What a lovely and delish brunch idea.

January 7, 2012 - 11:41 am

Laurel @ Lolly's Sweet & Savory Treats - Glad you are back to 100%. These tartlets look amazing. Your quinoa cakes with poached eggs are still on my “to-make” list!

April 8, 2012 - 4:01 pm

Easter Brunch « letstalkfashionandfood - […] Egg, cheese and ham tartlets Recipe (originally from The Curvy Carrot) […]

February 13, 2013 - 3:03 pm

Elena del mar - Hola soy de españa y me encantan vuestras recetas!

May 10, 2013 - 9:44 am

Egg and Cheese Tartlettes - […] source:  thecurvycarrot.com […]

November 29, 2013 - 6:58 am

MINITARTE CU BRANZA SI OUA - […] Sursa […]

December 17, 2014 - 9:47 am

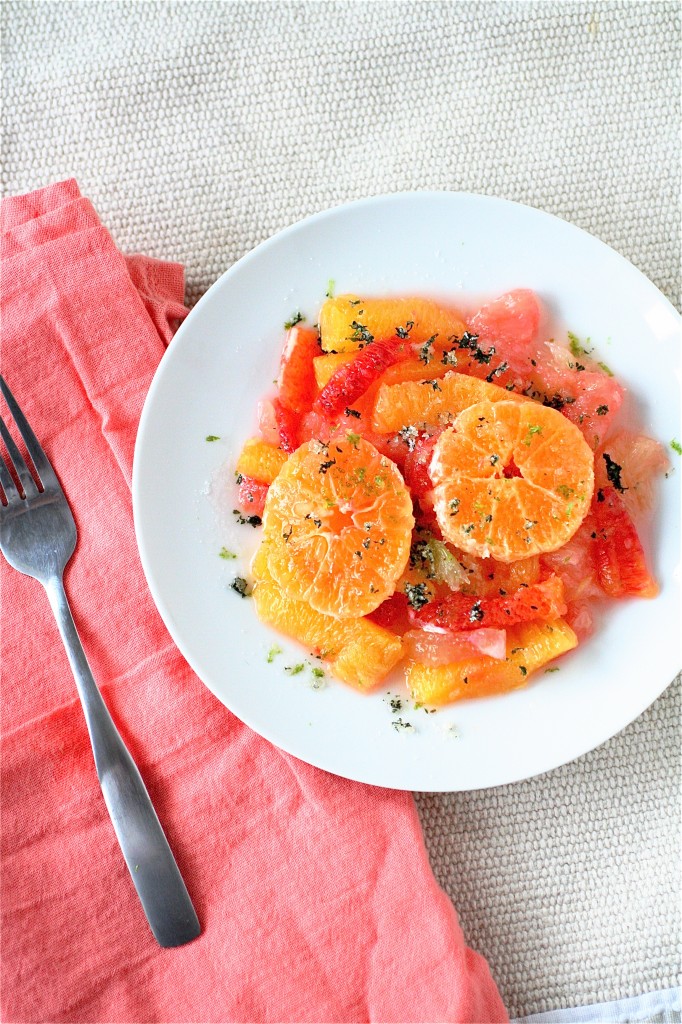
Citrus and Mint Salad


Happy New Year to You!  I hope 2012 brings you health, happiness, and fun in the kitchen.  I have a few goals for the website in the coming year (now hopefully my schedule can relax a little and I can get back to regular blogging), and I will be excited to share them with you along the way.

But, first, I want to thank those of you who have supported the Curvy Carrot, whether by your kind words, comments, or emails.  I spend a lot of time and energy working on this extracurricular hobby of mine, and it means a lot to me to be able to share my love for food with you.  I try every recipe that I post online-and, believe me, there are many-a-failed recipes I have tried.  Your constructive and positive feedback means a lot.

I thought I would start out the year with a fresh, healthy, and vibrant salad.  I’ve been under the weather for the past week (fevers, chills, and all), and this was the only thing that sounded good to me.  I used whatever fresh citrus was available at my local market-this recipe is extremely versatile in what kinds of fruits you use-I even threw in half a leftover lemon from my tea (hey, I needed as much vitamin C as possible!)  I made enough for two large main course salads, but what I have posted here would also be enough for four small side salads. If you are not a fan of mint, I would omit it and add a dash of cranberry juice (or other juice) that you have on hand.  Depending on the ripeness of the citrus fruits you choose, this is not necessarily a sweet type of salad (of course, you can adjust that by the amount of sugar or sugar substitute you use on top), but it’s definitely refreshing.

Citrus and Mint Salad

Servings: 2 large main course salads or 4 small side salads

Ingredients

3 ruby red grapefruits, peeled, pith removed and supremed

3 navel oranges, peeled, pith removed, and supremed

2 clementines, peeled, and sliced into 1/4″ slices

2 blood oranges, peeled, pith removed, and supremed

1/2 lemon, peeled, pith removed, and supremed

1 lime, peeled, pith removed, and supremed

1/4 cup granulated sugar

2 tablespoons fresh mint leaves


Instructions

1. In a large bowl, combine all the fruit (I used a paring knife to slice off the tops and bottoms off of each fruit, then carefully peeled the rind of with the knife.  Once I got to that point, I carefully slit each segment of fruit free of its membrane.  Time consuming?  Yes.  Worth it?  Yes.)

2.  Chill until ready to serve.

3. Meanwhile, in your food processor, combine the sugar and mint leaves and pulse until the mint is finely chopped.

4. Sprinkle desired amount of sugar over the fruit and serve immediately.

Source:  Adapted from Bon Appétit.


January 2, 2012 - 12:12 pm

Audra@The-Baker-Chick - Beautiful salad! I am under the weather today too and that sure sounds amazing. Wonderful photos too!

January 2, 2012 - 3:04 pm

Ann P. - That looks so incredibly juicy, my mouth is watering just a little! I love the way you cut the oranges, and I think the addition of mint would add a really great kick 🙂

January 2, 2012 - 4:38 pm

Julie - All my fav citrus fruits as well, refreshing!

January 2, 2012 - 10:01 pm

Selene - Love your blog…very good dishes on here & this one is no exception! Makes my mouth water!!

January 2, 2012 - 11:11 pm

beti - I just love the combination of flavors, the acid of the grapefruits vs the sweetnes of the oranges and a touch of mint, perfect

January 3, 2012 - 1:32 pm

The Dinner Belle for Kimberlybelle.com - Since winter hit, I can’t get enough citrus. This salad sounds like a great healthy alternative to dessert–maybe I should start the year off right?! 😉 I love savory citrus salads too. Right now I am loving orange, fennel, radish, cilantro, and pistachios. Its so simple but so delicious.

The Dinner Belle for Kimberlybelle.com

April 30, 2013 - 3:35 pm

Citrus and Mint Salad - […] For recipe visit:  thecurvycarrot.com […]

Spinach and Artichoke Stuffed Mushrooms


Ah, a nice and easy appetizer for the holiday season.  And while I am big on appetizers in general, I am even bigger on easy WARM appetizers that can be served this time of year.  This one is great for two reasons: it really is simple to throw together (you can make and pre-fill the mushrooms and pop them in the oven when you are almost ready to serve), and the flavors are great.  Who doesn’t love spinach and artichoke dip?  But in portable, finger-food friendly form?  Ok.  I’m sold.


While I used full-fat versions of the mayonnaise and the cream cheese, you could substitute in lower-fat versions.  As far as a vegan version of this, I’m sure you could substitute in your vegan favorites for the cream cheese and mayo (I haven’t tried this yet, so let me know if you try it and how it works out!)


Have a fantastic rest of your holiday season!


Spinach and Artichoke Stuffed Mushrooms


Servings: 8 large “stuffing” mushrooms**I had leftover filling, please feel free to make extra mushrooms with this recipe


Ingredients


8 large stuffing mushrooms (or mushroom variety of your choice)

4 ounces (1/2 brick) cream cheese, at room temperature

2/3 cup mayonnaise

One 12-ounce jar of artichoke hearts, liquid drained, chopped and squeezed dry

1 cup frozen spinach, thawed and squeezed dry

3 cloves garlic,  minced

1 teaspoon sugar

1 cup Parmesan cheese, grated

Sea salt and pepper, to taste


Instructions

  1. Preheat the oven to 350 degrees.
  2.  Clean the mushrooms by gently blotting them with damp paper towel, removing the stems and scoop out the gills.
  3. In a large bowl, combine the cream cheese, mayonnaise, artichoke hearts, spinach, garlic, sugar, Parmesan cheese, and salt and pepper, mixing until completely combined.
  4. Gently fill each mushroom with a heaping tablespoon (or two) of the filling mixture.
  5.  Place the mushrooms on a rimmed baking sheet and bake until the topping is lightly golden, about 15-20 minutes.  Serve immediately.

Source:  Adapted from Eating Well Living Thin.


December 30, 2011 - 7:12 pm

Tina - This is awesome! Hubby and I were just out to dinner and had spinach artichoke dip and he said he was sure I could make something better at home. I said I’d look it up when we got back and lo and behold – the interwebz delivered directly to my Google Reader this recipe! Looks wonderful and I can wait to try it with and without the mushrooms. Thank you!

December 31, 2011 - 12:13 pm

Kim - Liv Life - These look like a treat! Love the flavors you have going on, and serving in the mushroom is brilliant! Nicely done. Happy New Year to you!! Sending you off with some buzz!!

December 31, 2011 - 3:33 pm

Ann P. - I love mushrooms! Stuffed? Even better 🙂 Love your photography on this one, too!

January 1, 2012 - 7:52 am

marla - Love these mushrooms for appetizers! Happy New Year!

January 1, 2012 - 11:59 am

Mrs. Measurement - Yummm! My husband I love mushrooms and this looks absolutely delicious. I’ll have to try it out as a side dish or an appetizer.

January 1, 2012 - 8:20 pm

Vegolicious - I love mushrooms! So delicious and nutritious.

I’d love for you to submit your delicious mushrooms to Vegolicious, a food photo gallery of the best vegetarian recipes on the web. You can submit your entry here http://www.vegolicious.com/submit

May 10, 2012 - 3:20 pm

25 Super Bowl Appetizer/Treat Ideas - […] Spinach and Artichoke Stuffed Mushrooms […]

November 5, 2012 - 9:05 am

Monday Coffee Break: The Best of the Weekend ~ Festive Holiday Appetizers | Like This, Try That - […] last, but not least, this twist on the classic stuffed mushroom. These Spinach Artichoke Stuffed Mushrooms from The Curvy Carrot  seem like the perfect combo of a favorite dip and a favorite classic […]

March 5, 2013 - 10:37 pm

Monday Coffee Break: The Best of the Weekend ~ Festive Holiday Appetizers | Rebekah Griffin – Gamble - […] last, but not least, this twist on the classic stuffed mushroom. These Spinach Artichoke Stuffed Mushrooms from The Curvy Carrot  seem like the perfect combo of a favorite dip and a favorite classic […]

May 22, 2013 - 3:35 pm

Stuffed Mushrooms | Roddy's Restaurant - […] Stuffed Mushrooms […]

January 17, 2014 - 2:51 pm

22 Scrumptious Appetizer Recipes: Volume 7 - Top Appetizer Recipes - […] View Recipe Preparation Instructions […]

June 25, 2014 - 11:05 am

Susan - Great Appetitizer

October 5, 2014 - 12:41 pm

Food Lover's Friday: Holiday Gatherings - The Spicy BeeThe Spicy Bee - […] from HELL (he’s no fan of mushrooms, artichoke, or spinach!). These savory little bites from The Curvy Carrot bake up real nice and would be Christmasy with some red chili flakes on […]