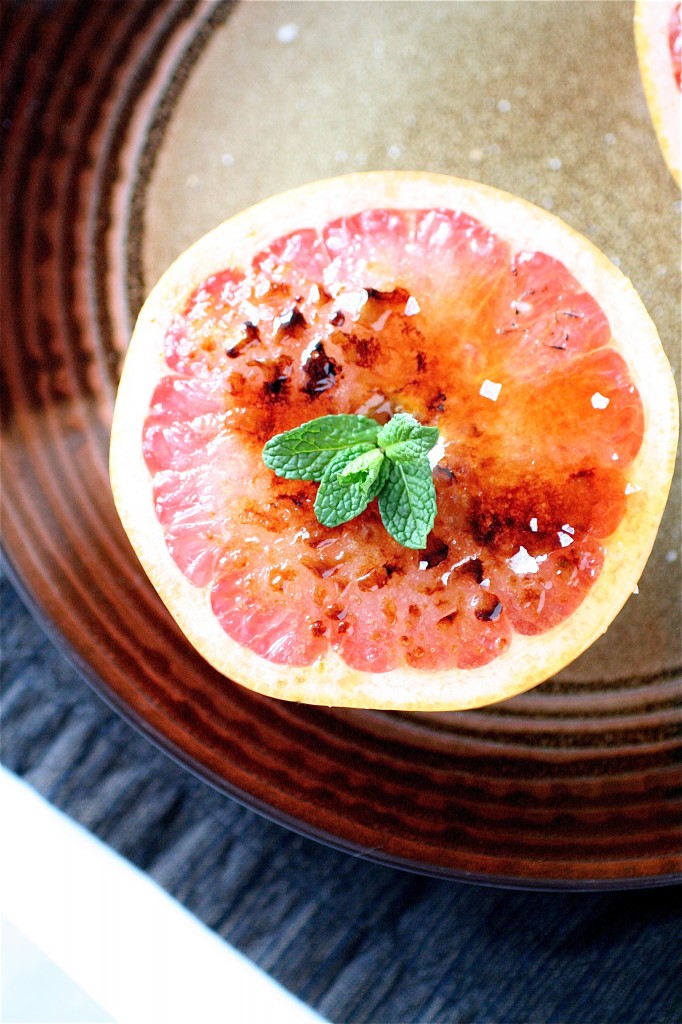
Broiled Grapefruit

I have jumped upon the broiled grapefruit bandwagon.  Because I got a brand new kitchen toy that I had wanted for months-a little brulee torch.  Hooray!


I have actually been eating a lot of grapefruit lately.  Like, at least one a day.  I sprinkle on some sugar, some flaky sea salt, and I am good to go.  I had also been experimenting with my broiler (my apartment oven leaves a lot to be desired), and I had tried broiling them this way, as well.  But I wasn’t getting the results I wanted: you know, that cracked, sweet shell that you would find on top of a brulee.  So I wanted one of these torches in the baddest of ways.  Now, if you have a more reliable oven with a high shelf and a decent broiler (even a toaster oven would work), you can also make these.  Don’t let not having a torch stop you from enjoying one of the best things about winter produce.


I have experimented a little bit with what sort of sweet topping I put on top: I’ve tried maple syrup, brown sugar, honey, etc.  But I think my favorite combination is a mixture of granulated and brown sugars-but feel free to experiment with your own concoctions.
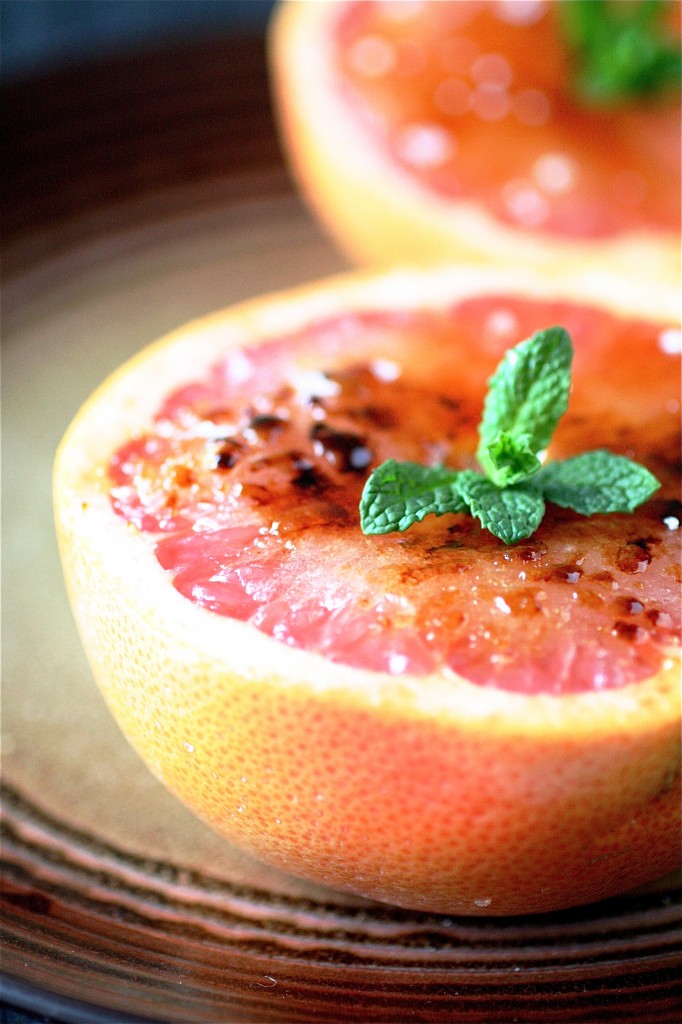
 

Broiled Grapefruit

Servings: 1 grapefruit, halved

Ingredients

1 large grapefruit (preferably Ruby Red-the redder the sweeter), halved

2 tablespoons granulated sugar

2 teaspoons brown sugar

Pinch flaky sea salt, like Maldon

Mint, for garnish


Instructions

1. In a small bowl, combine the granulated and brown sugars.

2. Evenly sprinkle the sugar mixture over the cut surface of each grapefruit.

3. Using a torch, very carefully and lightly torch the surface of the grapefruit until it is lightly golden brown and the sugar is melted, a few seconds.  If using a broiler (preheated to 500 degrees), broil on the top shelf for about 4-5 minutes, checking the grapefruit frequently.

4. Sprinkle with sea salt and garnish with fresh mint.
Source: A Curvy Carrot original.

January 22, 2012 - 7:20 am

Maureen - I’ve only made these once but they were a big hit at breakfast. Easy to make and plenty of time to finish off breakfast while they’re tucking in to the fruit. 🙂

January 22, 2012 - 9:22 am

Molly - Ha! I have been making myself a broiled grapefruit every day for a month or so, now. So easy and different, and feels a bit of an indulgence on frosty cold mornings.

January 22, 2012 - 12:52 pm

Liz @ Blog is the New Black - Super easy, mostly healthy, and totally delish!

January 22, 2012 - 3:14 pm

Jacqueline - Was totally eating a grapefruit when I read this post, and decided this would be much better. Although with my love of kitchen gadgets I’m afraid I’ll be buying myself a torch soon :-)!

January 22, 2012 - 8:06 pm

Cara - This really makes me wish I had a grapefruit hanging around right now. I’ve never tried broiled grapefruit. I’d totally give it a shot with coconut palm sugar.

January 22, 2012 - 8:23 pm

Ann P. - I love grapefruit for breakfast, but have never had the chance to try it this way! I think it’s about time I got a brulee torch, too 🙂

January 24, 2012 - 1:47 pm

natalie (the sweets life) - i love grapefruit but have never thought to try it with sea salt! i can’t wait to give this a try!!

January 24, 2012 - 4:18 pm

Joanne (Inspired Taste) - I love grapefruit, but never had it like this. Will definitely be giving it a try soon! Thanks for sharing. -Joanne

February 3, 2012 - 4:01 pm

…have a delicious weekend! » Zella and Jack - […] …broiled grapefruit […]

September 15, 2013 - 10:27 pm

Dan Corrigan - Oh, I love beets and have a beetroot brownie recipe lined up for posting. It took me a while to like mushrooms; I finally turned the corner after entering adulthood. I can see that the grapefruit glaze would really go well with the beets. Thanks!

June 18, 2014 - 11:42 am

Broiled Grapefruit | Food- Mafia - […] Go to full Instructions […]

October 25, 2014 - 9:27 pm
December 19, 2014 - 8:39 pm
March 13, 2015 - 8:04 pm

Layered Taco Dip

The Super Bowl is coming up, and we all need good football-watching food ideas.  Wait.  Who am I kidding?  I don’t need football for this dip.

After a bad week of intense nacho craving, I decided to go ahead and make something similar to take over to a friend’s house for a little get-together.  This spicy (you can totally control the spice factor here) dip is extremely versatile-you can add or omit what you like and don’t like. Me?  I’m a fan of black beans and queso freco, so I had to have them.  I added in a habanero pepper cheddar from Cabot (so so spicy, but so so good…).  I could have added in some guacamole or some bell peppers, but I didn’t have them on hand.  The best part about this dip?  Oh, just the sour cream/cream cheese layer.  It cuts the heat a little bit and makes this an official caloric splurge.

And, this dip isn’t too incredibly hard to assemble.  You just need a little prep time and a sturdy can opener, and you are good to go.  I ended up doubling the recipe (with the doubling, this will fit into a 9 x 13-inch baking pan, so please feel free to halve it) so that I could try to feed a party of about 12 people, but I had leftovers.   For game day, this might be the perfect snacking food.

Layered Taco Dip

Servings: one 9 x 13-inch casserole dish


Ingredients

Two 1-ounce packages of taco seasoning.  Or make your own.  Check out this recipe.

Two 16-ounce cans refried beans

Two 16-ounce cans black beans, drained and rinsed

Two 8-ounce packages cream cheese, at room temperature

2 and 1/2 cups sour cream

2 cups fresh salsa

4 tablespoons green onions, chopped

4 cups iceberg lettuce, shredded

Two 6-ounce cans black olives, sliced and drained

2 cups habanero pepper cheese, shredded

1 cup queso fresco,crumbled


Instructions

1. In a large bowl, combine the taco seasoning packets with the refried beans.  Mix until well combined and spread evenly into your serving dish.

2. In another large bowl (or using your stand mixer) mix together the cream cheese and sour cream, mixing until smooth.  Evenly spread this layer over the refried beans.

3. Top the sour cream with the salsa, followed by the lettuce, black beans, green onions, black olives, and cheeses.

4. Cover and chill until ready to serve.


Source:  Adapted from All Recipes.


January 20, 2012 - 11:52 am

Melissa @ Kids in the Sink - I have never seen a habanero pepper cheese! Did you get it at your regular grocery store or a specialty store? Because I am so into it. It looks like the perfect addition to taco dip!

January 20, 2012 - 12:08 pm

srlacy - Hi Melissa-
I got it at my local market. It’s from a local creamery here in the Upper Valley,
called Cabot Creamery.

January 21, 2012 - 4:17 pm

Ann P. - YESSS for NFC Championship game…. GO NINERS!

January 21, 2012 - 6:52 pm

Annette - How do you use the black beans in this recipe. Maybe I’m just missing them in the directions.

January 21, 2012 - 7:19 pm

srlacy - Hi Annette-
Thanks for catching that. I have added them in. They just get layered with the rest of the ingredients.

March 21, 2012 - 2:29 am

Layered Taco Dip | Countertop Confections - […] Adapted from The Curvy Carrot FacebookPrintRedditEmail This entry was posted in Snacks and tagged snacks, taco dip by Meaghan. […]

September 5, 2013 - 3:42 pm

{Entertain} Appetizer Party – the key to kays - […]  Layered Taco Dip.  Probably the easiest dip […]

Chocolate-Hazelnut Tartlets

The other night, I was out at a restaurant/bar with some fantastic friends.  All of a sudden, a Frangelico on the rocks appeared.  Subsequently, it was passed around the table and everyone began professing their love for all things flavored hazelnut.  I have to admit, I haven’t done too much with them in the way of cooking/baking, but when I do, I always wonder why I haven’t played a little bit more with them.

The following night, I was going to spend some time with the same set of friends to begrudgingly watch the Patriots beat the Broncos….(remember, I am originally from Indiana and therefore have blue/white blood running through my veins for the Colts…even if they had a terrible season.)  I wanted to surprise my friends with a little hazelnut love since they had expressed it the night before.  It also was mighty convenient that I had these little treats bookmarked for a pre-Valentines Day post.  Perfect timing.

I find the raspberries completely seductive.  Yes.  I just said that.  But you could sub in any kind of (less seductive) fruit.  I had the raspberry preserves on hand, so it just seemed fitting that I used raspberries for the top.  You could really do anything: blueberries, orange, even candied hazelnuts.  Anything works.

Looking for some more hazelnut love?  Try these.  Or this.

Chocolate-Hazelnut Tartlets

Servings: 24 tartlets


Ingredients

For the shells:

1 and 1/2 cups whole hazelnuts

8 tablespoons (1 stick) unsalted butter, at room temperature

1/4 cup packed light brown sugar

1 cup all-purpose flour

For the ganache:

2 cups high-quality chocolate (use your choice: bittersweet, semisweet, whatever…), chopped

1 cup heavy cream

For the assembly:

1/2 cup seedless raspberry preserves

1 pint fresh raspberries

Instructions

1. For the shells: In the bowl of your food processor, process the hazelnuts until they reach the consistency of coarse sand.

2. In the bowl of your standing mixer fitted with the paddle attachment, cream the butter and brown sugar on medium high speed until light and fluffy, about 2 minutes.

3.  Reduce the mixer speed to low and carefully add the flour and chopped hazelnuts, scraping down the sides of the bowl as necessary.

4. Once the dough comes together, roll it into a ball and wrap tightly with plastic wrap.  Refrigerate for at least 30 minutes.

5. For the ganache: In a small saucepan over medium heat, bring the cream to a gentle simmer.  Meanwhile, place the chopped chocolate in a heatproof bowl.

6. Pour the hot cream over the chocolate and let sit for about 2 minutes; then whisk until smooth and uniform in color.

7. Refrigerate the ganache until ready to use.***This will help firm it up so it can be easily piped.

8. For baking the shells:  Preheat the oven to 350 degrees.  Generously butter a mini muffin pan.

9. Place about 2 teaspoons of dough into each muffin cup and, using your finger,  gently make an indentation in the center of each one to form the tart shape.

10.  Bake the tartlets until golden, about 10-12 minutes.  Let cool completely. ***Check them frequently.  The nuts will bake quickly.

11. To assemble:  Heat the raspberry preserves (either in a small saucepan over medium-low heat or in a heatproof bowl in the microwave at 10-second intervals) and stir until smooth.

12.  Spoon or pipe about 1/2 teaspoon of preserves into the center indentation of each tartlet.

13.  Using a piping bag and the pastry tip of your choice, pipe the chocolate ganache over the raspberry preserves.  **I found that I had to chill my still-warm ganache a little bit more before I could get a stiffer consistency to pipe.

14. Top each tartlet with a fresh raspberry.  Enjoy.

Source: Barely adapted from Yankee Magazine.


January 18, 2012 - 6:14 am

Liz @ Blog is the New Black - Shanon, these look AMAZING! I love hazelnut/nutella anything… yum!

January 18, 2012 - 11:00 am

Cara - How do I get that drink to magically appear at my next dinner outing? 🙂

January 18, 2012 - 11:46 am

Heidi @ Food Doodles - How cute are these? They must be delicious – honestly, chocolate and hazelnut is one of the best combos ever 😀

January 18, 2012 - 3:26 pm

Ann P. - These are so elegant! What a great way to show some love to the hazelnut, the raspberry, and your friends 🙂

January 18, 2012 - 9:30 pm

Maureen - What a gorgeous treat to bring to friends. You must be everyone’s best friend for sure!

January 19, 2012 - 1:22 pm

Melissa @ Kids in the Sink - These look so cute and fancy! Any dessert that looks fancy is good in my book.

January 19, 2012 - 9:31 pm

Laurel @ Lolly's Sweet & Savory Treats - I actually got some Frangelico for Christmas and I’ve been wanting to drink it all… I mean bake with it. These look delicious! I wonder if you could add some Frangelico to the ganache for a little extra hazelnut pizazz!?

January 19, 2012 - 9:46 pm

srlacy - I bet you could, and I bet it would be AWESOME! 🙂

February 14, 2012 - 11:33 pm

DJ - I am going to make them next week andd take them to work <3 Thanks <3

March 23, 2012 - 8:19 pm

megan - I made these for a party and the ganache needs to cool and set for 30 min. so it will be piping consistency. also make sure you press the tart thin because it will puff when you bake it. 🙂

September 28, 2012 - 7:44 am

Suzie - I have totally cheated and bought store tartlet cases – can I make these today to serve tomorrow at lunch or will the pastry go soggy ?
Thanks for a fab recipe – can’t wait to try it – will try the hazelnut bases next time I promise !
((hugs)) Suzie xoxo

September 28, 2012 - 1:36 pm

srlacy - Hi Suzie-

I think they should hold up just fine-the chocolate ganache is thick and rich. No worries! Good luck!