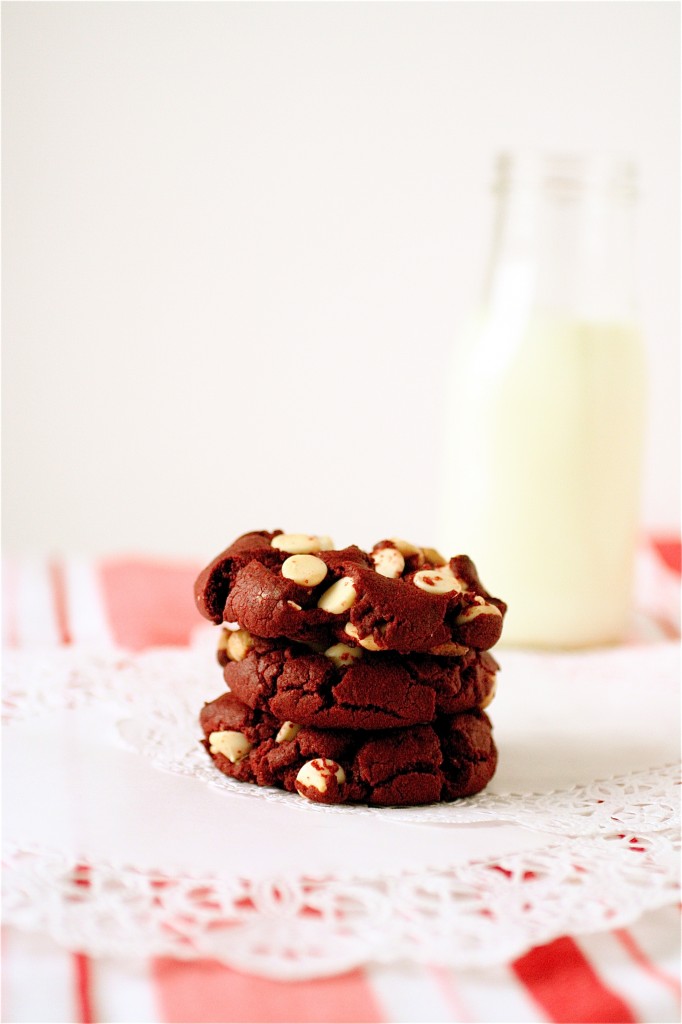
Red Velvet White Chocolate Chip Cookies


The other day I was getting ready to head over to my friend Jill’s house to watch a movie.  She’s a huge fan of cookies and red velvet, so I figured I should whip something up before I headed over (to eat cookies).  Since Valentine’s Day is quickly approaching, I wanted to try my hand at something a little festive and appropriate for the holiday.  These little guys fit the bill.  I took them over, still warm from the oven, and they were quickly and repeatedly snacked on.  Nothing beats good red velvet, right?

So, before you make this recipe, there are a few things you should know.  Some things that I may have had a few issues with.  But the end result turned out so good that I had to share them with you.

The cookie dough is VERY thick, so if you don’t happen to have an electric or (preferably) standing mixer, I would give these a pass.  The dough would probably be way too tough to combine by hand.  As far as the red food coloring goes, I used the standard Wilton red food coloring gel….but I had to use an awful lot of it (almost the entire larger vial) to get the cookies to turn a red shade.  Perhaps a liquid food coloring would work better with this recipe in the future (it might also help with the thickness of the cookie dough, too.)  When you are ready to bake them, flatten them down a little with your fingers or the back of a spoon-they are very cake-like and won’t flatten out like regular (less delicious) cookies.

The fact that Jill continues to talk about how delicious these cookies over a week later says a lot.  That’s music to my ears.
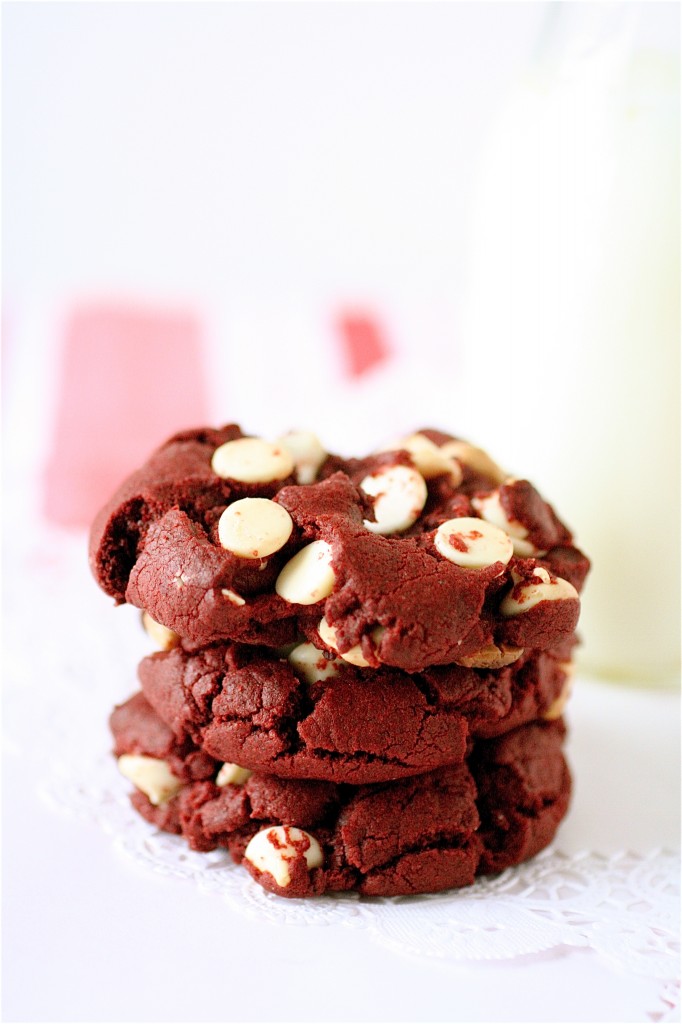
 

Red Velvet White Chocolate Chip Cookies


Servings: approximately 20 cookies

Ingredients

1/2 cup (1 stick) unsalted butter, at room temperature

1/2 cup granulated sugar

1/2 cup light brown sugar, packed

1 large egg

1 teaspoon vanilla

1 and 1/2 cups all-purpose flour

1 teaspoon baking soda

1/4 teaspoon salt

1/3 cup cocoa powder

Red food coloring liquid or gel

1/2 cup white chocolate chips
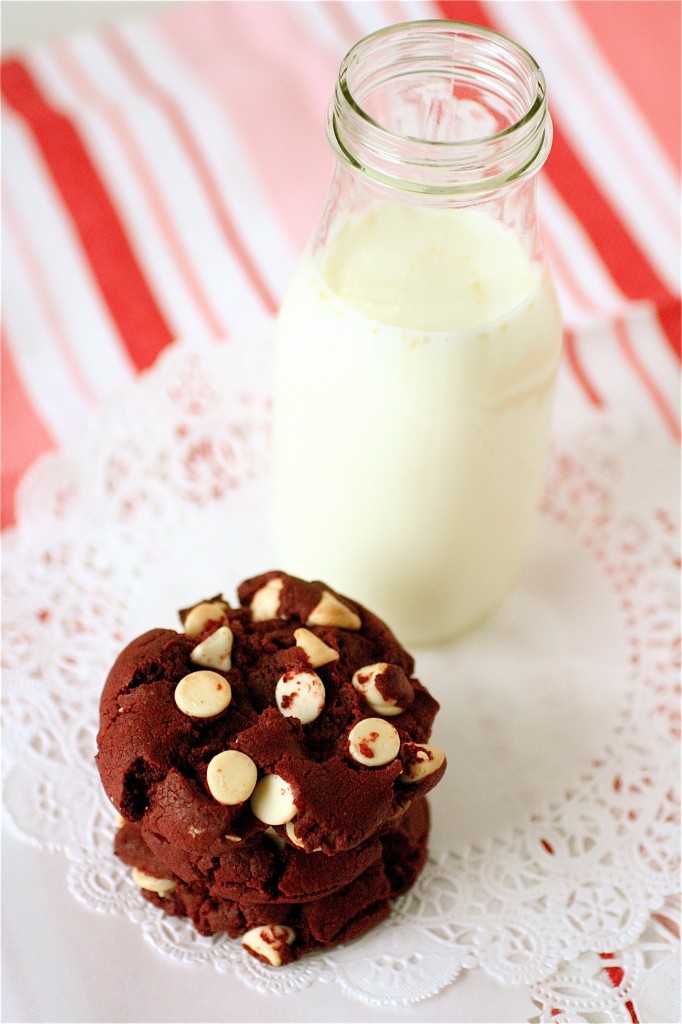
Instructions

1. Preheat the oven to 375 degrees.  Line two baking sheets with parchment paper; set aside.

2. In the bowl of your standing mixer fitted with the paddle attachment, cream the butter and both sugars on medium-high speed until light and fluffy, about 2 minutes.

3. Add the food coloring gel or liquid until you reach the desired color.

4. Reduce the mixer speed to medium-low and add the egg and vanilla, mixing well until combined.

5. Reduce the mixer speed to low and add the flour, baking soda, salt, and cocoa powder, mixing until thoroughly combined.**I had to add  more food coloring gel at this point because the addition of the cocoa powder really changed the color.

6. Using a rubber spatula, gently fold in the white chocolate chips until incorporated.

7. Using a cookie dough scoop or a tablespoon, drop the dough into mounds about two inches apart from one another.  Lightly flatten each cookie dough mound with your fingers or the back of a spoon.

8. Bake until slightly golden and crisp around the edges, about 10-12 minutes.  Enjoy.


Source: Barely adapted from How Sweet It Is.


January 28, 2012 - 7:30 am

Maureen - What big cookies. I’ve only ever had red velvet cake. My recipe comes from White Lily Flour company that used to be in Knoxville a million years ago when I lived there going to college. My recipe is pretty dog eared.

I can make these cookies instead and preserve that old recipe for posterity.

January 28, 2012 - 9:09 am

Liz - YUM!!!! Is it wrong to want one for breakfast????

January 28, 2012 - 9:26 am

srlacy - Haha! No way!

January 28, 2012 - 9:43 am

Maggie - I need to go make these right now!!! Perfect for Valentine’s Day too 🙂

January 28, 2012 - 9:45 am

Blog is the New Black - The consistency of these cookies looks just like what I love!

January 28, 2012 - 3:11 pm

Claire - I’ve been wanting to make red velvet white-choc chip cookies (and just made red velvet cupcakes last night). Thanks for sharing. Most of the recipes that I had been seeing lately involved cake mixes. The red velvet brownies on Smells Like Home are also ah-mazing. Congrats on your job! My sister is waiting to hear on where she’ll land for her surgical residency. 🙂

January 28, 2012 - 4:04 pm

srlacy - I love Smells Like Home! ALL of Tara’s recipes and photos look incredible…and those red velvet brownies she has have been on my must-do list for ages!

January 29, 2012 - 2:20 am

Amrita - I have to say red velvet cookie sounds at least ten times more intriguing than a classic red velvet cake. Although, the way these look gorgeous, it may be more dangerous to be left alone with these cookies than a piece of cake!

January 29, 2012 - 2:33 am

Anna - Thanks for a wonderful recipe. The tips are really helpful. I may have wondered if it turned out the dough is sticky, but knowing it before hand makes a lot of difference. Thanks again. Will try soon…

January 29, 2012 - 3:02 am

Kathy - Those look amazing! I love the second photo, it just shows how sweet and puffy they are. I’m jealous that I don’t have white chocolate, flour, or red food coloring on hand. Just not fair…hehe ^^~

http://milk-and-tea.blogspot.com/

January 29, 2012 - 8:28 am

jess white @athriftyfoodie - Thanks for the heads up with making these. Luckily, I only have red food colouring liquid, hopefully that will be more effective! Can’t wait to make these

January 30, 2012 - 5:05 pm

Ann P. - White chocolate chips are the perfect addition to red velvet! And a red velvet cookie sounds easy and simple to make 🙂

February 3, 2012 - 11:02 am

Monique - It looks so delicious! the white chocolate chips with thred velvet are a perfect combination! Thanks for sharing!

February 4, 2012 - 9:15 am

Jesica @ Pencil Kitchen - hmm… I will try to make these one day

February 9, 2012 - 5:16 pm

Amy - Omg! These are to die for and came out perfectly!

February 11, 2012 - 12:02 pm

Valentine’s Day Love « Fleur-De-Licious - […] Red Velvet White Chocolate Chip Cookies from The Curvy Carrot. […]

February 12, 2012 - 1:48 pm

Mariko - These look amazing. Question though: can I make these and keep them in the fridge to bake at a later time (like chocolate chip cookies) ?

February 12, 2012 - 2:11 pm

srlacy - Sure!

February 15, 2012 - 7:21 am

Dreaming in red - […] of my co-workers is really into baking and she inspired me to try this recipe. It was actually a lot of fun and way less intimidating than I was expecting! Get ready for more […]

February 24, 2012 - 5:21 pm

Benthe - I just baked these and ate two, they are perfect 🙂 A little soft on the inside, crispy on the inside. Love them and will bake them again for sure!

March 7, 2012 - 2:50 am

maryknitsdotcom » Blog Archive » Red Velvet chocolate Cookie variety - […] attempt at making red velvet chocolate cookies. Got the recipe here. now, I don’t know what makes these red velvet, except perhaps the color, so I’ve just […]

March 14, 2012 - 1:41 am

Baker Street - love the idea of red velvet cookies! and they have been so perfectly paired with white chocolate.

April 6, 2012 - 12:49 pm

wellseasonedwilly - These look amazing! You’ve got to love the combo, I’ve just made some so similar! But mine look a little different. My recipe was in grams not cups (british/american divides), hence the difference. But are these quite chewy and soft or more substantial and crunchy?

April 6, 2012 - 3:33 pm

srlacy - They are more chewy and soft.

April 27, 2012 - 11:49 pm

Carole - I used your recipe, but added half a standard block of cream cheese to make it more moist and to tie in the frosting flavor of the cake. I also added some apple cider vinegar to it because I read that the reaction with a vinegar substance (such as buttermilk) with the cocoa creates a reddish tint (Wikipedia).
With the added moisture, you will probably have to add more flour (don’t really know how much more, just keep adding it until the dough is the right consistency).
Anyway, these came out seductively delicious. My boyfriend seems to be in a love struck daze as he bites into them.

April 29, 2012 - 12:33 pm

Sheila Brown - I’m so glad I found this recipe! I recently went to our weekend summer art/fruit/ect. market and a vendor was selling these cookies. They were really good, but expensive! 1 for $3 or 2 for 5. For a few more dollars I could make a LOT! The only difference with his recipe is he used semi-sweet chips. (which I prefer, or bittersweet) does it matter, because I’m not a fan of white chocolate.

June 17, 2012 - 3:37 am

Seima Bakes - I looked high and low for other red velvet cookies,and yours seems perfect! I can’t’t wait to make these,I know my family will love them! I will post your recipes on my blog too,hope you won’t mind!? Credit goes to you of course… Happy me!

http://thebakingsanctuary.blogspot.com

July 23, 2012 - 11:16 pm

Brianna - I made these tonight and they were delicious! I substituted dark chocolate chips for the white and they were so yummy! I couldn’t get them to turn a pretty red color, they were a brown-ish red, but they were quite tasty!

July 28, 2012 - 11:35 pm

J'enay - Just made these – great recipe, awesome cookies!

September 21, 2012 - 6:01 pm

Cristina - Ended up using more than half a cup of white chocolate chips and not using enough red food coloring. my cookies ended up..brown/purple lol. but good recipe, will try again with adjustments

February 14, 2013 - 8:07 pm

Christina - I just made these and they are YUMMY! I found that not flattening them worked better in my oven. I live in Colorado so maybe it’s something to do with the altitude. When I flattened them they came out paper thin and not soft in the center. I didn’t make any adjustments to the recipe. Next time I will try them with cut up Milky Way bar instead of white chocolate chips. Thanks!

March 12, 2013 - 7:11 am

White Truffle Macaroni and Cheese

I’ve been waiting to post this one for a while now.  I didn’t want to let the cat out of the bag yet.

I don’t share all that much about my personal life on this blog.  It’s about the food for me.  But, I feel strongly about this one, so I figured I would share it with all of you, my friends through the internet.

Some of you may know that I had been traveling cross country the past few months, interviewing at several different places for my final, real, grown-up job.  Hectic?  Just a smidge.  After going through all this training (ahem, student loans galore….), I wanted to make the right decision when it came to finally settling down somewhere for a while.  Get my roots, you know?  And after some pretty extensive turmoil over the past four years or so of my life, I was ready to finally go ahead and get my big girl pants on….find a job…negotiate a contract…uproot myself (again) on my own (with a package deal of one fat orange cat, one petite and prissy black cat, and one lovable, sweet sweet boxer..) and start the next phase of my life.

And, so I did.  I’m moving to Milwaukee, friends!  So, starting in July, expect a lot more recipes that call for beer and/or cheese.  I’m going to a great practice with great people, and I will get to do my dream job…everyday.  It’s rare that opportunities like this come up for people in my field, so I am running with one.

To celebrate, I wanted to share a recipe with cheese.  Lots of it.  Something comforting.  Something rewarding.  I indulged at the market with the truffle oil.  I had passed by the white truffle oils several times, giving them a sideways glance and wondering what all the fuss was about.  And, as in fuss, I mean a small bottle costing nearly $20.  My grocery bills are exorbitant enough for one person (I mean, sometimes it’s seriously embarrassing with the amount of food I bring home..for one person.) so I never went for it.  But, with the contract officially signed and sent off now, I figured I should celebrate.  So I bought the big bottle.  Big girl (fancy) pants, right?

A few things about this recipe: I think I may have used a little too much truffle oil, so I am tweaking the recipe here for you.  The flavor is great..it’s a little hard to describe: earthy, savory, a little salty…but definitely fancy.  I also used Dijon mustard in the original recipe, but I would also omit this as well the next time I make this (so I omitted it for you here). The cheese combination melted beautifully.  I used the panko because I prefer that over bread crumbs any day, but feel free to use whatever topping you like.  I decided to broil the mac and cheese instead of baking it because I prefer the texture of a creamy stove-top-like one over a baked version.

And so what did I do?  I poured myself a nice glass of wine, made a side salad, ate something totally unhealthy for dessert, and enjoyed this fancy-pants mac and cheese to celebrate my new transition into being a grown-up.

White Truffle Macaroni and Cheese

Servings: approximately 8


Ingredients

1 cup panko

1/2 cup Parmesan cheese, grated

1-2 tablespoons white truffle oil (to taste)

2 tablespoons unsalted butter

2 tablespoons flour

2 cups half and half

8 ounces white cheddar cheese, grated

8 ounces Fontina cheese, grated

Salt and pepper, to taste

8 ounces elbow macaroni (or your personal favorite type of pasta)

Green onions, chopped, for garnish (optional)

Instructions

1. Preheat the oven to 500 degrees (this is considered broiling).  Generously spray a 2.5-quart casserole dish with cooking spray.

2. In a medium bowl, combine the panko, Parmesan and 1 tablespoon white truffle oil (if using less white truffle oil overall, use about 1/2 tablespoon here), mixing until combined.

3. In a large saucepan or Dutch oven, melt the butter over medium heat. (If you are short on time, it might be helpful at this point to get your water boiling for the macaroni.)

4. Add the flour and whisk continuously until the mixture forms a thick paste, about a minute or so.

5. Slowly whisk in the half and half until smooth (some lumps may remain-that’s ok).

6. Bring the mixture to a simmer and let cook, stirring occasionally, about 3 minutes.

7. Using a wooden spoon, slowly add the cheeses and stir until completely melted.

8. Add the remaining truffle oil and salt and pepper, to taste.

9. Meanwhile, cook the macaroni as directed on the package.  Once cooked, drain the pasta and add it to the cheese sauce.

10.  Evenly distribute the macaroni into the prepared casserole dish and top with the panko mixture.

11.  Broil until the panko topping is lightly golden, about 3-4 minutes.  (Watch it carefully so that it doesn’t burn!)  Top with green onions (if using) and serve immediately.


Source:  Adapted from Leites Culinaria.


January 26, 2012 - 8:47 am

Lori - Shannon,
Congratulations! While you might now be too close to Indianapolis, you are still in the midwest. I used to talk with a lot of people in Milwaulkee. I am sure you will feel at home in no time.

I know you are a doctor…but what is it again that your specialty is in? I love to hear the success stories because my son is off to college this fall as a Bio major. Thanks for posting this recipe. I’ll be sure to give it a try.

January 26, 2012 - 8:58 am

Liz @ Blog is the New Black - Shanon, congrats! You are so deserving of your new position. That is terrific! And to boot, this meal looks totally worthy of a celebration!

January 26, 2012 - 9:05 am

srlacy - Thanks, Liz! 🙂

January 26, 2012 - 9:06 am

srlacy - Hi Lori-
Thanks for the kind words. I’m finishing up a fellowship in dermatopathology. So, basically, I look at skin biopsies under the microscope. I look at everything from crazy rashes to melanomas. I love it. Good luck to your son!

January 26, 2012 - 9:28 am

Liz Parker - That mac-n-cheese looks divine. Thank you for posting about the broiler, how simple is that?! My son loves the creamy of the stove top (or now my pessure cooker version) and my husband likes the baked kind. Yes meeting right in the middle!

Congrats on the job and thanks for letting us share in our happiness. I wish you much success!

January 26, 2012 - 10:34 am

Robyn - beer? good! cheese? good! congratulations on your job! i’m sure it will feel great to settle down. and when you’re looking for a place you can pick one with a big kitchen with lots of natural light!

January 26, 2012 - 11:52 am

srlacy - Haha! Robyn, you are absolutely 100% right on. Here are the requirements for my new apartment: they can allow my dog…and I have a big kitchen!!! No more stacking everything on my kitchen table!!

January 26, 2012 - 1:38 pm

Jessica - Congratulations on the new job! Beer and cheese…sounds good to me. This recipe looks amazing – one of the best things I’ve ever tasted in my life was a truffled mac & cheese from a fancy restaurant in DC, it was indescribably good. And fancy pants. So I may just try to recreate that decadent cheesy deliciousness by trying your recipe. Do you have plans for the rest of that truffle oil? I’m excited to see what else you make with it.

January 26, 2012 - 1:42 pm

Rachel - Congratulations! Small world, my father is a pathologist about an hour north of you! I grew up in Wisconsin and can truly say it’s one of my favorite places & I’m proud to call home. Milwaukee is a great city, enjoy yourself 🙂

January 26, 2012 - 1:59 pm

srlacy - Hi Jessica-no plans as of yet, but I’m working on it….. 🙂

January 26, 2012 - 2:17 pm

natalie (the sweets life) - congrats! i spent the first 12 or so years of my life in the Milwaukee area and we still have family there…it’s definitely becoming more of a ‘foodie’ town so I think you’ll enjoy it (whatever you do, get Kopp’s custard as soon as possible!!! :))

January 26, 2012 - 2:27 pm

Brenda Stary - Congrats!! this recipe is perfect, I was just thinking 5 days ago, I should look up a mac and cheese recipe and there it is!!!! thank you!! My daughter lives in Milw and loves it. When she comes home, she can’t wait to get back!! Milwaukee has ALOT to offer. Do your research and enjoy the city! I also have 2 sisters in chicago which is only a $20 train ride away from milw! Both cities are great!! congrats again!

January 26, 2012 - 3:05 pm

Kelsey - Congratulations, Shanon! I’m so happy you’ve found a place that feels right AND that you’ve got that bottle of truffle oil. I bet you’ll make some mean fondue when you get to Milwaukee and get your hands on all that delicious cheese!

January 26, 2012 - 4:32 pm

srlacy - Heck yeah! Ooooh, fondue….now I am hungry!

January 26, 2012 - 5:35 pm

Ann P. - CONGRATULATIONS! this is so big! One day I hope to be in a position like yours (on my way–I’m taking the MCAT this Saturday!), so I definitely can imagine how happy you are. 🙂 This is the perfect celebration food, too! LOVE truffle mac & cheese!

January 26, 2012 - 6:14 pm

Nicole O - Welcome to Wisconsin!! Grew up here, left, and then came back.. so I guess that’s a good sign 🙂

January 26, 2012 - 8:39 pm

Culinary Cache - Yum! I love truffled mac n cheese such the perfect flavor combination! Great recipe!

January 27, 2012 - 9:45 am

Maureen - Congratulations on the new job! How exciting to finally get your life going. Well done!

Your mac and cheese with truffle oil sounds so good. I’m going to have to get some mac and cheese on a plate soon.

January 27, 2012 - 12:42 pm

Heather - Many congrats on your new job!!! I’m sure you will do very well there! All the best to you! (PS – lookin forward to beer/cheese recipes. Cause who in the WORLD doesn’t love beer and cheese?)

January 27, 2012 - 12:54 pm

Kim in MD - I stumbled upon your blog today through TasteSpotting. This mac & cheese recipe looks TO DIE FOR! Congrats on your new job, too! Here’s a tip to get the most out of your new bottle of truffle oil- keep it in the fridge. It will turn rancid pretty fast if you don’t, and if you keep it in the fridge it will last for years! 🙂 I am off to explore your blog. Thanks for the great recipe!

January 27, 2012 - 2:22 pm

srlacy - Thanks, Kim!! Will do!

January 27, 2012 - 7:14 pm

Sarah G. - I just want to say Welcome to Milwaukee!! If you ever need suggestions for restaurants, or anything really, let me know!

January 27, 2012 - 7:24 pm

Krissy @ Krissy's Creations - Congratulations!! So excited for you and this wonderful change :). This Mac&Cheese looks incredible! I love truffle, I love mac and cheese, I love this!

January 28, 2012 - 1:15 am

Jo - This looks absolutely delicious. Would love for you to share your gorgeous pictures with us at foodepix.com.

January 28, 2012 - 3:13 pm

Rachel @ Bakerita - Congrast! And ahh, drooling! This mac n cheese looks to die for. I’m all for anything and everything truffle and mac and cheese is probably my favorite food. I want this…now!

January 29, 2012 - 10:42 am

Gina - I have followed your blog for some time now. I love your recipes and look to it for inspiration. I live and grew up in the Milwaukee area! It is a wonderful city with down to earth people! Congrats on your job and welcome!

February 2, 2012 - 11:30 am

gail - Congrats! My husband and I live in Chicago but LOVE Milwaukee! Such great restaurant, art and general fun! We make the trip several times a year. You will LOVE it!

February 2, 2012 - 5:22 pm

DishingGourmet - This is my first time on your blog, and I will certainly be back. This recipe looks fantastic! I am planning to make it for my fiance this weekend as part of his special birthday dinner. Best wishes to you!

February 2, 2012 - 11:39 pm

Elizabeth - Hello, this is my firt time visiting via Pinterest.

I am from Milwaukee and, oddly enough I am visiting Milwaukee right now. I have not read enough of your blog to know much about you but I can tell you this. Milwaukee is a fabulous place, the people are kind, the city is beautiful and there is a lot to do here. I think you will be very happy here. I am sure that you have received a lot of advice about the city but if you would like to know more please do not hesitate ot contact me. I would be more than happy to tell you some great stores to “feed your food” habit, or differst things to see and do as well as great areas to live in.

August 25, 2012 - 7:10 pm

Sharron - Thank you very much for the recipe.

I used two 5oz packages of Walmart’s parmesan cheese blend which contains Fontina and Asiago cheeses as well as the parm. I used a 13.5oz box piccolini shells. Added enough milk to the half and half to remain mixable.

October 13, 2012 - 10:09 pm

this « collegeandcooking - […] this […]

April 2, 2013 - 8:50 pm

Tiffany - I made this tonight. It was good but 8 oz of pasta definitely was not enough for us. Almost a whole 16 oz package might have been enough. I used about 10 oz. I will be making this again, though! Just with more pasta next time. 😀

January 15, 2015 - 8:39 pm

American Classic: Gouda and Cheddar Mac and Cheese - […] I have adapted this tasty recipe from: The Curvy Carrot White Truffle Macaroni and Cheese […]

Cheese and Vegetable Quinoa Bites

If you are familiar with the food blogging world, then you have had to have seen these little bites making their way around the blogosphere.  Genius, I have to say.  A genius appetizer for the health-conscious.  Super Bowl, anyone?  Anyways, the first time I saw these was on Pinterest, then the food photography websites, and I knew I would be adding them to my ever-growing list of “must-dos”.

I’ve already talked about the health benefits of quinoa from one of my favorite blog posts of all time (check it out!), so I don’t need to repeat myself there.  But if you’ve got a box or bag of quinoa on hand, some leftover veggies to get rid of, and maybe a little bit of cheese on hand, then you’ve got an easy, savory, and bite-sized appetizer ready in less than 20 minutes.

I had ironically made quinoa for a little veggie dish the night before and was wondering what to do with the leftovers.  I had cooked way too much of the stuff in order to get rid of the box and make room in my pantry, so I had exactly 2 cups of cooked quinoa ready to go.  I had a few random carrots, some fresh spinach, and some shallot on hand, too.  The beauty of this recipe is its versatility in what you can add into it.  Peas?  Maybe.  Corn?  Probably.  Kale? Hopefully.  I just tossed the veggies in my food processor and was good to go.  And, as far as cheese goes, I added in some sharp cheddar in because I was out of Parmesan.  As long as you can bind it all together with those eggs, I say add as many veggies in as possible.

For serving, I dipped them in Ranch dressing.  Probably not the healthiest, but, since Ranch is my kryptonite, I couldn’t resist.  You can forgo the dipping sauce by adding in some additional spices to add to the flavor content.

In my opinion, these are best straight from the oven.  When I reheated them in the microwave, they were a bit soggy for my taste (I was too impatient to try re-heating them in the oven.), but they were still flavorful and satisfying.

Here’s to our health.  And the Super Bowl.

Cheese and Vegetable Quinoa Bites

Servings: 24 bites


Ingredients

2 cups cooked quinoa

2 large eggs

3 carrots, shredded

1 and 1/2 cups fresh spinach, chopped

1 medium shallot, chopped

2 teaspoons garlic

4 ounces sharp cheddar cheese, grated **Or, to your liking

2 tablespoons flour

Sea salt and pepper, to taste

Instructions

1. Preheat the oven to 350 degrees.

2. Lightly spray a mini muffin pan with cooking spray.

3. In a large bowl, combine all of the ingredients together, mixing until thoroughly combined.

4. Using a melon baller or a tablespoon, place rounded drops of the mixture into each cup of the muffin pan, pressing each one down lightly with your fingers to make sure that each one is firmly packed.

5. Bake until lightly golden, about 15-20 minutes.

6. Serve immediately.


Source:  Adapted from So Very Blessed.

January 24, 2012 - 6:33 am

Maureen - I made a curried quinoa salad this week and I loved it but that’s before I saw these veggie bites. I love quinoa so it’s gonna be veggie bites next in my kitchen!

January 24, 2012 - 12:54 pm

Heidi @ Food Doodles - I know my kids will love these, I’ve got to try them. I’ve been seeing them around too, they must be good 😀

January 24, 2012 - 3:42 pm

Ann P. - these look SOOO dang good! What would you suggest as a dipping sauce besides ranch?

January 24, 2012 - 4:43 pm

srlacy - You could really try anything. I always go for the Ranch, but maybe a cheese sauce would work? The original source of this recipe used a low-fat type of salad dressing. I’m not sure if mustard would work, either…that might be too much flavor going on.

January 24, 2012 - 7:47 pm

Margaret Murphy Tripp - They look DELICIOUS!!!

January 26, 2012 - 12:02 pm

take-it-to-go thursdays: mexican quinoa salad « the kitchen counsel - […] Since I had it so many moons ago, I assume that everyone has had quinoa. However, after talking about it with people, I realize that is not the case. However, it is getting more popular–I’ve seen it all over the blogosphere in the past few months. […]

January 26, 2012 - 1:07 pm

take-it-to-go thursdays: mexican confetti quinoa salad « the kitchen counsel - […] Since I had it so many moons ago, I assume that everyone has had quinoa. However, after talking about it with people, I realize that is not the case. However, it is getting more popular–I’ve seen it all over the blogosphere in the past few months. […]

January 27, 2012 - 5:19 am

Miriam - oh my!!! I died a little. Can’t wait to try these

January 29, 2012 - 1:21 pm

Niki - I saw these on pinterest they look really tasty!! Could I sub. the flour for rice flour, cornstarch, or something gluten free?

January 29, 2012 - 3:19 pm

srlacy - Hi Niki-
I have not tried this myself, so all I can say is to go for it and see what happens. The rice flour would probably work the best out of those choices, I would think. Good luck!

January 29, 2012 - 11:53 pm

Becky (So Very Blessed) - These look incredible! Love the addition of spinach! Thank you so much for your kind words about my recipe! That was so sweet of you to say! And I totally agree about them being best straight from the oven! Ranch also happens to be my kryptonite…I could eat it with practically EVERYTHING!

January 30, 2012 - 12:22 am

Samantha R. - So, I “pintrested” upon your blog and saw these quinoa bites. Made them today – used my food processor to chop up the veggies, worked great – and they were wonderful. Even my anti-vegetable husband liked them. I’m making a second batch tomorrow and I’m going to freeze them into balls so I can pull them out after our daughter comes (hopefully in the next 2weeks). Excited to have some healthy, quick meal options for the long days ahead.

January 31, 2012 - 1:24 pm

Tiffany Youngren - I am super familiar with the food blogging world – but haven’t yet come across these! They look so yummy!

~ Tiffany

Transfer of Health
Healthy Recipes and How to Feel Good

February 4, 2012 - 10:37 am
February 4, 2012 - 10:33 pm

sally - are these suitable to freeze?

February 5, 2012 - 10:25 am

srlacy - I haven’t tried it, but I am sure that they would be fine if you froze in advance.

February 5, 2012 - 11:07 pm

Mrs. Lansdell - Made these tonight for a Super Bowl snack. They were YUM. I used broccoli as the veggie. I felt so good about serving them bc I am a big fan of quinoa. This recipe is a keeper. It was simple to make, has lots of possibilities (using a variety of veggies), easy to serve, tasty, satisfying and HEALTHY. Thank you for posting!

February 6, 2012 - 12:55 pm

Dee - Made these last night – delicious!!

Dip – sriracha sauce and a President’s Choice hummus salad dressing (in Canada)

I added chickpeas, spinach, red pepper, zucchini, onion, garlic, carrots, jalapeño jack, cheddar AND Romano cheeses, as well as a splash of sriracha sauce (for heat).

I didn’t have mini muffin tins, so I made small patties and baked on a cookie sheet with parchment paper (no oil needed!). Took about 25 min at 350 as I think all those veggies added more liquid, but turned out just awesome!

Thanks!!

February 6, 2012 - 1:48 pm

Dee - Made these last night – delicious!

Dip – sriracha sauce and President’s Choice hummus salad dressing (in Canada).

I added chickpeas, spinach, red pepper, zucchini, onion, garlic, and carrots to the food processor, and jalapeño jack, cheddar and Romano cheeses (grated), as well as a splash of sriracha sauce (for heat).

I didn’t have mini muffin tins, so I made small patties and and baked on a cookie sheet with parchment paper (no oil needed!). Took about 25 min at 350 as I think all those extra veggies added more liquid, but turned out just awesome!

Thanks!!

February 8, 2012 - 2:02 pm

recipe: cheese & vegetable quinoa bites » A Bigger Story - […] great together.  I, of course, can’t take credit for this recipe.  I originally found it here (via Pinterest).  If you’re looking for something a little different and new, give these a […]

March 11, 2012 - 3:51 am

Internet Meals | Ocean Soul - […] from the top left corner and going clockwise:   Cheese and Vegetable Quinoa Bites (but I used potato starch instead of flour), Gluten Free Potato Leek Soup, Gluten Free Apricot […]

March 16, 2012 - 10:40 pm

Lucia - I just made this!!!! They are beyond delicious!! Have anyone tried them with gluten free flour? Would love to give this recipe to my mom that is Celiac! Thanks

April 2, 2012 - 7:52 am

Vegetable quinoa bites with simple yogurt dip « clementinecuisine - […] slightly adapted from The Curvy Carrot Share this:TwitterFacebookLike this:LikeBe the first to like this post. Tags cheese, light, quick […]

April 2, 2012 - 12:59 pm

Bouchées quinoa légumes et dip au yaourt « clementine cuisine - […] légèrement adapté de The Curvy Carrot  Share this:TwitterFacebookJ'aimeJ'aime  Tags fromage, léger, quinoa Catégories A […]

April 19, 2012 - 1:50 am

Georgia - I only have quinoa flakes, do you think it would work?

April 19, 2012 - 9:44 am

srlacy - Hi Georgia-

I had to Google to see what quinoa flakes are! 🙂 I don’t think that these would work, only because you need the texture and firmness of the grain to make the patties. I think the flakes would be a little too soft.

May 10, 2012 - 9:30 pm

Jayanthi - Love quinoa, I’m one of those quinoa fanatics….these bites look awesome. Now its going on to my must-do list.

June 19, 2012 - 6:01 am

on the menu « girl evolving - […] quinoa veggie bites […]

June 22, 2012 - 8:04 am

Ingredient Spotlight: Quinoa | Mod City Mag - […] Cheese & Veggie Quinoa Bites […]

June 23, 2012 - 3:42 pm

Quinoa « ahealthyhappyhome - […] Cheese and Vegetable Quinoa Bites Share this:TwitterFacebookLike this:LikeBe the first to like this. Permalink […]

August 30, 2012 - 11:12 am
September 30, 2012 - 5:32 pm

Mimi Bear - I have made these a couple of times–DELICIOUS. I make the for a cold snack and they are really excellent.

October 1, 2012 - 10:06 am

Trying new things: Cheesy Veggie Quinoa Bites « seasonedwithsarcasm - […] adapted from The Curvy Carrot […]

October 31, 2012 - 1:26 pm

MamaBear to 4 - These are delicious! I just made them for lunch for my 3 girls and they love them! They are saying they are delicious cupcakes. I used gluten free bread crumbs in place of the flour and onion powder in place of the shallot (only because I didn’t have one on hand). Thanks for the great idea!

November 18, 2012 - 12:29 pm

Healthy Thanksgiving Ideas « ahealthyhappyhome - […] Cheese and Vegetable Quinoa Bites […]

December 18, 2012 - 10:32 am

Cheesy Quinoa Bites « Kids in the Sink - […] Slightly adapted from The Curvy Carrot Share this:TwitterFacebookLike this:LikeBe the first to like […]

February 4, 2013 - 11:59 am

Recent projects and OJH fun » Organized Jewish Home | Organized Jewish Home - […] are tons of variations on the internet: taco, cheese and vegetable, parmesan…Just search! It’s a fun way to get your protein and even […]

May 19, 2013 - 6:43 pm

Black Bean Sliders » The Curvy Carrot - […] Cheese and Vegetable Quinoa Bites […]

September 15, 2013 - 7:39 pm

Susan - Made these for a party and skipped the ranch dressing. They were quite a hit!

October 20, 2013 - 12:16 am

Alice Jackson - Made these today….delicious! I used brown rice flour and omitted the shallot. My batch made 24 mini’s and 12 regular sized muffins. Great for a veggie side dish or a healthy snack.

January 25, 2014 - 6:30 am

Quinoa Recipes - Rachel Cooks - […] Cheese and Vegetable Quinoa Bites {The Curvy Carrot} […]

February 15, 2014 - 1:58 pm

Laurie Ottinger - I modified your recipe, adding freekah and wheat berries with the quinoa. I also shred zucchini and broccoli and add to it. I wanted to let you know that Bolthouse Farms makes the most AWESOME yogurt ranch dressing. You will never feel guilty about eating ranch dressing again!!
I make about a dozen of these have 2 every day at breakfast.
Yummy!

April 30, 2014 - 11:17 pm

Jacqueline Lovitch - I made these. I added an egg so that I could remove the flour and it worked! So very worth the long prep time!

July 1, 2014 - 12:39 pm

Susan - I have made these twice for parties and both times they were a hit! No dipping sauce needed, just go heavy on the cheddar.

August 27, 2014 - 4:36 pm

50 Creative Recipes to Eat More Quinoa | RealFoodies - […] 10. Cheese and Vegetable Quinoa Bites The next time you host a party, serve up some of these savory baked bites. These little guys contain cheese, shredded carrots, and fresh spinach (a superfood in its own right), and owe their flavor to garlic and shallots. […]

November 30, 2014 - 7:54 pm

Karen - Can these be frozen?

January 21, 2015 - 6:06 pm

Vegetable Quinoa Wrap | All Documents - […] Cheese and Vegetable Quinoa Bites | The Curvy Carrot – Maureen-I made a curried quinoa salad this week and I loved it but that’s before I saw these veggie bites. I love quinoa so it’s gonna be veggie bites next in my …… […]