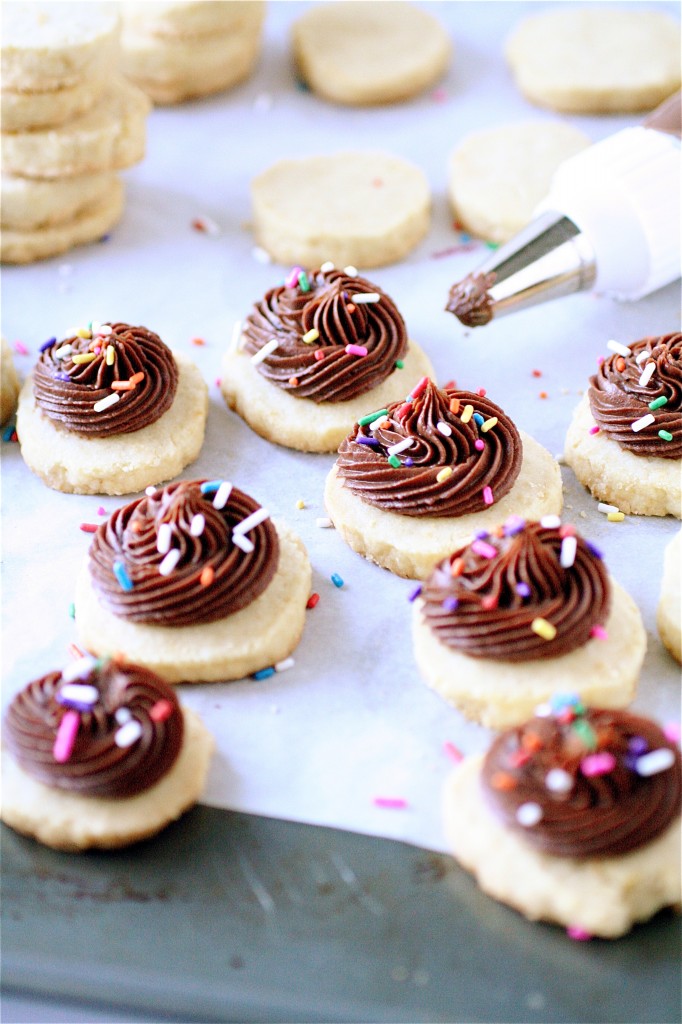
Homemade Vanilla Wafers with Fudge Frosting

This one is a throwback to my childhood.  To the skinny tall yellow box that my parents may or may not have strategically placed on the very top shelf of the pantry, so that we kids would probably have a hard time reaching them.  Growing up with a diabetic dad, this was a secret “low-fat-ish” snack that he would have in lieu of double-stuffed Oreos (although those did make a very short appearance every once in a while as well….).  We’d crumble them up over ice cream, dip them in tall, cold glasses of milk, or just eat them plain out of the box.  Vanilla wafers.  Plain old fashioned goodness in cookie form.

Recently, in a discussion with someone I am very fond of, I came to learn that one of his favorite cookies was similar to the old school vanilla wafer..with fudge on top.  I stuck that in the corners of my mind and quickly did a search to see if I could find a recipe to make a homemade version.  I was pumped when Shawnda’s version came up first in my Google search, so I went off to try my own hand at it.

Now, a caveat.  They are not *exactly* like the cookies that come from the box.  They have more of a shortbread consistency to them, and they pack a little less of the vanilla flavor.  (I was tempted to try vanilla beans in lieu of vanilla extract, and next time I might add one or two beans in to add a little more vanilla punch to the cookie.)  And, as far as the fudge frosting, I found a nice smooth chocolate ganache with a little sour cream in it to add a little tanginess.  (I love piping with ganache, so that was a bonus.)  Top them off with some sprinkles?  Why, of course.
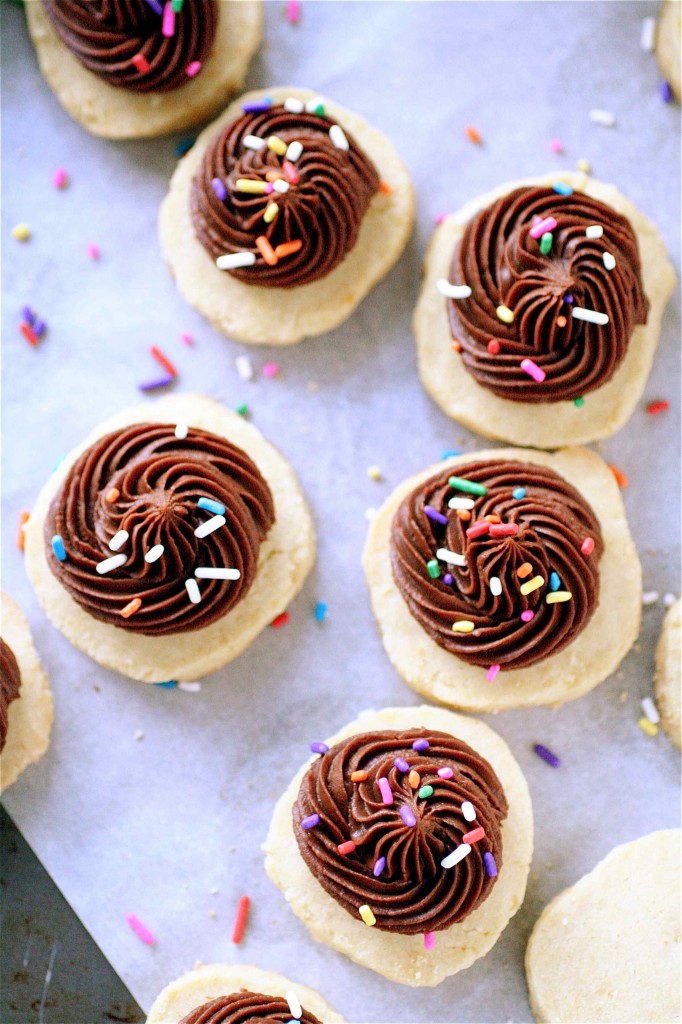
Homemade Vanilla Wafers with Fudge Frosting

Servings: approximately 24 cookies


Ingredients

For the wafers:

16 tablespoons (2 sticks) unsalted butter, at room temperature

1/2 cup granulated sugar

1/4 teaspoon salt

2 egg yolks

1 tablespoon vanilla extract

2 and 1/3 cups all-purpose flour
For the frosting:

1/2 cup heavy whipping cream

3 tablespoons unsalted butter

8 ounces semisweet chocolate chips

3/4 cup sour cream

Sprinkles, for garnish (optional)

Instructions

1. For the wafers:  In the bowl of your standing mixer fitted with the paddle attachment, combine the butter, sugar, and salt on medium-high speed and mix until light and fluffy, about 2-3 minutes.

2.  Reduce the mixer speed to low and add the egg yolks, one at a time, mixing well after each addition.

3. Add the vanilla.

4. Add the flour and mix until thoroughly combined.

5. Transfer the dough to a clean and lightly floured surface and divide it into three equal portions.

6. Roll each portion in to a 2-inch diameter cylinder.

7. Wrap each cylinder tightly with plastic wrap and chill until firm, at least 2 hours.  *You can also do a quick freeze of about 20 minutes if you are short on time.

8. Preheat the oven to 350 degrees.

9.  Line two baking sheets with parchment paper.

10. Unwrap each cylinder, and very carefully, cut each cylinder into 1/4-inch thick slices.  Place each slice onto the prepared baking sheet, spacing each wafer about one inch apart from one another.

11. Bake until the wafers are lightly golden, about 12-15 minutes.  Let cool completely before frosting.

12. For the frosting: In a medium saucepan over medium heat, combine the whipping cream and butter and stir until the butter is completely melted.

13. Remove the saucepan from the heat and add the chocolate chips. Let sit for about 2 minutes before stirring.

14. After two minutes, whisk the chocolate into the melted butter mixture, mixing until completely smooth.

15. Add the sour cream and whisk until combined.

16. Transfer to a medium bowl, cover tightly with plastic wrap, and chill for at least 30 minutes.

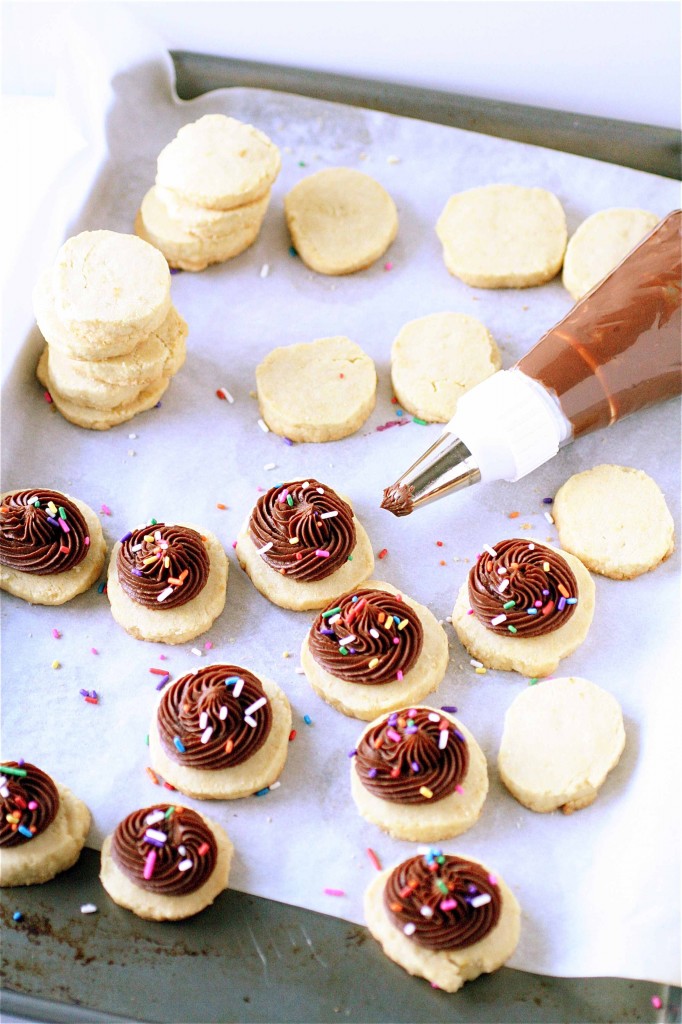
17. Pipe as desired onto the wafers.


Sources:  Vanilla wafers from Confections of a Foodie Bride, originally adapted from Williams-Sonoma.  Frosting from Bon Appétit, via Epicurious.


February 21, 2012 - 6:20 am

Blog is the New Black - These look great, Shanon!

February 21, 2012 - 8:57 am

Maureen - I can’t remember the last time I had a Nilla wafer. They aren’t sold in Australia but I did get some once at the import store a few years ago. Ahh memories.

I’m going to give these a try when I’m feeling especially American. Thanks! 🙂

February 21, 2012 - 8:44 pm

Suzi - How cool, I remember vanilla wafers and that box, the frosting on top is killer. Love this.

February 22, 2012 - 3:06 pm

Shawnda - Beautilful! The ganache is a wonderful idea!

February 23, 2012 - 4:04 pm

what katie's baking - i actually prefer a shortbread consistency. these look fabulous!

October 18, 2012 - 6:39 pm

Paleo Vanilla Waffers - […] pudding with a homemade “wafer” (more like short bread) using all-purpose flour.  We cut this recipe in half for the vanilla wafer, and used this recipe for the vanilla pudding but because I get […]

February 2, 2014 - 2:26 am

Loretta - Are these a suggested treat for diabetics?

December 27, 2014 - 9:24 pm

Becky - How are these Paleo? You use all purpose gluten flour! Wanted to try this recipe until I saw that. Disappointed.

December 31, 2014 - 2:18 pm

srlacy - Hi Becky-

I’m a little surprised and amused by your comment, and I’m wondering how you got directed to my site. I have never once posted a Paleo recipe on my site nor have I ever promoted my blog as being Paleo-friendly. Seems like there’s a bit of confusion here. You’re right. These aren’t Paleo. Sorry to disappoint you. I hope you found something similar that is Paleo-friendly. Have a wonderful new year!

February 23, 2015 - 10:32 pm

nic - i know i’m very late to this, but i just came across this recipe & am wondering if the frosting needs to be refrigerated after using? thank you! these look delicious!

Chocolate Orange Sour Cream Pound Cake

Long title, huh?

It’s worth it.


Usually, when I go to pair chocolate with something in the realm of sweetness, I go with raspberry or cherry (as evidenced by the umpteen chocolate-raspberry or chocolate-cherry flavor combinations on this website).  But, recently at a “I really shouldn’t go because I’ll spend money I don’t have” trip to King Arthur Flour Company, I walked away with a set of flavoring citrus oils (lime, lemon, and orange) and absolutely no idea of what to do with them.

I’ve never really been a fan of the chocolate-orange combination, either.  Which is why it was a leap of faith when I decided to take a regular sour cream pound cake (oh, yeah!) and mix in a little orange oil and orange zest.  It’s citrus season, right?

The results? Well, the chocolate pound cake speaks for itself.  How can that not be good?  Dense, rich, chocolatey.  I added in chocolate chips, well, because, you know…..who in their right mind wouldn’t?   The powdered sugar glaze was almost like a thick, candy coating. And, as far as that orange flavoring?  Holy smokes.  I think I’m a convert.  I cut this loaf into little bite-sized pieces and brought them into work, for two different departments.  At the end of the day, every crumb was gone.  I assume this means that it was good. 🙂

How to find the flavoring oils?  Most bakery/specialty stores will have them.  You can find them online at King Arthur here.  I’m not sure what the equivalent would be if you tried to use zest in place of the oil (It would have to be a lot because these are pretty potent.)  But, they are worth the splurge.


Chocolate Orange Sour Cream Pound Cake

Servings: 1 loaf


Ingredients

2 and 1/4 cups cake flour

3/4 cup cocoa powder

3/4 teaspoon baking soda

16 tablespoons (2 sticks) unsalted butter, at room temperature

2 cups granulated sugar, divided

3 large eggs

1 teaspoon vanilla

3 teaspoons orange oil

1 cup sour cream

6 ounces bittersweet or semisweet chocolate chips

1/2 cup water

Zest from one orange


Instructions

1. Preheat the oven to 325 degrees.

2.  Generously butter the bottom and sides of a loaf pan (I used a 9-inch) with butter, and place a pre-cut piece of parchment paper on the bottom of the loaf pan.

3. In a medium bowl, whisk together the flour, cocoa powder, and baking soda; set aside.

4. In the bowl of your standing mixer fitted with the paddle attachment, cream the butter and 1 cup of the granulated sugar at medium-high speed until light and fluffy, about 2-3 minutes.

5. Reduce the mixer speed to medium and add the eggs, one at a time, mixing well after each addition.

6. Add the vanilla and the orange oil.

7. Reduce the mixer speed to low and add the sour cream and dry ingredients (alternating them) in 3 separate additions.

8. Add the chocolate chips and mix until completely combined.

9. Pour the batter into the prepared loaf pan and gently smooth the top with a rubber spatula.

10.  Bake until a tester inserted into the center comes out clean, about 1 hour and 1o minutes.

11. Remove the cake from the oven and let cool for at least 10 minutes before inverting onto a cooling rack.  Let cool completely before glazing.

12. For the glaze:  In a small saucepan, combine the remaining 1 cup of granulated sugar and the water over medium-high heat.

13.  Bring the sugar water to a simmer and stir until the sugar is completely dissolved, about 5 minutes or so.

14. Brush the cake with the glaze and let sit for about 5 minutes (you should wait for the glaze to soak in and dry slightly.)

15. Repeat the glazing process two more times.  **The glaze should end up thick and shiny.  Sprinkle with orange zest.


Source: Adapted from Food and Wine.


February 19, 2012 - 5:54 am

Medeja - It looks very beautiful and I imagine that it had that lovely orange flavor..

February 19, 2012 - 9:01 am

Maureen - A lot going on in this cake and it all spells delicious!

February 19, 2012 - 11:34 am

Jillian {Her Split Ends} - I literally said “yummmm” out loud when i read the title of this post {my husband gave me a very strange look!} Sounds delicious…will be testing this one out soon!!

~ Jillian
http://www.hersplitends.com

February 19, 2012 - 2:13 pm

Heidi @ Food Doodles - This is beautiful! Especially that glaze – yum! The sprinkling of orange zest over top is pretty too, such a nice pop of color 😀 And I loooove the chocolate and orange combo!

February 19, 2012 - 2:31 pm

Megan - Shannon, This looks great! I am jealous you are able to visit the King Arthur store often. I recently visited and had a great time! I purchased the Fiori di Sicilia flavoring. It is also a bit pricey, but potent and so good. You should give that a try!

February 19, 2012 - 6:50 pm

Heidi - yum! can’t wait to see what you do with the lime and lemon oils

February 20, 2012 - 2:13 pm

Heather @ Kids in the Sink - It’s a dream of ours to visit the King Arthur store some day! But we will have to get rich first because there are SO many goodies from King Arthur! I’be never been a fan of orange and chocolate either but I see so many recipes floating around that I wonder if in missing out on something. Maybe I should follow you and take a leap of faith.

February 20, 2012 - 11:30 pm

Jennie @sundayswithjennie - That looks incredible. I love citrus and this pound cake looks amazing!

February 21, 2012 - 5:00 pm

Chocolate Orange Sour Cream Pound Cake | *bespoke* zine - […] never made a pound cake before but this Chocolate Orange Sour Cream Pound Cake looks delicious!  I love the little orange rind on the top.  It’s darling!  A big thanks […]

February 24, 2012 - 9:57 am

Javelin Warrior - This is my kind of pound cake! Moist, chocolatey, coated in sugar – perfection… I have featured this post in today’s Friday Food Fetish roundup. Let me know if you have any objections and thanks as ever for the inspiration…

February 25, 2012 - 8:09 am

Sample Saturday | Homekeeping Adventures - […] Chocolate Orange Sour Cream Pound Cake – The Curvy Carrot shares a recipe and some awesome photography for this beautiful loaf cake. […]

February 25, 2012 - 9:54 am

Annie - Oh dude. This sounds *really* good. I want it, like now.

March 10, 2012 - 3:34 am

Elisa - I LOVE the pairing of chocolate and orange – I don’t think there are enough dessert that pair the two! Thank you for sharing this recipe, this cake sounds fabulous!

Also, I am impressed with your food photography skills. Can you give a gal a few pointers?

March 10, 2012 - 8:07 am

srlacy - Hi Elisa–
Thanks for the kind words! As far as photography goes, there’s a lot to talk about. I only use natural light-no light boxes. I’m just not a fan. I also take several shots of each food and then edit them down. I don’t like photos where it’s the same angle, same props, etc over and over again. You can email me directly for some more tips if you want-I am certainly not an expert by any means 🙂

May 9, 2013 - 7:41 am

Chocolate Orange Sour Cream Pound Cake - […] source:  thecurvycarrot.com […]

May 26, 2013 - 11:14 pm

Chocolate Orange Sour Cream Pound Cake | *bespoke* magazine ~ handmade craft vintage art design vintage | Australia - […] never made a pound cake before but this Chocolate Orange Sour Cream Pound Cake looks delicious!  I love the little orange rind on the top.  It’s darling!  A big thanks […]

Mushroom and Mascarpone Tarts and a Virtual Baby Shower

Today’s post is in honor of one of my dear blogging friends, Courtney, of Cook Like A Champion.

You see, the food blogging world isn’t all that big.  There are all sorts of ways food bloggers connect with one another-photography conferences, conventions (yes, there are conventions devoted to food blogging), and of course, the network of comments, threads, and fan pages.  I had the opportunity to first “meet” Courtney through Annie, and I quickly realized that she was a friendly and inspiring “face” among my favorite food bloggers.

The best part?  I have met Courtney in person.  And even better, I met her for the first time in the early days of her pregnancy.  On an impromptu trip back home to Indianapolis earlier this fall, I was able to meet Courtney and Annie (and brought along my dear friend Kelli) for a fantastic brunch at one of my favorite breakfast places in Indy.  It was so much fun to chat: chat about food, baking projects, ideas, the food blogging world, etc.  And when Courtney excitedly announced that she was expecting her first child, I couldn’t contain my own excitement for her as she transitions into the world of motherhood.

Today, Josie is hosting the virtual baby shower in honor of Courtney’s new arrival (an arrival coming very, very, very soon…..).  Baby C will be here before we know it, and today a fantastic group of food bloggers has come together to celebrate such a happy occasion.

For a complete round-up of the virtual shower, please visit both Josie and Courtney’s websites to see a mouth-watering spread.

As far as my contribution?  I wanted to run with something savory for the occasion.  I happened upon these little tarts and couldn’t pass them up.  I obviously love anything with the word “tart” in it, so a savory spin on something traditionally sweet was intriguing to me.  And anything with sweet and mild creamy mascarpone has me hooked.  And, well, anything with caramelized shallots and cremini mushrooms does as well.  All in all?  A great appetizer for an elegant baby shower.  (P.S.  While these should be served warm, I DID try a few cold, and they were pretty good, too.  A hint for someone short on time?  You can pre-assemble the tarts by piping the mascarpone and chilling in advance.  Simply top with the warm mushroom/shallot mixture before serving-this is easily re-heated in the microwave.)

Mushroom and Mascarpone Tarts

Servings: approximately 16 tarts (I halved the original recipe when I made these and am posting that version here.  Please feel free to double this recipe if you need more.)


Ingredients

For the tarts:

1 and 3/4 cups all-purpose flour

1/4 teaspoon salt

1/2 cup (1 stick) unsalted butter, cubed and chilled

1 egg, lightly beaten

1/2 tablespoon fresh lemon juice

1/8 cup ice water, plus more if needed

For the topping:

1 tablespoon unsalted butter

1 tablespoon extra virgin olive oil

1 cup shallot, thinly sliced (about 3-4 medium shallots)

1 teaspoon garlic, minced (about 1 clove)

10 ounces cremini (baby bella) mushrooms, trimmed, cleaned, and sliced

1/4 ounce dried porcini mushrooms, (soaked in hot water for about 20 minutes and squeezed dry), thinly sliced

1 cup mascarpone cheese (or less depending on your personal/piping preference)

Sea salt and pepper


Instructions

1. For the tarts:  Combine the flour and salt in your food processor and pulse until combined.

2. Add the butter pieces, one at a time, through the feeder tube and process until the dough resembles coarse sand.

3. In a small bowl, whisk together the egg, lemon juice, and ice water.

4. With the motor running, slowly add the egg mixture to the dough, until the dough comes together in a solid mass.

5. Turn the dough onto a clean and floured surface and pat into a disk.

6. Wrap the dough tightly with plastic wrap and refrigerate until firm, about 2 hours or overnight.

7. Once the dough is firm, preheat the oven to 375 degrees.

8. Roll the dough out into a 1/8″-thick layer.

9. Using a 2″ biscuit cutter, cut the tart shapes out from the rolled dough, combining and rerolling the excess dough as necessary.  Place the cut tarts onto a baking sheet lined with parchment paper.

10.  Pierce each tart gently several times with a fork.

11. Bake the tarts until slightly puffed and lightly golden, about 15 minutes or so. Let cool completely.

12. For the topping: In a sauté pan over medium heat, combine the butter and olive oil.

13. Add the shallots and cook until lightly golden and softened, about 5-6 minutes, stirring frequently.

14. Add the garlic and cook until fragrant, about 1 minute.

15.  Add the cremini and the reconstituted porcini and cook, stirring frequently, until softened, about 5 minutes.

16. Season the mushroom/shallot mixture with salt and pepper.

17. For assembly: Using your desired piping tip (I used my standard Wilton 1M), pipe the mascarpone onto each tart.  Top with 1-2 teaspoons of the mushroom/shallot mixture.  Serve immediately.


Source:  Adapted from Williams-Sonoma.


February 17, 2012 - 6:28 am

Maureen - This is the third baby shower post I’ve read and they are all so great! This baby will come into the world very well fed. 🙂

Your tarts are a dream calling me to eat them. They are wonderful.

February 17, 2012 - 10:00 am

Shawnda - Shanon, those look *amazing*!

February 17, 2012 - 10:10 am

elly - LOVE these. They basically have all my favorite foods in them – mushrooms, caramelized shallots, cheese. Yum. I definitely need to make them!

February 17, 2012 - 10:43 am

Josie - These are so pretty! And it’s hard to go wrong with mushrooms and mascarpone.

February 17, 2012 - 12:06 pm

Kelsey - These look and sound so delicious, Shanon. What a great contribution to Courtney’s shower!

February 17, 2012 - 12:48 pm

Annie - Dude, I just drooled all over my computer. These look flipping amazing. I can’t wait to try them! Very nice presentation as well. Everything is prettier with a piping bag 🙂

February 17, 2012 - 5:14 pm

Our Virtual Baby Shower - […] and, even though I’m not a vegetarian, I always find myself saving recipes from it. She made Mushroom and Mascarpone Tarts. I love tarts, and these look elegant and sound […]

February 17, 2012 - 5:16 pm

Courtney - Shanon, these are stunning! Seriously, the way they’re piped is just beautiful. I love any type of tart, too, so this recipe is perfect for me. Thank you so much for joining in the shower!

February 17, 2012 - 5:19 pm

Nikki - Stunning! Gosh, after today I have too many new recipes to try from this dang shower. And, this is at the top! 🙂

February 17, 2012 - 9:02 pm

branny - I adore mushrooms and don’t eat them enough since my husband doesn’t. Yum!

February 17, 2012 - 9:48 pm

Ryan - Wow, these are beautiful! I am definitely trying these the next time I have a party or people over or… can come up with an excuse to make these. The idea the combination of shallots, mushrooms and mascarpone sounds SO good!

February 17, 2012 - 11:28 pm

cate - These are GORGEOUS!

February 18, 2012 - 11:02 am

Suzi - Wow, these mushrooms look divine. Beautiful photos too. Have a wonderful day.

February 19, 2012 - 3:09 am

Labonnebouche - Your tarts look amazing, perfect for any kind of party. Can”t wait to give them a try at my next dinner party.

February 19, 2012 - 10:48 am

Tara - OMG Shanon, what an incredible appetizer! And your photos and presentation? Seriously stunning!

February 19, 2012 - 11:36 am

Angie@Angie's Recipes - These look fantastic!

February 19, 2012 - 4:21 pm

Cornelia - So cute these where! Great for starters or drink snacks!:)

February 19, 2012 - 9:39 pm

Jo - This looks absolutely delicious. Would love for you to share this with us over at foodepix.com.

February 21, 2012 - 4:27 pm

Gabi@SavoryandSimple - These look amazing. Are there any other toppings you would recommend besides the mushrooms?

February 21, 2012 - 5:02 pm

srlacy - Hi Gabi-
The possibilities are endless: caramelized onions, roasted tomatoes, sautéed spinach. The mascarpone will go with anything!

June 1, 2013 - 9:55 am

Anitha - Wow these look so yummy.. got to try them out..!

January 18, 2015 - 1:49 pm

10 Ways to Use Mascarpone Cheese | Gracie's Ravioli - […] #2 Mushroom and Mascarpone Tarts – If you are the type of person that likes a mix of sweet and savory then this dish is for you.  Great as an appetizer when you are expecting a crowd or as a more intimate dish for a planned dinner party.  Give yourself a little time to put these tarts together, and I’m sure you will find it worth the bother.  Click here for the recipe, http://www.thecurvycarrot.com/2012/02/17/mushroom-and-mascarpone-tarts-and-a-virtual-baby-shower/ […]