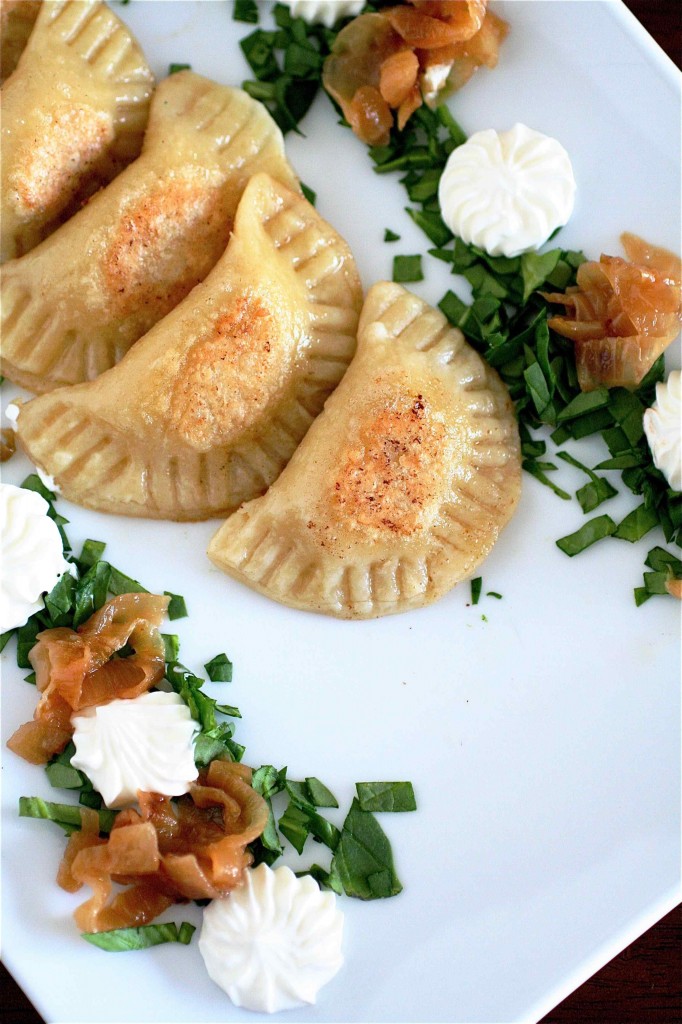
Homemade Pierogi

Sometimes I can get a little too ambitious with my meal planning adventures.  Working 50-60 hours per week as a fellow, trying to read/study/teaching prep in the evenings, and spend high-quality time with my friends can get a little overwhelming at times.  Besides the laundry, walking the dog, running errands type of everyday chores that seem to take up way more time than I ever set aside.   I’d like to have all the time in the world to bake 8-layer cakes and 7-course meals…but I don’t.  And I refuse to sacrifice my sanity to achieve all that (ok, off my soap box now).  I’m just a normal girl with a pretty busy life and an intense passion for all things related to food.

That being said, when I usually plan out my weekend cooking strategy, sometimes I throw in some pretty time-consuming meals.  Being so busy sometimes, it’s a disaster if those meals don’t turn out the way I wanted them to (like last weekend’s homemade four cheese white pizza disaster that left me an oven full of burnt ricotta and a smoke detector that wouldn’t quit.) Talk about disappointment.

Regardless, when someone I know said that one of his favorite childhood meals was a homemade pierogi, I knew I would be venturing into very risky territory.  A homemade dough that would require some chill time, some homemade filling, and a rolling pin and a dough cutter was not something that could be done with a lot of extra time.  After researching several recipes, I went with the trustworthy Cook’s Illustrated.  I knew I couldn’t go wrong, even though it looked like a beast of a recipe.

OK.  First things first.  The recipe stresses that you should make the dough and use it right then and there.  Fair enough, but it was something that I couldn’t manage.  So I cheated.  I made the dough the day before and chilled it over night.  And then I let it come to room temperature the next day before even attempting to roll it out.  It worked just fine, in my opinion.  I also made the filling the day before and kept it tightly covered in the fridge overnight.  It also was fine once it came up to room temperature the next day.

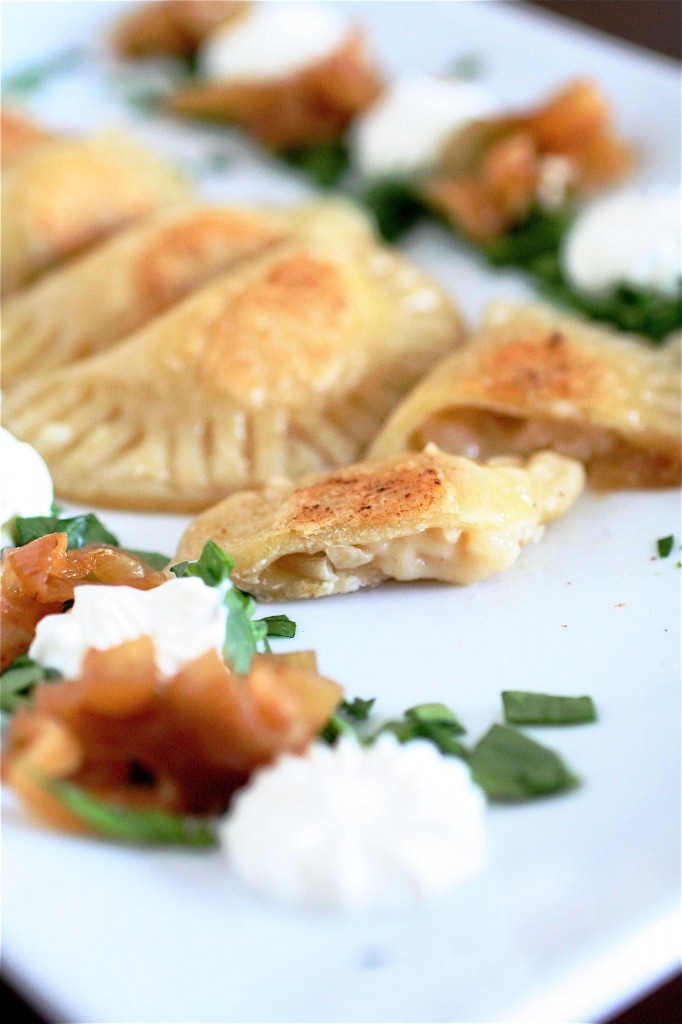
Success.  Finally.  After a string of frustrating time-consuming recipes, this was a winner.  And a nod to my maternal grandmother’s Polish heritage.  Cheesy potato and onion-filled dumplings?  Ok.  Game on.
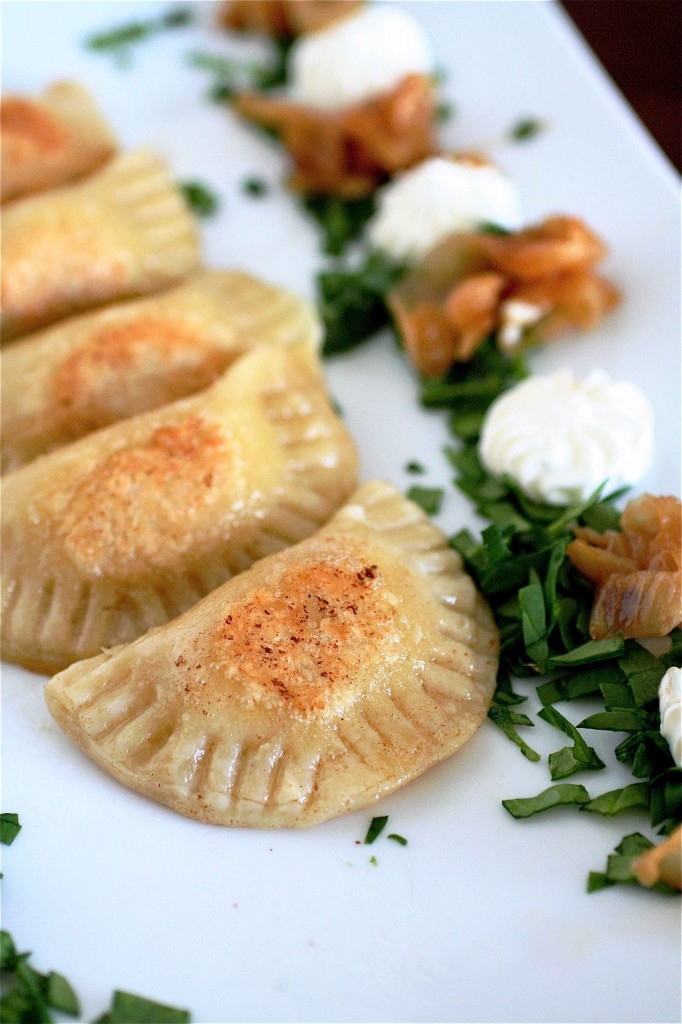
 

Homemade Pierogi

Servings: about 30 pierogi


Ingredients

For the dough:

2 cups all-purpose flour, plus extra for rolling out the dough

1/2 teaspoon salt

1 large egg

1 large egg yolk

1 tablespoon vegetable oil

4-6 tablespoons cold water

4 tablespoons (1/2 stick) unsalted butter, for frying the pierogi

For the onions:

4 tablespoons (1/2 stick) unsalted butter

2 large onions, sliced thinly

For the filling:

1 medium russet potato, peeled and sliced 3/4-inch thick

Salt

1/2 cup reserved caramelized onions, chopped

3/4 cup cheddar cheese, shredded

1/4 cup farmer’s cheese, shredded (you can sub in ricotta if this not available.)

1 tablespoon unsalted butter

Ground black pepper

For serving:

Sour cream

Additional caramelized onions
Instructions

1. For the dough:  In a food processor, pulse together the flour and salt until combined.

2. With the machine running, slowly add the whole egg, the egg yolk, and the oil through the feed tube. Let it run for about 30 seconds or so.

3.  With the machine still running, add the water (one tablespoon at a time) until the dough forms a nice ball.

4. Transfer the dough to a clean, flat, and lightly floured work surface and knead for about 2 minutes.  Cover it with plastic wrap and let it rest at least 15 minutes or up to 2 hours.

5.  For the onions:  In a large sauté pan over medium heat, melt the butter.

6. Add the onions and 1/4 teaspoon of salt and cook until the onions are softened and browned, about 15-20 minutes.

7. Once cooked, remove 1/2 cup of the onions and chop them (you will use them in the filling later.)  Keep the remaining onions covered and warm.

8. For the filling:  Cover the potato by 1-inch of water in a saucepan and season with salt.

9. Bring it to a boil and reduce to a simmer, allowing to cook until the potato is tender, about 10-12 minutes.  Drain the potato in a colander.

10. Using a ricer or food mill (or if you are like me, and have neither, use a potato masher), mash the potatoes until smooth or completely processed.

11. Add the caramelized onions, cheeses and butter until incorporated.  Season to taste with salt and pepper.

12.  Cool slightly before filling the pierogi.  (Or cover tightly and refrigerate until you are ready to go.)

13. For the pierogi:  Dust a baking sheet (or two) liberally with flour; set aside.

14.  Divide the dough into two equal pieces and wrap one with plastic wrap.

15. Working with the non-wrapped portion of dough, roll it out onto a lightly floured surface to a thickness of 1/16-inch.

16. Using a 3-inch round biscuit cutter, cut out as many rounds as possible and place them on the prepared baking sheets, carefully gathering up the remaining scraps and re-rolling/cutting out the dough as necessary.

17. To fill the pierogi: Place about 1 teaspoon of filling into the center of each dough round.

18. Using wet fingers, lightly moisten the edges of each dough round.

19. Fold the dough rounds in half, and using a fork, crimp each one tightly shut.  (Keep the pierogi moist with a wet towel once they are made.  If you are planning on freezing them, transfer the baking sheets to the freezer, still covered.  Once they are fully frozen, you can directly boil them for 8-10 minutes at a later time.)

20.  Meanwhile, bring 4 quarts of lightly salted water to a boil.

21. Add half of the pierogi, cooking until the edges feel al dente, about 5-6 minutes.

22. Using a slotted spoon or wire spider, transfer the pierogi to a colander and set aside.  Repeat with the remaining batch.

23.  Melt two tablespoons of the butter in a sauté pan over medium-high heat.

24.  Add the pierogi in batches, cooking until golden brown on both sides, about 1-2 minutes per side.  Repeat with the entire batch.

25. Sprinkle with caramelized onions and serve with sour cream.


Source:  Slightly adapted from Cook’s Illustrated: The Best International Recipe.


March 16, 2012 - 7:29 am

Lora - These look amazing! I’ve always wanted to try and make these at home. This recipe looks perfect. Thank you!

March 16, 2012 - 10:23 am

Emily @ She Makes and Bakes - I have always wanted to make these. I’ll have to try this version. Love it! Thanks for doing all the hard work. 🙂

March 16, 2012 - 12:05 pm

Bryan & YiRan - Love pierogi! This looks great – maybe a bit more complicated than for a weeknight, but a good weekend idea!

March 16, 2012 - 2:55 pm

Clem - Oh my god! I made them too and published them *today* on my blog! I’m a faithful reader of yours, it’s super nice — and you’re an inspiration!

March 16, 2012 - 5:38 pm

Blogger Spotlight: Homemade Pierogi | The Feed - […] knew these Polish gems could be made by hand? Not me! Which leads me to Shanon’s post over at The Curvy Carrot, this week’s blogger spotlight. Not only did she find time in her hectic schedule to make a […]

March 17, 2012 - 4:28 pm

mom - Shay! these look great! Nana would be proud, and your brother Ben too, since he loves pierogi’s!

March 17, 2012 - 11:12 pm

Liz - These really do look good!!! Great job! 🙂

March 19, 2012 - 5:27 am

Toasty - As a polish kid, I do a giant pierogi making weekend every few months and freeze bags of potato and mushroom and pumpkin pierogis. I bought a kitchen aid pasta roller attachment SPECIFICALLY for the springy pierogi dough, cut it out with a glass, and then roll it a little oblong to make closing easier in a giant assembly line. I’ve normally done a sour cream dough, is it still a little chewy? Favorite part.

March 19, 2012 - 9:38 am

misha - muhahahaha! Reading the recipe has made me hungry. These sound soo good and relatively easy. my Polish mom is gonna love me when i serve these up this week. Bonus that I can freeze some for later too. Thank you for sharing such a nice recipe .

March 23, 2012 - 1:24 am

Javelin Warrior - Pierogi have to be one of my favorite comfort foods ever and I love that you took the time to make these from scratch – and showed HOW to do it! I am featuring this post in today’s Friday Food Fetish roundup (with a link-back and attribution), but please let me know if you have any objections. It’s a pleasure following your creations…

March 23, 2012 - 12:58 pm

Emily (New York, NY) - Oh I am so happy I found this recipe! My boyfriend is Polish (I’m not) and it’s really a huge part of his life. I’m sure he would love if I surprised him by making these! Thank you for sharing 🙂

May 13, 2012 - 6:44 pm

An Attempt at Pierogi’s | agirlacatandakitchen - […] the Curvy Carrot.  Originally slightly adapted from Cook’s Illustrated: The Best International […]

May 7, 2013 - 11:02 am

Homemade Pierogi - […] source:  thecurvycarrot.com […]

Triple Layer Cappuccino Brownies

I know it’s Pi Day.  I know.  But, I have a confession.  (I don’t really like pie.) I’m a cake kind of girl.  Like, a big ole fat slice of rich chocolate cake with thick creamy frosting and maybe some sprinkles.  There.  I feel better now having gotten that out of my system.

I have another confession.  Are you ready?  I don’t really care for coffee-flavored desserts all that much.  Now, a coffee drink to have WITH that big ole slice of chocolate cake?  Yep, I’m all for that.  But, not so much the coffee-flavored chocolates, ice creams, and cakes.  But, I’m working on this weakness (yes, I realize that it’s a weakness.)

So, to *sort of* celebrate Pi Day (in my own, warped chocolate brownie way), I decided to run with some cappuccino-flavored brownies.  A three-layered brownie, that is.  A chewy and thick brownie with bittersweet chocolate chunks, a sweet espresso buttercream frosting, and a rich, chocolate ganache on top.  Topped with some chocolate-covered espresso beans (thanks to Jill who bought me those during a day-long shopping escapade….).  Ah, my opinion of coffee-flavored desserts may be changing (but I still need a nice serving of chocolate to go with it….)

Triple Layer Cappuccino Brownies

Servings: One 8 x 8-inch pan of brownies


Ingredients

For the brownies:

1/2 cup (1 stick) unsalted butter

3 ounces unsweetened chocolate, in pieces

1 cup granulated sugar

2 eggs

1 teaspoon vanilla

2/3 cup all-purpose flour

1/4 teaspoon baking soda

2 ounces bittersweet chocolate chunks (or chips)

For the espresso buttercream:

1 teaspoon espresso powder (or instant coffee crystals)

1 tablespoon heavy cream

1 and 1/2 cups powdered sugar

2 tablespoons unsalted butter, at room temperature

For the chocolate ganache:

1 cup bittersweet chocolate chips

1/3 cup heavy cream

For garnish:

Chocolate-covered espresso beans, optional

Instructions

1. For the brownies: Preheat the oven to 350 degrees.

2. Thoroughly coat an 8 x 8-inch baking pan with cooking spray.

3. In a large saucepan over low heat, melt the butter and the unsweetened chocolate until smooth, stirring frequently.

4. Remove the chocolate from the heat and let cool slightly.

5. Add the sugar, mixing well.

6. Add the eggs, one at a time, mixing well after each addition.

7. Add the vanilla.

8. In a separate small bowl, mix the flour and the baking soda.

9. Add the flour to the chocolate mixture and stir until just combined.

10. Add the bittersweet chocolate chunks to the batter and mix until combined.

11. Pour and evenly spread the batter into the pan and bake until a tester inserted into the center comes out clean, about 30 minutes. Let cool completely.

12. For the frosting: Dissolve the espresso powder (or coffee crystals) in the heavy cream.

13.  In the bowl of your standing mixer fitted with the paddle attachment (or using a hand mixer), beat the powdered sugar and the butter on medium speed until crumbly.

14. Reduce the mixer speed to low and add the coffee/cream mixture until smooth, adding more cream if necessary for your desired consistency.

15. Spread the frosting evenly over the cooled brownies.

16. For the chocolate ganache:  In a small saucepan, heat the cream and the chocolate chips over low heat, stirring frequently, until smooth and slightly thickened.  Let cool to room temperature before frosting (0r chill in the fridge until ready to use.)  Once smooth, frost the brownies with the chocolate ganache.  Top with chocolate-covered espresso beans, if using.

Source: Adapted from The Ultimate Cookie Book.


March 14, 2012 - 5:16 am

Blog is the New Black - THESE LOOK AMAZING!!! 🙂

March 14, 2012 - 1:12 pm

Lynsey - The look and sound heavenly! I will be making these very soon.

March 14, 2012 - 11:19 pm

Memoria - Whoa, those brownies look amazing. I think I will add espresso to each layer. YUM! Thanks for sharing this recipe.

March 14, 2012 - 11:48 pm

Tessa - I kind of feel the same way about pie. I’d much rather have cake or even cookies! These look delicious!

March 15, 2012 - 1:32 pm

what katie's baking - i should’ve known these were yours when i saw them on foodgawker!
your stuff is always so amazing. these look crazy good

March 19, 2012 - 4:12 pm

Winnie - Delicious and amazing looking brownies
Really mouth-watering

June 16, 2012 - 9:24 pm

jenB - I had a question about the buttercream. Is there really only 2 tablespoons of butter in it or is that a typo? The ratio of butter to powdered sugar seems a little off.

June 18, 2012 - 8:22 am

srlacy - Hi JenB-

The recipe is correct as written. I thought it was a little odd, too, but it turned out just fine.

June 24, 2012 - 4:55 pm

Coffee iced brownies | hungryhinny - […] had the original recipe from The Curvy Carrot bookmarked for ages so I’m also entering these to Bookmarked Recipes, hosted by Jacqueline at […]

June 24, 2012 - 5:50 pm

jenB - Shanon,
Thanks for double-checking that for me. I made the brownies for some family this past week and they loved them. I’ll be the first to admit, however, that I was unsure of the frosting so I swapped in the frosting from Brown Eyed Baker’s mocha brownies (very similar, but with more butter). Having a frosting that uses less butter is appealing so I’ll definitely be using your recipe (as written) next time around. Thanks again!
JenB

May 10, 2013 - 9:09 am

Triple Layer Cappuccino Brownies - […] source:   thecurvycarrot.com […]

July 20, 2013 - 11:26 am

Triple Layer Cappuccino Brownies | - […] Recipe adapted from The Curvy Carrot […]

Roasted Pimentón Chickpeas


I know what you are thinking.  What the heck is Pimentón?  Well, I have to admit that I didn’t know either before I made this recipe.  Apparently pimentón is another word for paprika.  So, I decided to get all fancy-pants on you and use a fancy word to describe the main spice in this healthy, go-to snack.  Somehow it just sounds better than roasted paprika chickpeas.  Or roasted paprika garbanzo beans.

Roasted chickpeas in endless flavor varieties have been popping up all over the place these days.  I have made them in the past, usually just being a plain jane with sea salt and pepper.  But, when I realized that I had a gigantic spice jar of smoked paprika in my cupboard and a complete loss of what I was going to do with it, I came across a recipe that I thought I might try.

So, with a little mixture of plain paprika and smoked paprika roasting away in my oven on a Saturday morning, dare I say that I almost thought it smelled a little like bacon?  It totally did.  And, while these little chickpeas did not taste like bacon, they packed a little spicy, earthy punch to snack on during the day and week that was totally satisfying.

Roasted Pimentón Chickpeas

Servings: about 3 cups


Ingredients

Two 15-ounce cans chickpeas, rinsed and drained

2 teaspoons extra virgin olive oil

1 teaspoon fresh lemon juice

1 and 1/4 teaspoon smoked paprika

1 teaspoon paprika

1/2 teaspoon black pepper

1 teaspoon sea salt

Instructions

1. Preheat the oven to 425 degrees.

2. Line a rimmed baking sheet with parchment paper.

3. In a large bowl, combine all of the ingredients together, mixing well with a rubber spatula.

4. Transfer the chickpeas to the rimmed baking sheet and carefully spread them in an even, single layer.

5. Bake until lightly crisped, tossing occasionally, about 40 minutes or so.


Source: Adapted from Whole Foods.


March 12, 2012 - 6:31 pm

Krissy's Creations - I love how roasted chickpeas can be the easiest, yet best tasting, snacks around. And thanks for teaching me about a new spice 🙂

March 12, 2012 - 6:50 pm

Beverley - Shanon , these look so delicious that not only will I have to try them out I must pin them too! Have a great time in San Diego xoxo

March 13, 2012 - 8:40 am

siba-rita - Hi I follow your blog and I came out with a doubt.
Which type of pimentón are you using? Dulce (mild) or Picante (spicy)???
In case that you are using spanish pimentón, is your “smoked paprika” for Pimentón de la Vera??
Thanks in advanced.

March 13, 2012 - 9:03 am

srlacy - My spice bottle doesn’t specify, but I am betting it is mild. It only says “smoked paprika”. It is made by a local company here that does bulk spices, so I am not sure.

March 13, 2012 - 12:17 pm

Purabi Naha - This sounds like amazingly delicious and healthy chickpea preparation. The photograph is absolutely stunning!! http://cosmopolitancurrymania.blogspot.com

March 13, 2012 - 7:45 pm

Kristen @ The Endless Meal - These look so delicious! I’ve seen roasted chickpeas on the internet before but have never got around to making them. I think it’s about time I changed that!

Btw I use my smoked paprika on yam fries and I add it to the flour I use to coat fish when I’m making fish tacos 🙂

March 16, 2012 - 9:24 am

Javelin Warrior - These chickpeas look so good I just want a big bowl if front of me right now =) Love the color and color and the seasonings… I am featuring this post in today’s Friday Food Fetish roundup (with a link-back and attribution), but please let me know if you have any objections. It’s a pleasure following your creations…

March 23, 2012 - 10:06 am

lelie - Is the heatsetting is fahrenheit?

I really want to try these!

March 23, 2012 - 10:34 am

srlacy - Hi Lelie-

Yep, it’s Fahrenheit.

March 23, 2012 - 12:45 pm

Lelie - Thanks for you quick respond! I’m going to try it now 🙂

November 10, 2013 - 1:51 am

Meatless Monday Recipe Roundup: Eating on the Go | theorganicauthority.com - Organic Living - […] at The Curvy Carrot are keeping our savory tooth satisfied in times of need with this recipe for Roasted Pimentón Chickpeas. A handful here and there will hold you over until dinner and prevent a wild […]