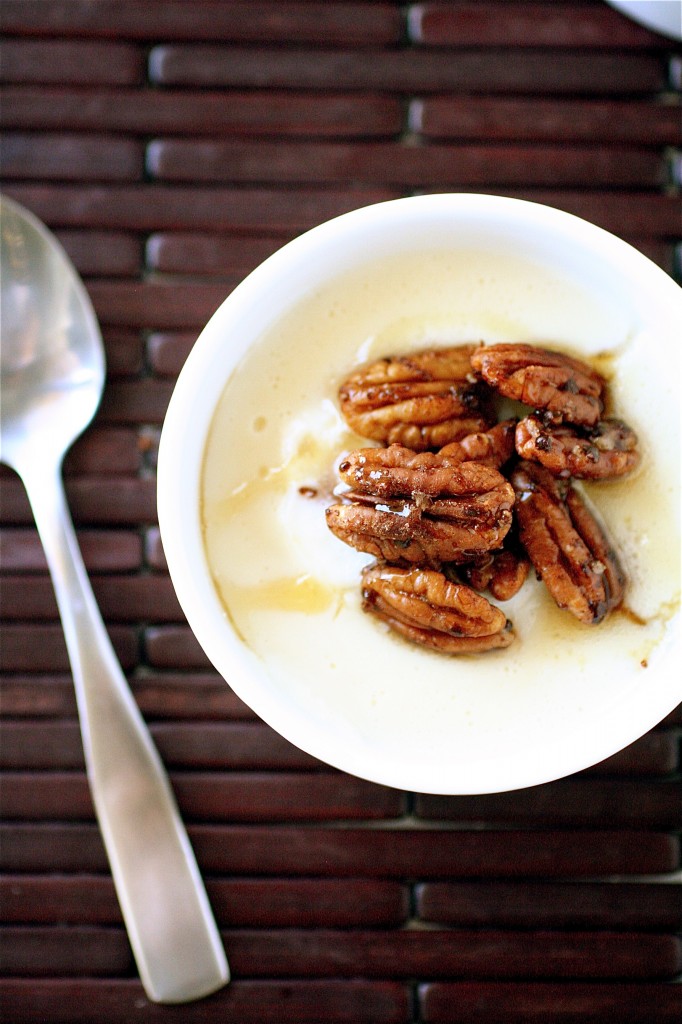
Maple Pudding with Spiced Pecans from Herbivoracious

Today is a pretty special day on The Curvy Carrot.  I’ve been excited about this for several weeks, but now I can share some good news with you.

One of my favorite vegetarian bloggers, Michael Natkin, is now a cookbook author.  I was even more excited when I was invited to have a sneak peek at his new cookbook, Herbivoracious, and I was given the opportunity to share it with you.

I’ve been following Michael for a pretty long time.  His vegetarian recipes range from simple to completely inventive…cheddar battered onion rings?  I mean, seriously.  That idea is BRILLIANT (unfortunately, due to my super sensitive smoke detector and tiny little apartment kitchen, I had to pass on trying that recipe for something else instead…but, let me tell you, it’s on my bucket list.)  Through reading through many of his recipes, I have been introduced to new ingredients, new ideas, and new flavor combinations that leave me inspired, excited, and proud to be almost a full-time vegetarian.

For my recipe, I chose his Maple Pudding with Spiced Pecans.  For several reasons.  One, I have been longing to make a homemade pudding from scratch.  It’s easy, folks.  Two, apparently it’s maple season around the Upper Valley, and I am becoming a maple fan.  Not a super sugary processed maple.  The maple that is thick and golden and tastes like nothing else in this world.  THAT kind of maple.  And, lastly, I knew his meals and entrees would be great, so I wanted to test out a dessert.  Glad I did.  Smooth and creamy with sweet maple flavoring-that’s how this tasted.  It was a really hard decision, to be honest.  I went through this cookbook at least 6 or 7 times before deciding.  The photography is fantastic.  It’s a great cookbook-and not just for vegetarians. To pre-order yours before it comes out on May 8, click here.


Thanks, Michael, for offering me the chance to try your wonderful recipes!
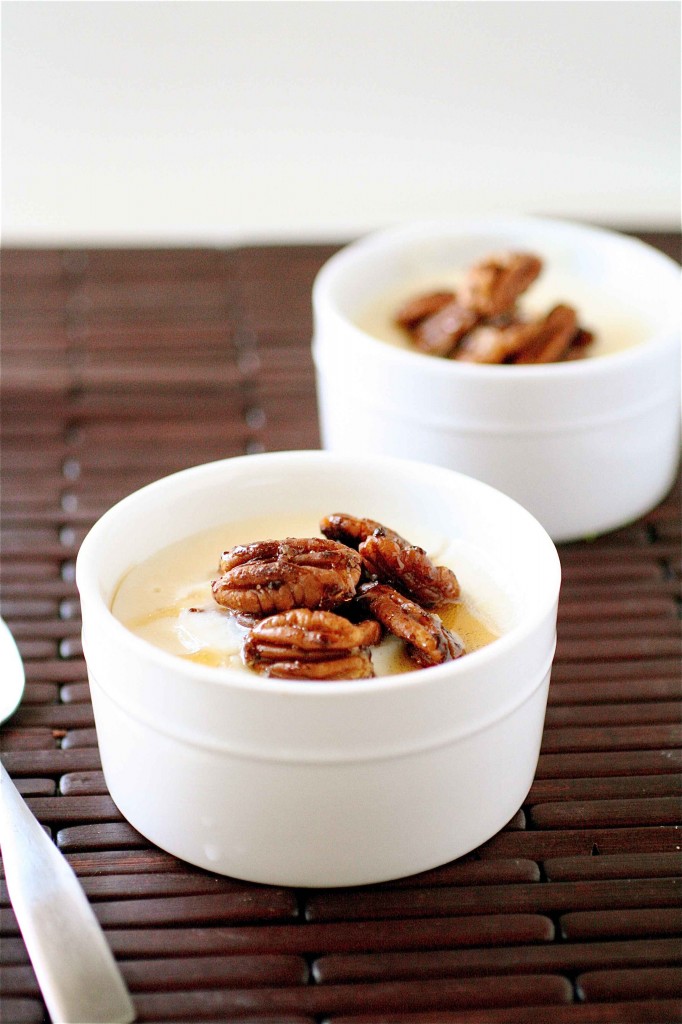
Maple Pudding with Spiced Pecans

Servings: 4


Ingredients

For the pudding: 

3 tablespoons cornstarch

2 cups whole milk

1/2 cup maple syrup (preferably Grade B)

Salt

For the spiced pecans: 

2 teaspoons sugar

1/2 cup pecans (halves or pieces)

1/4 teaspoon ground cinnamon

Nutmeg (preferably freshly grated)

Smoked paprika

Salt

2 teaspoons unsalted butter
Instructions

1.  For the pudding: In a small bowl, whisk the cornstarch and 1 teaspoon of milk together until smooth.

2.  Place the remaining milk into a medium saucepan and add the cornstarch/milk mixture, whisking until smooth.

3. Whisk in the maple syrup and a pinch of salt.

4. Place over medium heat and bring to a simmer, stirring frequently.

5. As soon as the mixture begins to thicken (a couple of minutes), remove it from the heat and pour into a medium bowl or four ramekins.

6. Cover with plastic wrap and refrigerate until chilled and set. (1-2 hours or so.)

7.  For the spiced pecans: In a small skillet over medium heat, cook the sugar and pecans, stirring frequently, until the sugar is melted and the pecans are browned, about 5 minutes.

8. Stir in the cinnamon, a few gratings of nutmeg, a big pinch of smoked paprika, a pinch of salt, and the butter.

9. As soon as the butter is melted and has coated the nuts, remove from the heat and pour the nuts onto a plate to cool. They may stick together somewhat; simply break up the clusters with your hands at serving time.

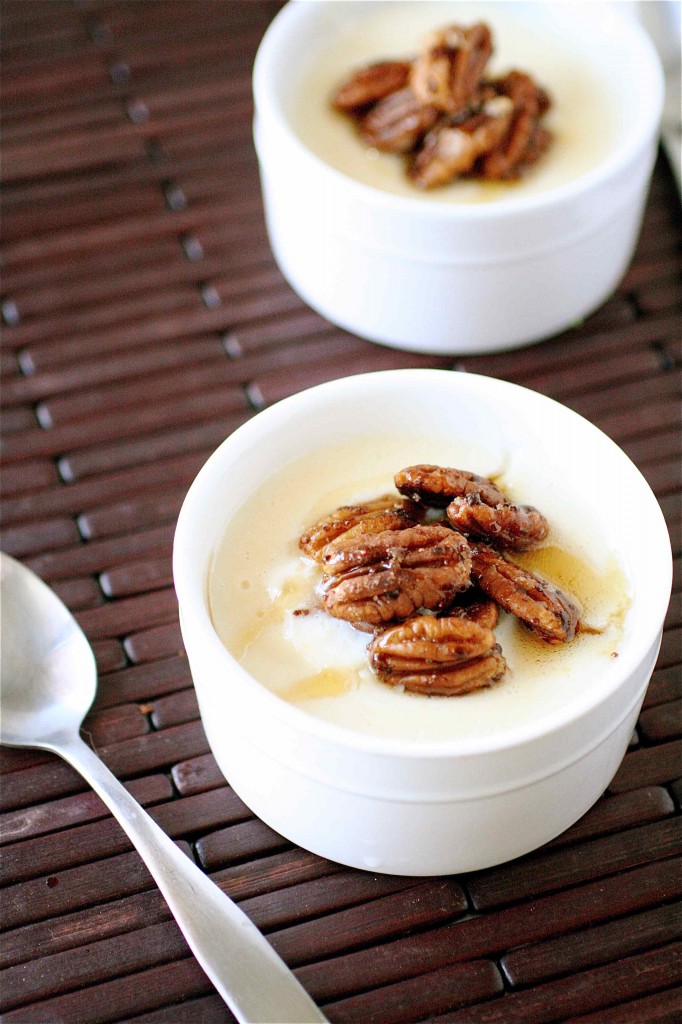
10.  Place about 2 tablespoons of the nuts on each portion of maple pudding and serve.


Source: Directly from Herbivoracious.


March 22, 2012 - 8:51 am

Virginia - This was probably not the best thing to look at before breakfast- now I don’t want my granola bar and am craving pudding! this is going to the top of the “must make” list.

March 22, 2012 - 12:27 pm

Michael Natkin - Thank you so much for trying out the book and sharing! Your pictures of the pudding are absolutely gorgeous.

March 23, 2012 - 5:10 am

Medeja - Wow..Looks like a really lovely pudding! I guess flavor combination is just adorable.

March 23, 2012 - 1:19 pm

Georgia @ The Comfort of Cooking - What a fabulous pudding and lovely photos! This looks so delicious. Thanks for sharing. Also, I’m having a great giveaway today with four potential prize winners, so you should enter!

April 9, 2012 - 1:40 pm

Herbivoracious in the News » Harvard Common Press - […] The Curvy Carrot ran a review and recipe from […]

April 2, 2013 - 12:01 pm

Julia - This was so easy, I was skeptical that it would work. But it was really nice! I added a bit of vanilla. The maple flavor was good, but fairly subtle. Next time I would add a touch of maple extract. The spiced nuts and some whipped cream are mandatory, otherwise it would be pretty boring.

May 9, 2013 - 8:09 am

Maple Pudding with Spiced Pecans - […] For recipe visit:  thecurvycarrot.com […]

Baked Cinnamon French Toast

The other day I was craving cinnamon toast.  Which was weird because I normally don’t crave carbs all that much.  It’s usually cheese and chocolate (or salt) for me.

But, this craving lasted for a good 48 hours, so in my book, that means that I will usually give in.  I figure if it hangs around for that long, it deserves some attention.  And, with a nice Sunday morning ahead of me, I figured I would (yet again) prep the night before and have a nice cinnamon French toast casserole ready to go the next morning.  I’m totally loving these make-ahead meals right now.

I halved this recipe because I actually didn’t have my large pan in my possession at the time.  Instead, I used my 1.5-quart casserole dish to make the French toast in, and this worked just fine.  It was enough for about 4 large servings.

And what can I tell you about this dish?  A sweet and crunchy cinnamon-glazed topping over buttery, golden bread awaits you.  I’m glad I gave into this one.


Baked Cinnamon French Toast

Servings: about 4


Ingredients

1/2 loaf sourdough bread, torn into large pieces

4 eggs

1 cup whole milk

1/4 cup hevay cream

1/2 cup sugar

1 tablespoon vanilla

1/2 cup flour

1/2 cup brown sugar

1 teaspoon cinnamon

1/4 teaspoon salt

8 tablespoons (1 stick) unsalted butter, in pieces


Instructions

1. Generously spray a 1.5-quart casserole dish with cooking spray.

2. Evenly spread the sourdough pieces on the bottom of the pan. (It’s ok it they layer a bit.)

3. In a large bowl, whisk together the eggs, milk, heavy cream, sugar, and vanilla.

4. Pour the egg mixture evenly over the bread.  Cover tightly with plastic wrap and chill for several hours (preferably overnight.)

5. In a separate bowl, combine the flour, brown sugar, cinnamon, salt, and butter pieces. Using a pastry cutter or your fingers, mix the ingredients together until they resemble coarse sand.  Cover the mixture tightly with plastic wrap and chill until ready to use.

6. The next day, preheat the oven to 350 degrees.

7.  Evenly sprinkle the dry ingredients over the bread.

8. Bake the cinnamon toast until lightly golden and crisp, about 1 hour.  Serve immediately with butter and maple syrup, if desired.


Source:   The Pioneer Woman.


March 20, 2012 - 5:18 am

Blog is the New Black - This looks delicious and sinful!

March 20, 2012 - 6:30 am

Caroline @ chocolate & carrots - This is genius! I’m so craving this now for breakfast.

March 21, 2012 - 12:04 am

myfudo - I am craving for a delicious and healthy breakfast option…The fact that this is easy to prepare is a welcoming bonus! Thanks for sharing!

March 21, 2012 - 12:45 am

Dianna - Is there some special reason for using sourdough bread in this recipe? Is it ok to substitute French bread or something similar without the sour taste?

March 21, 2012 - 8:34 am

srlacy - Hi Dianna-

Absolutely! I used sourdough because I had seen it as an option in the original recipe and wondered about the sour taste, too. It actually wasn’t bad at all! But you can use French bread or whatever other kind of bread you like. I think a cinnamon swirl bread would be awesome!

March 22, 2012 - 2:30 pm

Memoria - I really really do not like French Toast because of the soggy, eggy flavor it has, but my friend convinced me to try out a Cooking Illustrated recipe that eliminated that factor. Just when I was about to try out that recipe, I found yours and clicked on the link to Pioneer Woman. I read how this recipe did not yield a soggy texture if baked for an hour; however, it still came out soggy and eggy for me. Even after cooking the underside for an additional 20 minutes. So, for those of you who don’t like an soggy, eggy French toast (which goes against the point of French toast, I guess haha), don’t make this recipe. The only good thing about it was the topping. I had to throw away almost all of the dish. Fortunately, I made half of your recipe (1/4th of PW’s recipe?), but it was still a waste of ingredients. Now I know not to ever eat any version of French Toast no matter what haha. Thanks for sharing this recipe anyway. My curiosity is now gone.

March 23, 2012 - 2:30 pm

Brenda - WOW! I made this for my co-workers using ciabatta (that’s all I had in the house) and it still turned out delicious. Our staff meetings on Friday morning are at 8:15 (office opens at 8am) and by the end of the staff meeting there was absolutely none left. So easy to assemble too. Loved this!!!

April 3, 2012 - 11:39 pm

Tangent Tuesday — Koko Likes - […] to be up in Alaska with Q for Easter. I was thinking for Easter brunch I would make a strata, baked French toast, and these coconut macaroon nutella nests. A random grouping, but we have limited kitchen supplies […]

June 14, 2012 - 3:34 pm

Super New Casserole Recipes Website Coming to a Screen Near You! | RecipeLionBlog - […]  Baked Cinnamon French Toast from The Curvy Carrot […]

Peanut Butter Chocolate Chunk Reeses Cup Cookies


This cookie is not an original one.  I will tell you, however, that it’s one of my favorite go-to peanut butter cookie recipes.  The base recipe is soft, peanut buttery, and chewy.  I had originally posted an M&M version of this cookie a few months ago, and they were a giant hit.  So, when I realized that I had half a bag of Reeses miniature cups in my pantry that I needed to use before I singlehandedly ate them in one sitting, I figured I would try to make this delightful little peanut butter cookie a little bit more peanut buttery with those chopped Reeses cups. Oh, and some extra semisweet chocolate chunks because…well…you know.  What’s better than chocolate and peanut butter together?

Like I said, this base recipe is pretty amenable to any sort of add-in that you may want.  The dough holds up well, doesn’t spread around too much, and has a great flavor to complement any kind of extra addition:  M&M’s, nuts, candy, you name it….it’s all good.  I’m sure I will be adding to my armamentarium of peanut butter cookie varieties with this one.  It’s a keeper.


Peanut Butter Chocolate Chunk Reeses Cup Cookies

Servings: about 24 cookies

Ingredients

1 and 3/4 cups all-purpose flour

1/2 teaspoon salt

1 teaspoon baking soda

1/2 cup (1 stick) unsalted butter, at room temperature

1/2 cup granulated sugar

1/2 cup brown sugar

1/2 cup creamy peanut butter

1 egg

1 teaspoon vanilla

2 tablespoons milk

One 6-ounce bag semisweet chocolate chunk pieces

6 ounces (1/2 bag) miniature Reeses cups, chopped


Instructions

1. Preheat the oven to 350 degrees.

2. Line two rimmed baking sheets with parchment paper; set aside.

3. In a large bowl, combine the flour, salt, and baking soda, whisking until combined.  Set aside.

4. In the bowl of your stand mixer fitted with the paddle attachment, cream the butter on medium high speed until smooth, about 1 minute.

5. Add the sugars and peanut butter, mixing until smooth, about 2-3 minutes.

6. Reduce the mixer speed and add the egg, vanilla, and milk, mixing until completely combined.  Slowly add in the dry ingredients, mixing until thoroughly combined.

7. Using a rubber spatula, gently stir in the chocolate chunks and the chopped Reeses cups.

8. Drop the cookie dough by rounded tablespoons onto the prepared baking sheets and bake the cookies until lightly golden around the edges, about 10 minutes.  Let cool completely.


Source:  Adapted from Pennies on a Platter, originally adapted from Baking Junkie.

March 18, 2012 - 8:29 am

Blog is the New Black - I need these. Stat.

March 18, 2012 - 8:35 am

Virginia - holy cow those look amazing. mini reese’s AND chocolate chips? these will last about 2.5 seconds in my house. Can I also say how awesome I think you are for using terms of art like “armamentarium” in everyday speech?

March 18, 2012 - 10:44 am

Nikki - Mmmmm!! I love the idea of adding the miniature peanut butter cups!! They look so ooey gooey scrumptious! 🙂

March 18, 2012 - 11:07 am

Annie @ Annie's Cooking Lab - Yum, those look great! I have a huge weakness for anything with chocolate and peanut butter!

March 18, 2012 - 12:27 pm

Caroline @ chocolate & carrots - Mmmm…they look so melty and delicious! 😀

March 19, 2012 - 1:21 pm

Mary - You’ve created a cookie that has it all :-). I am new to your blog, so I took some time to browse through your earlier posts. I’m so glad Idid that. I really like the food and recipes you share with your readers and I’ll definitely be back. I hope you have a great day. Blessings…Mary

March 21, 2012 - 5:59 am

Simone - They look soooo good!
Sad we don’t have peanut butter cups in the Netherlands 🙁

April 26, 2012 - 8:04 am

whole grain mix « grace garden - […] Multi-Grain Peanut Butter Reese Cup Cookies Adapted from The Curvy Carrot […]

February 13, 2014 - 3:41 pm

Jeanette Breidenbach - Found this recipe on pinterest! It looks amazing so I thought I would try it for my boyfriend! I found while going through your recipe that you forgot to say when to add in the flour mixture to the sugar mixture. I added it in at the end right before the choc. chunks and pb cups. They baked simply perfect though! I was expecting them to spread a little bit more so they turned out sort of ball like. But, lesson learned, second batch turned out perfect! 🙂

Thanks for sharing!

February 13, 2014 - 4:10 pm

srlacy - Thanks for catching that mistake, Jeanette! I have corrected the recipe now. Much appreciated!