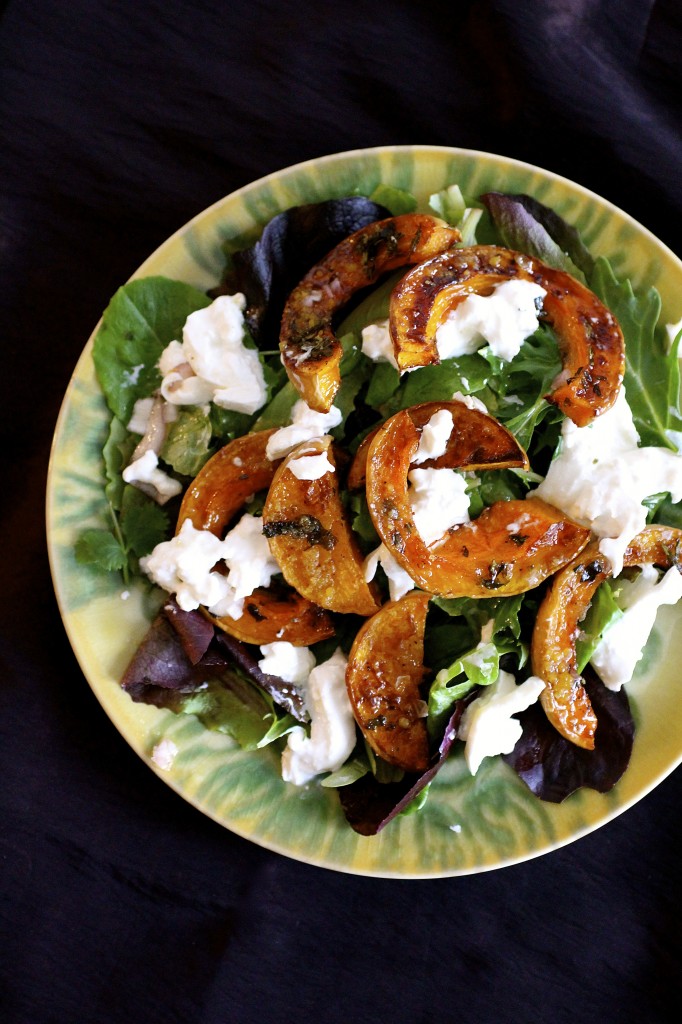
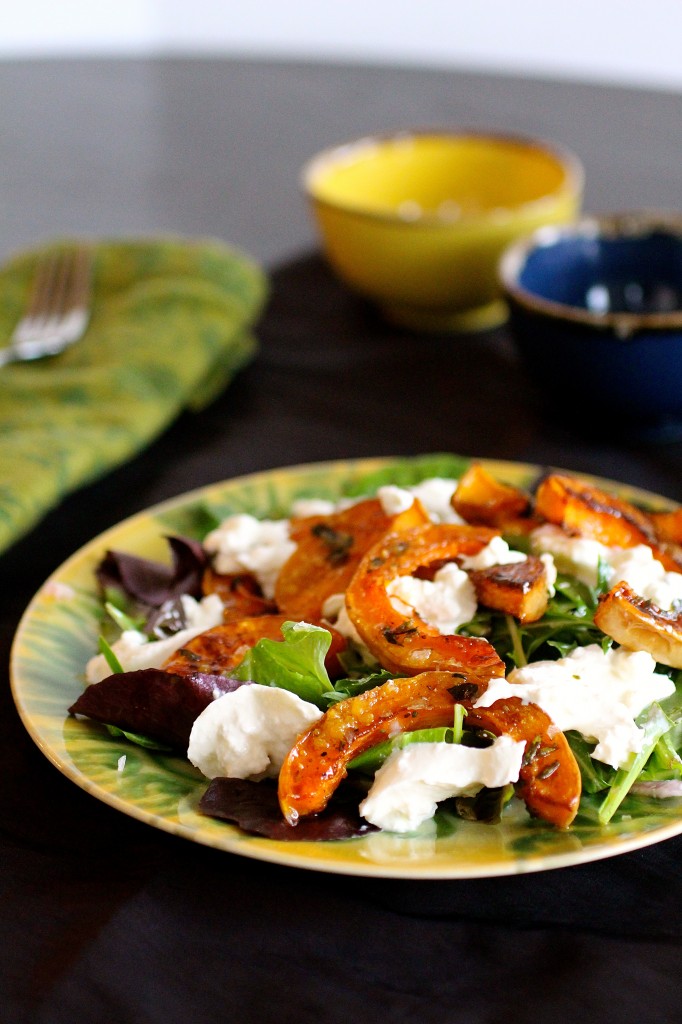
Roasted Maple Squash Salad

IMG_0839


I was so all over this salad when I first saw it in the February issue of Food and Wine Magazine.  I had pretty much been roasting at least one squash per week (the leftovers heat really well for a quick healthy lunch during the day….). My favorite squash so far to roast?  Acorn, hands down (easy portability and mellow taste).  But, I’ve grown to love all different kinds.  I always have one on hand during the winter months (it’s also convenient when Scout gets a little tummy rumble and I can give her some bland, mashed squash to get her feeling better.)

Here, I used butternut squash.  I was a little hesitant to leave the skins on for this recipe, but I went ahead and left them on….once everything was cooked, I couldn’t really tell. (If you want to avoid eating the skins, just peel the squash beforehand.)  I had some burrata on hand (as usual….I never need an excuse to eat burrata), but use (or omit for a vegan version) your favorite cheese here.  And as for the maple sugar, it might be a little hard to find if you don’t have a specialty market nearby.  I am pretty sure that you could use a small drizzle of maple syrup or even some brown sugar here instead of the actual maple sugar.  This is the brand that I used (found mine in the baking section of Whole Foods, near the spices.)

This salad was a nice mix of warm and cold, sweet and bitter, and very filling.  That’s my kind of salad.

IMG_0846


Roasted Maple Squash Salad

Servings: about 4 large salads


Ingredients

One 2 lb. winter squash (I used butternut..you could use acorn, buttercup, or kabocha if you can still get your hands on them), washed, halved lengthwise, seeded and sliced crosswise 3/4-inch thick

1/4 cup plus 2 tablespoons extra-virgin olive oil

1 tablespoon finely chopped flat-leaf parsley

1 teaspoon finely chopped marjoram

1/2 teaspoon finely chopped thyme

Salt and pepper, to taste

2 tablespoons maple sugar

2 tablespoon red wine vinegar

1 small shallot, minced

10 ounces bitter salad greens (or whatever kind of greens you like)

Burrata cheese (or whatever kind of cheese you like-the original recipe called for a hard cheese, like Parmigiano-Reggiano)


Instructions

1. Preheat the oven to 375 degrees.

2. Toss the squash wedges with 2 tablespoons of the olive oil with the parsley, marjoram, and thyme in a large bowl, seasoning to taste with salt and pepper, and lay the squash wedges in a single layer on a rimmed baking sheet.

3. Bake the squash until just softened, turning the squash halfway through the baking time, about 20-25 minutes.

4. Sprinkle the squash with 1 tablespoon of the maple sugar and bake for another 15 minutes, just until the sugar starts to caramelize.

5. Turn the squash over and sprinkle with the remaining 1 tablespoon of maple sugar and bake for another 15 minutes, until the squash pieces are golden.  Set aside to cool.

6. In a large bowl, whisk together the red wine vinegar with the shallot and the remaining 1/4 cup of the olive oil.

7. Toss the salad greens with the oil mixture, coating the greens evenly.

8. Transfer the salad greens to your serving plates and top each one with the roasted squash and cheese, if using.  Serve immediately.


Source:  Barely adapted from Food and Wine.

March 7, 2013 - 8:54 am

Katrina @ Warm Vanilla Sugar - Heck yes! This looks so good!

March 7, 2013 - 10:59 am

Heidi @foodiecrush - I quit subscribing to Food & Wine a while ago and it looks like I need to get back into its pages. Thanks for the hearty and healthy salad!

Black Bean Salsa Chili with Avocado Cream

IMG_0939

Spring is taunting me.  It got a little bit warmer here for a while, the sun was shining, and I mistakenly thought (and apparently others did as well, since I did witness two people in Target with shorts on a couple of weeks ago) that maybe spring was around the corner.

And then it snowed and snowed and…snowed.  And while it was pretty and calming and cute to accessorize with various hats/gloves, I’m pretty much over it.  But I’m not entirely over warm and fuzzy bowls of comfort food to eat in your pj’s with a good movie or book to go with them.  Like this Black Bean Salsa Chili with Avocado Cream.

Since avocados are ripe for roughly 15 minutes (I swear, they always go bad before I can use them), I had one on hand that needed to be used up immediately.  This chili was a wee bit spicy for me, so the avocado cream was a fantastic way to cool it all down.  This was originally a recipe with ground turkey and even some bacon, but, to be honest, I didn’t miss any of that here.  This is filling, healthy, and very low in fat.  And it’s even better the second day.

 IMG_0971


Black Bean Salsa Chili with Avocado Cream

Servings: about 6


Ingredients

For the chili:

Two 15-ounce cans black beans, drained and rinsed

2/3 cup water

1 tablespoon dark brown sugar

1 tablespoon extra-virgin olive oil

1 onion, chopped

1 green bell pepper, chopped

1 red bell pepper, chopped

1 and 1/2 tablespoons chili powder (I used a chipotle blend here….holy smokes..that was good.)

1 tablespoon cumin

1 teaspoon oregano

Pinch cayenne pepper (or to taste)

1 and 1/2 cups prepared salsa

3 tablespoons tomato paste

2 cups vegetable broth

For the avocado cream:

1 ripe avocado

1 cup nonfat Greek yogurt

2 teaspoons lime juice

3/4 teaspoon cumin

1/4 teaspoon sea salt


Instructions

1. For the chili:  In your food processor, combine 1 and 1/2 cups of the black beans, the water, and the sugar.  Process the mixture until smooth.

2. Transfer the bean puree to a medium bowl and stir in the remaining beans.  Set aside.

3.  In a large sauce pot or Dutch oven, heat the olive oil until shimmering over medium-high heat.

4. Add the onion and bell peppers, stirring occasionally, and cook until the onions are softened and translucent, about 5 minutes.

5. Add the chili powder, cumin, oregano, and cayenne pepper to the mixture, stirring to coat.

6. Add the bean mixture, salsa, tomato paste, and vegetable broth.  Bring the mixture to a boil.

7. Reduce the heat to low and simmer for about 30 minutes, stirring occasionally.

8. For the avocado cream:  In your food processor, combine the avocado, Greek yogurt, lime juice, cumin, and salt.  Process the mixture until smooth, adjusting the seasonings accordingly.  Serve the chili with a tablespoon or so of the avocado cream.


Sources:  Chili adapted from Cooking Light; Avocado cream from Williams-Sonoma.


March 3, 2013 - 8:24 pm

Virginia - What brand of chili powder did you use? I have never seen a chipotle blend before and it sounds like something that would be a huge hit in my house- we go through bottles of smoked Tabasco like it’s water. I’ll definitely be giving this recipe a try!

March 3, 2013 - 8:29 pm

srlacy - Hi Virginia-The brand is Urban Accents Mesa Rosa Chipotle blend. I picked some up at Whole Foods….I had never seen it before and was intrigued…it’s awesome!

March 3, 2013 - 9:34 pm

Simply Sweet Justice - The avocado cream is very creative. I heard Trader Joe’s has a low-fat guacamole which is essentially avocado and Greek yogurt!

March 3, 2013 - 10:29 pm

Annie @ Annie's Cooking Lab - That looks great, I love the sound of the avocado cream! We must have been thinking alike this weekend, I just posted a Black Bean Chili recipe today too!

March 4, 2013 - 1:58 pm

Katrina @ Warm Vanilla Sugar - I’m all over this. Yum!

March 4, 2013 - 7:13 pm

mustardseed - Oh I love everything about this dish! The avocado cream on top sounds sooo good!!

March 4, 2013 - 7:40 pm

Courtney Jones - Oh my, this looks incredible! I cannot wait to make this. The avocado cream sound amazing! Yum!!!!

March 6, 2013 - 12:02 pm

Rebekah Beene - Love this! I can easily modify it for no dairy – skip the greek yogurt and the avocado and it will still be creamy. And leave out the brown sugar and it will still be yummy! Great recipe.

March 7, 2013 - 7:44 am

Cindy - This looks great! My question is the recipe says one can of beans should it say two ? As you put into the blender one and half cups of the black beans. Looking forward to making this . Thanks for the post.

March 7, 2013 - 9:55 am

srlacy - Hi Cindy! Yes, you are right! Thanks for catching that error. It is corrected now.

March 7, 2013 - 3:19 pm

“The sun did not shine. It was too wet to play. So we sat in the house. All that cold, cold, wet day.” | Falling into Boston - […] a supermarket in the North End, chili just wasn’t going to happen (I did just see a recipe for a Black Bean Salsa Chili with Avocado Cream today that I have to try in the near future). So while I was perusing cookbooks during naptime, […]

March 9, 2013 - 7:18 pm

Michelle - This recipe is definitely a keeper. Our whole family loved it. I didn’t even make the avocado topping and it was still excellent. Thanks!

April 19, 2013 - 1:05 am

Lindsey May - A Vegan option for the non-fat greek yogurt could be cashew cream…I cant wait to try this! I love the look of your blog so clean, and focuses on the food..great job keep it up!

April 19, 2013 - 11:29 am

srlacy - Thanks Lindsey! I haven’t tried the cashew cream yet, but I am really tempted to try. And as far as the website goes, in about a month, the new website is going to be launched, which looks about a million times better than this one! SO excited!

April 28, 2013 - 6:58 pm

Black Bean Salsa Chili with Avocado Cream - […] For recipe visit:  thecurvycarrot.com […]

September 24, 2013 - 11:27 am

Jenny - This was the perfect vegetarian treat after a cold gray day. It even got me the old cliche “you know your way to my heart” from the boyfriend. Again, thank you for yet another yummy staple in my diet!

November 18, 2014 - 3:40 pm

Puy Lentils, Black Beans and … um … chocolate? · a bit more veg - […] Black Bean Salsa Chili with Avocado Cream – The Lentil and Black Bean Soup recipe then sent me off of an search for black bean recipes and while I’m not sure if I will make this I wanted to take note of it. I want to get further with my healthy eating goals before I work on another dip for tortilla chips. […]

Cauliflower Chickpea Cashew Curry


IMG_1266

You know, in the three or four years (really, has it been that long?) since I’ve had this blog, I’m surprised that I have never posted a single curry recipe.  I don’t mind curry.  I like it.  In fact, during my first year of med school in my little box of an apartment in Chicago, I pretty much made a curry dish every night (which I’m sure my neighbours really really loved….).  The little entryway to the apartment building  probably smelled like curry everyday, which sometimes isn’t the aroma that you want to experience at 6:30am, 10pm, or on a particularly hot and humid day.  I was THAT girl, I think.

Regardless, a curry is a great way to sneak in some extra veggies and a little bit of protein…whatever your choice of protein may be.  I used an extra-firm tofu here, which I recommend, but you could use whatever you like.  The other thing about a curry?  It’s completely amenable to whatever veggies you have on hand (or need to use up to free some space up in your freezer….seriously, I couldn’t get the freezer door to close the other day because I have stocked up on way too many things apparently.)  This particular curry highlights the seasonal trend of the moment: cauliflower.  And pretty much anything with cashews in it is awesome as well.

What do you like in your curry, friends?

 IMG_1272


Cauliflower Chickpea Cashew Curry

Servings: enough for 4 good-sized portions


Ingredients

One 13.5-ounce can of coconut milk (I used whole here, feel free to sub in light coconut milk)

1 tablespoon curry powder (use whatever specialty flavor variation you might like)

1/2 teaspoon salt

1/2 medium yellow onion, chopped

1 garlic clove, minced

1/3 cup water

4 ounces extra-firm tofu, cut into small pieces

1 (small) head cauliflower, chopped into bite-sized florets

One 13.4-ounce can chickpeas, drained and rinsed

1/2 cup cashews, toasted

1 cup frozen peas, thawed

Cilantro, chopped

Basmati rice


Instructions

1. In a medium or large sauce pot over medium-high heat, bring 1/2 cup of the coconut milk to a gentle simmer.

2. Whisk in the curry powder and salt until combined.

3.  Add the onion and garlic, stirring to combine and let cook, stirring occasionally, for about 1-2 minutes.

4. Stir in the remaining coconut milk, water, and the tofu.  Let simmer for about 10 minutes. (This is a good time to get your rice cooking if you are making some to go with the dish.)

5.  Add the peas, cauliflower florets, and the chickpeas.  Cover the pot and let simmer for about 10 minutes, or until the cauliflower is cooked through, stirring occasionally.

6.  Remove the curry from the heat and add the cashews.

7. Top the rice with your desired amount of curry and garnish with cilantro.


Source:  Adapted from 101 Cookbooks.


February 28, 2013 - 10:09 am

Katrina @ Warm Vanilla Sugar - Mmm this sounds awesome!!

February 28, 2013 - 2:43 pm

Mollie - I love curry and all indian-ish foods. I’m a bit intimidated by the spice blends, but my roommate has an Indian Slow-Cooker cookbook that she’s been testing recipes from (and I’ve been eating!). I’m not a big slow-cooker person, but it is absolutely amazing! The book is called “The Indian Slow Cooker: 50 Healthy, Easy, Authentic Recipes” if you want to check it out. (Sorry I sound like a commercial, but I’ve been telling all my friends about this!)

March 1, 2013 - 3:28 pm

Louise@cakeandcalico.com - The colours are gorgeous – I have to try this! L.x

March 1, 2013 - 8:23 pm

Friday Favourites - […] love a good cauliflower curry! This Cauliflower Chickpea Cashew Curry from The Curvy Carrot looks amazing! And this Cauliflower Yellow Lentil Curry from Pinch of […]

March 1, 2013 - 10:01 pm

janet @ the taste space - Love it! I don’t post as many curries as I eat, either. I should, though, especially when they are as flavourful and healthy as this.

Btw, with your mention of med school, I read through your about me page. Funnily enough, I am a PGY5 in AP and writing my boards this spring, then off for a cytopath fellowship at MDACC. Pathology breeds food love, no? 🙂

April 17, 2013 - 5:48 am

bob mcduff - Looks fab! For brits, I recommend HOME BARGAINS for Coconut Cream/Milk ====50p! And very cheap but very high quality curry powders.
TESCO in asian-dense areas for big 2kg bags of chickpeas for 3 quid (Indus brand)
and CAULDRON Organic Tofu, this is quite different from the silken stuff, it is quite rough textured by comparison, and in my opinion, far superior. Pan griddles with a crispy side, rather than sticks to the pan like Silken lol.
Nice recipe, thanks.

April 28, 2013 - 7:19 pm

Cauliflower Chickpea Cashew Curry - […] source:  thecurvycarrot.com […]

June 18, 2013 - 11:29 pm

Eating the Alphabet | Fractals In My Coffee - […] Cauliflower Chickpea Curry I substituted a pile of spinach for the tofu because I didn’t have tofu on hand. […]

July 4, 2013 - 9:09 am

Warm Vanilla Sugar | June Things - […] by Pinch of Yum Vegetarian Thai Green Curry by Cookie and Kate Parmesan Baked Eggs by Pinch of Yum Cauliflower Chickpea Cashew Curry by The Curvy Carrot Stetson Chunky Potato Salad by Foodie Crush Garlic Bread Pizza Crust by How […]

August 27, 2013 - 9:44 pm

Mylah - Made this tonight & it was really good! Would you have the nutritional content for it?

August 28, 2013 - 12:07 pm

srlacy - Hi Mylah-

I am so glad you liked it! I do not have the nutritional content, however. There may be online calculators that you could maybe try. Hope that helps!

February 10, 2014 - 1:01 am

Weekly Workouts & Winter Weekend Cookin’ - […] Cauliflower Chickpea Cashew Curry (sans rice) – The Curvy Carrot […]

May 6, 2014 - 7:08 pm

Denise - Is 4 oz of tofu a mistake? The package is 14 oz

May 6, 2014 - 7:32 pm

srlacy - Hi Denise-

It’s not a mistake. I used 4 ounces for this recipe (there are different brands with different amounts in each package), but if you like a lot of tofu, by all means use the amount you like. Enjoy!

May 18, 2014 - 7:03 pm

Cauliflower Chickpea Curry | My Blog - […] Cauliflower Chickpea Cashew Curry from The Curvy Carrot […]