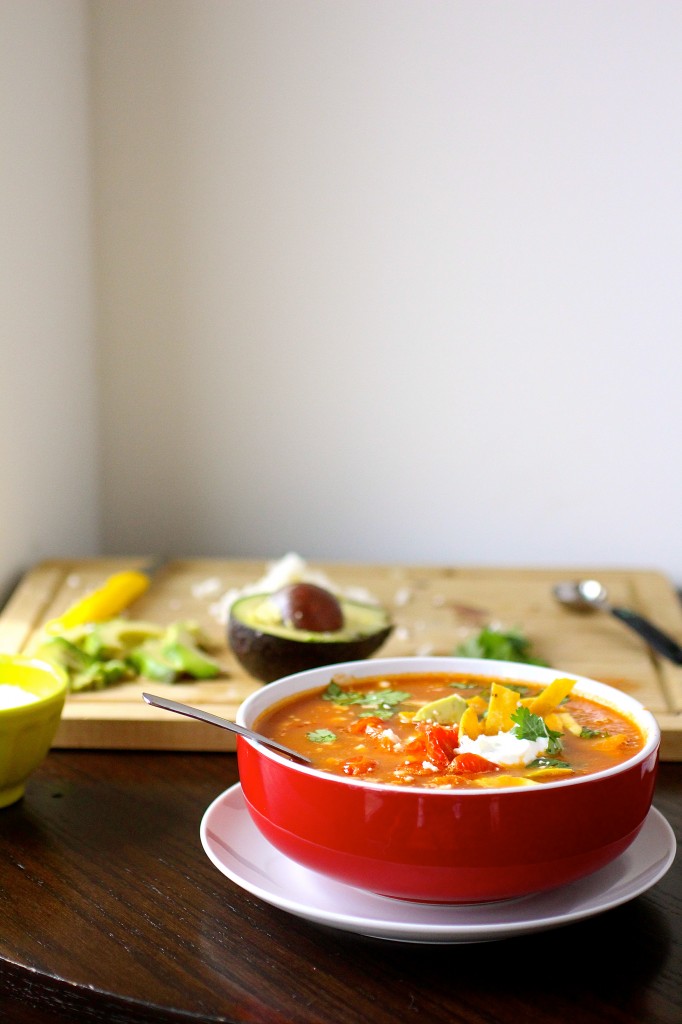
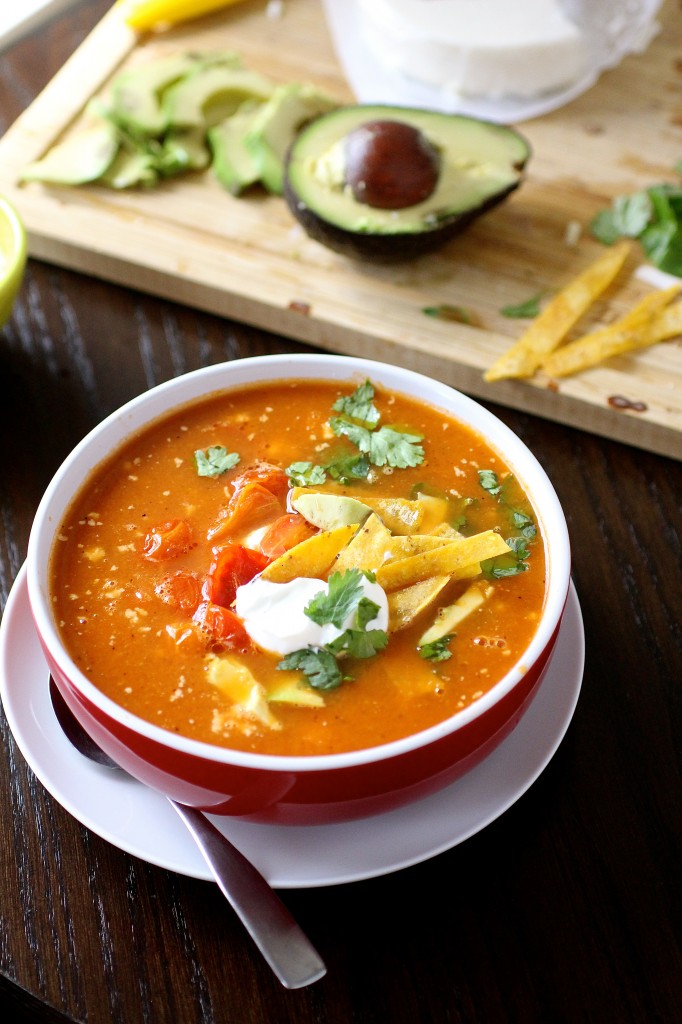
Vegetarian Tortilla Soup

IMG_3009


Whenever I happen to be in Indiana, visiting with my family, we will usually end up going out to dinner for Mexican…and my mom will inevitably end up ordering tortilla soup.  I always want some-it looks so good topped with crunchy tortilla chips and some fresh avocado.  But, inevitably, it will always be a chicken-broth base, and I will make a mental note to find a nice vegetarian (vegan here, if you omit topping it with cheese) version to enjoy on my own.

And this one certainly delivers.  Made with a tomato/onion base and some vegetable broth, it packs a fresh, earthy flavor.  The mixture of spices here can be tweeked a bit to siut your own likings: I used a chipotle smoky southwestern spice to give it a little kick, but you can make this as spicy (or not spicy) as you like.  If you are short on time, you can skip roasting the grape tomatoes (they are only used as a topping here) all together for a quick weeknight meal.  I wouldn’t skip baking the tortilla chips, though-they are a really nice addition to this dish. You can add in some more veggies to the mix, too, if you would like. And, as with any homemade soup, the flavors were even better the next day.

I think this version is probably better than any restaurant chicken-broth based version.  🙂

IMG_2976


Vegetarian Tortilla Soup

Servings: about 4-6


Ingredients

For the tortilla chips:

6 corn tortillas, cut in half and then sliced into thin strips (Using a pizza cutter helps here.)

1 tablespoon extra-virgin olive oil

1/2 teaspoon salt

For the roasted tomatoes:

2 cups grape tomatoes, sliced lengthwise

1 tablespoon extra-virgin olive oil

Pinch salt

For the soup:

1 tablespoon extra-virgin olive oil

4 cloves garlic, minced

1 large yellow onion, chopped

1 teaspoon ground cumin

2 teaspoons ground coriander

1 teaspoon chipotle seasoning blend (optional)

Pinch cayenne pepper

1 14-ounce can crushed fire-roasted tomatoes

6 cups vegetable broth

For garnish:  Greek yogurt, queso fresco, avocado, cilantro


IMG_2897


Instructions

1. For the tortilla chips:  Preheat the oven to 350 degrees.

2. In a medium bowl, gently combine the tortilla strips, the olive oil, and the salt, tossing to thoroughly coat.

3. Arrange the tortilla strips in a single layer on a rimmed baking sheet, and bake until golden and crispy, about 10 minutes or so. Keep the oven set at 350 degrees to roast the tomatoes. Set aside.

4. For the roasted tomatoes:  Arrange the tomatoes in a single layer in a small baking dish.

5. Lightly drizzle the olive oil over the tomatoes and sprinkle with salt, to taste.

6. Bake the tomatoes at 350 degrees until the tomatoes are shrunken and lightly golden around the edges, about 40 minutes.  Set aside.  (These can be made a day or two in advance and stored in the refrigerator.)

7. For the soup: In a Dutch oven or large saucepot set over medium heat, heat the olive oil until shimmering.

8. Add the garlic and onion, stirring, until slightly softened, about 1 minute.

9. Add the spices and the canned tomatoes, mixing to combine.  Let cook for about 5 minutes.

10. Remove the mixture from the heat, and add one cup of the vegetable broth.

11. Using an immersion blender (or in small batches with a blender), carefully puree the mixture until smooth.

12. Add the remaining 5 cups of vegetable broth and puree the mixture until smooth.

13. Return the soup to medium heat and simmer until heated through, about 10-15 minutes.

14. Serve the soup with the tortilla chips, roasted tomatoes, and any other garnishes you desire.


Source:  Slightly adapted from 101 Cookbooks.

April 1, 2013 - 11:39 am

Mr. & Mrs. P - Looks beautiful!! Love the bright orangy color!!

April 1, 2013 - 1:03 pm

Michael - Looks like my kind of soup – super quick and easy!

April 1, 2013 - 10:01 pm

Kali - This looks delicious! As a vegetarian also, I’m always disappointed that I can’t find tortilla soup that is vegetarian in most restaurants!

April 3, 2013 - 9:46 am

Becky - Made this last night. It was great. Thanks

April 5, 2013 - 2:10 pm

Weekly Favorites | Ambitious Kitchen - […] soup with a vegetarian […]

April 7, 2013 - 7:08 pm

Julia | JuliasAlbum.com - Gorgeous soup with rich, vibrant colors! Pinned!

April 29, 2013 - 10:48 pm

Judee @ Gluten Free A-Z - I know just how you feel. I always wanted to taste tortilla soup too , but it is always chicken soup based. Can’t wait to try this recipe.

May 13, 2013 - 6:58 pm

Mandy - This is dinner tonight! I didn’t have any cayenne pepper, so I added some hot sauce (I like spice!) and some salt. I also added a can of corn to it, half before blending and half after. It gave it a nice flavor. Very yum!

May 14, 2013 - 1:20 pm

srlacy - Yay! So glad you liked it!

December 27, 2013 - 10:44 pm

Nico Bellissimo - I am obsessed with your food blog! I made this amazing soup this evening and it came out really great!!

The garlic lovers in us always double the recipe for garlic, so we used 8 cloves of minced garlic. 😉 We also love chunky, so I didn’t puree the ingredients. It was really great with the chunky diced ingredients. I also added one diced jalapeno and one diced red bell pepper and one extra tsp. of comino. Beautiful!

It was outrageously delicious, especially with the avocado, crispy tortilla chips, cilantro, and sour cream, plus a dash of lime! Plus a mojito. Haha. 😉 Thank you so much for these great recipes!!

Peanut Butter Banana Quinoa Muffins

IMG_2719


Here’s a new protein-packed semi-sweet snack that I am absolutely nuts about.  Seriously.  I made these and have consumed no less than two of these per day since.  They are great as an on-the-go breakfast, a mid morning side with some coffee, or even as a pre-work-out carb boost.  And, I may or may not have eaten one with a little bit of Nutella on top (which might be my favorite version.)

So, here’s the deal with this recipe.  I only had one small, overripe banana on hand when I made these.  If I could have, I would have added another banana to the mix.  These are dense, nutrient-packed muffins with a little bit of crunch from the quinoa, so please don’t expect a light and fluffy muffin here.   I also used a freshly ground peanut butter here, so there were no extra oils/fats. If you use a jarred brand of peanut butter, you might experience a little bit more moisture in the muffins. I would have made these entirely with the spelt flour, but I ran out.  You can substitute all-purpose flour here if you would like.  And, for a quick vegan version, just substitute the egg with your favorite egg replacement. These are protein-packed powerhouses with one of my favorite flavor combinations.

IMG_2721


Peanut Butter Banana Quinoa Muffins

Servings: 12


Ingredients

1 cup quinoa, rinsed

1 cup water

1 and 1/2 cups spelt (whole grain) flour

1/2 cup all-purpose flour

3/4 cup packed dark-brown sugar

1 and 1/2 teaspoons baking powder

1 teaspoon salt

1/4 cup coconut oil *See step #5 below.  Or you can use vegetable oil here instead.

3/4 cup peanut butter

1 cup skim milk

1 large egg

1 overripe banana (see my intro above.  If I would have had two overripe bananas, I would have used them instead of one for more banana flavor.)

1 teaspoon pure vanilla extract


Instructions

1. Preheat the oven to 350 degrees and line a muffin pan with paper liners. (Alternatively, just brush each muffin cup lightly with oil if you want to skip liners.)

2. In a medium saucepan, bring the quinoa and the water to a boil.

3. Reduce the heat to low and simmer; covered, and cook until the water has been absorbed and quinoa is tender, about 10 minutes or so.

4. In a medium bowl, whisk together the flours, sugar, baking powder, salt, and 2 cups cooked quinoa (If you have a little quinoa leftover, like I did, simply save it for another use.)

5. In the bowl of your standing mixer fitted with the paddle attachment, combine the coconut oil (it’s ok if your coconut oil is still solid.  I warmed mine slightly in the microwave for about 10 seconds, and this helped melt it slightly),peanut butter,  milk, egg, banana(s) and vanilla.  Mix on medium speed until thoroughly combined.

6. Reduce the mixer speed to low and slowly add the flour mixture, mixing until combined.

7. Divide the batter among the prepared muffin cups.

8. Bake until a toothpick inserted into the center of a muffin comes out clean, about 25 minutes.


Source: Adapted from Martha Stewart online.

March 27, 2013 - 9:38 am

Amrita - Hi Shanon, the peanut butter seems to be missing from the recipe. How much did you use?

March 27, 2013 - 11:10 am

srlacy - Hi Amrita-

I just corrected the recipe. I swear, no matter how many times I proofread and write it down in my notebooks, I still make a mistake! Thanks for catching it. 🙂

March 27, 2013 - 4:38 pm

Mr. & Mrs. P - Wow.. What a wonderful combo!!! Sounds Delish!!!

March 27, 2013 - 8:30 pm

Maria Tadic - I’ve never baked with cooked quinoa before! This sounds so interesting. I love peanut butter and banana – can’t get any better. Hope to try these!

March 28, 2013 - 11:02 am

Katrina @ Warm Vanilla Sugar - These look so lovely!!

March 28, 2013 - 11:44 am

Keri - These look great! My husband has a quinoa allergy, though. Is there a grain substitute you’d recommend? Or do you think steel cut oats could work?

March 28, 2013 - 12:59 pm

Amy - Peanut butter, bananas AND quinoa? It doesn’t get any better!! I love all three of them and I’m sure I would love your muffins too!! Great recipe! I’m so gonna try it!

March 28, 2013 - 1:46 pm

srlacy - Hi Keri-

I bet you could substitute in oats just fine. I’ve made muffins with oats in them before, and they were great. You could play around with this recipe:

http://www.thecurvycarrot.com/2012/10/03/baked-pumpkin-spice-oatmeal-to-go/

Let me know how it turns out for you!

March 31, 2013 - 4:16 pm

Suzi - I made a batch of these yesterday and, even completely forgetting to add the brown sugar, they are still delicious. And I can eat them guilt free since there’s no butter or sugar involved! Thanks for the excellent recipe!

April 4, 2013 - 2:31 pm

Jen - just waiting for these to come out of the oven – hoping the batter i licked from the spoon is an indication of just how delicious these are!! yummmm….but you say it makes 12 – wow! i got 24 out of the batter…how big are your muffin tins?? also, for anyone wondering these muffins, when made in batches of 24, are 4 points plus if you’re counting 😉

April 4, 2013 - 2:32 pm

Jen - ps – 4 points plus when made with whole milk, which is all i had!

April 4, 2013 - 3:12 pm

srlacy - I definitely had to scrape the mixing bowl to get 12 from my batter….I just used a regular standard muffin tin. Hmmm…maybe a difference in the quinoa?

April 4, 2013 - 8:42 pm

Jen - muffins are amazing! my daughter and my daycare kids gobbled them up 🙂 funny about the difference…i had extra batter (maybe a muffin or two more) left over when i had filled 24!

May 3, 2013 - 1:24 pm

kim - I just made these with brown rice flour and got 27. Only rose to 1-1.25 inches. Calculated the per muffin calories as 211. Does this seem right?

May 3, 2013 - 1:40 pm

srlacy - Hi Kim-

I am not sure. I have never tried baking with brown rice flour.

May 10, 2013 - 12:14 pm

Muffins, Muffins and More Muffins! « Chickpea Chatter - […] from this recipe from The Curvy Carrot, these were a huge hit – both with Fin and Dane.  Super moist and […]

August 22, 2013 - 10:52 pm

MyFitnessPal Summer Shape-up Meal Plan – Part 2 | MyFitnessPal Blog - […] portions from the freezer and pair with a cup of low-fat yogurt for a cool, high-protein snack. 3. The Curvy Carrot – Peanut Butter Banana Quinoa Muffins Recipe Details: 334 calories per large muffin Try baking as mini muffins for a smaller snack to […]

December 19, 2013 - 9:18 pm

Sara - I love these muffins! They are moist and delicious. My toddler loves them as well and with not a lot of sugar and tons of protein they are a great snack! Sometimes when I make them I use white flour and they turn out good. They make a lot so I enjoy freezing them for later too! Thanks so much for the great recipe!

March 29, 2014 - 3:51 pm

Helene - I followed the recipe plus added sultanas. I had enough for 12 muffins plus enough to pour into a 5×7 pan. Love to have an option to banana loaf to use those extra bananas we always seems to have.

October 15, 2014 - 10:15 pm

Ellen - I only have whole wheat flour. Can I use that instead of spelt?

October 15, 2014 - 10:34 pm

srlacy - Hi Ellen
I think whole wheat flour should be just fine here.

December 27, 2014 - 12:54 pm

Lori B - i also got 24 good sized muffins, filling them about 3/4 full.
i didn’t have spelt flour and was trying to make them gluten free and so i used 2 cups (8 oz) gluten free all purpose flour and added 1 1/2 tsp of xanthan gum for all the flours… they needed about 30 minutes baking time and they taste FABULOUS!!!! i will definitely be making these regularly!

White Cheddar Filled Pretzel Bites with Honey Jalapeno Mustard

IMG_2569


May I proudly present to you, my dear friends, my most favorite pretzel bite recipe…ever.  Which is saying a lot because pretzel bites are pretty much my kryptonite.  When I first moved to Milwaukee, we made a point of going to every single restaurant within walking distance…yes…just to compare pretzel bites, as they are invariably a staple appetizer at many of the restaurants in this city.

These pretzel bites, even though I had to make them myself, are the best…hands down.  Made with a slightly sweet dough, these little guys were actually pretty straightforward to make.  I usually avoid making anything “stuffed” as it usually explodes on me and becomes a kitchen nightmare, but these stayed (for the most part-there were a few minor casualties) intact.  And the honey jalapeno mustard?  Wow.  Normally, I’m a cheese dipper…but this dip has me believing that I might be a convert.

I made these the morning of a party that I was hosting later that night.  I made them as directed, and then I simply refrigerated them until serving time.  I simply popped them in a 250 degree oven when I was about 10-15 minutes from serving them, and they were just fine (and lasted less than 5 minutes on the platter.)  Otherwise, you can make them and then freeze them for later (just thaw slightly and bake at 400 degrees for about 10 minutes or so.)


IMG_2557


White Cheddar Filled Pretzel Bites with Honey Jalapeno Mustard

Servings: about 40-50 pretzel bites

Ingredients

For the pretzel bites:

1  and 1/2 teaspoons active dry yeast

2 tablespoons plus 1 teaspoon packed light brown sugar, divided

1/4 cup warm water (110-115°F)

1 cup warm milk (110-115°F)

2 and 1/2 to 3 cups all-purpose flour

1/3 cup sharp white Cheddar, shredded

6 cups water

4 teaspoons baking soda

For the mustard dip:

1/2 cup Dijon mustard

2 tablespoons finely chopped seeded fresh jalapeños

1 tablespoon mild honey

For brushing onto the warm pretzel bites:

1/2 stick unsalted butter, melted

Coarse sea salt, for sprinkling


IMG_2622


Instructions

1. For the pretzel bites:  In the bowl of your standing mixer fitted with the paddle attachment, combine the yeast, 1 teaspoon brown sugar and warm water, and let the mixture stand until foamy, about 5-6 minutes.

2. In a separate bowl, stir remaining 2 tablespoons brown sugar into warm milk until dissolved.

3. With the mixer running on low speed, add 2 and 1/2 cups of the flour and the brown sugar/milk to the yeast mixture, mixing until a soft dough forms, adding up to 1/2 cup additional flour, if necessary.

4. Turn out dough onto a lightly floured surface and gently knead a few times to form a smooth ball.

5. Transfer the dough to a clean bowl, cover with a light towel and let rise at room temperature, about 2 hours.

6. Once the dough has risen, preheat  the oven to 400 degrees with the racks in the upper and lower thirds, and line two rimmed baking sheets with parchment paper.

7. Turn out dough onto a lightly floured surface and cut into 4 equal pieces.

8. Lightly dust your hands with flour, then gently roll and stretch 1 piece of dough to form a 12-inch-long rope.

9. Flatten dough and arrange so a long side is nearest you, then roll out to a roughly 12- by 4-inch rectangle with a lightly floured rolling pin.

10. Gently press about 1/4th of the cheese into lower third of rectangle, leaving a 1/2-inch border along bottom edge.

11. Stretch bottom edge of dough up over filling and press tightly to seal, then roll up as tightly as possible to form a rope.

12. Cut the rope into 12 pieces, squeezing the dough around the cheese on either side to tightly seal the pretzel bite and transfer to your prepared pan.

13. Repeat the process, making three more ropes with remaining dough and cheese and cut into pieces, transferring to the prepared baking pans.

14. Let the pretzel bites rest at room temperature, uncovered, about 30 minutes.

15. Meanwhile, the six cups of water to a boil in a Dutch oven or large saucepan.

16. Reduce heat to medium and stir in baking soda. (Careful-the water will bubble and rise!)

17. Cook the pretzel bites in batches in the water, turning once, until slightly puffed, about 20 seconds.

18. Transfer with a slotted spoon or tongs to prepared baking sheets.

19. Bake until puffed and golden-brown, about 15 minutes (cheese may ooze slightly).

20. Immediately after removing the pretzel bites from the oven, lightly brush each one with the melted butter and sprinkle with sea salt.

21.. For the mustard dip:  Combine all of the ingredients together in a small bowl, mixing well.


Source:  Adapted from Gourmet via Epicurious.


March 24, 2013 - 7:37 pm

Katrina @ Warm Vanilla Sugar - These look so delicious! Love this appetizer idea!

March 24, 2013 - 8:48 pm

Maria Tadic - Oh these look so good. I always fall for the pretzel bites and cheese! I definitely have to try these!!!

March 24, 2013 - 11:58 pm

Courtney Jones - Yum! These look so delicious…and addictive!

March 25, 2013 - 6:22 am

Becca @ Amuse Your Bouche - Yum! These look great, just the sort of thing I’d eat until someone stopped me haha

March 27, 2013 - 8:50 am

M - These look so tasty! I LOVE soft pretzels. I’m thinking of making them this weekend. Did you cook them completey, then put them in the fridge and heat them again to rewarm them, or did you stop before the baking step?

March 27, 2013 - 11:12 am

srlacy - Hi M-

I made them as directed to completion, let them chill, and then reheated them in a warm oven for about 10-15 minutes.

March 27, 2013 - 11:25 am

M - Awesome. Thanks for the recipe. Hopefully the fam will love it as an appetizer on Easter!

April 23, 2013 - 10:46 pm

Jenny - Oooh! I love all these flavors & the honey jalapeno mustard sounds delicious! We are hosting a soft pretzel link party this week in honor of Soft Pretzel month. Please stop by & link up if you like: http://www.ratetheplateutah.com/2013/04/food-holiday-link-party-national-soft.html.

April 30, 2013 - 3:18 pm

White Cheddar Filled Pretzel Bites with Honey Jalapeno Mustard - […] source:  thecurvycarrot.com […]

August 20, 2013 - 5:00 am

Whole Wheat Peanut Butter-Filled Pretzel Bites (with Wild Friends Nut Butter) » The Curvy Carrot - […] to run with an idea I had been playing around with in my head for a while.  I took one of my favorite pretzel bite recipes, but converted it so that it incorporated whole wheat flour. (I ended up going with half white […]

August 31, 2013 - 7:07 am

Blueeyes - I made these for a block party last night. They were easy, yummy, and looked pretty. Kids and adults gobbled them up. I cheated a little because Ken’s honey mustard sauce was on sale, so I chopped some jalapeño and added to that.