Cranberry Orange Steel Cut Oats

IMG_4746


I’m becoming a huge fan of oatmeal (actually steel cut oats-love the flavor.) I love them sweet, I love them savory, and I love putting a million different toppings on them.  I bought a giant bag of them a few weeks back when my bloodwork (yet again…sigh) came back with having high cholesterol.  Bummer.  I would like to blame it on the recent trip to Argentina where I had enough saturated fats to last a lifetime (hey, it’s vacation!  Eat a whole wheel of provoleta-yes, a whole wheel of melty, grilled provolone cheese.  I did.), but that would be an excuse.  I eat a lot of chocolate and cheese.  And there’s some genetic factor in there, too.  I’ve got to get it a bit more in control.

So, I’m trying to add in various things to my diet.  Like having oatmeal a few times a week.  Getting back into exercising (since October, I’ve taken a “hiatus”, and by “hiatus”, I mean sitting on my couch and watching TV while eating…cheese and chocolate.)  Increasing amounts of fruits and vegetables.  We shall see how this goes.  I will say that my cholesterol was lower than last year, so apparently I am doing something right.

I overbought cranberries around Thanksgiving, so I decided to make a nice cranberry orange sauce to swirl into my steel cut oats on a cold Sunday morning.  You can play around with what kind of flavors you like here-I had enough of this to last me for about 4 large servings of steel cut oats.  Also (and this is not an endorsement), I prefer the Bob’s Red Mill quick cooking steel cut oats-they are ready in less than ten minutes and still have that chewy, nutty flavor.

And, on a more personal note, I hope that you all have a safe, happy, and very blessed rest of 2013.  I have a feeling that 2014 is going to be our best year yet.


IMG_4752


Cranberry Orange Steel Cut Oats

Servings: makes enough for 4 large servings


Ingredients

2 cups fresh cranberries

1/2 cup orange juice

1/4 cup honey

1 teaspoon cinnamon

Orange zest, optional

Steel cut oats, prepared according to package directions


Instructions

1. In a medium saucepan over medium heat, combine the cranberries, orange juice, and honey, stirring to combine.

2. Bring the mixture to a gentle boil.  Once the cranberries have popped, reduce the heat to medium low and cook, stirring occasionally, for an additional 4-5 minutes.

3. Add the cinnamon and cook for an additional minute or so.

4. Drizzle the sauce evenly over your oats and serve immediately.


Source:  A Curvy Carrot original.

December 24, 2013 - 9:43 am

Lauren - Yum! I bought a kilo bag of frozen cranberries (I haven’t seen them for sale fresh here in South Australia) to make mince pies with but didn’t make them- this looks like a yummier and healthier alternative.Thanks!
Happy holidays!

December 24, 2013 - 10:21 am

Katrina @ WVS - I’m a huge fan of oatmeal too! Sometimes I eat it for dinner totally by choice…so good. I love this flavour!

December 26, 2013 - 9:10 am

Joanne - I don’t need an excuse to enjoy oatmeal in the morning! Especially with this yummy cranberry sauce addition. Such a nice way to perk it up!

January 1, 2014 - 10:03 pm

Maria - I, too, love steel cut oats. On kitchn.com, I learned a method of prepping them that takes a few minutes the night before, then they soak overnight. Magical! Check it out: http://www.thekitchn.com/how-to-cook-steelcut-oats-for-134185

January 7, 2014 - 11:29 am

Philia (from sweetphi.com) - Can I just say your photos are so pretty? They seriously are making me drool over here, and this one is just GORGEOUS! I need to eat more oats, and this recipe look absolutely perfect to do so, I’m going to have to give this a try!!

January 9, 2014 - 5:01 pm

ekaren - I am struggling with high cholesterol too … and I’m right there with you on the cheese and the chocolate! One thing you also might try adding into your oatmeal is one or two Tbsp of flaxseed meal. It is supposed to help in decreasing cholesterol and it has a nice, nutty flavor. I also stir it into yogurt for some texture. You can also bake it into cookies, muffins or breads. (If nothing else, it makes me feel slightly less guilty about the cheese!)

January 17, 2014 - 9:02 pm

Cranberry Orange Sauce for Oatmeal | annie's cooking lab - […] Source: The Curvy Carrot […]

Bananas Foster Breakfast Strata

IMG_4270


Come and get your Christmas carbs, ladies and gentlemen.

The December 2013 issue of Cooking Light, was, far and away, one of their best issues yet.  When I get the issue in the mail each month, I promptly draw up a bubble bath (inevitably putting in way too much soap and then laughing way too much when I turn the jacuzzi jets on and the bubbles go up over my head.  The saddest part?  I know that it’s going to happen every single time.  But, it’s one of those little childish indulges-I revert back to age 5 when I used to beg my parents to buy me Mr. Bubble.  Sometimes a She-Ra action figure or a glamorous Barbie would catch my eye instead, but I pretty much exclusively wanted Mr. Bubble.  Odd?  Yes. But at least I was a clean child.)

So, usually I flip through the magazine and just dog-ear the pages of recipes that I want to try.  This issue is all wrinkly and warped from getting wet and most of the pages have dog-ears.  That’s a brilliant success for me.  Bravo, Cooking Light, bravo.

Anyways, this was one of the recipes I wanted to try.  You know, to get in the Christmas spirit.

Or just in the spirit of having something with rum in it for a lazy Saturday breakfast.


IMG_4283


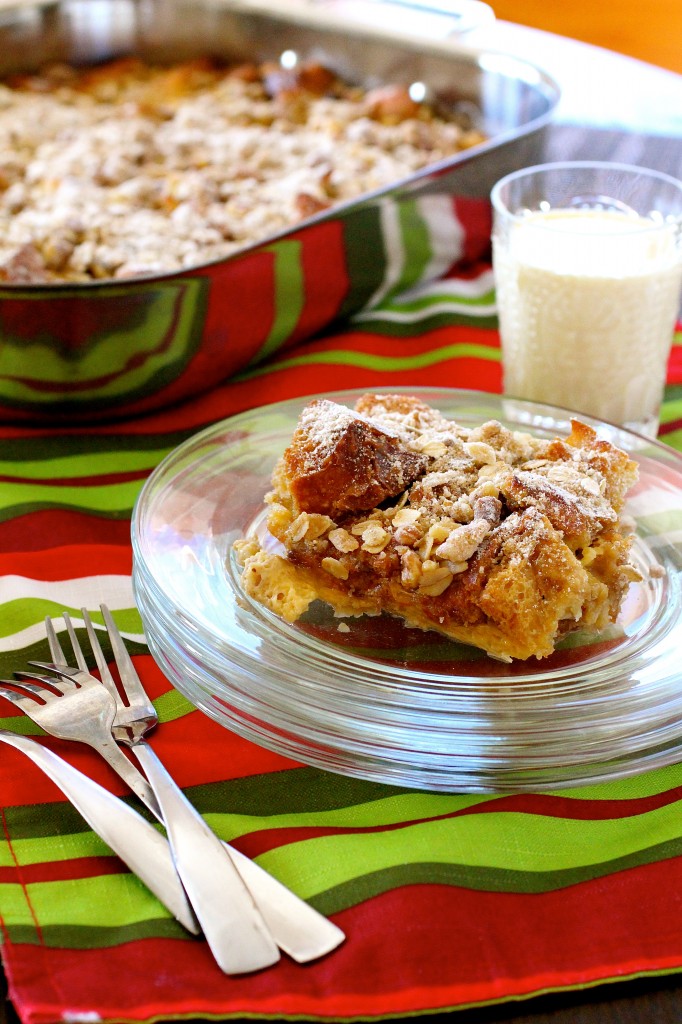
Bananas Foster Breakfast Strata

Servings: 8-10


Ingredients

For the strata:

1 tablespoon canola oil

1 tablespoon unsalted butter

3 medium ripe bananas, sliced

1/2 cup rum

1 cup  brown sugar

1/2 teaspoon salt

1 cup half-and-half

1/2 cup granulated sugar

4 large eggs, lightly beaten

Two 12-ounce cans of fat-free evaporated milk

1 (1-pound) French bread baguette, cut into 1/2-inch cubes

For the streusel topping:

1/3 cup all-purpose flour

1/4 cup chopped walnuts

1/4 cup packed brown sugar

1/4 cup old-fashioned rolled oats

Pinch of salt

1 tablespoon canola oil

2 tablespoons powdered sugar


Instructions

1. For the strata: Preheat oven to 350 degrees and spray a 9 x 13-inch baking dish with cooking spray.

2. Over medium-high heat, place 1 tablespoon canola oil and 1 tablespoon of butter in a large skillet.

3. Add the bananas; sauté 1 minute.

4. Carefully add half of the rum; cook the rum until flames subside. (I didn’t get much of a flame on mine-if you don’t that’s ok. Just be safe.)

5. Add remaining the rum, 1 cup brown sugar, and 1/2 teaspoon salt; cook for about 3 minutes or until the bananas are soft.

6. Transfer the banana mixture to a large bowl, and smash the  bananas with a pastry blender or fork until chunky.

7. In a separate bowl, whisk together the half-and-half, granulated sugar, eggs, and evaporated milk.

8. Add the egg mixture and bread cubes to the smashed bananas, tossing well to coat.

9. Spread the mixture into your prepared baking dish and bake for 20 minutes.

10. For the streusel topping: In a medium bowl, whisk together the flour, walnuts, brown sugar, rolled oats, and salt.

11. Stir in 1 tablespoon canola oil.

12. After the strata has baked for the 20 minutes, carefully remove it from the oven; sprinkle evenly with the streusel.

13. Bake for an additional 30 minutes or until golden and set. Sprinkle with powdered sugar.


Source:  Cooking Light December 2013 issue as part of my monthly contribution to the Cooking Light Bloggers’ Connection.

December 20, 2013 - 11:34 am

Katrina @ Warm Vanilla Sugar - This is a definite breakfast dream of mine! Yum!

December 20, 2013 - 5:10 pm

natalie@thesweetslife - I do the same thing! Except I rip the pages out instead of dog-earring them…and this one was definitely ripped out. Cannot wait to make it-yours looks fab!

December 21, 2013 - 2:41 pm

Claire @ Simply Sweet Justice - This looks ah-mazing. I think I need to subscribe to this magazine now!

December 21, 2013 - 3:23 pm

Joanne - I made a savory strata this past week and I think I need to follow it up with this rum-infused sweetness!

Baked Bean Chimichangas

 IMG_4685


It’s really cold here in Milwaukee.  And probably everywhere else in the non-Southern United States.

But I’ve seen the Milverine TWICE now in the past two days.  I consider this an incredibly good omen.  (If you aren’t familiar with the Milverine, check out THIS post for the explanatory links.)

But the problem is this:  he’s not wearing a coat..ever.  He’s wearing a few layers around that chiseled chest of his, gloves, and, of course, a nice tight skull cap, but I’m a little worried about him.  He’s still walking with the determined, jagged steps.  He still has a slight, menacing scowl.  But I’m worried that he’s going to end up stranded on the south side of Milwaukee with frost bite (which, actually, might be a pretty horrible nightmare to some.)

He doesn’t know how much the sight of him brightens my day.  It’s weird, my mild obsession.  He’s a good luck charm for me.  Even if I had the most horrible of horrible, long days, the simple sight of the Milverine cheers me up.  I fist pump the air and shout “Milverine!” in my car when I see him.  It makes me happy.  And since last week was such a hectic week for me, I consider my two-day-solid streak of seeing him as a little good karma headed my way.

I doubt this man will never know how much his simple presence (and scowl and determined step) can change my day.  And, I think we all secretly have these little “good luck” things in our lives, don’t we?  (just roll with it if you don’t to make me feel a little less crazy).

And now I segue into the food awkwardly.

These chimichangas were on my brains for months before I made them.  I wanted the taste of a chimichanga (basically a loaded burrito), but I couldn’t stand the thought of frying them (I still have high cholesterol), so I had to figure out a way to get that crisped outer tortilla without greasing them up.  This was a decent substitute.

And here’s the thing:  you can put whatever you want in these.  I did a nice bean mixture, but you could add more veggies, etc if you like.  I lightly brushed them with olive oil and baked them until they were crisped and golden.  No, it’s not like a deep-fried, beany-cheesy chimichanga, but there’s enough of a nice texture/flavor here to keep a girl seriously satisfied.


IMG_4602


Baked Bean Chimichangas

Servings: 4-6


Ingredients

1 tablespoon extra-virgin olive oil, plus more for brushing the tortillas

1/2 cup chopped yellow onion

1 teaspoon garlic, minced

One 4-ounce can green chiles, drained

2 cups black beans (I soaked some beans overnight the night before)

1 teaspoon chili powder

1/2 teaspoon cumin

Juice of one lime

2 cups refried beans, cooked, and hopefully still a little warm (here’s a link to some homemade refried beans….one of my favorites and I highly recommend it.  It’s a super simple recipe and great to make if you have dried pinto beans on hand.)

Tortillas (use whatever kind you like…and use as many as you like.  I used 8-inch flour tortillas. The bean mixture can make about 12 chimichangas-certainly enough for two per person.)

For garnish (optional, of course):

Cheese-I used a combination of shredded Monterey Jack and queso fresco

Cilantro

1 tomato, chopped

Greek yogurt, optional

Black olives

Avocado


Instructions

1. In a saute pan over medium heat, heat the olive oil until shimmering. Meanwhile, preheat the oven to 400 degrees.  Spray a baking pan (I used a 9×13-inch glass baking pan) with cooking spray; set aside.

2. Add the onion and cook, stirring occasionally, until softened and translucent, about 4-5 minutes.

3. Add the garlic and cook until fragrant, about 30 seconds.

4. Add the green chiles, black beans, chili powder, cumin, and lime juice, stirring until combined.  Cook until the beans are heated through, about 3-4 minutes.

5. Once the beans are heated through, place about 2 tablespoons of each of the refried beans and the black bean mixture into the center of each tortilla.  Top with whatever garnishes you might want inside the chimichangas-I used a small amount of cheese on each one).  Fold in the ends of each tortilla and roll up the chimichanga.  Place each chimichanga, seam side down, into the prepared baking dish.

6. Lightly and thoroughly brush each chimichanga with olive oil.

7. Bake the chimichangas until heated through and lightly browned, about 20-25 minutes or so.  ***Watch your chimichangas carefully.  As oven temperatures can vary significantly, the browning time may be dependent on your oven.  Use your own judgment here.

8. Top each chimichanga with the garnishes of your own choosing, and enjoy.


Source:  A Curvy Carrot original.

December 17, 2013 - 11:10 pm

Joanne - I’m trying to think of whether I have any omens like that or not. Probably for me it’s whether or not I catch the light while crossing the street to get to work. It is a LONG light to have to stand at the corner in this cold!

December 18, 2013 - 11:18 am

Katrina @ WVS - These look smashing!! Yum!

December 18, 2013 - 12:02 pm

Chelsea Smith (@ChelsaBea) - The Milverine, oh man, this guy cracks me up. Love when I have a sighting. And these Chimichangas look amazing! I cannot wait to make them.

December 18, 2013 - 3:07 pm

Kelly Mitchem - These look amazing, obviously the fried part is delicious but healthy is better! Can’t wait to make them!

January 2, 2014 - 10:10 pm

Ginger - Thankyou for sharing your recipes. I love collecting interesting vegetarian recipes and this one looks like a lot of fun.

January 29, 2014 - 11:53 am

Meal Planning | Tiny Spark Academy - […] 10: Oven Baked Bean Chimichangas (definitely a favorite, use ANCHO chili powder.  Trust […]

February 14, 2014 - 9:54 pm

15 Crunchy Finger-Licking Chimichangas - […] Recipe & Photo credit to thecurvycarrot.com […]

March 5, 2014 - 10:40 pm

Felicia - We love this bean filling! Thanks for the recipe!

March 24, 2014 - 5:50 pm

{Menu Monday} Week of March 24 - […] Friday- Baked Black Bean Chimichangas […]

April 24, 2014 - 7:38 am

10 Crunchy Finger-Licking Chimichangas | Crazy Food Blog - […] Recipe & Photo credit to thecurvycarrot.com […]