
Vanilla “Baby” Bean Cupcakes with Vanilla Bean Frosting

My friend, Bridget, is having a baby.  A little girl.  But, if you ask Bridget’s perfectly healthy identical twin sons, Max and Tyler, who are 2, what is in her belly, they will tell you “a Baby Robot.”

I find this to be one of the cutest and funniest stories of all time.

The point is, Bridget’s boys were born severely premature at 26 weeks and 1 day-and, because of their early arrival, Bridget never had a baby shower for her first pregnancy. Well, it was not the case this time.  Bridget’s sisters threw her a very elegant and beautiful baby shower a few weeks back, and I had the honor of providing cupcakes for the occasion.  Bridget is a friend from way, way back from the land of college.  I may have met her on the first day I moved into the dorms.  Regardless, Bridget has always been a true blue friend-no matter what the distance, time, or space is-we always pick right back up where we left off.  And I am astonished by her strength and patience, and I am so so happy that this little baby girl has officially entered the land of “full term pregnancy”.

I am “borrowing” this recipe from Annie.  (You know you can never go wrong with an Annie cupcake.)  She made these vanilla bean cupcakes for our friend, Alden, when we threw a little impromptu baby shower for the arrival of his son.  I immediately thought I had died and gone to heaven.  The difference between vanilla extract (what I was used to) and a true vanilla bean is amazing.  The flavor pops, it’s sweet and light, and almost a little flowery.  I ended up doubling the recipe for the buttercream to make sure I had enough frosting for each cupcake.  Vanilla beans may be expensive, but they are so worth the cost.  Just be careful slicing them-they can be a little hard to slice sometimes. 🙂

Congratulations to Bridget and little “Baby Robot!”  I can’t wait to meet you!

Vanilla “Baby” Bean Cupcakes with Vanilla Bean Frosting

Servings:  Approximately 24

Ingredients:

For the cupcakes:

3 cups cake flour

1 tbsp. baking powder

½ tsp. salt

1 vanilla bean, split lengthwise***I recommend using the highest quality you can find for ease of removing the seeds.

16 tbsp. unsalted butter, at room temperature

2 cups sugar

5 large eggs, at room temperature

1¼ cups buttermilk, at room temperature

1 tbsp. vanilla extract

For the frosting:

20 tablespoons unsalted butter, softened (yep, that’s a whole lot of butter)

1 vanilla bean, halved lengthwise

2 and 1/2 cups confectioners’ sugar

Pinch table salt

1 teaspoon vanilla extract

2 tablespoons heavy cream

Food coloring, to desired color

Instructions:

For the cupcakes:

1. Preheat the oven to 350° F and line two cupcake pans with paper liners.  Set aside.

2. In a medium mixing bowl, combine the cake flour, baking powder and salt.  Whisk together and set aside.

3. Add the butter to the bowl of an electric mixer fitted with the paddle attachment.

4.Scrape the vanilla bean seeds into the bowl of the mixer with the butter and discard the pod.

5. Beat on medium-high speed for 3 minutes, until light and creamy in color.  Scrape down the sides of the bowl and beat for one more minute.

6. Add the sugar to the butter mixture, ¼ cup at a time, beating 1 minute after each addition.

7. Mix in the eggs one at a time until incorporated.  Scrape down the sides of the bowl after each addition.

8. Combine the buttermilk and the vanilla extract in a liquid measuring cup.

9. With the mixer on low speed, add the dry ingredients alternately with the wet ingredients, beginning and ending with the dry ingredients and mixing just until incorporated.  Scrape down the sides of the bowl and mix for 15 seconds longer.

10. Divide the batter between the prepared paper liners, filling each about 2/3 of the way full.

11. Bake 18-22 minutes, or until a toothpick inserted in the center comes out clean.

12. Allow to cool in the pans 5-10 minutes, then transfer to a cooling rack to cool completely.

For the frosting:

1.In standing mixer fitted with whisk attachment, beat butter at medium-high speed until smooth, about 20 seconds.

2. Using paring knife, scrape seeds from vanilla bean into butter and beat mixture at medium-high speed to combine, about 15 seconds.

3. Add confectioners’ sugar and salt; beat at medium-low speed until most of the sugar is moistened, about 45 seconds.

4. Scrape down bowl and beat at medium speed until mixture is fully combined, about 15 seconds; scrape bowl, add vanilla and heavy cream, and beat at medium speed until incorporated, about 10 seconds, then increase speed to medium-high and beat until light and fluffy, about 4 minutes, scraping down bowl once or twice.

5. Add desired food coloring to mixture.

6.  Using a pastry bag and your desired tip shape, pipe the frosting mixture onto each (completely) cooled cupcake.

Sources:  Vanilla Bean Cupcakes from Annie’s Eats and Vanilla Bean Frosting from Cook’s Illustrated.
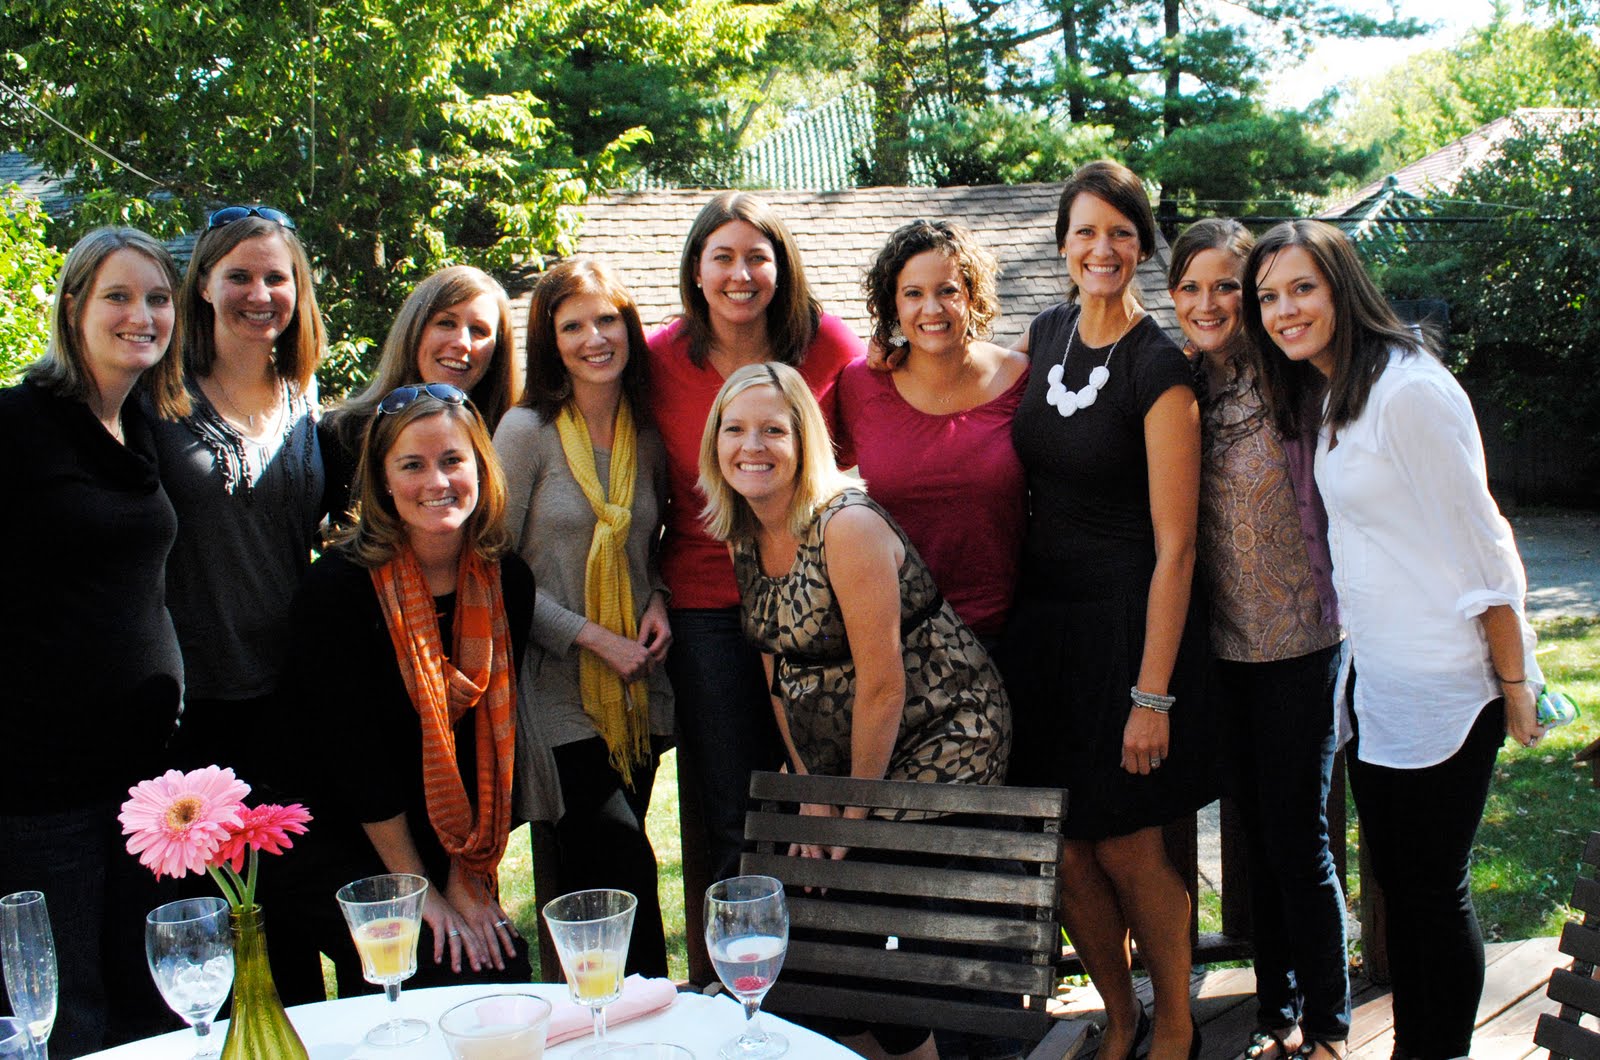
The girls.  Look at the beautiful mom in the center with the blond hair.  That’s Bridget. (It’s official that this photo will go onto every blog of guests at this party-haha.)

October 12, 2010 - 5:50 am

notyet100 - such cute cupcakes,..;-)

October 12, 2010 - 8:31 am

Jenny - Such a nice post, Shanon! 🙂 A party wouldn’t be the same without your cupcakes…it’s true. Can’t wait to see what surprise you bring to Boo Bash!!!

October 12, 2010 - 11:13 am

Kim - Liv Life - What gorgeous cupcakes! I’m planning a shower for a new mom on our street a few months from now, I’ve copied this and we may copy your idea if you don’t mind. I love the photo of all of you, such a beautiful group of girls! Congratulations to the new mom, hopefully you will be able to update us with a newborn pic soon!!

October 12, 2010 - 2:08 pm

Gina - The twins sound adorable. What cuties. Baby robots in their tummies! 🙂

Love the pics of the finished product. Very cute.

The recipe sounds delicious, but I am not sure I could ever bring myself to make it or eat it with so much butter in the cupcakes and the frosting. That amount of butter sounds terribly unhealthy, and the cupcakes/frosting are clearly very fattening. 😛

October 12, 2010 - 2:31 pm

Shanon Lacy - Gina-

Thanks for the comment. They definitely are not the healthiest treat out there, but they are definitely worth the indulgence once in a while.

Thank you for stopping by my blog.

October 12, 2010 - 6:17 pm

Rachel - I seriously laughed so hard at the “baby robot”. So cute!

October 12, 2010 - 6:58 pm

Annie - They look beautiful! Glad you love this recipe as much as I do. And LOL at the idea of cupcakes needing to be healthy 🙂 FYI, I buy vanilla beans on Amazon. You can get about 40 beans for $30 or so. Much more economical and then you always have some handy.

October 12, 2010 - 8:54 pm

Tara - Shanon- you girls look great, so good to see your smiling faces! Congrats to Bridget, that’s so exciting 🙂 all the best, Tara Fergusson

October 14, 2010 - 1:02 pm

Bridget - Those were the greatest cupcakes… and I have the greatest friends in the world. Thanks for making the day so special, Shan!! I love ya!

October 16, 2010 - 1:10 am

zurin - I came across ur blog from top 9 today foodbuzz.

Gorgeous cupcakes.

And EVERYONE looks beautiful in the photo! :))

u have a lovely blog.

November 6, 2010 - 10:17 pm

The Curvy Carrot » Top-Heavy Heavenly Hash - […] for those of you who have so sweetly asked, “Baby Robot” has arrived.  Born on Wednesday, October 20th, Margaret “Maisie” Susan is beautiful. […]

January 18, 2011 - 1:44 pm

Catherine - so, they are baby, miniature cupcakes then?

January 18, 2011 - 1:53 pm

srlacy - Nope-they are regular sized cupcakes. Just named “baby” for the baby shower.

Pumpkin Chocolate Cheesecake Bars

Pumpkin?  Check.  Cheesecake? Check.  Chocolate?  Check.

Allow me to introduce you to the perfect dessert for this time of year.

The pumpkin chocolate cheesecake bar aka a little bit of perfection.

Not only are these straightforward to put together (albeit a little time consuming), they are one of the best Fall desserts I have ever made.  These will probably be making a comeback at my Thanksgiving dinner this year.  Yes, they make my official “Thanksgiving Meal” cut, which is a pretty big deal.

I changed the recipe a bit to suit my own selfish needs. I made a chocolate version of the crust, and I decided to add a chocolate drizzle on top.  I bet you could add some nuts, too, which would be pretty good as well.

I hope you make this.  You will not be disappointed.

Pumpkin Chocolate Cheesecake Bars

Servings: 24 bars

Ingredients:

For the crust:

1 and 1/4 cups chocolate graham cracker crumbs***I pulsed mine in a food processor until fine

1/4 cup sugar

1/3 cup melted unsalted butter

For the filling:

2 8-ounce packages cream cheese, softened

1 and 3/4 cups sugar

3 large eggs

1 cup canned pumpkin

1/2 teaspoon pumpkin pie spice

1/2 teaspoon vanilla

1/4 teaspoon salt

6 ounces (half a bag) of semisweet chocolate chips

2 tablespoons unsalted butter

1 and 1/4 cups sour cream

1/4 sugar

Instructions:

1. For the crust: Pre-heat the oven to 325 degrees.  Lightly grease a 13x9x2-inch baking pan.

2. In a large bowl, stir the together the graham cracker crumbs and sugar.

3. Add the melted butter; mix well.

4. Press the crumb mixture evenly into the bottom of the prepared pan.

5. For the filling: In a large mixing bowl. beat the cream cheese and the 1 and 3/4 cups sugar with an electric mixer on medium speed until combined.

6. Add the eggs, one at a time, beating on low speed after each addition until just combined.

7. Stir in pumpkin, pumpkin pie spice, vanilla, and salt.

8. Transfer 1 and 1/4 cups of the filling to another medium bowl.  Set both bowls aside.

9. In a small saucepan, heat and stir the chocolate and butter over low heat until smooth.

10. Stir the melted chocolate mixture into the 1 and 1/4 cups filling.

11.  carefully spread the chocolate filling over the graham cracker crust and bake for 15 minutes.

12. Carefully pour the remaining pumpkin filling over the baked chocolate layer, spreading evenly.

13.  Bake for 40 t0 45 minutes more or until mixture is slightly puffed around eggs and just set in the center. Let stand in pan on a wire rack for 30 minutes.

14.  Meanwhile, in a small bowl, stir together the sour cream and 1/4 cup sugar.  Cover; let stand at room temperature while cooling.

15. Gently spread the sour cream mixture over the partially cooled baked mixture; cool completely.

16.  Cover and chill at least 4 hours.

Adapted from: Better Homes and Gardens: The Ultimate Cookie Book.

October 10, 2010 - 8:01 am

KeepItSweet - these look like a perfect addition to a dinner party i’m planning!

October 11, 2010 - 7:49 am

Monica - You are right. This has all of the required elements: pumpkin, cheesecake, and chocolate. Yum. These will be on my dessert buffet at my party next weekend. A perfect seasonal dessert. Thank you!

October 11, 2010 - 8:52 am

Lauren at KeepItSweet - for the crust, is it 1/3 of a cup of melted butter?

October 11, 2010 - 9:40 am

Shanon Lacy - Hey Lauren!

Ooopss..I made a boo-boo. That’s what happens when you have a million things going through your head at all times. 🙂

Yes, it’s definitely 1/3 cup of butter. Thanks for catching that for me.

October 12, 2010 - 12:28 pm

Megan - Just made these last night and they were delicious!!! I wish I would have remembered to drizzle them in a little chocolate to make them look a little prettier! I will next time! Thank you!

October 12, 2010 - 2:20 pm

natalie (the sweets life) - just bookmarked these–they sound and look fabulous!

November 20, 2010 - 1:52 pm

Pumpkin Chocolate Cheesecake Bars « Keep It Sweet - […] saw Sharon’s recipe on the Curvy Carrot about a month ago and new right away I had to make it myself.  There were […]

February 1, 2011 - 11:39 am

ChocolateCentral - Chocolate and pumpkin together?! Wow, definitely will be a new adventure for me. I love both pumpkin and everyone who knows me can attest to how much I worship chocolate. Hmm, I’ll have to try this recipe, but can’t be sure if I’ll like it. I’ll let you know.

February 9, 2011 - 9:24 pm

Black and White and Loving Vanilla Bean « Keep It Sweet - […] Adapted from this recipe which was adapted from The Curvy Carrot […]

February 25, 2011 - 3:53 pm

» Black and White and Loving Vanilla Bean Keep It Sweet - […] Adapted from this recipe which was adapted from The Curvy Carrot […]

February 25, 2011 - 6:34 pm

» Pumpkin Chocolate Cheesecake Bars Keep It Sweet - […] saw Sharon’s recipe on the Curvy Carrot about a month ago and new right away I had to make it myself.  There were a […]

November 23, 2011 - 12:08 pm

Ivy - What’s pumpkin spice and where can I find it? – Thanks! 🙂

November 23, 2011 - 1:34 pm

srlacy - Hi Ivy-

You can find it in the spice aisle of most grocery stores.

November 21, 2012 - 8:34 am

Chocolate Home Made Holiday Ideas | My Chocolate Peaces - […] I enjoy chocolate. Pumpkin is there, but the combination of all three? It could be good. The Pumpkin Chocolate Cheesecake bars by the Curvy Carrot sure look […]

December 26, 2013 - 4:16 pm

Pumpkin Chocolate Cheesecake Bars | Keep It Sweet Desserts - […] saw Shanon’s recipe on the Curvy Carrot about a month ago and new right away I had to make it myself.  There were a […]

December 30, 2013 - 7:54 am

Black and White and Loving Vanilla Bean | Keep It Sweet Desserts - […] Adapted from this recipe which was adapted from The Curvy Carrot […]

Vegetarian Chili

It’s that time of year.  Chili time.

I had been craving chili.  I was looking for a recipe that would be filling, vegetarian (actually vegan without the toppings), easy to throw together, and healthy.  Guess what?  I found it.

I served this to my sister and her boyfriend.  Her boyfriend said it was the best chili he had ever had.  I took that as a huge compliment.  Hopefully you will feel the same way.

Vegetarian Chili

Servings: 4

Ingredients:

3 tablespoons vegetable oil***I used canola oil

1 medium onion, chopped fine ( about 1 cup)

1 large red bell pepper, stemmed, seeded, and chopped fine (about 1 1/4 cups)

8 medium cloves garlic, minced

1 tablespoon cumin seeds***I used just plain ground cumin

3 tablespoons chili powder

1/4 teaspoon cayenne pepper

2 cups water

1 28-ounce can crushed tomatoes

1 teaspoon dried oregano

1 tablespoon brown sugar

3 cups canned beans, drained and rinsed***I used 1 can of red kidney beans and 1 can of black beans

1 cup frozen corn kernels, thawed

1 1/2 teaspoons salt

1/4 cup coarsely chopped fresh cilantro

1 tablespoon lime juice

Cheese, optional

Sour cream, optional

Instructions:

1. Heat the oil in a large Dutch oven over medium-high heat until about shimmering.

2. Add the onion and cook until translucent and slightly softened, about 3 minutes.

3. Add the red pepper and cook until it and the onion are soft and slightly browned around the edges, about 3 minutes.

4. Add the garlic and cook until fragrant, about 1 minute.

5. Push the vegetables to the perimeter of the pot so that the center of the pot is clear.

6.  Sprinkle the cumin seeds (or ground cumin) into the center of pot and cook for 30 seconds, stirring constantly.

7. Stir the cumin and vegetables together and let cook until the cumin is fragrant, about 1 minute.

8. Add the chili powder and cayenne pepper and stir to coat the vegetables.  Cook until fragrant, about 1 minute.

9.  Add 2 cups water and stir well to combine, scraping up any browned bits from the bottom of the pot.

10.  Bring to a boil, reduce the heat, and simmer until slightly thickened, about 5 minutes.

11.  Stir in the tomatoes, oregano, and brown sugar, and bring back to a simmer.  Simmer until slightly thickened, about 25 minutes.

12. Add the beans and corn and stir gently to incorporate.

13. Remove the pot from the heat and stir in salt, cilantro, and lime juice immediately before serving.

Source: Soups and Stews

October 8, 2010 - 8:01 am

kitchenarian - I love chili and this one looks great. I like the combination of the two different beans. It gives it great color and really enhances the flavor. I will definitely make this recipe.
Thanks!

October 8, 2010 - 9:21 am

Jenny - I am in charge of our weekly office chili lunch next week, and I’m going to make this and show the meat-lovers that veggie things are JUST as good…if not better! This post came at the perfect time – thanks, Shan! 🙂

October 8, 2010 - 10:03 am

Rachel - Your chili is so vibrantly red! Looks fresh and tasty!

October 12, 2010 - 6:37 am

fooddreamer - This looks like fantastic chili!

October 12, 2010 - 12:44 pm

Heather - I love making vegetarian chili–so hearty and delicious. This looks great!

October 12, 2010 - 3:59 pm

shannon abdollmohammadi - Wonderful post!!! Great Pics and congrats on making Foodbuzz Top 9!! That is totally cool!!!

October 12, 2010 - 4:11 pm

Jenny - Made it for the office chili lunch. Didn’t look like yours…but it was a hit. I forgot the brown sugar (tear) and used dry beans instead of canned…was more like a soup than chili. But so good – thanks, Lavern! 🙂

October 12, 2010 - 6:17 pm

Jenny Nguyen - Chilli is also a really good one for freezing for the lazy days 🙂 Thanks for sharing, looks delicious!

October 13, 2010 - 3:11 pm

Pretty. Good. Food. - This looks perfect for the cool days ahead!

October 14, 2010 - 7:53 pm

Carrie @ TV and Dinners - I just made this for dinner and it was amazing. Thanks for the recipe! I’m sure I’ll be making it again and again this winter.

October 14, 2010 - 8:53 pm

Shanon Lacy - Hey Carrie!

Thanks for the comment…I’m glad you liked it. It’s crazy delicious-and healthy! 🙂

October 20, 2010 - 4:11 pm

Suzanne B - Made this last night, had the first real taste of it for lunch today — delicious! It’s got just the right amount of kick. Can’t wait to try more of the recipes on here! It’s great to find the blog of a fellow pescetarian with similar taste!

November 11, 2010 - 9:12 pm

Vegetarian Chili « The Healthy Haven - […] When the weather starts to cool down, my thoughts turn to what I refer to as comfort foods.  Comfort foods are there to warm you up from the inside out and also stick to your ribs for when you have to literally weather chilly days and nights.  So when I came upon this Vegetarian Chili recipe by Shanon, writer of The Curvy Carrot Blog, I knew this recipe would hit the spot and when I saw the delectable photo, it sealed the deal. Click here to see the original recipe post. […]

November 12, 2010 - 6:47 pm

Vegetarian Chili | Herbal for Health - […] When the weather starts to cool down, my thoughts turn to what I refer to as comfort foods.  Comfort foods are there to warm you up from the inside out and also stick to your ribs for when you have to literally weather chilly days and nights.  So when I came upon this Vegetarian Chili recipe by Shanon, writer of The Curvy Carrot Blog, I knew this recipe would hit the spot and when I saw the delectable photo, it sealed the deal. Click here to see the original recipe post. […]

December 1, 2010 - 10:35 am

paula dean recipes - I love making vegetarian chili–so hearty and delicious. This looks great!

January 17, 2011 - 11:54 pm

Katie - This chili is REALLY good-thanks!

January 27, 2011 - 3:28 am

Jiyeon Kim - Since I tried this recipe, this one becomes my favorite comfort food ever! thanks for the recipe, this one is SERIOUSLY, SOOOOOO GOOD!!!!!!!

September 27, 2011 - 5:02 am

The Curvy Carrot » Spicy Two-Bean Chili - […] course, a traditional fall (and football) food is chili.  And, for me, that means another easy and meat-free 100% vegan base recipe (I added the cheese on top, well, because you know that I […]

November 9, 2011 - 11:11 am

Jessica - I’m going to try this tonight – I have a vegetarian tofu chili recipe that I love, but I’m looking for something new, and this looks perfect. Great for the fall weather!

December 8, 2011 - 4:32 pm

Simple Vegetable Ideas for a Healthy Holiday - […] Vegetarian Chili on The Curvy Carrot. […]

December 20, 2011 - 10:08 pm

Meatless Monday: Vegetarian Chili | cookingandhooking.com - […] from: The Curvy Carrot (love her blog by the […]

December 23, 2011 - 8:51 pm

Jessica - I just wanted to pop in again and let you know how much we LOVE this chili! I just made it for the second time, and it’s just as delicious as I remember. So easy and filling and healthy – it’s perfect. It’s great to find the blog of a fellow pescetarian who loves food. I blogged about your chili: http://feastie.com/blog/spicy-vegetarian-chili-and-best-cornbread Your photos are beautiful, too.

January 17, 2012 - 3:21 pm

Abigail - Love, love, looooved this recipe. Just curious – Any idea how many calories are in a serving?

January 17, 2012 - 3:59 pm

srlacy - Hi Abigail-

Thanks! Glad you liked it-it’s one of my favorites. Unfortunately I don’t have the caloric content on any of the recipes I post. I tried to calculate for a while, but it was too complicated.

January 30, 2012 - 7:01 am

Chili Recipe Roundup 2011 - Jeanette's Healthy Living - […] and Chipotle Chili – The Brassica Diaries Zesty Wheat Berry Black Bean Chili – 5 second rule Vegetarian Chili – The Curvy Carrot Vegetarian Chili with Smoked Spices – A Food Centric Life Vegetarian […]

March 6, 2012 - 4:02 pm

A Vegan Camping Menu » Truth & The Life - […] Here’s the recipe (from “The Curvy Carrot” Blog): […]

March 26, 2012 - 2:47 am

Meatless Monday – Vegan Chili! | Natural Kidz Blog - […] Check out this week’s vegan chili recipe from The Curvy Carrot! […]

August 3, 2012 - 6:42 pm

Starving Student - Great recipe and super easy! I will definitely make it again.

January 30, 2013 - 8:30 pm

Romeo - Excellent chili! I may have put a bit too much chili powder in, but it was yummy nonetheless. You’ve found yourself a new groupee. I had your kale and bean soup the other day and also loved it. 🙂

February 12, 2013 - 10:13 pm

Karen - I made this chili over the weekend while we had 2 feet of snow fall. It was absolutely delicious!!! I’ve been looking for a vegetarian chili that looked hearty, yummy, and healthy. This recipe was all three. It is definitely my new favorite “comfort food” dish. I’m planning on making again next weekend. Good thing my husband liked it too! Thanks for sharing!!

March 3, 2013 - 8:32 pm

Sweet n Spicy Chili Cups and Cornbread Monster Sticks... - - […] when it’s chilly…I like to make chili…ha! I came across a recipe over at The Curvy Carrot. The original recipe produces more of a spicy chili and I’m more of a sweet n spicy chili […]

March 5, 2013 - 2:08 am

Vegetarian Chili | daily-pins.com - […] Read all the details about the recipe on thecurvycarrot.com […]

March 6, 2013 - 9:29 am

Hmesina - Just made this its SO good and SUPER flavorful. I used canned corn and added a can of sliced mushrooms I finely chopped. Very hearty, very delicious.

March 15, 2013 - 9:28 am

Veggie - This looks wonderful. I was searching for a nice vegan chili recipe to make a nice dinner for my sister. I guess she will love this one!

April 23, 2013 - 1:18 pm

Melissa Hulke - Do you think this could be made in a crock pot? Looks delish!

April 23, 2013 - 1:22 pm

srlacy - Hi Melissa-

I don’t see why not! Let me know how it goes!

August 7, 2013 - 5:34 am

Vegetarian Chili | Foods, Drinks & Recipes - […] Read all the details about the recipe on thecurvycarrot.com […]

September 3, 2013 - 12:19 pm
October 8, 2013 - 5:00 am

Spicy Bean Chili with Quinoa and Kale » The Curvy Carrot - […] is an adaptation from one of my early posts from the blog.  I modified the recipe to add in some quinoa (which, by the way, the United Nations […]

December 24, 2013 - 11:06 pm

Nico Bellissimo - This chili recipe was outstanding (along with Jessica’s recommendation of the cornbread recipe)! I followed the recipe perfectly, except I used 2 tbs. of chili powder and I did add *some* chili meat for my husband and my boys. 😉 It was very tasty and perfect for this cold weather. I will recommend to my friends and family because this was the best chili we have ever had!!! Thank you! 🙂

March 2, 2015 - 5:56 pm

New Recipe #2: Vegetarian Chili (+ love for the #fattylifestyle) | shmeruns - […] I was assured that most cyclists don’t care about that like runners do haha).  I found a recipe online and followed it loosely–I quadrupled it (which made a VAT of chili)–but I didn’t […]

March 8, 2015 - 7:27 pm

Brenda P - Just made this tonight,and it was amazing! Added some balsamic vinegar and soy sauce for depth, but otherwise no changes. Thank you – brought back chili for my daughter who’s working on one year as a vegetarian.