Falafel with Tahini-Lemon Sauce

Happy World Vegan Day!

In 1994, World Vegan Day was established in order to promote awareness for the environment, as well as healthy eating choices for all humans.  No matter where you stand on the issue…meat or no meat….animal products or no animal products…November is officially Vegan Awareness Month.  Even though I am not a vegan myself, I completely respect those that are.  I appreciate the efforts and beliefs that vegans have, and my salute to them is by this 100% vegan post.

While I love all things dairy, I wanted to challenge myself to create a completely vegan meal…from start to finish.  And what I ended up with actually begins as a funny story.

When I was 15 years old, I decided to become a vegetarian.  I was successful until around age 21, when I let my own instincts and beliefs fall to the wayside as I let those around me influence my decision….and I slowly delved back into the world of poultry, meat, and pork.  I never felt completely right with it…morally, ethically, or, as I learned more about mass production of meat for American consumers (has anyone seen Food, Inc.?)..I realized that my own personal choice had been made at age 15, and I needed to go “back to my roots”.  Simply put, while I do not care one bit if you or your brother/son/sister/mother consumes meat…I choose not to.  And, while I try not to be a giant consumer of animal products (which is why you will never ever find a recipe on this blog that uses gelatin…), I understand that my choices should, in no way, be assumed as the “right” way or the “only” way.

Back to the story.  So, Thanksgiving has always been one of my favorite holidays, if not my ultimate favorite.  But I never really liked the turkey anyways as a kid.  I always went for the sides and desserts (so what else is new?).  So, one year, my loving mother tried to overcome my seeming lack of an entree by creating some falafel balls to substitute for the turkey.  (The year before that was my Tofu Turkey aka cardboard….which was an ultimate fail.)  They were not my favorite, I will admit.  They looked like unappetizing brown balls of goop on my plate….everyone laughed at them…and they were quickly coined “Awful Falafel.”

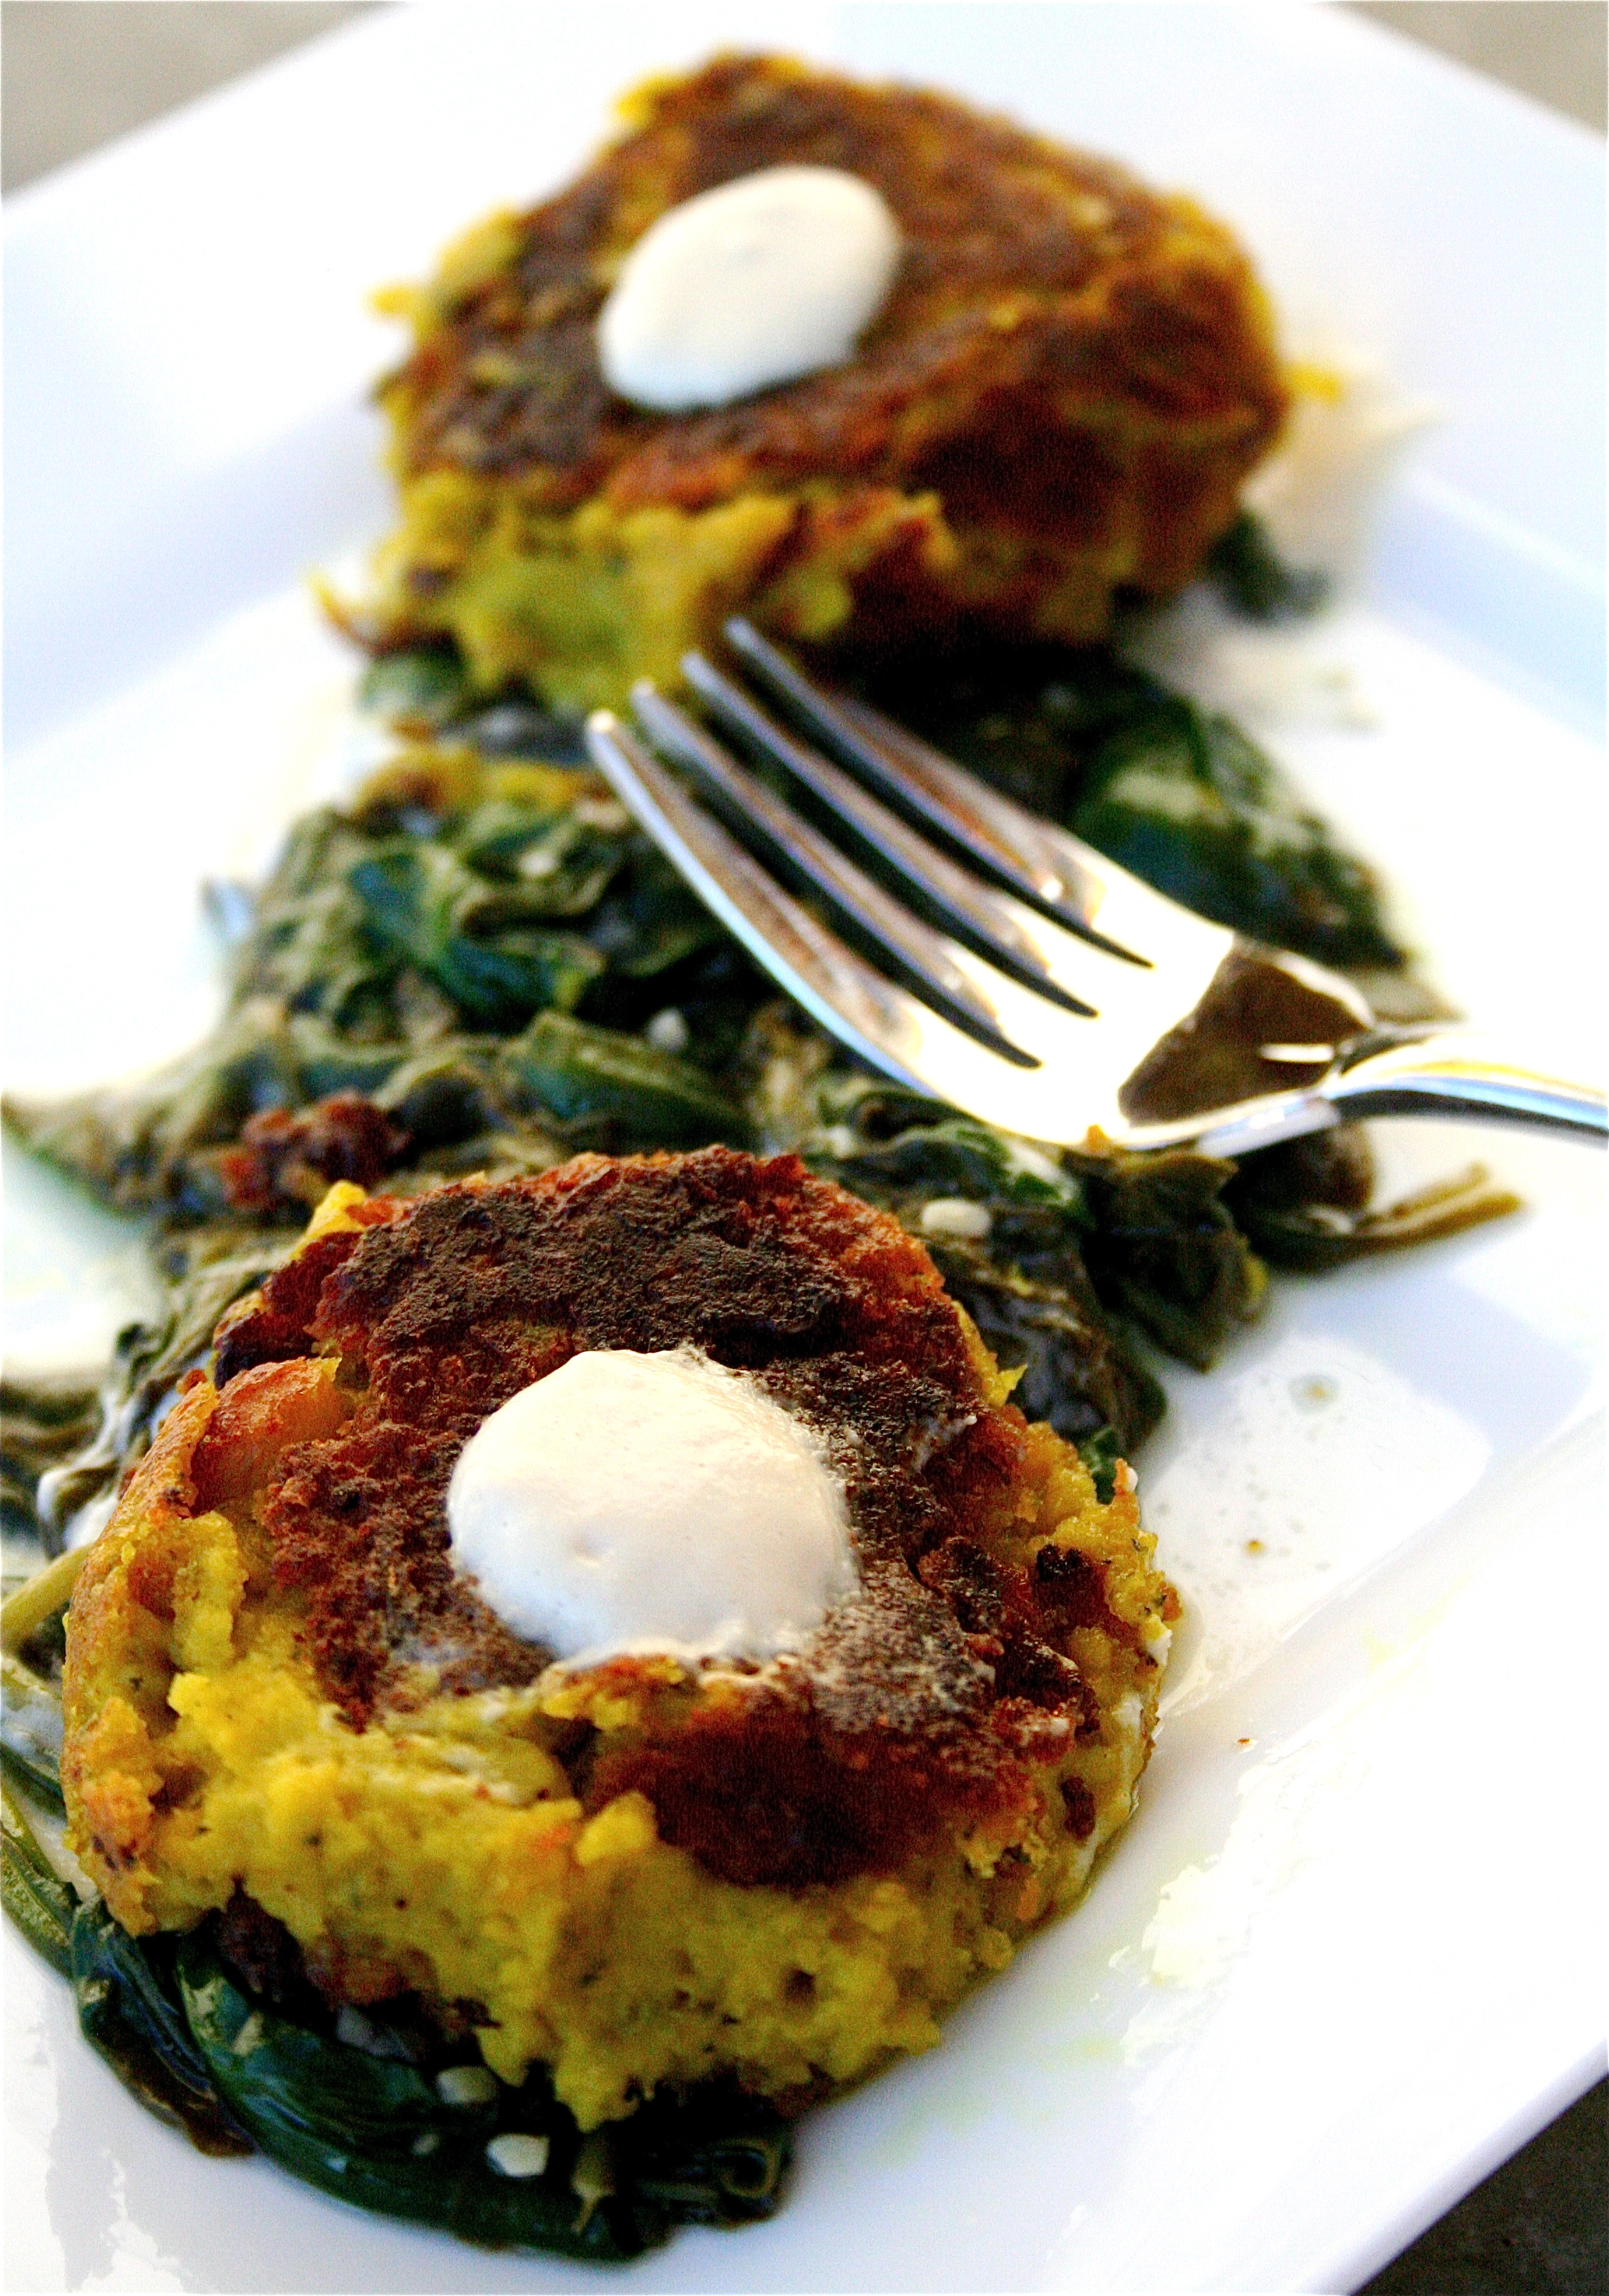
All things aside, as my tastes have changed, and I have become a lot more interested in branching out from my Midwestern-heavy cooking habits, I decided to give the old “Awful Falafel” another go-round. To my surprise, they were delicious, a snap to prepare, and my 1-year-old nephew, Oliver, LOVED them.  I served them with some wilted spinach and a Tahini-Lemon sauce….and…wow.  Super flavorful.  Super healthy (minus the oil to cook them in…).  And Super Vegan.

Happy World Vegan Day.  This is NOT Awful Falafel.  🙂

Falafel with Tahini-Lemon Sauce

Servings: about 24 2-inch falafel balls (4-6 per serving)

Ingredients

For the Falafel:

2 15-ounce canned chick peas

4 medium garlic cloves, minced

2 teaspoons cumin

1 teaspoon turmeric

1 teaspoon salt

1/2 cup minced scallions (aka green onions)

1/4 cup minced cilantro

1/4 cup water

1 tablespoon fresh lemon juice

Pinch cayenne

1/3 cup flour

Oil for frying

For the Tahini-Lemon Sauce:

3/4 cup sesame tahini

5 tablespoons fresh lemon juice

1 small to medium garlic clove, minced

3/4 to 1 and 1/2 cups water, depending on desired thickness

1/2 to 1 teaspoon salt, to taste

Instructions:

1. For the falafel: Rinse the chickpeas, and drain them well.

2. Combine all the ingredients except flour in a food processor until smooth.

3.  Transfer to a large bowl and add the flour. (At this point, you can refrigerate the “batter” for up to 3 days.)

4.  In the meantime, add about 3 tablespoons of oil to a heavy skillet over medium heat.

5.  Once heated and shimmering, drop rounded tablespoons of the falafel batter into to oil, flattening each slightly with a spatula.

6. Sauté for about 10 minutes on each side, until golden and crisp.

7.  Place the cooked falafel on a plate line with paper towels, and, if necessary, keep warm in a 300 degree oven until serving time.

8. For the Tahini-Lemon Sauce:  Place tahini, lemon juice, and garlic in a food processor fitted with the steel blade (or you can use a blender).

9.  Keeping the motor running, slowly drizzle in the water, checking every now and then to monitor the consistency.

10.  Transfer to a small bowl or container, and cover tightly.  Refrigerate until ready for use.

Who loves Falafel with Tahini-Lemon Sauce???  Oliver does!!!  (Yep, that’s what he did while eating them….for real!)  🙂

Adapted from:  The New Moosewood Cookbook by Mollie Katzen.

November 1, 2010 - 5:15 am

notyet100 - still to try this looks yum..

November 9, 2010 - 4:48 am

Yesim - i love falafel , i cooked once it was delicious but not as much as i ate in lubenon , soon i m going to lubenon for weekend i ll eat as much as i can:)) i really enjoy that and i ve made tarator sauce with it, it s very suits too:))

March 9, 2012 - 12:21 pm

tgoody - This looks good . . . I know I am late, but this is supposed to be vegan . . . so what is that white blob in the middle of the picture? Just wonderin’ . . . thanks for the interesting recipe! I plan to give it a whirl.

March 9, 2012 - 12:55 pm

srlacy - It’s the tahini lemon sauce.

August 31, 2012 - 9:58 am

Annsley - This recipe looks great! I have been absolutely loving your blog!! Great layout and so much fun to read. Your picture quality is excellent as well. Have you ever been to the Moosewood restaurant in Ithaca, NY? I just visited last week, it is wonderful!

October 3, 2012 - 1:39 pm

Yvonne - I just had to thank you for this recipe. Since going vegan I’ve tried to make falafel quite a few times, but it’s never been right, but I tried your combination and although I baked mine in the oven instead of frying, they were truly delicious and the consistency perfect, so thank you!

October 8, 2012 - 2:01 pm

Tricia - Did this today but cheated with the falafel and used trader joe’s frozen (I don’t like to fry things). Excellent sauce, the spinach was a good addition as well.

October 9, 2012 - 3:58 am

Baked Falafel with a delicious Tahini dressing | This Is My Inspiration - […] a nosey through to see what we could have for dinner, he found this fantastic falafel recipe from The Curvy Carrot I’ve modified it slightly to suit our own tastes but it was an excellent choice and I think […]

March 31, 2013 - 12:27 pm

Susan Cahalane - This sounds great, I’m making it for lunch today!! Is there anyway to follow your blog by email? I love your vegetarian/vegan ideas!

✿Sue✿
Science for Kids Blog

March 31, 2013 - 2:32 pm

srlacy - Hi Susan-

There is, but many users have been having issues-I think users with Macs are ok. If you want, you can follow me on either Facebook, Flickr, or Pinterest. I have accounts on all three, but pretty soon when the blog relaunches, you will be able to subscribe via email without any issues.

June 30, 2014 - 1:12 pm

Diana Croom - Looks good!

Spiderweb Brownie Cake

Happy Halloween, everyone!

Wherever you are, I hope you are able to enjoy the day.  This weekend has been big for parties galore-for both grown-ups and children alike.  I’ve definitely done my fair share of celebrating this year already.  But now I’m looking forward to spending the afternoon today with my nephews, Elliott and Oliver, aka Woody and Buzz Lightyear.  What are YOU dressing up as this year?

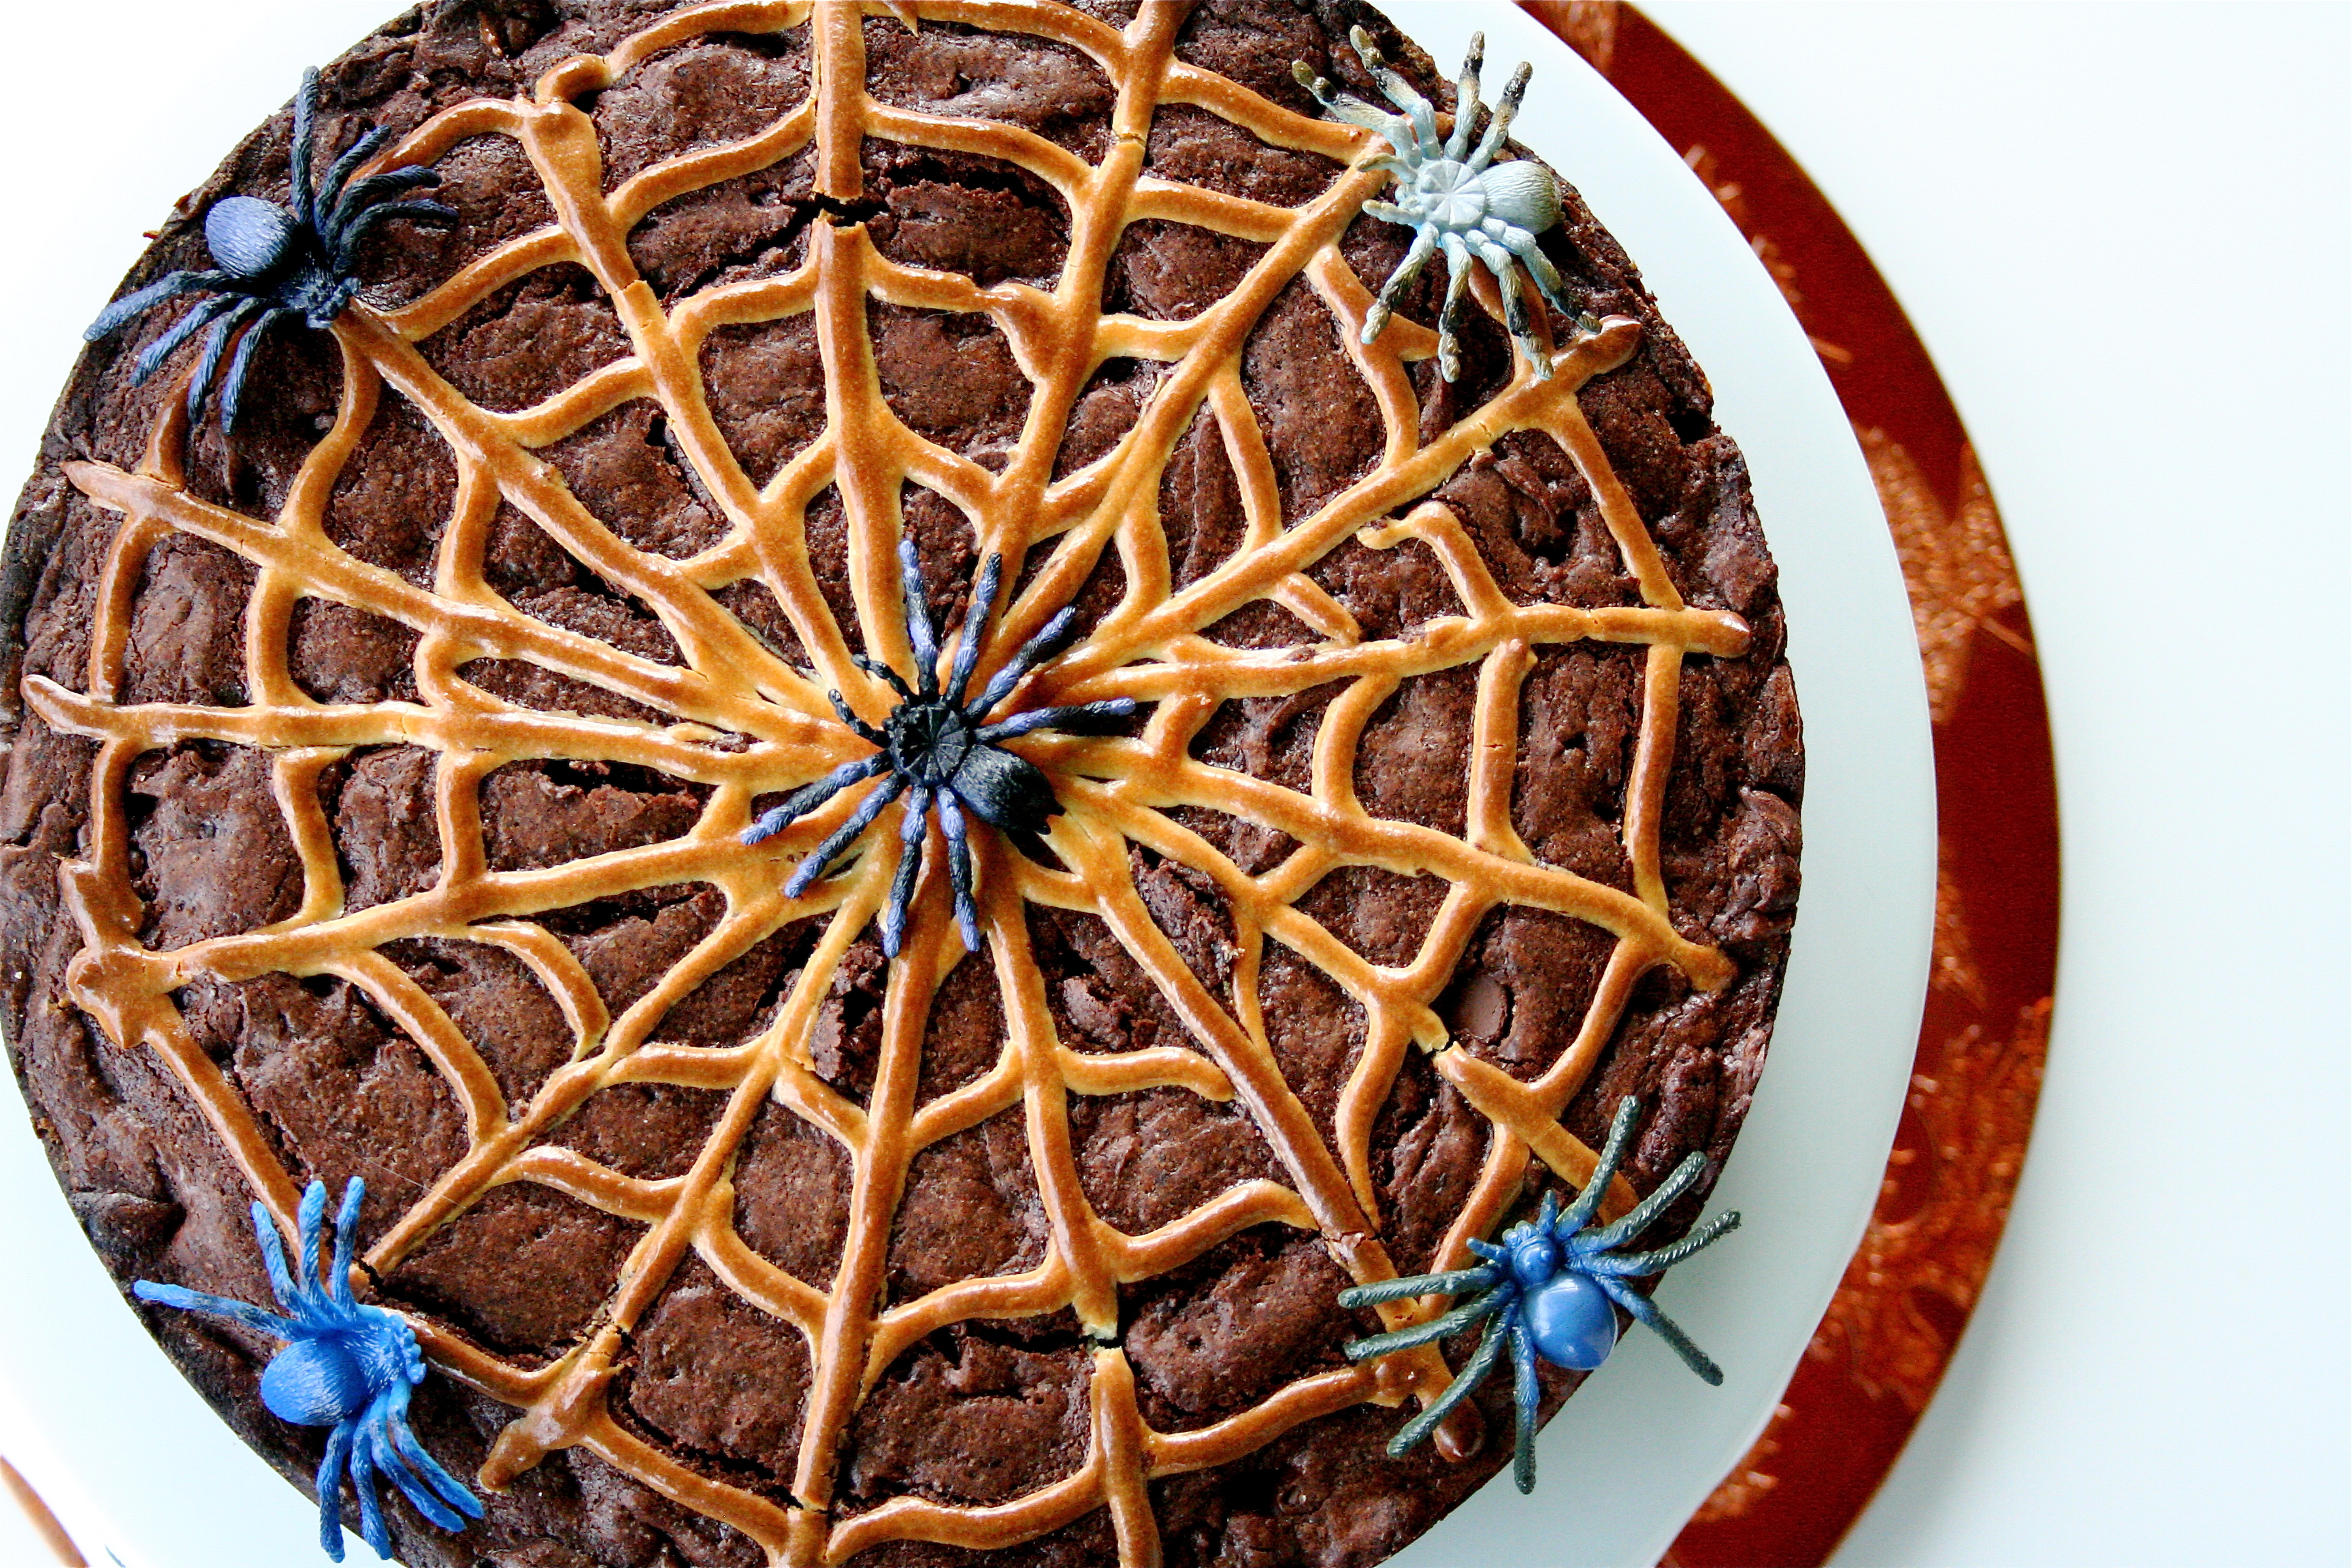
This Spiderweb Brownie Cake came at the perfect time.  I had originally planned to make some red velvet bleeding heart cupcakes for one of the parties, but my call schedule at work last week was incredibly hectic.  I wasn’t able to devote as much time to it (who does, really?) as I wanted to, so I scratched the whole idea all together…and then I saw this.  Simple, but still festive.  Not too much preparation needed.  Not too much creativity, endless frosting colors, or crazy ingredients.  In fact, I had all that I needed.  I wanted it to look festive….but I really wanted it to taste even better.  In fact, if you want….you still have time to make this today in time for your Trick or Treaters!

So, from me to you….Happy Halloween!

Spiderweb Brownie Cake

Ingredients

For the Brownie:

1 cup (2 sticks) unsalted butter

2 and  1/4 cups sugar

4 large eggs

1 and 1/4 cups Double-Dutch Dark Cocoa or Dutch-process cocoa

1 teaspoon salt

1 teaspoon baking powder

1 teaspoon espresso powder

1 tablespoon vanilla extract

1 and 1/2 cups unbleached all-purpose flour

2 cups chocolate chips

For the cream cheese “web”:

4 ounces cream cheese, at room temperature

2 tablespoons sugar

1 tablespoon unbleached all-purpose flour

1 large egg yolk

1/2 teaspoon almond flavoring (optional)

1. For the brownies: Preheat the oven to 350°F. Lightly grease a 9″ x 13″ pan, or 9″ springform pan. (You can also use 2 8-inch cake pans.)
2. In a medium-sized microwave-safe bowl, or in a saucepan set over low heat, melt the butter, then add the sugar and stir to combine.3. Return the mixture to the heat (or microwave) briefly, just until it’s hot (about 110°F to 120°F), but not bubbling; it’ll become shiny looking as you stir it.
4. While the sugar heats a second time, crack the 4 eggs into a bowl, and beat them with the cocoa, salt, baking powder, espresso powder, and vanilla till smooth.
5. Add the hot butter/sugar mixture, stirring until smooth.
6. Add the flour and chips, again stirring until smooth.
7. Spoon the batter into pan.

8. For the spiderweb: Combine the cream cheese, sugar and flour in a small bowl, and mix until smooth.9. Add the egg yolk and almond flavoring (if using), mixing until smooth once again.

10. Transfer the mixture to a disposable pastry bag fitted with a standard piping tip (I used Wilton #1).

11.Place a small pool of the mixture in the center of the brownie batter. Draw circles around this pool, about 1 inch apart, moving out from the center each time.

12. Once the circles are drawn, take a table knife, wet the tip, and draw it back and forth through the circle.

13. Use the remaining filling to trace the path where the knife travelled, to create the spokes of the web.
14. Bake the brownies for 30 minutes, until the brownies just barely pull away from the edge of the pan. The center will rise while baking, but will sink back level once the brownies are cool. Remove them from the oven and cool before cutting.Decorate with fake plastic spiders from the Halloween store (since you don’t have time to make cute ones by hand…….) and pretend it’s scary!  🙂

Source:  King Arthur Flour Company.

October 31, 2010 - 7:43 am

KeepItSweet - such a fun halloween dessert, and i can totally relate to picking the less time consuming option! sometimes you are just too busy to do everything!!

October 31, 2010 - 10:32 am

buttersweetmelody - it looks incredible! For some reason I think I would manage so screw up the design…Im not very good at that. Thanks fo the recipe!

-Amalia

http://buttersweetmelody.wordpress.com

October 31, 2010 - 10:57 am

Susi - This looks like a wonderful and tasty Halloween dessert! I love brownies with cheesecake and this is such a clever idea!

October 31, 2010 - 11:53 am

Patty - Happy Halloween! What a fun cake! Sounds delicious too. 🙂

Crispin and I dressed up as the iPhone app we just designed called iBooser. It was an interactive costume and when people tapped on us they received a confidence boosting compliment. Went over very well at fiesta last night!

The next 2 days here in Mexico are All Soul’s Day and Day of The Dead – and today we’re baking and decorating some cute skull cookies. 🙂

October 31, 2010 - 2:25 pm

RavieNomNoms - So cute! Looks awesome!

October 31, 2010 - 2:50 pm

Yesim - woow.. it really looks awesome..

October 31, 2010 - 3:45 pm

Pattie@IOlla-Podrida - BEAUTIFUL! Thanks for the tutorial.

October 31, 2010 - 10:28 pm

Kruzon - Beautiful presentationand and a brownie cake to boot.

November 1, 2010 - 11:28 am

briarrose - Wonderful job. Love the cream cheese web.

November 2, 2010 - 1:04 am

Konstant Kraver - That is super cool! Thanks for the great post:)

November 2, 2010 - 7:31 am

Peggy - Our weekend was just as hectic! It’s past Halloween but I’m still thinking about making this cake the next chance I get!

November 2, 2010 - 8:09 am

Annie - I’ve never thought of making brownies in a cake form like that. How creative and easy!

November 2, 2010 - 8:57 am

Kori - Wow, this is beautiful and so fun and festive! I’ll have to bookmark it for next Halloween. Thanks for sharing, and congrats on the top 9!!!

November 10, 2010 - 1:43 pm

Nik - Looks really delicious, beautiful and yummy

October 21, 2011 - 1:26 pm

Spooky Spider Goodies for a Screamin’ Good Halloween | Yummly - […] Spiderweb Brownie Cake (from The Curvy Carrot) […]

May 9, 2012 - 2:49 pm

Tara Noland - This would be great for Halloween!! My favourite time of year!!

September 29, 2012 - 6:32 am

51 Halloween Treats Made Simple - […] Spiderweb Brownie Cake by The Curvy […]

Pasta Puttanesca


Pasta Puttanesca.  Say it with a fake Italian accent (or a real one, if you have one, of course.)  It sounds great, doesn’t it?


I haven’t posted too much pasta on here, because, well, pasta is one of those foods I tend to overeat.  See the giant serving above?  Yep-I can down the whole thing.  You know, one serving of pasta is about a 1/2 cup or so.  The above bowl?  Probably at least 8 of those.  However, every once in  a while, I endulge.

But this recipe allows me to easily do it without so much guilt.  Usually, I go for the creamy things: fettucine, ravioli, manicotti.  Lots of cheese and cream sauce.  Mmm…..I’m sure some of those things will be popping shortly on this blog, but, for now:  Pasta Puttanesca.

This recipe is SUPER simple.  You can make the entire thing within 15 minutes-from start to finish.  I also used anchovy paste for the very first time in this recipe.  I didn’t even know where to find it in the grocery store…..(near the canned tuna, by the way), and I quickly got over my disgust of “fish paste” when I realized that it truly does add a lot of flavor to this recipe.  But not a fish flavor.  More of a savory type flavor.  I’m not so scared of it anymore.  If you still have some reservations, I am sure that this pasta dish would still be delicious without the anchovy paste.  It has a lot of other things to add flavor: Kalamata olives, capers, basil.  Serve this with some red wine and “That’s Amore!”  (ok, that was cheesy. Yes, I know.)


Pasta Puttanesca

Servings: 6

Ingredients

1 pound dried spaghetti, spaghettini, or linguine

5 garlic cloves, forced through garlic press (or use pre-minced, from the jar-much easier)

2 teaspoons anchovy paste

1/2 teaspoon hot red-pepper flakes

1 teaspoon salt

1/2 teaspoon pepper

1/3 cup extra-virgin olive oil

1 28-ounce can whole tomatoes in juice (preferably Italian)

1/2 cup pitted Kalamata olives

2 tablespoons drained capers

Pinch of sugar (optional)

3/4 cup coarsely chopped basil

Fresh Parmesan cheese, grated (optional, but, seriously worth it)


Instructions

1. Cook spaghetti in a pasta pot of boiling salted water according to package directions.

2. While pasta is boiling, heat oil in a large sauté pan on medium-high heat until shimmering.

3.  Add garlic, anchovy pasta, red-pepper flakes, salt, and pepper to pan and cook until fragrant and pale golden, stirring occasionally, about 2 minutes.

4.  Meanwhile, puree the tomatoes with their juices in a blender.

5. Add the tomato puree, olives, and capers to the sauté pan and simmer, stirring occasionally, until the pasta is ready.  Stir in the sugar, if using.

6.  Drain the pasta and add it to the sauce.

7.  Simmer, stirring and tossing the pasta with tongs, until heated through, about 2 minutes.

8.  Sprinkle with basil and Parmesan (if using).


Source:  Gourmet Magazine, June 2008.


October 30, 2010 - 8:49 am

kitchenarian - This recipe has so many of my favorite things – the olives, the capers, the basil, and of course the grated cheese. Oh yeah, all sitting on top of pasta! It looks delicious.

While I have had this in a restaurant, I have never made it at home. Thanks for the recipe.

October 30, 2010 - 12:05 pm

notyet100 - yummy platter

October 30, 2010 - 2:38 pm

Cristina @ TeenieCakes - I luv how “puttanesca” sounds too.

This is a gorgeous pasta dish with all tasty ingredients that work so well together. Beautifully arranged…served with a glass of wine – perfect. 😉

October 30, 2010 - 4:36 pm

kateiscooking - One of my very favorite dishes!! The Silver Palate also has a great recipe. You didn’t mention the history & it’s rather interesting. Turns out this is “whore’s pasta.” The ladies of the night could whip this up easily with ingredients on hand… If you want a canned version that’s really good try Rao’s. Happy Halloween!! Kate @ kateiscooking

October 30, 2010 - 5:16 pm

Shanon Lacy - Hi Kate! Great to hear from you!

LOL about the history. I am not, in any way, promoting the activity that produced such a great Italian classic! How funny is that? Well, I DO agree….it’s pretty straightforward to throw together. Thank you to those hard-working ladies. 🙂

October 31, 2010 - 11:58 am

Ann - One of my favourite pasta dishes. Your puttanesca looks delicious.

Ann