Triple Chocolate Biscotti

It’s getting to be that time of year again.  That’s right….the time of year when I down carbohydrates like its my job and drink big mugs of Aveda tea at night (oh my gosh…their tea is like my kryptonite…have you had this stuff?  I buy it in bulk….one of my most favorite things ever.)  Anyways, back to the point of this post.  Cozy nights with a good book (aka not a textbook), warm tea, thoughts about what I accomplished that day or what I have yet to accomplish…and, oh yes, THIS STUFF.

Biscotti is one of those things that I never really got turned on to until I was out of college and got it a couple of times with coffee while studying at the book store.  I had always thought of it as a grown-up type of thing, a sophisticated side to a grown-up drink.  And I never even fathomed making it myself.  It wasn’t until a friend at Christmas time had made some, and when she pulled the biscotti “logs” out of the oven, I couldn’t believe that she had made them.  And it was some funky kind of flavor, too, which completely intrigued me.  I love how you can mix just about anything in biscotti, and it will still turn out ok.

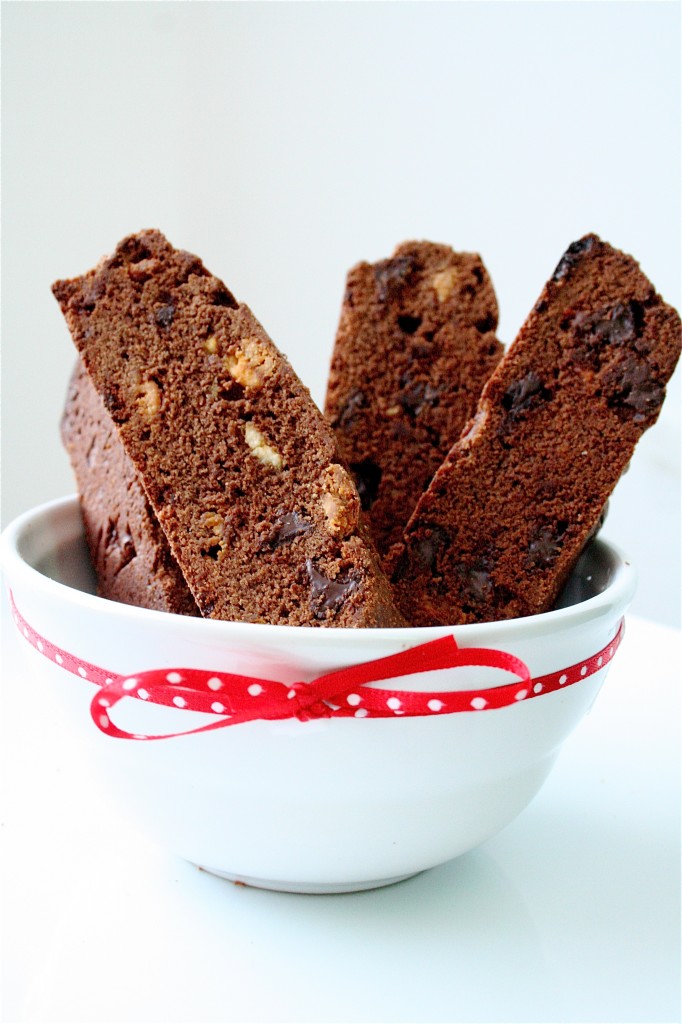
Since that time, I have gotten a little better about making my own homemade biscotti.  There’s something satisfying about dunking it into some coffee, or even my tea.  I’ve got some other recipes lurking around that I will post eventually, but, for now:  it’s chocolate time.  I think it was the name that grabbed my interest-who could say “no” to Triple Chocolate Biscotti?

And, as you will find (if this is your first venture into the land of biscotti-making), it’s really not that hard to make.  Easy dough to mix, easy to shape, easy to bake, and easy to slice.  Three cheers for Triple Chocolate Biscotti!

Triple Chocolate Biscotti

Servings: about 36 slices

Ingredients

1/2 cup unsalted butter, softened

2/3 cup sugar

1/4 cup unsweetened cocoa powder

2 teaspoons baking powder

2 eggs

1 and 3/4 cups all-purpose flour

3/4 cup white chocolate chips (Ah…Ghiradelli….)

1/2 cup semisweet chocolate chips

Instructions

1.  Preheat the oven to 375 degrees.

2. Grease a large cookie sheet and set aside.

3. In a large mixing bowl, beat butter on medium high speed about 30 seconds.

4. Add the sugar, cocoa powder, and baking powder.

5. Beat in the eggs until combined, scraping down the sides of the bowl occasionally.

6. Beat in as much flour as you can with the mixer (my stand mixer allowed me to add it all with no problems.)

7. Stir in the remaining flour, white chocolate, and semisweet chocolate chips (by hand if necessary).

8.  Divide the dough in half.

9.  Shape each half of the dough into a 9-inch-long loaf and place the loaves on the prepared cookie sheet.  Flatten each loaf with your fingertips until about 2 inches wide.

10. Bake for 20 to 25 minutes or until a toothpick inserted near the center comes out clean.  Cool completely on the cookie sheet.

11.  Reduce your oven temperature to 325 degrees.

12.  Transfer the loaves to a cutting board, and using a serrated knife, cut the loaves diagonally into 1/2-inch slices.

13.  Place the slices, cut sides down, on an ungreased cookie sheet.

14.  Bake for 7 to 9 minutes more or until dry and crisp.  Transfer biscotti to a wire rack and let cool.

Source:  The Ultimate Cookie Book.

November 11, 2010 - 9:08 am

Annie - I never tried biscotti until I was an adult either and now love it. It is also deceptively simple to make. I like that. Great recipe!

November 11, 2010 - 11:57 am

Acquired - I’ve never had biscotti, but for some strange reason it’s a recipe I’ve been wanting to try for sometime. Perhaps now is the time. Your recipe sounds divine, thanks.

November 11, 2010 - 12:13 pm

A Bowl Of Mush - I do love a good chocolate biscotti!

Looks fab!

November 11, 2010 - 3:39 pm

JP - what do you do with the eggs you have listed?

November 11, 2010 - 4:49 pm

srlacy - Ahhh… JP!

Thanks for catching that one. See step #5 above. I fixed it. This is what happens when you write the posts after working a 12 hour day. 🙂

November 11, 2010 - 10:36 pm

jenna laughs - The name of your blog is so cute. And I looooove biscotti. I will have to try this!

November 12, 2010 - 1:20 am

Laurie - I SO understand about the Aveda tea! It’s my absolute favorite! I was going overboard last winter and drank far too much –it’s a little pricey, so I haven’t had any this year. Now you just reminded me though. Darn!!!

November 12, 2010 - 11:13 am

Rachel - I took a while to warm up to biscotti too. My grandmother loved a good biscotti with her afternoon tea so she always had them in the house.
These look delicious and perfect for dunking in coffee (chocolate + coffee = bliss).

December 2, 2010 - 10:14 am

Patty - Gorgeous biscotti! Love the triple chocolate play. Italians might tell you they’re cantuccini – but I still call them biscotti. 😉

Caramel-Peanut-Topped Brownie Cake

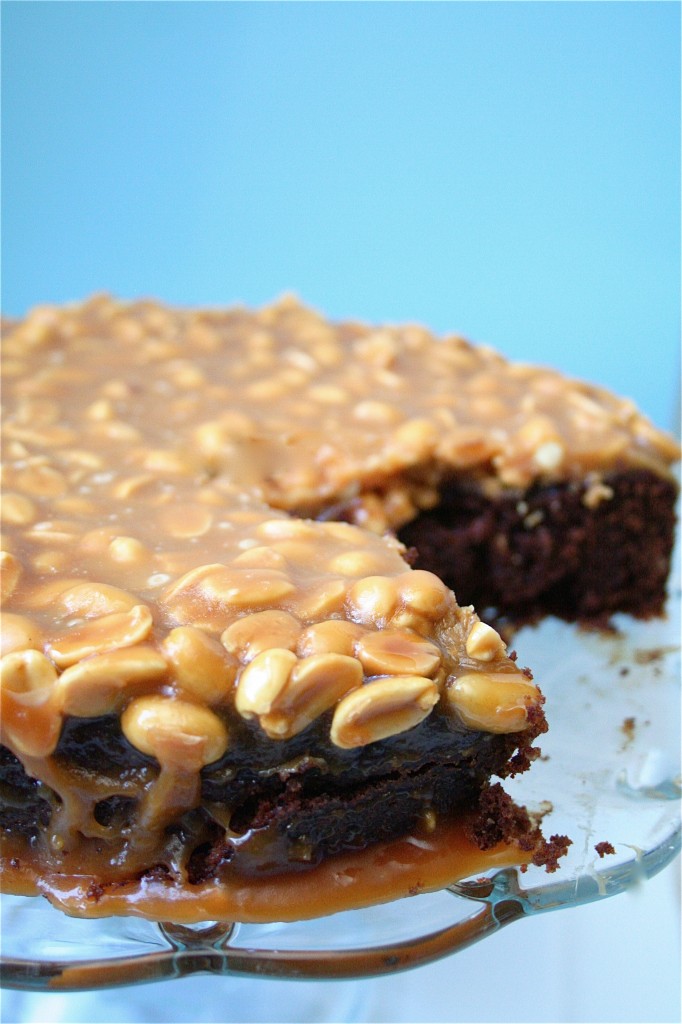
Yes, this is one of THE Dorie Greenspan cakes.  And, believe it or not, this is not my first time making this.  The first time I made it, about six or seven months ago for a friend’s birthday, I kind of ruined it.  And then I tried taking pictures of it, with no training or idea of what I was doing, and it was a complete travesty.  I was so frustrated.  I had spent about half the day working on this thing, and then I overcooked the caramel….leading to a burnt sugar kind of taste.  Now, that might be good in some circumstances (think s’mores with burnt marshmallows…I’m a fan), but, unfortunately, with this cake….scorched caramel is not good.

So….on to Round #2.  Unabashed and determined to get it right this time, I entered the kitchen with one key word….”Focus”.  No TV in the background, no Pandora radio playing from my laptop, no snacking on the cake batter, no texting while baking.  It was Game On.  I watched the caramel like a hawk, testing the color every 20 seconds or so. Because, as you will see, once the caramel starts turning color….it goes quickly.  Dorie says to let it get to a deep amber color…but I let mine get to the color of a light beer before I added the cream and butter.  This did the trick.  I don’t know, maybe it’s my stove that seems to heat it unevenly, but I erred on the side of underflavored caramel in order to salvage the entire thing.  Caramel….it’s simply a beautiful thing when done correctly.

Ultimately, this cake is not too challenging to throw together, if you can get a handle on the caramel.  In fact, the brownie cake part of it is more simple than a lot of the other recipes I have posted.  It’s just the caramel.  But you can do it.  You can and you will.

Caramel-Peanut-Topped Brownie Cake

Servings: 10

Ingredients

For the cake:

1 cup all-purpose flour

1 teaspoon baking soda

1/4 teaspoon salt

1 stick (8 tablespoons) unsalted butter, cut into 8 pieces

5 ounces bittersweet chocolate, coarsely chopped **(I just used Ghiradelli bittersweet chocolate chips….oh Ghiradelli…..sigh….)

3 large eggs

1/2 cup (packed) light brown sugar

1/4 cup sugar

3 tablespoons light corn syrup

1/2 teaspoon pure vanilla extract

For the topping:

2 cups sugar

1/2 cup water

1 and 1/2 tablespoons light corn syrup

2/3 cup heavy cream

2 tablespoons unsalted butter, at room temperature

1 cup salted peanuts

Instructions

1.  For the cake: Center a rack in the oven and preheat the oven to 350 degrees.

2.  Butter an 8-inch round springform pan, dust the inside with flour, tap out the excess and line the bottom of the pan with a piece of parchment paper.

3.  Put the pan on a baking sheet lined with parchment paper.

4.  Whisk the flour, baking soda and salt together.

5. Set a heatproof bowl over a saucepan of gently simmering water.

6.  Add the butter and chocolate to the bowl and heat, stirring occasionally, until the ingredients are just melted.

7.  Remove the bowl from the heat.

8. In a large bowl, whisk the eggs and sugars together until well blended.

9. Whisk in the corn syrup, followed by the vanilla.

10.  Whisk in the melted butter and chocolate.

11. Still working with a whisk, gently stir in the dry ingredients, mixing only until they are incorporated.

12.  Pour the batter into the prepared pan and spread until even.

13.  Bake the cake for 40-45 minutes, or until a thin knife inserted into the center comes out almost clean.

14.  Transfer the pan to a rack and cool the cake for 15 minutes, then run a blunt knife between the cake and the pan and remove the sides of the pan.  Cool the cake to room temperature.

15.  When the cake is completely cool, invert it, remove the base of the pan and peel off the paper.  Wash and dry the springform pan, and return the cake to it right-side up.  Refasten the sides.

16. For the topping: Put the sugar, water and corn syrup in a medium heavy-bottomed saucepan, stir just to combine the ingredients, and put the pan over medium-high heat on the stove.

17.  Heat, without stirring, until the caramel turns deep amber (mine was the color of light beer….test it on a white plate if you are unsure), about 5 to 10 minutes (depending on your stove and pan).  As the sugar is caramelizing, wipe down any splatters on the sides of the pan with a pastry brush dipped in cold water.

18.  Lower the heat a bit, and standing back from the saucepan, add the cream and butter.  (BE CAREFUL…IT IS HOT AND WILL BUBBLE AGGRESSIVELY.)

19.  When the caramel calms down a bit, stir to dissolve any lumps.

20.  Add the peanuts and stir.  Transfer the hot mixture to a 1-quart Pyrex measuring cup or a heat-proof bowl.

21.  Spoon the peanuts over the top of the cake, and then pour enough caramel to cover the peanuts and top of cake completely.  You may have leftover caramel.

22.  Allow the topping to set at room temperature about 20 minutes or so.

23.  When ready to serve, run a blunt knife around the edge of the springform pan and remove the sides.

Source:  Baking: From My Home To Yours by Dorie Greenspan.

November 9, 2010 - 8:51 am

Lauren at KeepItSweet - this looks amazing! i can see why you’d need to get the caramel just right

November 9, 2010 - 8:57 am

Lauren Zabaneh - this looks AMAZING! Chocolate and peanut and caramel have to be my favorite sweets combo. I get nervous with caramel too…therefore I dont’ do it much, but you’ve inspired me to give it another shot. This looks insanely good. Oh! I love the new look of your blog too. Really cute.

November 11, 2010 - 6:13 pm

natalie (the sweets life) - heck yes i will! WOW!

November 11, 2010 - 9:02 pm

LimeCake - This is a beautiful ‘mistake’. I love how it looks and it looks delicious!

November 15, 2010 - 1:37 am

Konstant Kraver - This looks so yummy , two of my favourite things caramel and peanut butter, I am thrilled to have found this blog on Foodbuzz and I would like to present you with a “Lovely Blog Award”…It will be on my blog later where you can pick it up and follow the directions.

November 15, 2010 - 6:40 am

Crustabakes - Totally agreeing with you on the caramel issues. I am such a wimp when it comes to making caramel. My caramel are always underdone. But i rather have them underdone, rather than overdone. LOL.

November 27, 2010 - 10:23 am

fooddreamer - It’s beautiful, so your focus this time obviously served you well! Burnt sugar on creme brulee…good. Burnt sugar in caramel…not so much.

November 30, 2010 - 10:28 am

Peanut Caramel Topped Brownies « Crustabakes - […] Brownie Cake (Recipe taken from The Curvy Carrot) thanks so much for […]

April 14, 2014 - 2:11 pm

doyle - I made this recently when some friends came to visit and it turned out really well. Thank you for sharing the recipe.

June 3, 2014 - 9:51 pm

Jennifer - Ugh…I’m sure this is going to taste fine, but this didn’t turn out well for me at all. 🙁 Let me guess…the topping should be made with BROWN sugar?? I cooked mine well over 10 minutes and it never changed color or thickened up like caramel. Also, because the cake “fell” in the middle while baking, all of the topping ran to the center rather than spreading nicely over the whole cake. The cake batter was delicious though….

June 3, 2014 - 11:46 pm

srlacy - Hi Jennifer-

I’m sorry it didn’t turn out for you, and I still hope it tastes fine-but the recipe should be made with sugar (granulated/white).

Rich Coffeecake with Sweet Cheese Filling

Now….that’s a title, isn’t it?

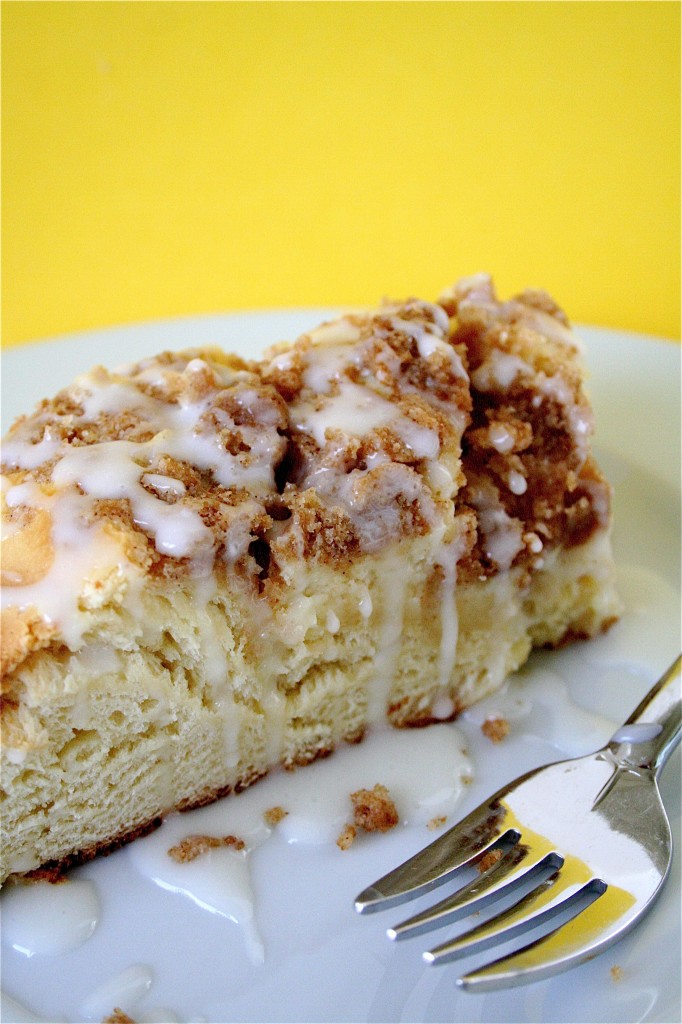
And, just to let you know, this is some coffeecake, too.  I couldn’t wait to post it.  Especially on a Sunday morning.  What a perfect day for a coffeecake.

I came across this recipe a while back, but, to be honest with you, the amount of time needed during the preparation of this treat did not satisfy my need for instant gratification when it comes to cravings.  Also, the word “yeast” in the ingredient list scared me off a little.  But, as I am learning more about yeast doughs, I am pleasantly surprised that even I (more of a cook it seems than a baker…..) can manage to create palatable breads/doughs/etc with yeast.  And if I can do it?  You can, too!

Now, this recipe takes some time.  It’s not good if you want it for Sunday morning breakfast, and it’s already 9am.  I pre-planned to have this Saturday morning, around 10 or 11 am or so, so I went ahead and prepped the night before.  The dough definitely needs the 3-4 hours to rise, then another 1 1/2 to 2 hours to rise again when you twist it.  Now, I wish I had a nice picture of the twisting, however, by the time I did all this, it was night and dark outside (I take my pictures in natural light….).  And when I had it in the oven, baking away and smelling divine, I realized that I had completely forgotten to take the picture. So I owe you.

So, as I write this, I just want to let you know that I ate half of the coffeecake today.  Half of it.  It’s that good……

Rich Coffeecake with Sweet Cheese Filling

Servings: 8-10 (makes 2 coffeecakes)*****You can half the ingredients if you only want one coffeecake.

Ingredients

For the coffeecake dough:

2 envelopes instant yeast (about 4 and 1/2 teaspoons)

1/4 warm water (about 110 degrees)

1/2 cup granulated sugar

4 large eggs

2 tablespoons milk (I used whole…because I was going ALL out on my fat content, of course…..)

1 teaspoon vanilla extract

4 and 1/4 cups unbleached all-purpose flour

1 and 1/2 teaspoons salt

16 tablespoons (2 sticks) unsalted butter, cut into 1-inch pieces and softened but still cool

For the sweet cheese filling:

8 ounces cream cheese, softened but still cool

1/4 cup granulated sugar

2 and 1/2 tablespoons unbleached all-purpose flour

Pinch salt

2 teaspoons finely grated zest from 1 lemon

1 large egg

1/2 teaspoon vanilla extract

For the streusel topping:

1/3 cup packed light or dark brown sugar

1 tablespoon granulated sugar

1/2 cup unbleached all-purpose flour

1/2 teaspoon ground cinnamon

1/4 teaspoon salt

5 tablespoons cold unsalted butter, cut into 8 pieces

For the icing:

3/4 cup confectioners’ sugar, sifted

3 and 1/2 teaspoons milk

1/2 teaspoon vanilla extract

For the egg wash:

1 large egg

1 teaspoon heavy cream

Instructions:

1. For the dough: Sprinkle the yeast over the warm water in the bowl of a standing mixer; stir to dissolve.

2.  Add the sugar, eggs, milk and vanilla; attach the paddle and mix at the lowest speed until well combined.

3.  Add 3 and 1/4 cups of the flour and the salt, mixing at low speed until the flour is incorporated, about 1 minute.

4.  Increase the speed to medium-low and add the butter pieces 1 at a time, beating until incorporated, about 20 seconds after each addition (total mixing time should be about 5 minutes.)

5.  Replace the paddle with the dough hook and add the remaining 1 cup flour; knead at medium-low speed until soft and smooth, about 5 minutes longer.

6.  Increase the speed to medium and knead until the dough tightens up slightly, about 2 minutes longer.

7. Scrape the dough into a lightly oiled bowl and cover tightly with plastic wrap.

8.  Let the dough rise at warm room temperature until doubled in size, 3 to 4 hours.

9.  Press down the dough, replace the plastic and refrigerate until thoroughly chilled, at least 4 or up to 24 hours (aka overnight).  If you are in a rush, you can spread the dough about 1 inch thick on a baking sheet, cover with plastic, and refrigerate until thoroughly chilled, about 2 hours.

10.  For the filling: Beat the cream cheese, sugar, flour, and salt in the bowl of a standing mixer at high speed until smooth, 2 to 4 minutes.

11.  Add the lemon zest, egg and vanilla.

12.  Reduce the speed to medium and continue beating, scraping down the sides of the bowl at least once, until incorporated, about 1 minute.

13.  Scrape the mixture into a small bowl and chill thoroughly before using.

14.  For the streusel: Mix the brown sugar and granulated sugars, flour, cinnamon, and salt in a small bowl.

15.  Add the butter and toss to coat.

16.  Pinch the butter chunks and dry mixture between your fingertips until the mixture is crumbly (fun part).

17.  Chill thoroughly before using.

18.  For the icing: Whisk all the ingredients in a medium bowl until smooth.

19.  When you are ready to shape the coffeecake, remove the chilled dough from the refrigerator and turn it out onto a lightly floured work surface.  Divide the dough in half.

20.  Shape the dough into a log about 8 inches long and 2 inches in diameter.

21.  Roll the dough evenly into a 40-inch rope about 1 inch in diameter.

22.  With your fingers together, gently press the log to flatten slightly into a 1 and 1/2-inch-wide strip.

23.  Using both hands, twist the rope.

24.  Loosely coil the rope in a spiral pattern (think….it should look like the yellow brick road with all the Munchkins standing by when Dorothy starts her journey), leaving a 1/4-inch space between the coils.

25.  Tuck the end under and pinch to secure.

26.  Place the coil on a parchment paper-lined baking sheet and cover with plastic wrap.

27. Proof until slightly puffed, 1 and 1/2 to 2 hours. ***See step #31 if you are going to make this now, so you can get the oven pre-heated while you do the next steps.

28. For the egg wash: In a small bowl, whisk the egg and heavy cream together.

29. Brush with the egg wash and place the filling over the center of the top, leaving a 1 and 1/2-inch border around the perimeter (WARNING: this is very tricky and mine ending up going everywhere……which actually led to delicious cheese filling around the edges of the coffeecake instead of just the center…..).

30.  Sprinkle the top with streusel.

31.  Adjust an oven rack to the middle position and heat the oven to 350 degrees.

32.  Working with and baking one coffeecake at a time, bake until deep golden brown, 25 to 30 minutes.

33.  Slide the parchment with the coffeecake onto a wire rack and cool at least 20 minutes.

34.  Drizzle the icing over the cooled cake and serve.

Source: Baking Illustrated.

November 7, 2010 - 1:37 pm

Lauren at KeepItSweet - i should try this recipe to get over my fear of yeast, based on this post, i think it would be worth it!

November 7, 2010 - 3:13 pm

Monica - This looks wonderful. I appreciate all of the detail in your step-by-step directions. You make this seem very doable. Can’t wait to try it.

November 7, 2010 - 3:31 pm

Brie - Sounds yummy!! Cant wait to make this!! 🙂

November 7, 2010 - 5:30 pm

Rachel - Now that’s rich!
I’ve been afraid of yeast in the past too but I’m learning to love it. Looks like this coffee cake is worth the time and effort – then you can sit and relax while you enjoy a piece!

November 7, 2010 - 5:34 pm

Joanne - I guess sometimes the good things in life are worth waiting for. And this is so one of them.

November 7, 2010 - 8:32 pm

Rebecca - This looks just like a cream cheese filled king cake! Yummy. Makes me miss New Orleans.

November 8, 2010 - 12:32 am

Kathy - Panini Happy - It always seems as if the best breakfast treats take till lunch to finish! Always worth it, though – this coffee cake looks divine!

November 8, 2010 - 8:43 am

Carine - Oh…Good lord!!! saliva drizzling…….

December 2, 2010 - 3:57 pm

Shawn - I made this for Thanksgiving breakfast and it was a big hit. Loved it!!!!

February 2, 2011 - 12:12 am

Gianna - This sounds so delicious! I love coffeecakes. I’m going to try this and sprinkle mini chocolate chips on one.

June 23, 2011 - 5:06 pm

Rich Coffeecake with Sweet Cheese Filling « Bittersweet Baker - […] (From Baking Illustrated, via The Curvy Carrot) […]