
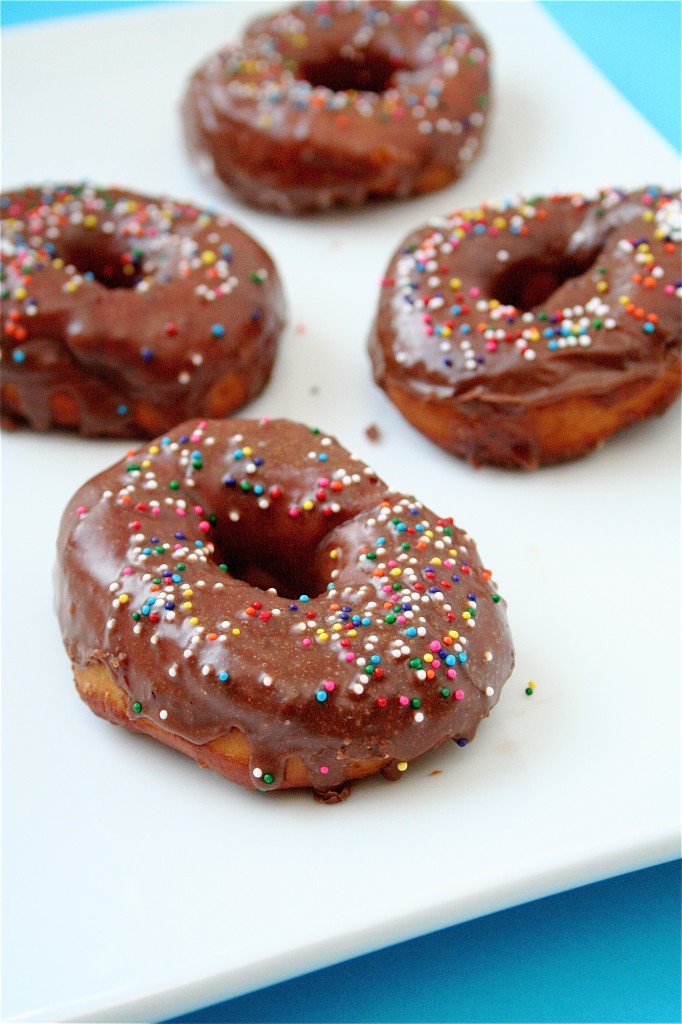
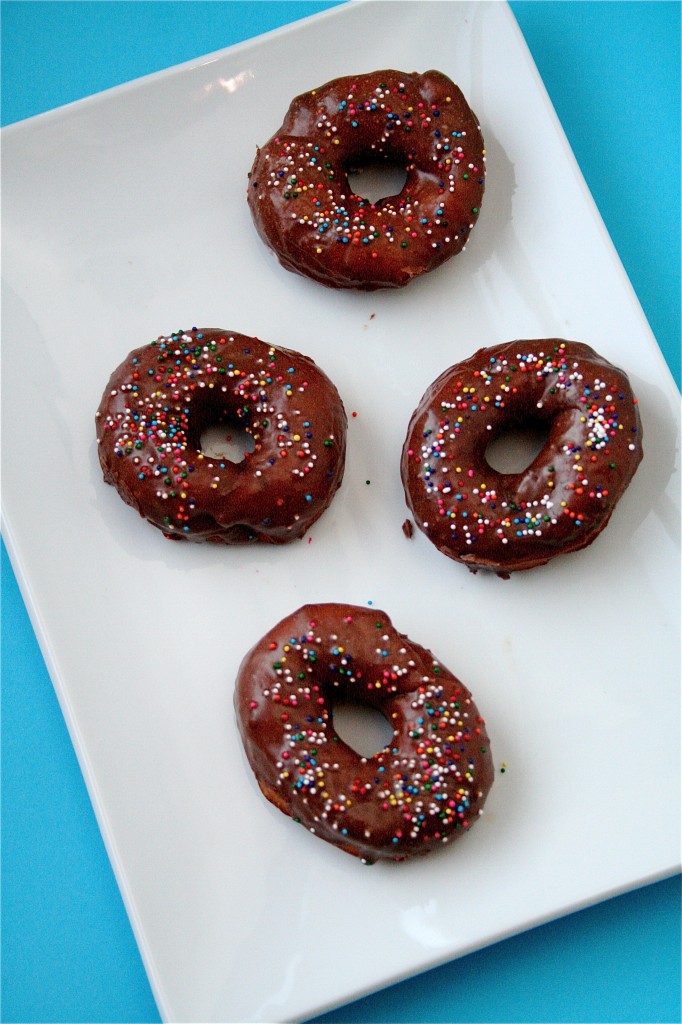
Chocolate Glazed Yeast Doughnuts

I made something for you.  In honor of making little victories.

I had been wanting to make doughnuts for a really long time.  The old-fashioned way.  With a really scary big pot full of hot oil, a skinny pair of tongs, and an intense fear of the gas flame under my pot catching on fire.  I secretly checked to see where the fire extinguisher was in the house before starting.  I was nervous, let me tell you.  The dough was easy enough to mix together (hey, I think I am getting the hang of this yeast aversion…), the rising process appeared to be successful, and those little sprinkles were beckoning to me, just waiting to top the chocolate glaze.  I attached my thermometer to the heavy side of the saucepan, poured in the oil, turned the gas flame on, and stepped back, almost as if it would bite me.  But it didn’t, of course (silly me).  The oil just kind of swirled around as it got hot, and I felt so much better.  I literally stood by the stove and watched the thermometer’s reading…..375 degrees.  Nothing more, nothing less.

The first doughnut was the scariest.  As I dropped the perfect little dough circle into the oil, it became indented by my apparent death-like grip on the tongs, and I quickly jumped back and dropped it in.  I peeked over the edge of the saucepan to see it rise to the top of the oil, bubbling away.  The recipe said that it would take about 30 seconds per side of the doughnut, but, as I started timing it in my head, I realized that it was getting really brown…really fast.  So, the poor thing looked like a little deformed rust-colored tire.  But, then, with those that followed, I got a lot better at my ability to not dent the doughnuts so much, and I was able to get a really pretty golden color to them.  It was actually fun!  So check this off my list of another scary thing in life accomplished.  The next day, I ate five doughnuts to celebrate this (tiny) accomplishment.  Yes, five.  They were outstanding. Next on my list of culinary challenges?  Jelly-filled ones, of course.  Stay tuned.

Here’s to little victories.

Yeasted Doughnuts with Chocolate Glaze

Servings: approximately 16 doughnuts

Ingredients

For the doughnuts:

3-3 and 1/4 cups unbleached all-purpose flour

1 envelope (or 2 and 1/4 teaspoons) instant yeast

6 tablespoons sugar

1/2 teaspoon salt

2/3 cup whole milk, at room temperature

2 large eggs, lightly beaten

6 tablespoons (3/4 stick) unsalted butter, cut into 6 pieces, softened but still cool

6 cups oil (I used peanut oil-and I went ahead and used the whole 48 ounce container, which seemed ok)

For the glaze:

4 ounces finely chopped bittersweet chocolate (you can also use chocolate chips!)

1/2 half-and-half

2 cups confectioners’ sugar, sifted

Sprinkles, optional

Instructions

1. For the doughnuts:  In a medium bowl, whisk together 3 cups of the flour, the yeast, 6 tablespoons sugar, and the salt.  Set aside.

2. Place the milk and eggs in the bowl of a standing mixer fitted with the dough hook.  Add the flour mixture and mix on low speed for 3 to 4 minutes, or until a ball of dough forms.

3.  Add the softened butter one piece at a time, waiting about 15 seconds after each addition.

4.  Continue mixing for about 3 minutes longer, adding the remaining flour 1 tablespoon at a time if necessary, until the dough forms a soft ball.

5.  Place the dough in a lightly oiled medium bowl and cover with plastic wrap.  Let the dough rise at room temperature until nearly doubled in size, 2 to 2 and 1/2 hours.

6.  Place the dough onto a floured surface and, using a rolling pin, roll it out to a thickness of 1/2-inch.

7.  Cut the dough using a 2 and 1/2-inch or 3-inch doughnut cutter, gathering the scraps and rerolling them as necessary.

8. Place the doughnut rings (and holes!) onto a floured baking sheet.

9.  Loosely cover with plastic wrap and let rise at room temperature until slightly puffy, 30 to 45 minutes.

10.  Meanwhile, fit a candy thermometer to the side of a large Dutch oven.

11.  Add the oil to the pot and gradually heat the oil over medium-high heat to 375 degrees.

12.  Place the rings (and holes!) carefully into the hot oil 4 or 5 at a time.

13.  Fry until golden brown (mine took about 7 or 8 seconds on each side).

14.  Remove the doughnuts from the hot oil and drain on a paper towel-lined rimmed baking sheet or wire rack.

15. Repeat with the remaining doughnuts, returning the oil to temperature between batches.

16.  Cool the doughnuts for about 10 minutes, or until cool enough to handle.

17. For the glaze:  While the doughnuts are cooling, place the chocolate in a small bowl.

18.  Heat the half-and-half on the stove or in the microwave until almost boiling.

19. Add the half-and-half to the chocolate and whisk together to melt the chocolate.

20.  Add the confectioners’ sugar and whisk until no lumps remain.

21. When the doughnuts have cooled, dip one side of each doughnut into the glaze, shake off any excess, and transfer to a wire rack to set the glaze.

22.  Decorate with your favorite sprinkles.

Adapted from:  Baking Illustrated.

December 5, 2010 - 9:34 am

Lauren at KeepItSweet - looks like you had success with your first time donuts! and they look delicious.

December 5, 2010 - 3:34 pm

Sammie - So proud of you for accomplishing hot oil, it is so scary isn’t it? Now you know why I called mom in the kitchen for my crab puffs…..LOVE the doughnuts! Hope you have leftovers? I want some!

December 5, 2010 - 10:05 pm

honeybeecooksjackfruit - I wuv doughnuts! I made them at home once, and I need to again. These look so yummy!

December 8, 2010 - 12:05 pm

Eat Good 4 Life - Just found your blog through tastespotting. Great dougnut recipe, may have to try some day 🙂

December 30, 2011 - 3:45 pm

Makelesi - what happened to step 11? I hope I haven’t missed anything out! 😀
Cant wait to try these!!!

December 30, 2011 - 5:10 pm

srlacy - Thanks for the catch! The recipe is correct as written-I have tweaked the step numbers! 🙂

January 5, 2012 - 12:46 pm

Danielle - They look delicious!

November 4, 2013 - 8:53 pm

Royal Icing Cookies

Ah, here it is.  The monster post.

I have to thank my friend, Annie, for introducing me to the world of royal icing.  I can’t remember which cookie of hers I got to try first, but I DO remember her sweetly packing me a Christmas package last year which contained a variety of insanely awesome holiday treats: one of which was her famous royal icing cookies-at which point I squealed with glee and savored every single little bite and marveled at her meticulous piping skills.  Now, I have made lots of batches of royal icing cookies since then (I do it on the side for a little cash for baby showers, bridal showers, and even some bachelorette parties!), and each time, I feel like I get the hang of it just a little bit more.  It’s intimidating, I know.

So, I have put together a post, inspired by lovely Annie (hope you don’t mind, girl), for the rest of us who are slowly working up the courage and piping skills to create some incredibly delectable AND beautiful cookies for our holiday get-togethers.  Trust me, this is going to be a very detailed and step-by-step approach.  Here goes……

The Rules of Royal Icing Cookies

1.  You must be patient (and gentle) with yourself.  Make some extra cookies for any “oops” moments if you need a certain number.  It takes the pressure off.

2. You need three days.  Three days.  I repeat…it’s ideal that you do this over a three day time period to ensure a) your cookies are completely cooled b) your flooding sets properly and c) you don’t feel rushed to get the details in.

3. Be meticulous when it comes to mixing up your icing.  A little water goes a long way, so be extremely careful when adjusting for your piping/flooding consistencies.

4.  Plan ahead.  Seriously.  Draw your designs out on paper (one of my favorite memories of Annie was when she was drawing out her designs for her Halloween 2009 cookie post during lunch one day at work and we were discussing which color would look the best….) especially if you don’t have a picture or example to look at.

5. Clean a large working space off for yourself and lay all your supplies out ahead of time.  It truly helps to be organized.

6.  Start simple.  If this is your first attempt at royal icing, pick one cookie cutter shape, one or two flooding colors, and a simple decorative design.  I made the mistake on my first attempts at setting my goals too high, and once I ended up with little houses with completely smeared shutters (I was not happy).

7.  I highly recommend the use of food coloring gels.  Some people have asked me about liquid food coloring.  That’s reaching into a realm of potential dangerous runny icing with excess liquid.  I have not tried powders.

8.  Piping and flooding consistencies:  if you overshoot on the water, just add some powdered (confectioners’) sugar and mix until you get it right.

Supplies


Pastry bags, tips, and couplers (# depends on how many colors you will be using)

Tall glasses, each filled with about 1/4-inch water

Toothpicks, to help with flooding (optional)

Plastic containers with fitted lids (# depends on how many colors you will be using)

Spoons for mixing water/color gels

Food coloring gels

Drawings/templates/pictures to use as examples

Now, this is the recipe that I have found to be my personal favorite when it comes to the cookie part.  I’ve substituted almond cookies as well, which seem to work and people like them, but I’m just a fan of big fat butter cookies.  You just can’t go wrong with these cookies.

Butter Cookies

Servings: 38 cookies

Ingredients

2 and 1/2 cups unbleached all-purpose flour

3/4 cup superfine sugar****Just put it in your food processor for about 10-15 seconds.

1/4 teaspoon salt

16 tablespoons (2 sticks) unsalted butter, softened, but still cool, cut into 16 1/2-inch pieces

2 teaspoons vanilla extract

2 tablespoons cream cheese, at room temperature

Instructions

1. In the bowl of a standing mixer, mix the flour, sugar, and salt at low speed until combined, about 5 seconds.

2. With the mixer running on low, add the butter 1 piece at a time; continue to mix until the mixture looks crumbly and slightly wet, about 1 minute longer.

3. Add the vanilla and cream cheese and mix on low until the dough just begins to form large clumps, about 30 seconds.

4. Knead the dough by hand in the bowl for 2 to 3 turns to form a large, cohesive mass.

5. Turn the dough out onto the countertop; divide it in half, pat each half into a 4-inch disk, wrap the disks in plastic, and refrigerate until they begin to firm up, 20 to 30 minutes.

6. Adjust an oven rack to the middle position; heat the oven to 375 degrees.

7. Roll out 1 dough disk to an even 1/4-inch thickness between two large sheets of parchment paper.

8. Slide the rolled dough, still on the parchment, onto a baking sheet and refrigerate until firm, about 10 minutes.

9. Meanwhile, repeat with the second disk.

10. Working with the first portion of rolled dough, cut into desired shapes using cookie cutters and place the shapes on a parchment-lined baking sheet, spacing them about 1 and 1/2 inches apart.

11. Bake until the cookies are light golden brown, about 10 minutes, rotating the baking sheet halfway through the baking time.

12.  Repeat with the second portion of rolled dough.

13.  Cool the cookies to room temperature on a wire rack.****I make my cookies the night before and let them cool completely overnight, under parchment paper so my sweet doggy Scout will not find them and eat them.

Royal Icing (make your Royal Icing on Day #2)

Ingredients

4 cups powdered sugar, sifted

2 tablespoons meringue powder

5 tablespoons water

Instructions

1. In the bowl of a standing mixer fitted with the paddle attachment, combine the ingredients and mix on low speed for about 10 minutes or so.  The icing should look thick, like paste.

2.  At this point, I divide the icing among my containers (make sure that you have lids for all of them!!).  If I am needing 4 different colors (including the colors for my decorative piping, which is the very last step), I use four different containers.

How to assemble your cookies:

Day #1: Make your sugar cookies.  Eat the scraps.

Day #2: Piping and flooding

Let the fun begin….piping.

1.  For piping color #1: First, I always add my color (gel) to get my desired icing tint.  A little goes a long way, but it may lighten a little as you add the water.  Don’t worry, you can always add more.  And, it may be hard to stir into that thick icing.  You can combat this by adding a little water (not more than a 1/4 teaspoon, though!)

2. Next, I usually add about 1/4 teaspoon of water to my icing and then stir by hand, adding a little water as I go, until I reach the desired consistency.

**For piping, you want a consistency of really thick toothpaste; i.e. it’s able to pass its way through your tip, but it won’t spread out and become flat.

3.  Add the piping icing (in various colors) to your open and folded-over pastry bags in the glasses.  **Remember, that low level of water at the bottom of the glasses serves to keep your tip from drying out and becoming blocked.)

4.  Once each bag is filled, I go ahead and twist the bags tightly to prevent the icing from “back-washing” onto my hand as I pipe.  You can use twistie ties, rubber bands, or an extremely firm grip to prevent this as well.

5. Using a steady hand, exert a constant pressure on the pastry bag, and begin piping your icing around the edges of the cookies.  **Practice first on some parchment paper or a baking sheet to make sure that you get the hang of it first.

6.  Let those beautifully piped cookies dry and set for at least an hour or two.  But, make sure you keep your icing (I do this to ensure that I have an exact color match for the flooding process).  Simply squirt the extra icing back into the container you used previously, and make sure you fit the lid tightly to prevent it from drying out!  I try to re-use my pastry bags-I simply twist them tightly or rubber band them and set them back in the glasses so they don’t dry out.  But you can always remove your tips, clean them, and get new bags to start fresh.

Now….for flooding.

Ok.  Your piping is set.  It looks great, by the way.  Don’t worry about the little minor imperfections:  uneven corners, little air bubbles, or slight cracking.  These will be nearly unnoticeable once the flooding is set.

1.  You squirted all the leftover piping icing back into the containers…

now, again, add 1/4 teaspoon of water to your icing until it reaches flooding consistency.  In my view, flooding consistency equals this:

You stir, lift your spoon off the icing and let it drip back into the container.  When the icing takes about 10 seconds or so to completely absorb back into the icing, leaving a smooth surface, you’re golden.

2.  Now, you can re-open and fold over your pastry bags and directly pour your icing into the bags (which are vertically anchored in your tall glass).

3.  Squirt a little icing out onto parchment paper or a baking sheet to make sure you get all the previous thicker icing out, and make sure you have your ideal consistency.

4.  Flood.  How I do it:  I try to follow just inside in the piped lines, using my tip to sort of smooth out the flooded icing to the edges.  I know people advocate the use of toothpicks for this (which I have used as well), but I seem to get better results if I squirt the icing out and gently spread it with the tip of the bag.  Fill in your entire cookie so you end up with a smooth, evenly distributed surface.

5.  Now, be patient.  Let those lovely cookies set overnight, or at least (bare minimum) 8 hours.  You DO NOT want to risk decorating/piping onto wet flooded icing.  It will make you very frustrated and sad.  And make sure that your icing that you have set aside in your airtight containers for the decorative piping is doing all right and hasn’t dried out too much.  You will need it for day #3.

Day #3: The final touches

Almost done-here comes the decorative piping.

1.  So now you’ve got the hang of this whole piping consistency (from day #2), right?  Because basically, you are going to re-create your piping consistency from day #2.  Add your water, 1/4 teaspoon at a time, until you reach your desired consistency.

2.  Now, using your template/drawing/picture or creative mind, pipe your decorative designs on each little cookie, applying even pressure and a steady hand.

3.  Once piped and simply beautiful, let the cookies set again for at least 1-2 hours.

The possibilities from there are endless:  package in clear cellophane bags, treat boxes, arrange on a platter, and definitely eat!


Let it Snow!

Source:  Sugar cookies from Baking Illustrated, Royal Icing and decorating/tutorial inspiration from Annie’s Eats.
December 3, 2010 - 9:56 am

Rachel - Wow. That sounds like quite a process. I had no idea so much love and labor went into royal icing cookies! I guess I must have never given it much thought, since now that I look at them I can see the level of planning and concentration that’s required.
You’re lucky to have had a friend’s guidance on these cookies and thanks so much for sharing the technique! I’ll have to work up some ambition and set aside some time for these!

December 3, 2010 - 3:06 pm

Annie - They look beautious! In fact, I had just decided I wasn’t going to do royal icing cookies in my holiday packages this year because I don’t have time to make that many, but these are just too pretty. So I’m still going to make them, just a couple for each bag. Snowflakes are one of my favorite holiday designs. Great job!

December 3, 2010 - 5:58 pm

Rosie - Loved all the thought and detail you put into this post! Thank you!!

December 4, 2010 - 7:01 pm

Lora - Wow these came out lovely. I love snowflake cookies.

December 5, 2010 - 11:00 am

Jun - So beautiful! It takes a lot of time, but i think it’s really beautiful and worth the effort!

December 5, 2010 - 11:34 am

katherine - I am wondering how long will the cookies itself last before they go stale? I am trying to figure out the schedule for making cookies for the week of christmas. I want to give cookies to my coworkers because I am cheap. This coming weekend(10th) is the only free weekend I have for this month!

Either i make the dough, freeze then bake when the time comes I guess?

December 5, 2010 - 12:08 pm

srlacy - Hi Katherine!

This is a great question.
You have a couple of options. The disks of dough can be frozen for up to 2 weeks-just defrost them in the refrigerator before using. (You can also refrigerate the dough for up to 3 days, if you decide not to freeze them.)
I am now on Day#8 since making the cookies, and I still have a couple left, and they still taste great. I would recommend, if you make them and immediately decorate them, to either package them individually (if that is what you are needing them for) or keeping them in a safe, airtight container for about a week. I have made them a week before an event, and they have been fine. In fact, I know people have kept theirs even longer, and they still have been ok.

Good luck with your cookie-baking this year! Sounds like a lot of fun!

December 5, 2010 - 12:53 pm

Juliana - Thank you so much for this incredible and delicious post! I am so looking foward now for my cookie-baking this year!! With your detailed tips, I am sure they’ll come out great! =)

December 5, 2010 - 1:12 pm

Frankie - Oh, wow. I never put that much thought into how people decorate those cute Christmas cookies. I just ravenously eat them. 😉

December 6, 2010 - 10:39 am

Kristin - I have to make 4 dozen decorated sugar cookies and I had no idea how to decorate them. THANK YOU!

December 6, 2010 - 4:20 pm

Katy - I think your royal icing/decorating skills are amazing. Too pretty to eat! Well, not if they were right in front of me. I would totally eat them.

December 10, 2010 - 1:25 am

Candice - Thank you so much for the detail in this post. It’s rare to find information about the right consistencies or things when cooking and baking.

December 14, 2010 - 10:10 pm

Janna M - I had my first experience with royal icing last night as I decorated sugar cookies to share for work. I was not patient enough to do any flooding but maybe next time I’ll be more confident thanks to your very thorough post. Thanks.
btw – It took me a while to get used to working with the icing but once I got the hang of it I got some beautiful results.

December 16, 2010 - 9:01 am

Sugar Cookies (Professional Style for Gifting) « Try It You Might Like It - […] to get used to it. I didn’t attempt the flooding method but I think that I will next time. The Curvy Carrot has an excellent tutorial on using Royal […]

February 1, 2011 - 5:03 am

The Curvy Carrot » Chocolate-Dipped Football Scotcheroos - […] batch of royal icing, in white […]

February 2, 2011 - 4:01 am

The Curvy Carrot » Pink Velvet Cake Truffles - […] batch of Royal Icing, divided and colored with desired food coloring […]

February 14, 2011 - 5:05 am

The Curvy Carrot » Chocolate Covered Strawberry Sugar Cookies - […] batch Royal Icing, divided into desired […]

May 29, 2012 - 12:37 pm

stephanie - question for you…. I am going to follow this recipie BUT I dont have a paddle for my mixer… I have a dough hook and the wisk like attachments…. which one of those would work best for the royal icing recipie? hopeing you get back to me asap as I am doing it this week.

May 29, 2012 - 12:55 pm

srlacy - Hi Stephanie-

I would try it with the whisk first. Hopefully it will hold up to the consistency of the icing.

May 30, 2012 - 10:27 am

stephanie - Thanks! the icing worked well! didnt even take 10 minutes. was very thick and school psate like very quickly. where can I share my finished product with you? this is my first time working with the icing and the cookie recipie

May 30, 2012 - 1:03 pm

srlacy - Hi Stephanie-

Feel free to post it on the Curvy Carrot’s Facebook page. That way other readers can see it, too!

May 1, 2013 - 5:03 pm

Springtime Butter Cookies with Royal Icing | berlin bakes - […] between “piping” and “flooding”, I found this post to be a huge help: http://www.thecurvycarrot.com/2010/12/03/royal-icing-cookies/) 3. Separate the icing and immediately place it in tupperware containers – it will dry out […]

September 2, 2013 - 4:18 am

Ann - Thanks for the step by step instructions 🙂
Is there any other way to make RI if I cant find meringue powder? Is it safe to use raw egg whites? Pls help…

September 2, 2013 - 4:12 pm

srlacy - Hi Ann-

I’m really not sure about this. I always seem to find meringue powder at places like craft stores, like Hobby Lobby. Even larger “superstores” like Meijer and Wal-Mart should have it (check the cake decorating section.) I would not advise using raw egg whites here.

February 28, 2014 - 9:09 am

Kate - How far in advance can I make these cookies? If they’re stored in an airtight container would they keep for a week?

February 28, 2014 - 10:42 am

srlacy - Hi Kate-

If they are stored in an airtight container, a week should be ok. I wouldn’t go longer, though, if you can avoid it.

May 22, 2014 - 10:45 am

I Ain’t Gonna Paint No More Painting Crafts | left brain craft brain - […] The Babe then painted the body parts of these too.  I’ve been using The Curvy Carrot’s Royal Icing Cookies recipe for years and they never fail to impress.  It’s a yummy butter shortbread style […]

Peanut Butter Torte

Peanut Butter Torte.  Yes, please.

I had scheduled this into my line-up of unusual desserts for Thanksgiving this year.  In fact, I can’t believe that I am admitting to you that I had this actual dessert planned for about a month in advance.  As I would flip through the pages of my “Dorie Book”, I would hesitate on this particular page, feel an intense longing, and softly release a loving sigh.  Ah, yes.  The peanut butter torte.  Page 282.  Dog-eared, pages with some  chocolate-y fingerprints of days past.  Yep, that’s the one.  I have daydreams about this cake.  The mousse filling, creamy chocolate ganache, salty and savory peanut crumbles. Oh, and let’s please not forget about that Oreo cookie crust.  If there is a heaven, then Dorie Greenspan is the head angel.  And I believe this dessert is a complete affirmation of that idea.

The Wednesday before Thanksgiving, as I left work, I had a game plan.  Hit the grocery store for some last minute things (apparently every person in my county had this same thought….), head home, make some fondue with my sister who was helping prepare some dishes with me, and then lose myself completely in the creation of this heavenly dessert.  And, true to form, as intimidating as it may look and seem, it’s not hard to prepare. It saves you valuable oven space when you’re trying to make a pumpkin cheesecake (which takes over an hour to make….) and other holiday goodies.  No, it only requires 10 minutes of baking time, and the rest is left to your mixer and food processor.  The downside?  Letting the whole thing chill for at least 4 hours….but, as we all know, good things come to those who wait.

Peanut Butter Torte

Servings: 6 to 8

Ingredients

1 and 1/4 cups finely chopped salted peanuts (for the filling, crunch, and topping-use your food processor to chop them)

2 teaspoons sugar

1/2 teaspoon instant espresso powder (or finely ground instant coffee)

1/4 teaspoon ground cinnamon

Pinch of freshly grated nutmeg

1/2 cup mini chocolate chips (or finely chopped semisweet chocolate)

24 Oreo cookies, finely crumbled or ground in a food processor or blender

1/2 stick (4 tablespoons) unsalted butter, melted and cooled

Small pinch of salt

2 and 1/2 cups heavy cream

1 and 1/4 cups confectioners’ sugar, sifted

12 ounces cream cheese, at room temperature

1 and 1/2 cups salted peanut butter-crunchy or smooth

2 tablespoons whole milk

4 ounces bittersweet chocolate, finely chopped

Instructions

1. Center a rack in the oven and preheat the oven to 350 degrees.

2. Butter a 9-inch springform pan and place it on a baking sheet lined with parchment or a silicone mat.

3. Toss 1/2 cup of the chopped peanuts, the sugar, espresso powder, cinnamon, nutmeg and chocolate chips together in a small bowl.  Set aside.

4. Put the Oreo crumbs, melted butter and salt in another small bowl and stir with a fork just until the crumbs are moistened.

5. Press the crumbs evenly over the bottom and up the sides of the springform pan (they should go up about 2 inches on the sides.)

6.  Freeze the crust for 10 minutes.

7. Bake the crust for 10 minutes, then transfer it to a rack and let it cool completely.

8. Working with a stand mixer fitted with the whisk attachment or with a hand mixer in a large bowl, whip 2 cups of the cream until it holds medium peaks.

9. Beat in 1/2 cup of the confectioners’ sugar and whip until the cream holds medium-firm peaks.

10. Scrape the cream into a bowl and refrigerate until needed.

11. Wipe out the bowl, fit the stand mixer with the paddle attachment if you have one, or continue with the hand mixer, and beat the cream cheese with the remaining 1 cup confectioners’ sugar on medium speed until the cream cheese is satiny smooth.

12.  Beat in the peanut butter, 1/4 cup of the chopped peanuts and the milk.

13. Using a large rubber spatula, gently stir in about one quarter of the whipped cream, just to lighten the mousse.

14. Still working with the spatula, stir in the crunchy peanut mixture, then gingerly fold in the remaining whipped cream.

15. Scrape the mousse into the crust, mounding and smoothing the top.

16. Refrigerate for at least 4 hours, or overnight; cover with plastic wrap as soon as the mousse firms.

17. After the mousse has chilled and set, put the chopped chocolate in a heatproof bowl and set the bowl over a saucepan of simmering water.

18. Leave the bowl over the water just until the chocolate softens and starts to melt, about 3 minutes; remove the bowl from the saucepan.

19. Bring the remaining 1/2 cup cream to a full boil.

20. Pour the cream over the chocolate and, working with a rubber spatula, very gently stir together until the ganache is completely blended and glossy.

21. Pour the ganache over the torte, smoothing it with a metal icing spatula.

22. Scatter the remaining 1/2 cup peanuts over the top and chill to set the topping, about 20 minutes.

23.  When the ganache is firm, remove the sides of the springform pan.

24.  Refrigerate until ready to serve.

Source: Baking: From My Home To Yours

December 2, 2010 - 7:30 am

cupcake - You’re killin’ me! YUM!
cupcake

December 2, 2010 - 10:45 pm

Patty - What a stellar cake! A multiple-dessert Thanksgiving sounds awesome. 🙂

December 3, 2010 - 10:32 am

Lauren at KeepItSweet - this looks incredible

December 3, 2010 - 10:32 am

Lauren at KeepItSweet - this looks incredible

December 3, 2010 - 4:25 pm

natalie (the sweets life) - i’ve made this! we actually stuck the leftovers in the freezer and ate it frozen–SO GOOD!