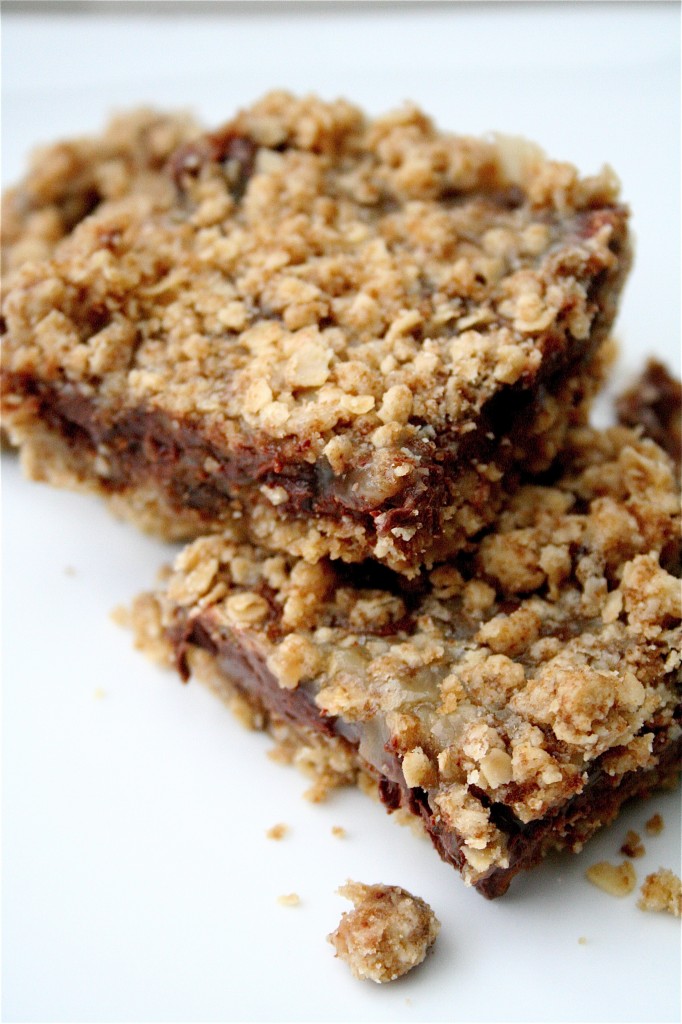
Heartland Turtle Bars

I just had to throw in a dessert, you know.  It’s Saturday, right?  Time for some R & R.

Take these turtle bars, for instance.  Over the holidays, I spent a lot of time checking out my local library.  It’s not very often that I have time off of work-especially the opportunity to feel completely free of my duties as chief resident.  And with my board exams looming in the next few months, it’s even MORE rare that I have the chance to pick up a book for the sheer joy of reading.  No textbooks, no journal articles, no board review books.  Nope.  Over the holidays, I made a pact with myself that I would take a true break from the hustle and bustle of the job and focus on taking good care of myself.

Now, there is a fine line between “taking good care of yourself” and enjoying the rare opportunity of having an open kitchen for an entire day (with natural lighting, no rush, and a seemingly endless amount of time).  And what I mean by enjoying the rare opportunity of having an open kitchen means trying the dessert recipes I have been longing to try without any reservations or guilt.  And, I am not going to lie.  I definitely have noticed (since the holidays) a little tightening of my waist line and a more ready inclination to eat some chocolate ice cream at night, but, a girl’s gotta do what a girl’s gotta do, right?  And, I achieved some major goals over the break: namely, these turtle bars.

This cookbook was one of the books that I had drooled over at Borders for the past few months, and I was delighted when my local library got it as a new book.  So, I checked it out, free of charge, and perused the pages one morning over coffee.  I’m not kidding…every single recipe I saw in the book was one that I could see myself making.  Ranging from super simple (like this one) to a little more challenging, the recipes are especially drool-worthy.  Even though I had to return the book (new books only are 14 day borrows…no renewing…because I tried….), I got this specific recipe out of the way before I had to give it back.

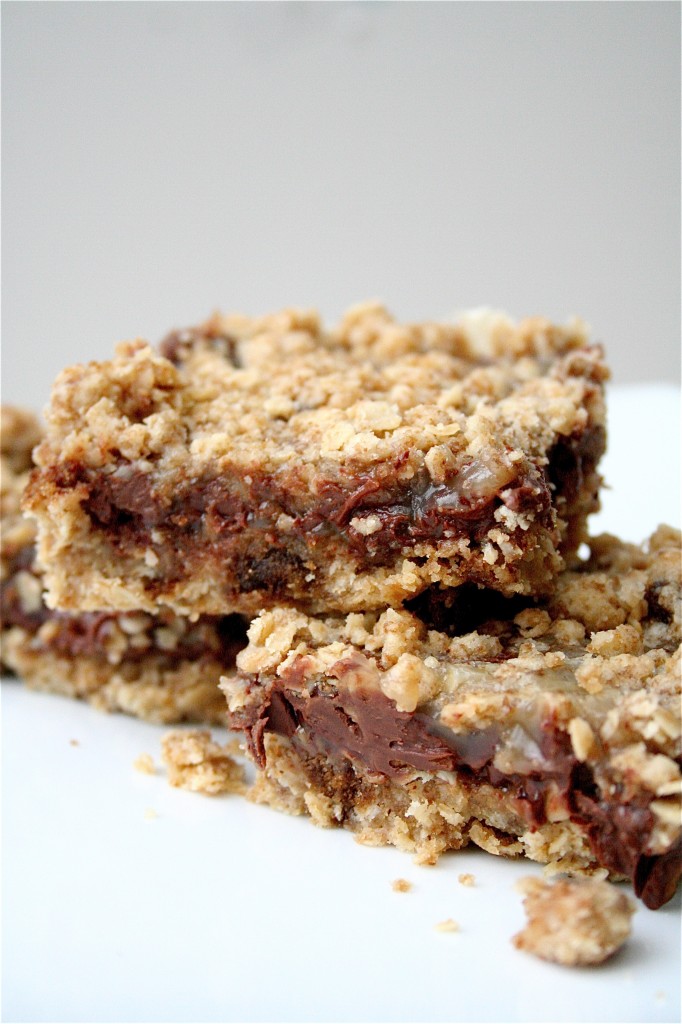
Buttery, sweet, and chocolatey?  Ummm, yes, please.  These are phenomenal, friends.  Just look.  No words. 🙂

Heartland Turtle Bars

Servings: 24 bars

Ingredients

For the bar topping and base:

1 and 1/2 cups all-purpose flour

1/4 teaspoon salt

3/4 teaspoon baking soda

1 cup firmly packed dark brown sugar

1 and 3/4 cups rolled oats

1 cup (2 sticks) unsalted butter, melted

1 cup toasted pecans, chopped into large pieces

1 and 1/2 cups chocolate chips

For the caramel filling:

1/2 cup firmly packed light brown sugar

10 tablespoons ( 1 and 1/4 sticks) unsalted butter, cut into cubes

2 tablespoons heavy cream

Instructions

1.  For the bar topping and base: Preheat the oven to 350 degrees.

2.  Butter the sides and bottom of a 9-by-13-inch glass or light colored metal baking pan.

3.  Line the pan with parchment paper so that the paper overhangs the pan on two sides.

4.  Butter the parchment.

5.  In a medium bowl, whisk together the flour, salt, and baking soda.

6. Use your hands to rub in the brown sugar.

7. Add the oats and stir until the ingredients are evenly combined.

8.  Make a well in the center of the dry ingredients, then pour in the melted butter and stir until the entire mixture is wet and combined.

9. Spread two-thirds of the mixture across the bottom of the prepared pan and bake for about 10 minutes.

10.  Remove the pan from the oven to cool (but leave the oven on).

11.  Sprinkle the pecans and chocolate chips across the cooled crust.

12. For the caramel filling: In a medium saucepan over medium-high heat, melt the sugar and butter together.

13.  Bring the mixture to a boil and boil for 1 minute, stirring constantly (the caramel will begin to darken at this point).

14.  Remove the pan from the heat, stir in the cream, and pour the caramel directly over the chocolate pecan layer.

15.  Use an offset spatula to evenly distribute the caramel.

16.  Sprinkle the remaining oatmeal mixture onto the caramel and bake for 10 to 12 minutes, or until the top is golden brown.

17.  Let the bars cool in the pan for about 15 minutes, then place the pan in the refrigerator and chill for 1 hour to firm up.

18.  Cut and serve.
Source:  directly from Baked Explorations: Classic American Desserts Reinvented

January 22, 2011 - 7:15 am

Caroline - Those look amazing. Definitely an excellent Saturday night treat! 😀

January 22, 2011 - 7:40 am

BeckyS - These will appear in my kitchen today. Thanks for the yummy recipe!

January 22, 2011 - 8:51 am

Lauren at KeepItSweet - Oh these look outrageous! I’d love a completely free day in the kitchen!!

January 22, 2011 - 11:05 am

Tweets that mention The Curvy Carrot » Heartland Turtle Bars -- Topsy.com - […] This post was mentioned on Twitter by Lisa Chan-Simms, Shanon Lacy. Shanon Lacy said: Turtle Bars. Chocolate. Caramel. Messy. Simple. http://fb.me/Orojw9fS […]

January 22, 2011 - 9:51 pm

Kat @ Cupcake Kat - Glad you enjoyed your time off
These look insanely delicious!

January 23, 2011 - 1:17 am

Lisa - Wow, seeing that bar stare me in the face is mesmerizing. It looks wonderfully gooey, sweet, and decadent, just what I like.

January 23, 2011 - 12:00 pm

SM - If you see a book you love at a book store, write down the title and author and let your library know! We are always looking for books our patrons like, because if one patron likes it, we can bet our boots another will as well!

PS — these do look great!

January 23, 2011 - 7:38 pm

Joanne - Ugh. Board review books. Don’t remind me. Those are exactly what I should be looking at right now instead of salivating over these turtle bars. But like you said. A girl’s gotta do what a girl’s gotta do! And sometimes a girl’s gotta make turtle bars. Beautiful.

February 7, 2012 - 12:27 pm

Mollie - I made these for the superbowl and I loved them! Thanks for the recipe!

http://www.eatrunread.com/2012/02/cake-of-week-caramel-oatmeal-bars.html

August 4, 2013 - 9:28 am

Oats, nuts, chocolate and caramel squares - […] by a turtle bars recipe (I don’t really know the definition for turtle bars), these nuggets contain oats, nuts, […]

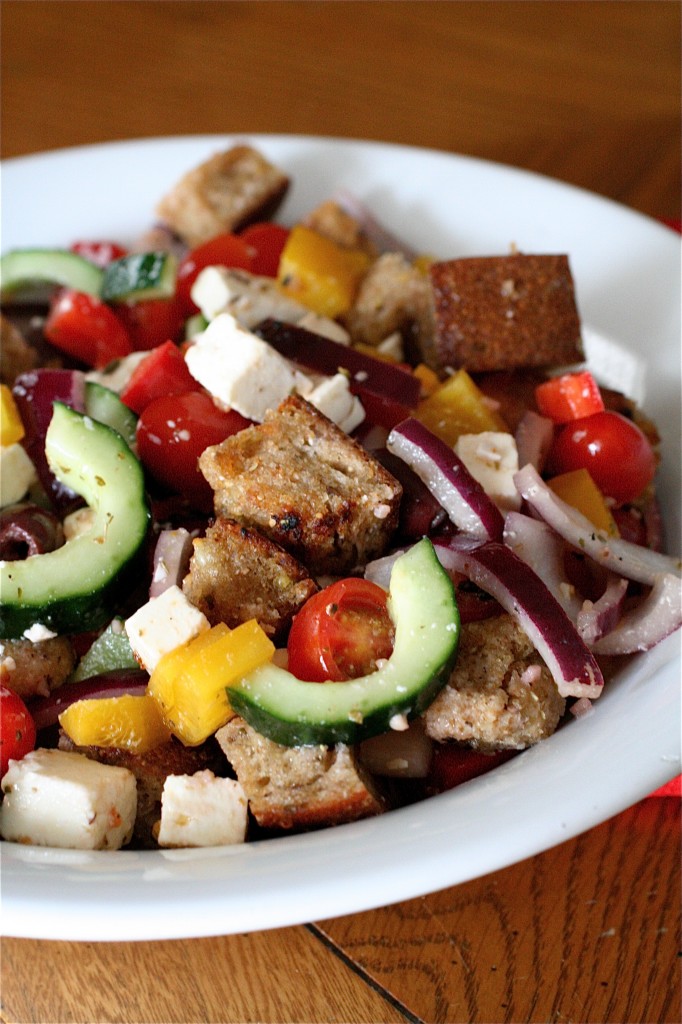
Greek Panzanella

I’m beginning to get a crush on Ina Garten.  Well, not really, but, I’m really starting to be inspired by her.  When I used to watch her show, I would be the first one to get frustrated and think, “She makes it all look so easy.  How can she pull all that off?  I would fail miserably.”  She has her stuff totally together, you know?

I was at TJ Maxx a few months ago (LOVE that store) and happened to pause in their book aisle.  Her new book, “How Easy Is That?”, just happened to be on super sale (the only one in stock, too!).  I picked up the book, thinking, “hmmm….she says it’s going to be easy….I’ll be the judge of that…”

And, let me tell you a secret.  I have a rule about buying cookbooks.  If I pick one up, start flipping through it, and if the first few recipes I see are ones that I would definitely make, then I either buy it or go check it out at the library first.  This recipe just happened to be the first one I flipped to.  Obviously, I would make the dish.  As I started flipping through it some more, I realized that many of the recipes were vegetarian-friendly (or at least adaptable to someone who eats fish occasionally).  I was sold.  I bought the book, took it home, and added my favorites to my “must-do” list.  This was the first one to be completed.  Healthy, fresh, great flavor, a lot of crunch, and inexpensive.  I’ll take it.

Greek Panzanella

Servings: 6

Ingredients

3/4 cup olive oil, divided

6 cups rustic bread (diced into 1-inch pieces)

1 hothouse cucumber, unpeeled, halved lengthwise, seeded and sliced 1/2-inch thick

1 red bell pepper, seeded and large-diced

1 yellow bell pepper, seeded and large-diced

1 pint cherry or grape tomatoes, halved

1/2 small red onion, thinly sliced in half rounds

1/4 cup good red wine vinegar

2 teaspoons minced garlic (2 cloves)

1 teaspoon dried oregano, crushed

1/2 teaspoon Dijon mustard

1/2 pound feta cheese, 3/4-inch diced

1/2 cup kalamata olives, pitted

1 teaspoon salt, plus more to taste/cooking bread

1/2 teaspoon pepper, plus more to taste/cooking bread

Instructions

1. Heat 1/4 cup of the olive oil in a large sauté pan until hot.

2.  Add the bread and sprinkle with salt and pepper; cook over low to medium heat, tossing frequently, for 5 to 10 minutes, until nicely browned.  Set aside.

3. Place cucumber, bell peppers, tomatoes, and red onion in a large bowl and toss together.

4. For the vinaigrette, place the vinegar, garlic, oregano, mustard, 1 teaspoon salt, and 1/2 teaspoon pepper in a small bowl and whisk together.

5. Whisking constantly, slowly add the remaining 1/2 cup of olive oil to make an emulsion.

6. Add the feta, olives, and bread to the vegetables in a the bowl, add the vinaigrette, and toss lightly.

7. Set aside for 30 minutes for the flavors to develop.

8. Season to taste and serve at room temperature.

Source:  How Easy Is That? by Ina Garten

January 20, 2011 - 6:18 am

Aku - Mmmmm. Looks great. I’ve been fancying a Greek salad for the past few days and I’ve also been thinking about giving a panzanella a try so I think this may be the perfect option!

January 20, 2011 - 7:16 am

Blog is the New Black - This looks amazing! I can’t wait to try it! 🙂

January 20, 2011 - 11:18 am

Annie - I LOVE this salad. I made it last summer and we were crazy about it. You can’t go wrong with Ina!

January 20, 2011 - 11:58 am

Kelli - WOWWWW!!! This looks ridiculously amazing! I will try it soon! (The “easy” bit makes it all the more appealing 🙂

January 20, 2011 - 4:34 pm

Jessica - Love this! Beautiful colors!

January 21, 2011 - 7:20 pm

Medifast Coupon - Oh so colourful, so healthy,and OH so tasty. This is a great recipe to feel refreshed from so many delicious flavours. Great recipe.

January 25, 2011 - 9:04 pm

Josie - I made this over the summer for Barefoot Bloggers, and we loved it as well – so so good!

January 26, 2011 - 9:17 am

JenK - This was everything I hoped it’d be! I made it last night for my sister and I and it was delicious! Thanks for the great recipe.

February 11, 2011 - 10:02 am

Tara @ Smells Like Home - this is one of my most favorite recipes ever! keep going with more Ina recipes and you’ll be completely hooked!

August 24, 2011 - 5:01 am

The Curvy Carrot » Sweet Panzanella - […] you’ve ever tried traditional panzanella (here’s a good recipe!), then you know that it’s basically a bread salad made with lots of fresh vegetables. […]

May 12, 2013 - 2:10 pm

Greek Panzanella - […] For recipe visit:    thecurvycarrot.com […]

California Style Tuna Salad Rolls

This is a fun appetizer idea that I knew I had to try.  It’s like sushi, but it’s not.  And, while it looks like sushi, it saves you the mess and confusion (at least in my book) of making your own “sushi rolls” from scratch, but you still get the idea of it.

Instead of using raw fish, tuna is an easy and quick substitute.  Instead of using rice, simple tortilla rolls are a great alternative.  In fact, these rolls are quite versatile.  You could put any kind of combination of vegetable in them.  And, not only are they simple and quick to make (took me 10 minutes, tops), they are cheap as well.  Next time, I’ll probably do a version of a Philadelphia roll.  The wasabi paste adds a little authentic kick to the rolls, although I like mine spicy, so next time, I will definitely be adding a little more of it to my tuna salad mixture.  Taste as you go-that stuff can be dangerous! 🙂

California Style Tuna Salad Rolls

Servings: 4

Ingredients

1 can albacore tuna, in water, drained and flaked

3 tablespoons mayonnaise

1/4 teaspoon wasabi paste (or more, if you like it hot)

2 10-inch flour tortillas

2 medium leaves Boston lettuce

1 Kirby cucumber, peeled, seeded and coarsely shredded lengthwise

1 medium carrot, peeled and coarsely shredded

1/2 of a ripe avocado; peeled, pitted, and sliced 1/2-inch thick

Instructions

1. Combine the tuna, 2 tablespoons of the mayonnaise, and wasabi pate in a small bowl and mix until blended.  Set aside.

2.  Lay the tortillas on a work surface and spread 1/2 tablespoon of mayonnaise on each tortilla.

3. Place one lettuce leaf on each tortilla, flat.

4. Arrange the cucumber, carrot, and avocado lengthwise in rows near one edge.

5.  Spoon the tuna in a line next to the vegetables (away from the edge).

6.  Roll each tortilla up snugly into a cylinder.  Cut crosswise in half.

Source: Real Food for Healthy Kids, July 2008

January 18, 2011 - 9:04 am

Trish @I_am_Succeeding - I love love love this!!!

January 18, 2011 - 1:37 pm

Annie - Dammit, Shanon, these look so good! I wish tuna was not on the high mercury list 🙁 And they really just make me want sushi more than I already do. Less than three months….

January 18, 2011 - 1:52 pm

srlacy - Hahaha! I thought about you when I made them. What’s not on the high mercury list? Crab? I bet you could substitute. They were really good, though.

January 18, 2011 - 7:12 pm

The Cooking Teacher - This would be a great substitute for my students when we do sushi since I can’t use raw fish in school…great idea! A friend of mine did dessert sushi in culinary school where she dipped spring roll wrappers in green gelatin for the nori and filled the rest of the “sushi” with marzipane treats, it was adorable!

January 19, 2011 - 8:28 am

Lauren at KeepItSweet - These are so fun! Love this idea for all sorts of variations.

January 19, 2011 - 3:41 pm

Jenny @ StrungByColor - Totally making these!!!

January 19, 2011 - 8:24 pm

Kelli - Hi, Curvy Carrot! Like you, love you, miss you!

February 29, 2012 - 10:49 pm

Am @ The Cook's Sister - Great idea for an appetizer! I’m saving this recipe for the next pot luck I attend!

October 8, 2012 - 12:21 pm

Weekly Menu plus Free Recipe Cards « - […] California Style Tuna Salad Rolls […]

May 12, 2013 - 2:04 pm

California Style Tuna Salad Rolls - […] source:  thecurvycarrot.com […]