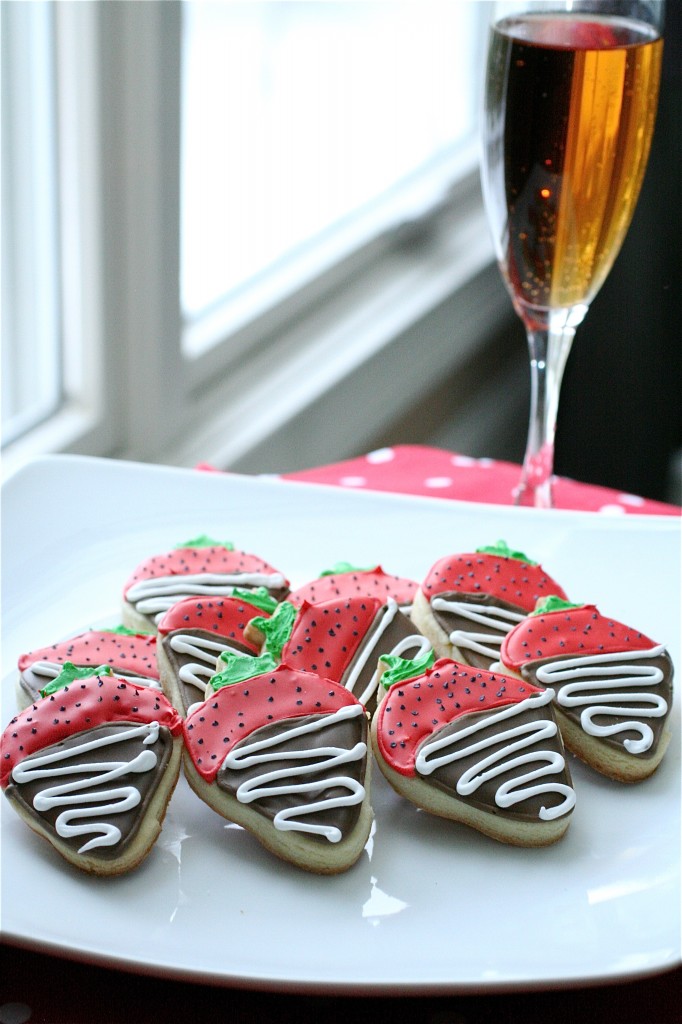
Chocolate Covered Strawberry Sugar Cookies

Happy Valentine’s Day!

I hope you are all enjoying your day, enjoying the things that you love the most.

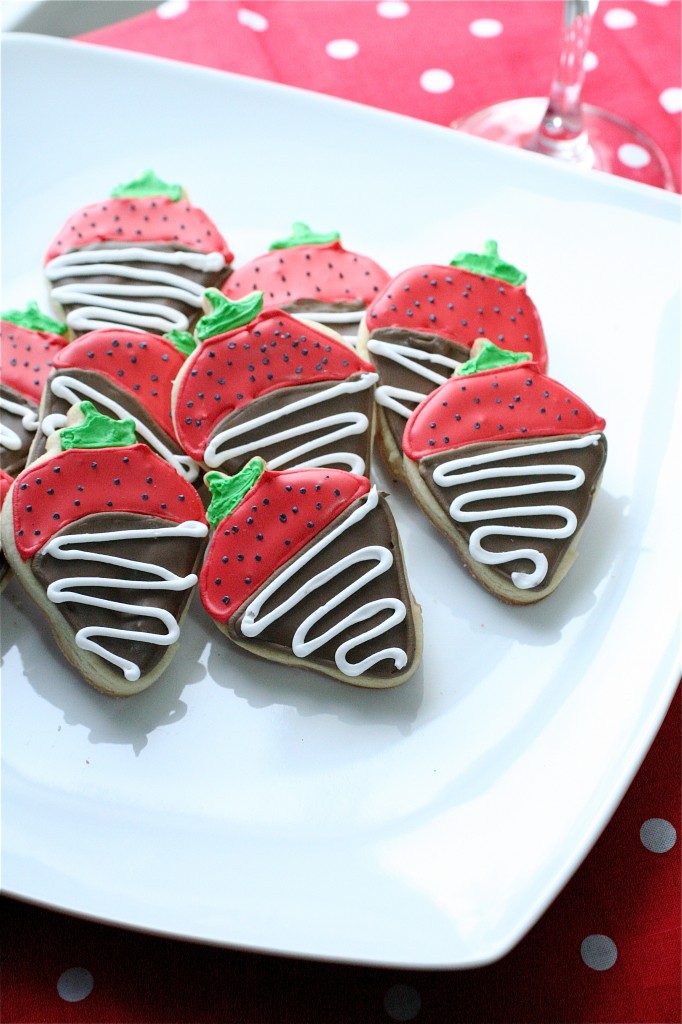
I thought that chocolate covered strawberry sugar cookies with royal icing might get you in the spirit.  🙂

I saw these little 3-inch or so cookie cutters at Sur la Table, and I had to have one.  With Valentine’s Day coming up, I wanted to try out a new sugar cookie recipe and play around with royal icing again.  They certainly got me in the loving spirit.  I have to say, while I am glad that I tried this new sugar cookie recipe, I still love my old one more.  The flavor of these cookies is great-light and buttery, but they are definitely not as soft and chewy as my other cookie recipe.  It’s a personal preference, I guess.  I always want my royal icing cookies to be soft-not crisp.  I was a little extra cautious with my baking time of these because of the small size.  I ended up baking them for only 10 minutes total, and that seemed to do the trick.

Enjoy!

Chocolate Covered Strawberry Sugar Cookies

Servings: approximately 36 3-inch small strawberry cookies

Ingredients

2 cups all-purpose flour, plus more for rolling

1/2 teaspoon baking powder

1/4 teaspoon salt

1/2 cup (1 stick) unsalted butter, room temperature

1 cup granulated sugar

1 egg

1 teaspoon vanilla extract

One batch Royal Icing, divided into desired colors****I added a little bit of dark cocoa powder to the “chocolate” royal icing-it added a little bit of color and a hint of chocolate flavor

Instructions

1. In your standing mixer fitted with the paddle attachment, beat the butter and sugar until light and fluffy, 2-3 minutes.

2. Meanwhile, in a separate medium bowl, combine the flour, baking powder, and salt.

3. Once the butter is light and fluffy, add the egg and vanilla, mixing well.

4. With the mixer on low speed, gradually add the flour mixture.

5. Mix until combined.

6.  Divide the dough into two halves, form into 4-5-inch flat disks, and wrap tightly with plastic wrap.

7. Freeze the dough until firm (about 20 minutes).

8. In the meantime, preheat the oven to 325 degrees.

9.  Line two baking sheets with parchment paper.

10.  Remove the dough disks from the freezer, one at a time.  You will need them to warm up a little bit before rolling.

11.  Once malleable, roll the dough out onto a lightly floured surface to an 1/8-inch thick rectangle, dusting with extra flour as needed.

12.  Cut out the strawberry shapes with your cookie cutter.

13.  Carefully transfer each cookie to the prepared baking sheets, rerolling and cutting out more shapes as needed, and repeating with the second dough disk.

14.  Bake each baking sheet, rotating halfway through, until the edges are lightly golden, 10 to 18 minutes.  Cool completely on wire racks.

15.  Once your royal icing is prepared and divided into the respective containers, pipe and flood the cookies as desire.

Please see my Royal Icing tutorial for some helpful hints and tips, as well as royal icing decorating instructions.
Source:  Martha Stewart’s Basic Sugar Cookies, Royal Icing inspiration and recipe originally from Annie’s Eats.

February 14, 2011 - 6:55 am

Medeja - In a smaller picture they really looked like strawberries 🙂 really nice job 🙂

February 14, 2011 - 8:08 am

Blog is the New Black - Cutest cookies yet!

February 14, 2011 - 8:40 am

Angie (Telly's Tasty Tidbits) - Oh my gosh, these are too adorable!!

February 14, 2011 - 8:48 am

Josie - Those are insanely cute, Shanon! Happy Valentine’s Day!!

February 14, 2011 - 11:25 am

natalie (the sweets life) - these are so stinking cute! Mucho impressed!!

February 14, 2011 - 11:35 am

Annie - Aw, they turned out so cute! Love them.

February 14, 2011 - 11:42 am

Stephanie - How freakin’ cute!!

February 14, 2011 - 3:34 pm

wizzythestick - These are really too adorable.

February 14, 2011 - 3:48 pm

Katy - ADORABLE! I love these. My favorite treat now in cookie-form!

February 15, 2011 - 2:00 pm

Jackie - How cute are these!! Love ’em!

October 9, 2011 - 1:40 am

Marilyn - Can you give us your favorite recipe for sugar cookies?

October 9, 2011 - 8:45 pm

srlacy - Hey Marilyn-

Here is a link to a royal icing tutorial with my favorite sugar cookies, from Baking Illustrated. This recipe is, by far, the best one I have ever tried!

http://www.thecurvycarrot.com/2010/12/03/royal-icing-cookies/

April 30, 2013 - 2:28 pm

Chocolate Covered Strawberry Sugar Cookies - […] For recipe visit the source:  thecurvycarrot.com […]

Cherry Almond Brownie Bites

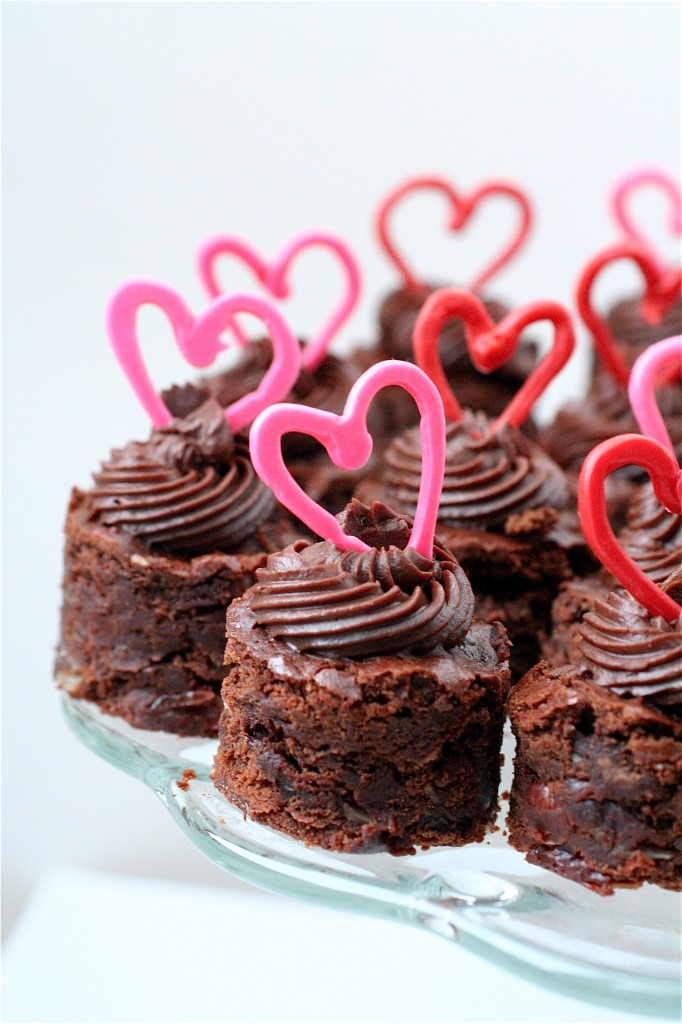
Here is decadent dessert #2 in my line-up of Valentine’s Day treats.  THIS is what I call celebrating Valentine’s Day.

I came across this recipe a while back, and I realized I didn’t have too many cherry chocolate combinations on the blog.  I have posted a chocolate covered cherry recipe in the past, but that was it.  I love the combination of chocolate and cherries-I love cherry flavored anything.  You know those Mr. Scent markers?  Yeah, the cherry one was, by far, my favorite as a kid.  Still is.

I realize I have been getting a little crazy with the candy melts lately.  But, I swear, these things are addicting to work with.  I’m finding myself doodling pictures here and there, coming up with new ways to work with and color those candy discs.  The possibilities are endless, but I promise you this is my last post with the candy melts in a while.

These heavenly little brownie bites were made in the usual way, in an 8 x 8-inch square baking pan, and then I used a small 1 and 1/2-inch round cookie cutter to cut out the rounds.  Surprisingly, I got a lot more out of the batch than I thought I would.  I added a swirl of thick and creamy chocolate ganache using my Wilton 4B large tip.  As my brownies were cooling, I simply melted down the candy melts (originally white in color), and then, once melted, I divided the batch in two and colored them red and pink with my food coloring gels. I filled my pastry bags with the melted candy, popped a Wilton #2 tip on each bag (one for the pink and one for the red), and then piped out heart designs on some wax paper.  It didn’t take that long for the candy to harden.  Once the ganache was set, I simply added a little candy heart to the top of each one to give it more dimension and served them later that night.

This brownie has incredible flavor-I opted for bittersweet chocolate in the recipe to decrease the sweet factor because I was afraid the cherries and additional ganache would make them too sugary-I was wrong.  If you like dark chocolate, then you need to try it with the bittersweet chocolate.  If you prefer your brownies to be sweet, try it with milk chocolate instead. I soaked the dried cherries in apple juice (see below) instead of the amaretto since I didn’t have any on hand, but I bet soaking the cherries in the alcohol would make this a more grown-up treat.

Cherry Almond Brownies

Servings: approximately 16  1 and 1/2-inch brownie rounds

Ingredients

For the brownies:

1/2 cup dried cherries, chopped

1 tablespoon apple juice (or Amaretto liqueur)

3/4 cup chopped unsweetened baking chocolate

1/2 cup unsalted butter, room temperature

1 cup granulated sugar

1/2 teaspoon salt

2 large eggs

3/4 cup all-purpose flour

1/2 teaspoon baking powder

1/2 cup sliced almonds, toasted

1 15-ounce can pitted dark, sweet cherries, drained***You can chop these if you want smaller pieces of cherry in the brownies.

1/2 cup bittersweet chocolate chips (feel free to substitute semisweet or milk chocolate if you prefer a sweeter brownie)

For the ganache:

4 ounces bittersweet chocolate chips

1/2 cup heavy cream

1 tablespoon unsalted butter, at room temperature

For the candy melt hearts:

1 14.5-ounce bag white candy melts

Red gel food coloring

Pink gel food coloring

Instructions

1. For the brownies: Preheat the oven to 350 degrees.

2.  Generously butter an 8×8-inch square baking pan, set aside.

3. In a microwave-safe bowl, combine the dried chopped cherries and the apple juice, cover, and microwave for 45 seconds.  Set aside to cool.

4. In a medium saucepan over low heat, melt the chocolate and butter, stirring frequently until smooth.

5.  Add the sugar and salt, whisking continuously.  Set aside to cool to room temperature.  **I waited about 10 minutes or so.  You could speed this process up by refrigerating it briefly.

6.  Once cooled, transfer the chocolate mixture to your standing mixer fitted with the paddle attachment.

7. Add the eggs, one at a time, to the chocolate mixture.

8. Add the flour, baking powder, soaked cherries, toasted almonds (it’s ok if they break up), canned dark sweet cherries (also ok if they break up a little), and chocolate chips. Mix well.

9. Pour the batter evenly into the prepared baking pan.

10. Bake the brownies for 25-30 minutes, or until a cake tester inserted into the center comes out clean.

11.  Remove from the oven and let cool to room temperature before cutting with your cookie cutter rounds.

12.  For the ganache: In a small saucepan over medium heat, bring the cream to a very gentle simmer (do not boil!)

13.  While the cream is warming up, place your chocolate chips in a separate medium-sized bowl.

14.  Once the cream is hot, pour it over the chocolate and let sit for 1-2 minutes.

15.  Gently whisk the mixture until smooth.

16. Add the butter and continue to whisk until completely incorporated and smooth.

17. Allow the ganache to come to room temperature (it will thicken), or you can place it in the refrigerator, stirring every 10 minutes, until it reaches your desired consistency.

18.  Once thickened, place the ganache in your pastry bag fitted with the Wilton 4B tip, and lightly swirl your ganache onto the top of each brownie bite.

19. For the candy hearts: In a heatproof bowl over gently simmering water, melt the candy melts, stirring frequently until completely smooth.

20. Remove from the heat, and, working quickly, remove half of the mixture to a second bowl.

21.  Add your desired gel colorings to each half, returning the bowls to their positions over the simmering water, if need be.  ***Remember, this stuff cools and hardens quickly.

22.  Add the colored candy melt mixtures to separate pastry bags fitted with Wilton #2 tips.

23.  Over sheets of wax paper, gently pipe out your heart shapes.

24. Let cool to room temperature.

25.  Garnish each brownie bite with a candy heart.

Happy Valentine’s Day!

Sources:  Brownies adapted from King Arthur Flour Company and ganache directly from Annie’s Eats.

February 13, 2011 - 6:07 am

bigFATcook - Wow! These bites look absolutely GORGEOUS!!!! I’m sure making them for my valentine <3 :))

February 13, 2011 - 9:29 am

marla - Love the combo of cherry, almonds and chocolate. Great dessert for Valentine’s Day!

February 13, 2011 - 10:35 am

Medifast Coupons - Well don’t these brownies look so decadent, yum!
Happy Valentine’s

February 13, 2011 - 11:15 am

Kelli - So cute! Happy Valentines day, tomorrow, my beautiful friend! xo

February 13, 2011 - 3:29 pm

Patty - Yum yum YUM! Thanks for sharing your sweetness. 🙂

February 13, 2011 - 4:58 pm

Dina - they look so cute and sound yummy!

February 13, 2011 - 7:22 pm

Blog is the New Black - These sound wonderful and I like the garnish!

February 13, 2011 - 11:14 pm

A Bowl Of Mush - These are so cute and romantical. Delicious!

February 14, 2011 - 12:39 am

Georgia @ The Comfort of Cooking - These are so adorable and perfect for Valentine’s Day! They look just so yummy and petite and wonderful. Thanks for sharing, Shanon!

February 14, 2011 - 1:17 pm

Tweets that mention The Curvy Carrot » Cherry Almond Brownie Bites -- Topsy.com - […] This post was mentioned on Twitter by Stephanie D, Shanon Lacy. Shanon Lacy said: Cherry Chocolate Almond Brownie Bites. If you love dark chocolate, this is the dessert for you. http://fb.me/zI1pfypX […]

April 30, 2013 - 2:26 pm

Cherry Almond Brownies - […] For recipe visit the source:  thecurvycarrot.com […]

January 12, 2015 - 7:28 pm

rhiannon {paperclips and peonies} - So perfect for valentines day! Love this!

Mini Chocolate Cupcakes

I’m on a Valentine’s Day kick.  The next few posts are going to be all about one of my favorite things: baking.  And this post?  Baking with chocolate.

I don’t know what it is: I equate Valentine’s Day with chocolate.  Not with fancy dinners, not with flowers, not with jewelry.  For me, it’s all about the chocolate.  When I was a little kid, my dad would always bring home a tiny red heart-shaped box full of chocolates-one for my older sister, Sara, and one for me.  Valentine’s Day has always had a special place in my heart-but not for the romantic association.  It’s more of a nostalgic thing for me as a kid-knowing that my dad would give my mom a big box of chocolates, and then always take care of his two “little valentines”.  Love it.

I recently went through a 10 year hiatus where Valentine’s Day was never celebrated.  A holiday made up by Hallmark?  A racket for upscale restaurants and wine sales?  How about florists?  Whatever opinion you may have, I think Valentine’s Day is just another day to truly tell those around you how much they mean to you-regardless of the gifts given or received, big night out plans, or mushy sentiments.  I don’t know.  I still do (and always have) had a little love for the day proclaiming to celebrate love.  And this year I am celebrating.

So, I’m foregoing the entrees, appetizers, and side dishes for the next few posts.  This is your fair warning.  These next few posts are celebrating some of MY loves-desserts.

Mini Chocolate Cupcakes

Servings: approximately 36 mini cupcakes

Ingredients

For the cupcakes:

1 and 1/2 cups all-purpose flour

1/2 cup cocoa powder***I used the “extra-dark” kind, and I loved the results!

2 teaspoons instant coffee powder

1 cup granulated sugar

1 teaspoon baking powder

1/2 teaspoon baking soda

1/4 teaspoon salt

3/4 cup milk***I used 2% because that’s what I had on hand.

1/2 cup oil**I used peanut oil because I also had that on hand-it was an experiment. (and, in my opinion, an experiment with good results)

1 teaspoon vanilla extract

2 teaspoons apple cider vinegar

For the frosting: (You probably will not use all of this frosting-so please feel free to divide it in half, if necessary)

1 cup (2 sticks) unsalted butter, room temperature

12 ounces cream cheese, room temperature

4 cups powdered (confectioners’) sugar

3/4 teaspoon pure vanilla extract

Rose or pink gel food coloring, to desired tint

Sprinkles, optional

Instructions

1. For the cupcakes: Preheat the oven to 350 degrees.

2. Line your mini muffin pans with your desired paper liners (or alternatively, just spray generously with cooking spray)

3. In the bowl of your standing mixer fitted with the whisk attachment, combine the flour, cocoa powder, instant coffee powder, sugar, baking powder, baking soda , and salt.  Mix well and set aside.

4. In a separate bowl, combine the milk, oil, vanilla, and apple cider vinegar, mixing well.

5. With the mixer running, slowly add the wet ingredients to the dry ingredients.  Mix until just combined.

6. Divide the batter evenly into the prepared mini muffin pan.

7. Bake for 10-12 minutes, or until a cake tester inserted into the center comes out clean.

8.  Remove cupcakes and let cool for about 10 minutes.  Transfer the cupcakes to a wire rack to let cool to room temperature before frosting.

9. For the cream cheese frosting: With a standing mixer on medium-high speed, beat the butter and cream cheese until fluffy, about 2-3 minutes.

10. Reduce mixer speed to low and add the sugar gradually, and mix until smooth, scraping down the sides of the bowl as needed.

11. Add vanilla and mix well.

12.  Add desired food color gel and mix to desired tint.  Set aside.  ***The frosting and cake can be made ahead of time and refrigerated up to 3 days ahead of time.

Source:  Cupcakes directly from Baking Bites, Frosting from Martha Stewart’s Cupcakes.

February 10, 2011 - 6:57 am

Lauren at KeepItSweet - I am in full support of chocolate for valentine’s day. I am in love with that hot pink frosting!

February 10, 2011 - 11:10 am

Blog is the New Black - So pretty and I love anything mini!

February 10, 2011 - 4:05 pm

natalie (the sweets life) - just bookmarked these! love the bright pink frosting!!!!

February 10, 2011 - 7:23 pm

Patty - I agree, it’s all about the chocolate. 😉
These are so stylie and cute!

February 10, 2011 - 8:40 pm

Christina - I love Valentine’s Day treats. Love the contrast between the hot pink and chocolate! Too cute.

February 10, 2011 - 8:58 pm

Y - Hi! I LOVE all your recipes. I was wondering if there’s a specific reason for adding the apple cider vinegar?

February 10, 2011 - 9:23 pm

srlacy - Hi Y!

Thanks for visiting the blog!
Actually, I had intended for these cupcakes to be vegan (obviously that thought was thrown out of the window when I added the cream cheese buttercream frosting.) This was a vegan recipe that I had bookmarked.

Apple cider vinegar can be used in the place of eggs-oddly enough. And, sometimes you have to be very careful with what kind of granulated sugar you are using (if you want to stay vegan!)-some companies use a filter material in the processing of their sugar that contains animal bones.

You could, if you wanted to avoid using the apple cider vinegar, use eggs.

Here is a link with a substitution guide that I found:
http://www.ehow.com/how_7706835_substitute-egg-white-vinegar-cupcakes.html

February 11, 2011 - 1:59 am

Tweets that mention The Curvy Carrot » Mini Chocolate Cupcakes -- Topsy.com - […] This post was mentioned on Twitter by Manuela Durson, Shanon Lacy. Shanon Lacy said: Mini Chocolate Cupcakes. I'm on a Valentine's Day dessert kick. This is your fair warning. 🙂 http://fb.me/Ky6wvhuy […]

February 11, 2011 - 4:57 am

Medeja - How cute and how bright 🙂 I love that nice cute frosting 🙂

February 11, 2011 - 11:26 am

Lacey @ dishfolio.com - These look amazing! Great photos! We’d love for you to share your recipe at dishfolio.com!

February 11, 2011 - 5:33 pm

Georgia @ The Comfort of Cooking - Shanon, these cupcakes are adorable and your piping is just perfect. Great job! I’ll have to try these sometime with the Valrhona cocoa powder I was given recently. Thanks so much for sharing!

February 12, 2011 - 10:08 am

Lisa (Dishes of Mrs. Fish) - I love the idea of mini cupcakes! Perfect bite sized treats! 🙂

February 12, 2011 - 11:54 am

Kelsey{itsybitsyfoodies} - Congrats on Foodbuzz Top 9! I love the hot pink frosting!

February 12, 2011 - 2:39 pm

The Farmers Wife - Love these, such adorable little treats! If only I could find a mini muffin pan somewhere in my state to buy… Congrats on the Top 9!

February 13, 2011 - 11:19 pm

Jenn@eatcakefordinner - These look so yummy.

September 5, 2011 - 9:32 am

natalie (the sweets life) - okay I want to make these this week and you mention they can be made 3 days ahead of time…can they be frosted and made ahead of time or just the 2 components made and refrigerated separately? don’t want to screw them up 🙂 plan to make Wednesday to serve Friday!

September 5, 2011 - 11:59 am

srlacy - Hey Natalie! How are you?
I would definitely make the cupcakes before hand and chill. I have never frosted them three days before, so I think when I originally posted, I was talking more about the actual cupcakes. I usually make my frostings the night before and then chill overnight. You could probably frost them ahead of time-I would just cover them really well so that the cool air doesn’t dry them out. 🙂

September 12, 2011 - 11:51 am

Sammy - I love these! I’m making them vegan buy using a different frosting but I’m going to make the cake this way! When you say instant coffee, what kind of coffee did you use? Is it just normal Folgers/DD/Starbucks or is it the instant like Via Starbucks that you pour in a cup and it makes coffee?

September 12, 2011 - 12:45 pm

srlacy - Hi Sammy!

I just used the instant Folgers coffee-the kind where you add a teaspoon or so to hot water. Hope they come
Out well for you!

September 12, 2011 - 2:32 pm

Sammy - not the kind you have to put through a coffee machine though right? would the starbucks via workout the same? sorry to be a pain haha they just look so good i want them to come out perfect!

September 12, 2011 - 2:50 pm

srlacy - Hey Sammy-no worries. It’s not the same kind that you would put through the coffee machine. You can find it in the coffee aisle-they are usually in smaller jars. Hope this helps!

November 18, 2011 - 2:30 pm

Giota - Hi, excellent recipe, I would like to ask, can you make this recipe ordinary cupcakes?

November 18, 2011 - 4:59 pm

srlacy - Hi Giota-
Sure! Just increase the baking time a little (maybe 20 minutes or so)-be sure to check them

January 20, 2012 - 11:27 pm

Malinda - I was just browsing and found these cupcakes! They’re so adorable. How did you do the piping?

January 21, 2012 - 12:28 am

srlacy - Hi Malinda-

My favorite piping tip is a Wilton 1M. I’m pretty sure that’s the tip I used. 🙂

February 9, 2012 - 10:00 am

Sweetheart Desserts | Vegan Hostess - […] Almond Tartlettes  .  Vegan Sugar Cookies Chocolate & Cherries Cake  .  Mini Chocolate Cupcakes Chocolate Cranberry Truffles  .  Peanut Butter Pillows Cut-Out Sugar Cookies  .  Fudgey […]

July 28, 2012 - 11:08 am

sweetheart desserts | The Vegan Lifestyle Guide - […] Almond Tartlettes  .  Vegan Sugar Cookies Chocolate & Cherries Cake  .  Mini Chocolate Cupcakes Chocolate Cranberry Truffles  .  Peanut Butter Pillows Cut-Out Sugar Cookies  .  Fudgey […]

February 7, 2014 - 7:05 am

Daniela - Hey,
I want to try to make the mini muffins. But what that mean these “cups”. how much is a cup? each 200 grams? (I read in some English recipes “cups”. Does this always the same quantity meant?)

baking powder and baking soda –> the ingredients are not the same?

I would be grateful for your help. =)

I hope you understand my bad english.

thaks.

love greetings

Daniela

February 7, 2014 - 12:10 pm

srlacy - Hi Daniela-

Cups are measured in ounces in the US. 1 cup=8 ounces.
Baking soda and baking powder are two different things.