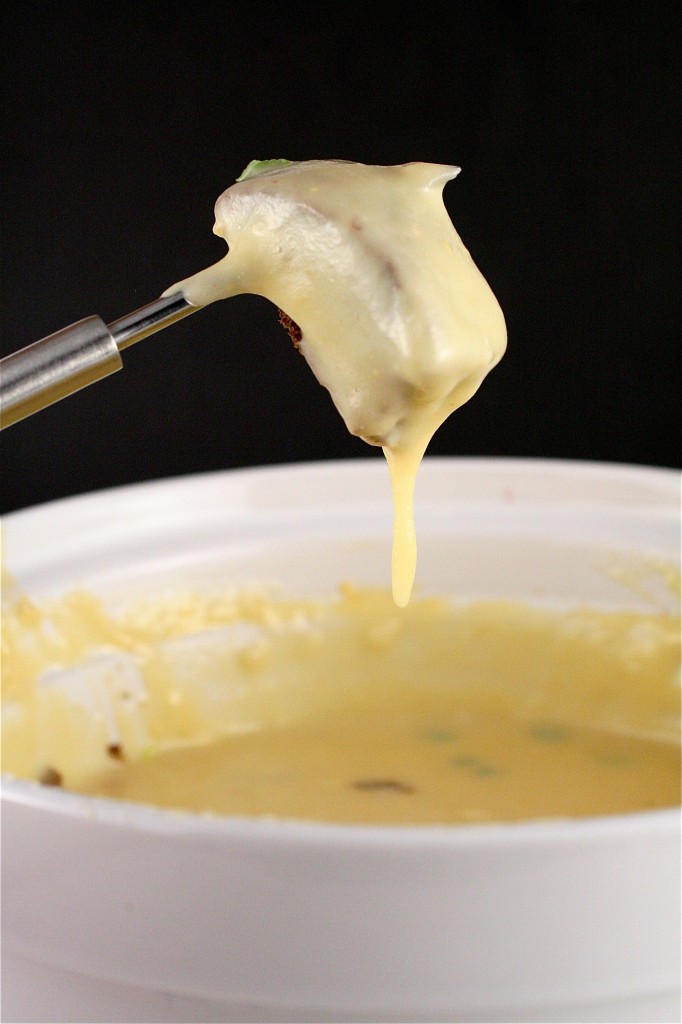
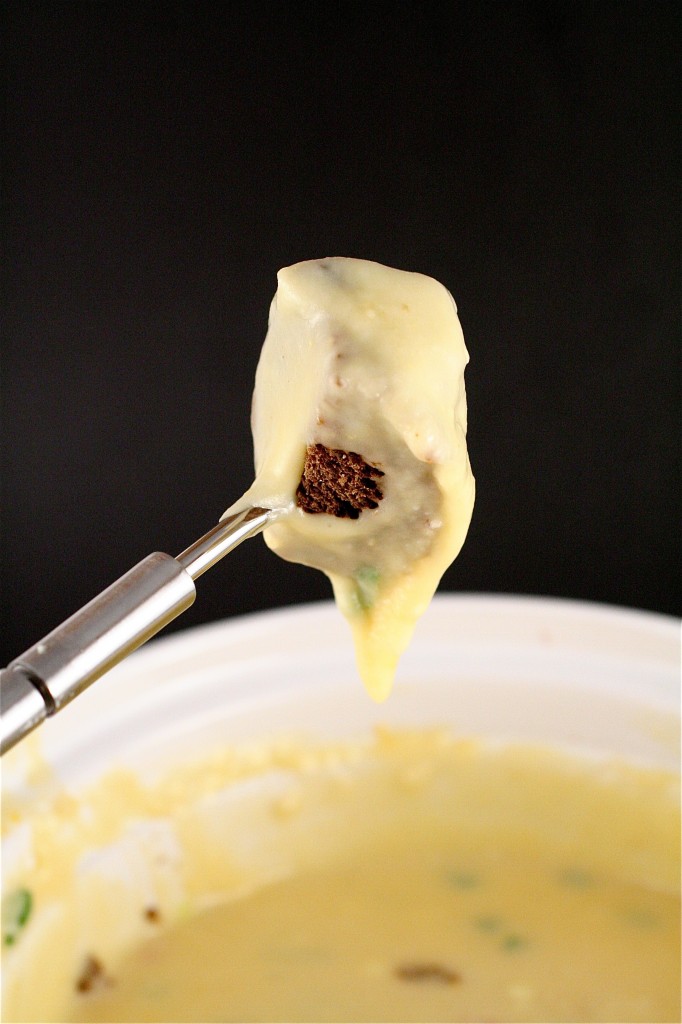
Four Cheese Fondue

If you know me at all (or if you read this blog regularly), then you will know that I love cheese.  LOVE. CHEESE.  All forms.  All shapes, sizes, flavors (even the stinky stuff-I will at least try it), and variations.  I tend to add it to most everything.  I have at least five or six different kinds of cheese right now in the refrigerator: string, shredded, blocks, and spreadable.  It’s all good in my world.

So when Wisconsin Cheese Talk approached me a few months ago to be a guest poster on their blog, I was excited.  The catch?  Create a unique recipe highlighting cheese as one of the main ingredients.  No problem!

And what do I go to?  Fondue, of course.  Fondue is one of those things that has always had a soft spot in my heart.  What better is there than hot, melted cheese?  And talk about creative liberties when it comes to creating a unique cheese-inspired dish….the possibilities are endless.  I have been making fondue for years now…and somewhere along the way, I morphed my own little recipe from adaptation after adaptation.  Now, fondue is one of those dishes that you need not be afraid of, if you have never tried it.  It’s incredibly easy, and creating a unique recipe was not a hard task at all.  And, believe me, I have tried all kinds:  Swiss, pub-style, Mexican-inspired, and even a slightly cherry-flavored adaptation.  But this one? It’s my favorite-because it has the most cheese in it, of course!  I loved the tanginess of the blue cheese here, but I know many people are not big fans.  If you don’t like blue cheese, feel free to add another type of cheese instead-I’m sure that anything will taste great!

If you love cheese, too, then I suggest you check out Wisconsin Cheese Talk for yourself to find some inspiring and quite drool-worthy recipes featuring cheese.

Four Cheese Fondue

Serves: 6-8 people

Ingredients

8 ounces (1 cup) Fontina cheese, grated

8 ounces (1 cup)  Butterkase cheese, grated

4 ounces (1/2 cup) mild cheddar cheese, grated

4 tablespoons flour

1 teaspoon dry mustard powder

Pinch cayenne pepper

1 shallot, minced

1 teaspoon garlic, minced (1 clove)

1 and 1/2 cup white wine, room temperature ***I used a dry white, like Sauvignon Blanc

1/4 cup dry sherry

1/4 cup blue cheese, crumbled

2 tablespoons scallions, chopped

Salt and pepper, to taste

For serving:  sourdough bread, pumpernickel bread, dill pickles, cauliflower, carrots, celery, apple wedges, and pretzels

Instructions

1.  In a large mixing bowl, combine the grated cheeses, flour, mustard powder, and cayenne pepper, mixing well to coat the cheese with the flour.

2.  In your fondue pot (or, alternatively, in a medium saucepan on the stove over medium heat), combine the shallot, garlic, white wine, and sherry over your flame until simmering and steaming.  If this seems to take too long, just preheat the ingredients on the stove and then transfer the mixture to the fondue pot when steaming.

3.  Once hot, add the cheese mixture in thirds to the fondue pot, mixing well after each addition, and stirring until smooth.

4.  Add the blue cheese, stir well.

5.  When ready to serve, add the scallions and season with salt and pepper to taste.

6.  Serve with bread, fruits, and/or vegetables (see above for serving accompaniment suggestions) as desired, and have fun!

Enjoy!
Source:  A Curvy Carrot original

March 10, 2011 - 8:31 am

Blog is the New Black - Lovin’ this! 🙂

March 10, 2011 - 5:31 pm

Kankana - Who can say NO to that ! I love cheese too .. i mean REALLY LOVE ! 🙂

March 10, 2011 - 7:02 pm

sweet road - Ahhh yes, the genius that is bread and cheese. Really though, whoever thought to make fondue probably didn’t realize how awesome an idea that was… at least in my book!

March 10, 2011 - 10:53 pm

Christina @ This Woman Cooks! - Yes! LOVE cheese too- I’m obsessed! Cheese fondue is one of my favorite things.

March 11, 2011 - 2:13 pm

Georgia @ The Comfort of Cooking - I absolutely love fondue but have never made it in my home. This looks delicious, Shanon! I think I’ll have to try this soon. Thanks for sharing!

December 28, 2012 - 2:11 pm

Ring In the New Year with Home-Made Cheese Fondue! « Mama's Bites - […] Four Cheese Fondue from The Curvy Carrot is a little different than your run-of-the-mill fondues and requires more […]

January 5, 2013 - 2:21 pm

Celebrate New Year’s Eve With a Delicious Cheese Fondue! | The Mama Maven Blog - […] Four Cheese Fondue from The Curvy Carrot is a little different than your run-of-the-mill fondues and requires more […]

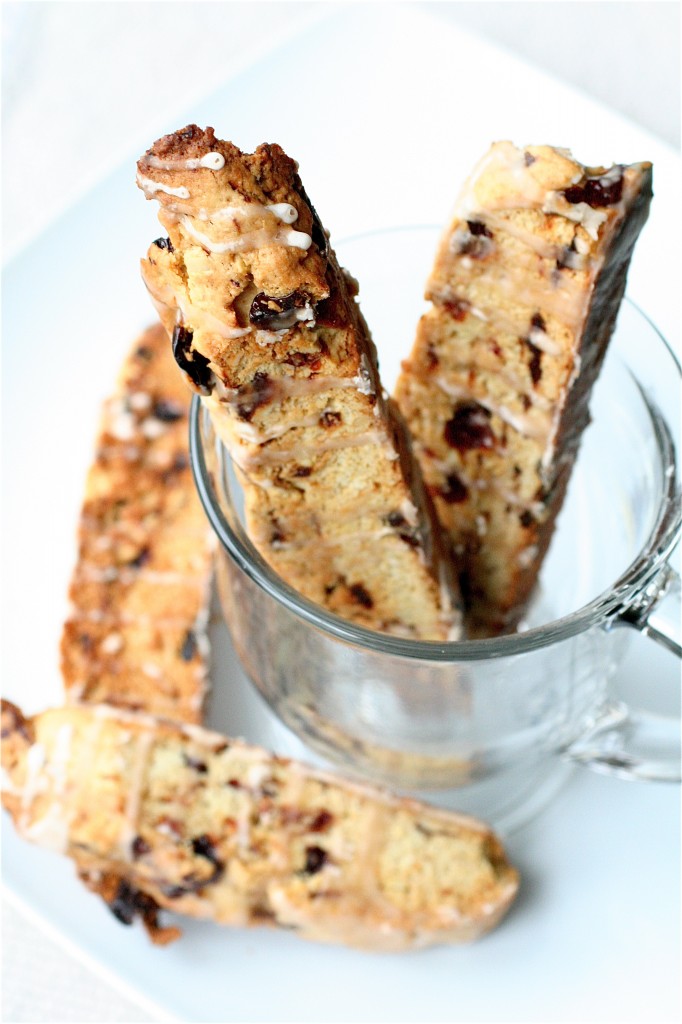
Cherry-Rum Biscotti

Who is in the mood for some super boozy biscotti?  😉


Some of the best things about studying so much lately are the coffee/tea concoctions I am making.  I may or may not have put Bailey’s Irish Cream in my coffee Sunday morning before taking Scout for her daily walk.  And let me tell you,  even though it’s been raining like crazy here in Indianapolis, and our hiking trail was halfway flooded, it was a great walk!  In all seriousness though (and, no, my one tablespoon of Bailey’s left me with full competency in both walking and then later studying capacities…), I am starting to delve into the realm of adding different liqueurs to some of the recipes I try.  I have never been a big fan of boozy foods in the past.  I think sometimes the flavors in the dish get overpowered by that alcohol taste.

This was one of those recipes where I debated back and forth.  I couldn’t get the motivation to sit down and actually get my studying done, so I made a deal with myself.  First, make some coffee.  Second, while the coffee is brewing, make some biscotti (it really doesn’t take THAT long, I thought).  And, then, I will enjoy some more coffee and a new flavor of biscotti…while I study.  Deal? Deal.


So, while all things are good in moderation…(let’s not over-do the alcohol consumption here, folks), these biscotti ended up giving me a great boost in motivation.  Whatever works, right?

Cherry-Rum Biscotti

Servings: about 36 biscotti

Ingredients

For the biscotti:

1 and 1/4 cups dried tart red cherries, coarsely chopped

1/2 cup spiced rum

1/2 cup unsalted butter, softened

1 cup sugar

1 tablespoon baking powder

1/4 teaspoon salt

3 eggs

1/2 teaspoon vanilla

1 teaspoon almond extract

3 and 1/4 cups all-purpose flour

3/4 cups sliced almonds

For the rum glaze:

1 and 1/2 cups powdered sugar

1 tablespoon of reserved cherry rum (see step #5)

Additional rum, for desired consistency


Instructions

1. For the biscotti: Preheat the oven to 350 degrees.

2. Line a baking sheet with parchment paper; set aside.

3. In a medium saucepan over medium heat, bring cherries and rum to a simmer.

4. Remove the pan from the heat and let stand for 15 minutes.

5.  After 15 minutes, drain the cherries, reserving the “cherry rum” leftover liquid for later use in the rum glaze.  Set the cherries aside.

6.  In the bowl of your standing mixer fitted with the paddle attachment, beat the butter until creamy, about 30 seconds.

7. Add the sugar, baking powder, and salt.  Mix well.

8. Add the eggs, vanilla, and almond extract until combined.

9. Reduce the mixer speed to low and gradually add the flour until completely combined.

10.  Add the cherries and almonds, scraping down the sides of the bowl as necessary.

11.  Divide the dough into 2 equal halves, and shape each half into a 9-inch-long loaf.

12.  Place the loaves on the prepared baking sheet and flatten each to about 2 and 1/2 inches wide (just use your fingers).

13. Bake the loaves for 20 to 25 minutes or until golden brown.  Remove the baking sheet from the oven and let the loaves cool completely.

14. Reduce the oven temperature to 300 degrees.

15.  Once cool, transfer the loaves to a cutting board, and using a serrated knife, cut the loaves diagonally into 1/2-inch slices.

16.  Place the slices, cut side down, on the baking sheet and bake for 10 minutes.

17. At the end of 10 minutes, flip each slice over and return the pan to the oven, baking for 10 to 15 minutes more (or until slides are dry).

18. Transfer the slices to a wire rack and let cool completely.

19. For the rum glaze: In a medium bowl, combine the powdered sugar with the reserved “cherry rum” from step #5 above.

20.  Using a fork or a whisk, add in additional rum until the glaze reaches your desired drizzling consistency.

21.  Drizzle the glaze over the cooled biscotti; let sit until glaze is set.


Source:  Adapted from The Ultimate Cookie Book

March 8, 2011 - 5:49 am

Blog is the New Black - I love making biscotti- these sound wonderful!!

March 8, 2011 - 7:00 am

Gina B. - These look amazing! I think I will serve a scoop of whitehouse ice cream in a martini glass drizzled with the leftover “cherry rum” and those biscotti as dessert for my card group! Thanks for this great recipe!

March 8, 2011 - 7:44 am

Lindsay @ Pinch of Yum - I am all over that rum glaze. Talk about starting the morning right! 😉

March 8, 2011 - 8:30 am

srlacy - Oh my gosh-I am drooling. What a great idea! Let me know how it turns out….mmmmmm…

March 9, 2011 - 12:39 pm

Georgia @ The Comfort of Cooking - I absolutely love making biscotti, and especially with cherries! These look wonderful, Shanon. Thank you for sharing and reminding me about one of my favorite cookies!

March 9, 2011 - 3:56 pm

Zippy - Those sound amazing! Definitely making some this weekend.

April 16, 2011 - 11:07 am

Blood Orange Apricot Biscotti « The Fig and Thistle - […] read several recipes before and during my own cooking, a lead player was this Cherry-Rum recipe from The Curvy Carrot which was a great base to start from. When venturing out into recipe […]

December 5, 2011 - 1:17 pm

Murph - Absolutely delicious. I made it with Jumping Bean Screech Blend coffee. It’s a coffee we have here in Newfoundland, made with our Screech rum! Soooooo good!

May 22, 2014 - 6:20 pm

Reach Arounds | The Hollywood Sigh - […] Food Porn of the Day- Cherry-Rum Biscotti – The Curvy Carrot […]

Black Bean Burgers

It’s rare that I find a cookbook that I get truly excited about.  I was at Borders a while back, searching for a vegetarian cookbook that contained decent veggie burgers.  I saw Veggie Burgers Every Which Way by Lukas Volger, and I started flipping through it.  This was a winner.  It has everything in it from hamburger buns to sweet potato fries to pretty much any type of veggie burger on the planet.  There are vegetarian recipes, vegan recipes, and I love the bright and colorful pictures for each recipe.  I was sold.  I have now made at  least four recipes out of this book, including the Basic Sandwich Rolls, and I have not been disappointed yet.  (And, no, I do not have any connection whatsoever with the book-I just really like it, so I am recommending it to you! And, you should check out his website for awesome vegetarian recipes.)

My latest go-round with this cookbook was this recipe for Black Bean Burgers-mostly because I had all the ingredients on hand.  I love the versatility with the recipe.  You can use any kind of bean-chick peas, black beans, red beans, etc.  I chose to use canned beans, only because I was short on time and already had a can of black beans, but you could use dried beans and cook them yourself (I always seem to think that they end up having more flavor than the canned ones).  These were ready within a half hour-which was great because it was a week night, and I didn’t have much time.  They are very filling, and you could modify the spices/flavorings to your liking.  I added a very sharp cheddar cheese slice on top of the burgers at the very end of the baking time-wow.  Even a meat lover could go for these.


Black Bean Burgers

Servings: 4 burgers


Ingredients

1 15-ounce can black beans (drained and rinsed), or 1 and 1/2 cups cooked black beans

2 eggs, beaten

1/2 cup parsley, chopped

1/4 cup grated Parmesan

2 teaspoon Dijon mustard

1/2 teaspoon salt

1/4 teaspoon ground black pepper

Squeeze of fresh lemon juice

3/4 cup panko

2 tablespoons olive oil

Whole wheat hamburger buns (or whatever you prefer), toasted

Toppings:  Sharp cheddar cheese, onion, lettuce, tomato, etc.


Instructions

1. Preheat the oven to 375 degrees.

2. In a large mixing bowl, mash the beans with a potato masher or fork.

3. Add the eggs, parsley, Parmesan, mustard, salt, pepper, and lemon juice. Mix well.

4. Add the panko to the mixture and stir to combine, set aside for at least 5 minutes. (This will allow the panko to soak up some of the additional moisture.)

5.  Shape the mixture into four, equally-sized patties.

6. In an ovenproof sauté pan over medium-high heat, heat the olive oil until shimmering.***If you don’t have an ovenproof sauté pan, just use a rimmed baking sheet for step #8 (see below).

7. Add the patties and cook until browned on each side, about 10-15 minutes total.

8. Once lightly browned, transfer the pan (or rimmed baking sheet) to the oven and bake for 12-15 minutes, until the burgers are completely cooked through.

9. Garnish as desired on hamburger buns and serve immediately.

Source: Barely adapted from Veggie Burgers Every Which Way by Lukas Volger.

March 6, 2011 - 7:48 am

Lauren at Keep It Sweet - Wow, these look great. Did you have any trouble with the mixture sticking together when you cooked them?

March 6, 2011 - 7:50 am

srlacy - Hey Lauren-actually no! They held together really well-I was surprised. They were easy to flip on the stove, too.

March 6, 2011 - 9:50 am

notyet100 - this looks too good,..;-0

March 6, 2011 - 11:07 am

Patty - I’m a big fan of black bean burgers – these ones sound awesome!

March 7, 2011 - 6:36 am

Happy When Not Hungry - Wow these burgers look amazing! I’ve never tried making black bean burgers before so will definitely have to try!

March 7, 2011 - 12:05 pm

Georgia @ The Comfort of Cooking - I can’t believe that these are meatless, they look just mouthwatering! Definitely worth a try this spring and summer. Thanks for sharing and inspiring me to try a no-meat burger, Shanon!

March 18, 2011 - 1:23 pm

maria - these are DELICIOUS! made them last night & topped them with lettuce, tomato, melted cheese & some caramelized onions to add a little sweetness. so good – thanks for the recipe!

June 29, 2011 - 2:33 pm

Alicia - I made these Monday night and they were wonderful! Topped with colby cheese, tomato, lettuce and carmalized onions (as someone suggested)…Very flavorful and filling and the hubby loved them!!

August 11, 2011 - 11:42 pm

Ruth - Thanks for this recipe! I’ve made them twice this week (cooking for 2 and had leftover beans). Super simple, really nice. I was a big fan of the texture of the ‘burgers’–not icky in any way like so many store bought veggie burgers. Really satisfying and filling without being heavy. Used cooked beans instead of canned–I’ve been cooking dried beans for a few months now, and I really think they make a difference. Canned, of course, are super convenient.

February 15, 2012 - 7:42 am

Alyssa - Found your burger on foodgawker. It looks awesome! I’m wondering if i can fool my meat-lovin’ hubby with it….I guess there is only one way to find out!

March 3, 2012 - 7:51 pm

Dina - I’m wondering if the parsley is necessary or if it could be swapped for spinach”

March 3, 2012 - 7:56 pm

srlacy - You can definitely swap the parsley for spinach-sounds great!

March 17, 2012 - 3:08 am

RE - So delicious!! I served them old-fashioned burger style with lettuce, tomatoes, onions, melted pepper jack cheese, and ketchup. I added a dash of cumin and a tablespoon of generic steak seasoning to amp the flavor a bit, and that made them even tastier. They cooked really quickly on the stovetop (almost burnt them, eek!) and I didn’t have to bake them in the oven. I toasted the buns, though. Carnivore Hubby declared them palatable; I loved them.

May 27, 2012 - 5:51 pm

Vicki Barber - Oh my gosh! These were to die for! Made up an avocado sauce to top it with. Delicious! Thank you

May 19, 2013 - 6:43 pm

Black Bean Sliders » The Curvy Carrot - […]   Black Bean Burger […]

July 29, 2013 - 1:30 am

10 Bulk Prep & Freeze Meal and Snack Recipes - […] Recipe & Photo: The Curvy Carrot […]