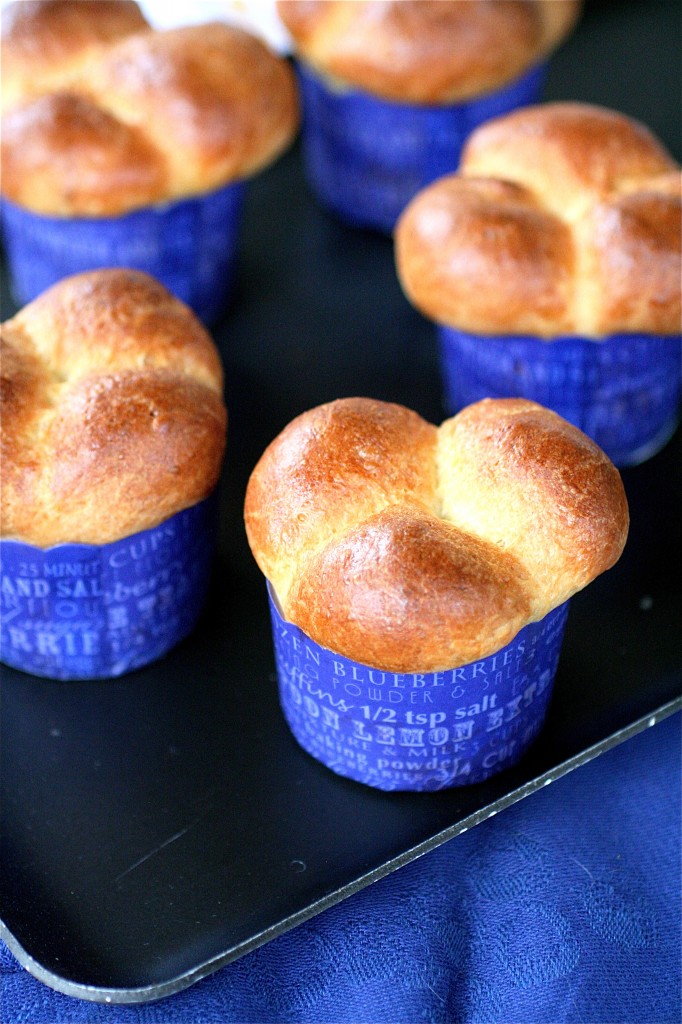
Bubble-Top Brioche


If you’ve never had brioche, you need to at least try it. It’s a beautiful thing.

I’ve actually made brioche before, but I never posted it.  For some reason, I was completely intimidated by it.  But, even though you need to rise and make the dough the day before (and sometimes I need the instant gratification of recipes and cannot bear to wait until the next day…), it’s really not all that hard to make.  Now, granted, I almost had a heart attack while I was mixing the dough with my KitchenAid mixer because the top part of the mixer started erratically bouncing up and down and refusing to stay in the locked position.  I was bound and determined to fix the mixer on my own.  One complete upside-down turn and the fumbling of a screwdriver later, I had quickly fixed the single loose screw on the underside of the top of the mixer. Two months ago I completely disassembled and fixed the garbage disposal.  Seriously, I must be on a roll. I can get the hang of this “girl power” routine. 🙂

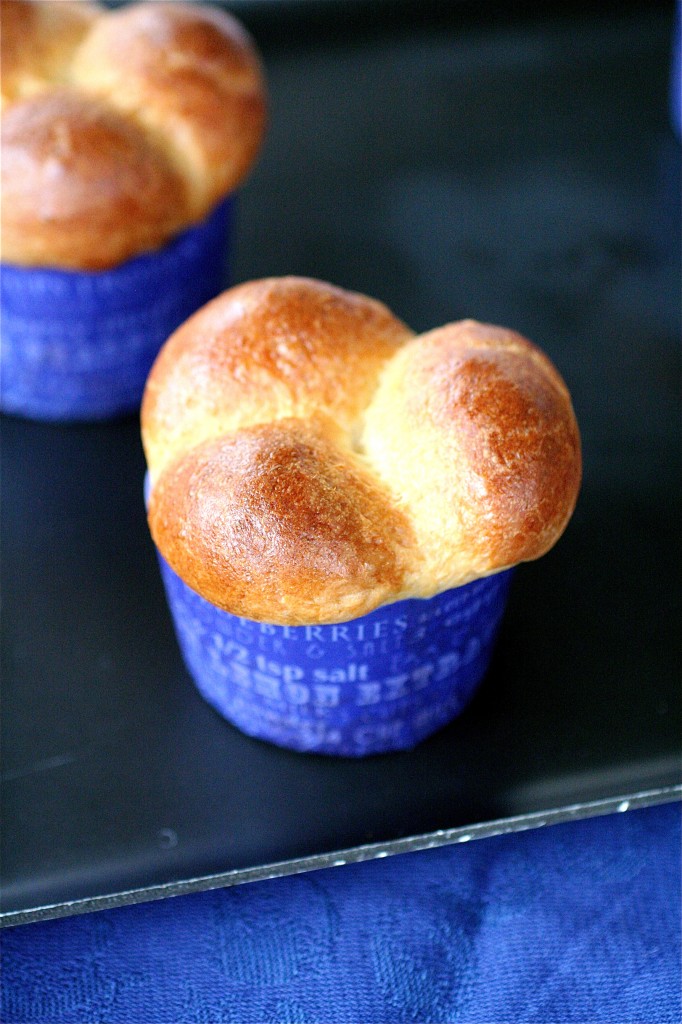
Anyways, these brioche are dense and buttery and amazingly delicious.  I served them with dinner with butter, but they are great with sweet or savory toppings as well. And the best part?  Use your leftovers for treats like bread pudding or French toast casserole…..(don’t worry..I totally did).


Bubble-Top Brioches

Servings: 12

Ingredients

1/4 cup whole milk, warm

1/4 cup water, warm

3 tablespoons granulated sugar

4 teaspoons active dry yeast

2 and 3/4 cups all-purpose flour

1 and 1/2 teaspoons salt

3 large eggs, at room temperature

12 tablespoons (1 and 1/2 sticks) unsalted butter, at room temperature

1 large egg, lightly beaten (for brushing the tops)

1 teaspoon cold water
Instructions

1. In the bowl of your standing mixer fitted with the paddle attachment, combine the warm milk, warm water, and a pinch of the granulated sugar.

2. Sprinkle the yeast over the top of the mixture and let sit for about 5 minutes, until the yeast is foamy and slightly absorbed.

3. In a separate bowl, combine the flour and salt.

4. On low speed, gently mix the yeast mixture until creamy.  Remove the paddle attachment and replace it with the dough hook.

5. Add all of the flour mixture at once to the yeast and turn the mixer on and off in short pulses to lightly moisten the dough.

6. On medium-low speed, mix the dough until dry but shaggy, scraping down the sides of the bowl as necessary, about 3 minutes.

7. Turn the mixer speed to low and add the eggs, one at a time, mixing well after each one.

8. Add in the remaining granulated sugar, increase the mixer speed to medium and mix for about 3 minutes.

9.  Reduce the mixer speed to low.

10. In 2-tablespoon increments, add the butter to the bowl, mixing well after each addition.

11. Increase the mixer speed to medium-high and beat until the dough pulls away from the sides of the bowl, about 10 minutes or so.

12. Transfer the dough to a lightly oiled bowl, cover with plastic wrap or a towel, and let rise until nearly doubled in size, about 1 hour or so.

13. Once risen, pull the dough up by the edges and let it fall back on itself to deflate.

14. Cover again and place the dough in the refrigerator, slapping it down every 30 minutes, for a total of about 2 hours. (You will slap it down 4 times.)

15. Press the plastic wrap tightly against the surface of the dough and let it rest overnight in the refrigerator.

16. The next day, butter a 12-cup muffin tin (or brioche molds). ***Or use Wilton paper liners like I did.

17. On a floured surface, divide the dough into 12 even portions, then split each portion into 3 round balls.

18. Place 3 balls into each muffin liner, and set aside.  Let rise in a warm place until they almost fill the cups, about 1 hour or so.

19. While the dough is rising, place a rack in the center of your oven and preheat the oven to 400 degrees.

20.  In a small bowl, whisk together the cold water and egg.

21. Lightly brush the tops of each brioche with the egg glaze-making sure to be very gentle.

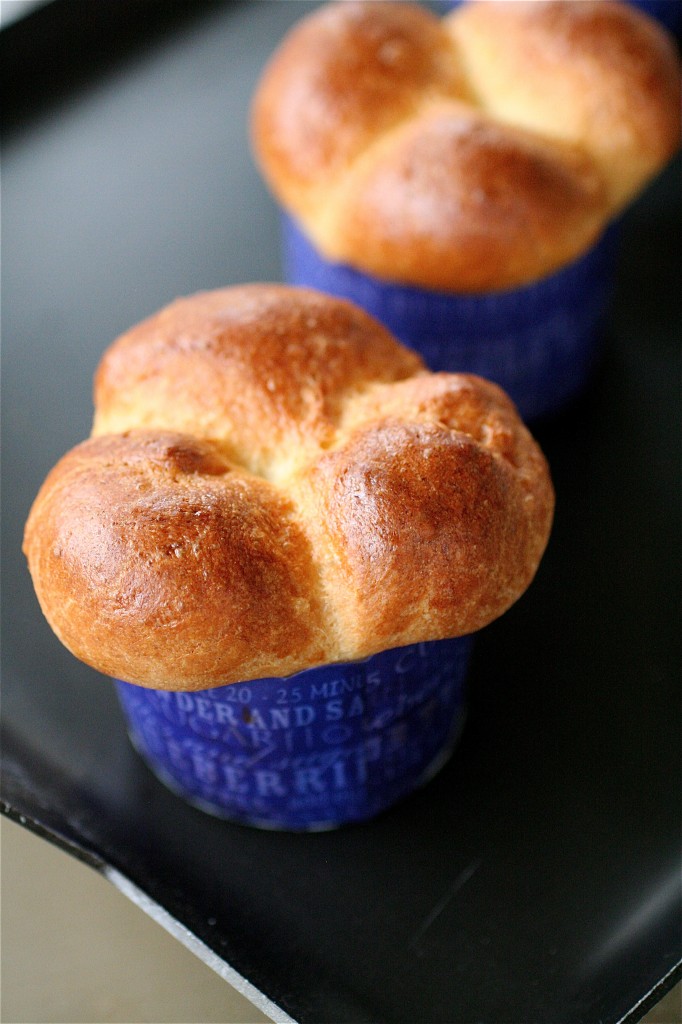
22. Bake the brioches for 20 minutes or so, or until deeply golden.  ***Watch them.  Mine were ready at exactly the 20 minute mark. If they start to brown too much, cover them with aluminum foil.

23. Remove the brioches from the oven and let cool on a wire rack for 5-10 minutes.
Source: Directly from Around My French Table by Dorie Greenspan (the queen!)

April 27, 2011 - 5:51 am

Blog is the New Black - These look gorgeous! I bet they taste even better!

April 27, 2011 - 6:21 am

Gwenevere - Isn’t it funny how a certain type of food can stike such fear in us. Come on it’s brioche, not the national debt. Then we try it and…wow, that wasn’t so bad! My list of recipes I’m afraid of is a little bit too long.

April 27, 2011 - 9:55 am

Tracey - I love the wrappers! Brioche is such a delicious bread, one of my favorites for sure – and your individual minis are beyond cute.

April 27, 2011 - 3:21 pm

natalie (the sweets life) - brioche is one of my very favorite breads—yours looks gorgeous!

April 27, 2011 - 4:08 pm

Josie - Those are gorgeous! I’ve been wanting to try brioche for a while now, so maybe I’ll try the bubble tops since they are so fun!

April 27, 2011 - 4:17 pm

Jane M - WOW if I baked these adorable brioche I’d have to wait OVERNIGHT to bake them! AAAAAAAAH! I hate waiting!

April 27, 2011 - 8:18 pm

Mai - those are so adorable. I’ve never had brioche before and I’m sure they taste amazing. Can’t wait to try this!

April 27, 2011 - 8:41 pm

Kathy - Panini Happy - These look just beautiful! I’ve been intimidated by them as well, glad to know they’re actually not that difficult. Will definitely give it a try!

April 27, 2011 - 8:56 pm

kellypea - I love brioche and haven’t made it in a while. Your tiny wrapped brioches are absolutely adorable! I think I’d have trouble stopping at one…

April 28, 2011 - 10:52 am

Patty - The are indeed beautiful Shanon!

April 28, 2011 - 1:38 pm

branny - The liners are really cute! I bet those little things are irresistible.

Crab Crostini


I’m all about crostini.  What’s not to love about it?  Bite-sized portions of endless possibilities?  Sign me up!


I came across this recipe while searching for something completely different.  I thought that this would be something that I could tackle for a little appetizer before a semi-fancy dinner I was preparing for my family.  Not only is this a snap to throw together, but it seemed to impress my “guinea pigs”.  I like my food a little bit more spicy, so I added the cayenne pepper liberally-feel free to get crazy here.  You could also throw in any kind of seasoning-crab seems to be a completely forgiving food.  I used fresh chives from my mom’s garden-oh my.  Nothing beats fresh herbs/veggies from the garden.


Crab Crostini

Servings: 8 crostini


Ingredients

8 slices French bread, cut into 1/2-inch slices

1/2 pound fresh crab meat, or 6 and 1/2-ounces canned meat

3 tablespoons minced green onion

1 tablespoon fresh lemon juice

2 tablespoons mayonnaise

2 teaspoons garlic, minced

1/2 teaspoon Dijon mustard

Cayenne pepper, to taste

Ground white pepper, to taste

Salt, to taste

1 cup Parmesan or Romano cheese, grated

Fresh chives, for garnish (optional)


Instructions

1. Preheat the broiler on your oven.

2. On a baking sheet, line the French bread pieces about 1-inch apart.

3. In a large bowl, combine the crab meat, green onions, lemon juice, mayonnaise, garlic, mustard, cayenne pepper, white pepper, and salt.  Mix well.

4. Lightly toast the bread slices under the broiler until lightly golden, about 4-5 minutes.

5. Remove the bread from the oven, and flip all the bread slices over to the other side.

6. Top each bread slice with about 1-2 tablespoons of the crab mixture (your desired amount).

7. Sprinkle the cheese over the top of each crostini evenly.

8. Broil the crostinis until the cheese is melted and lightly browned, about 4-5 minutes (depending on your broiler temperature).

9. Garnish with fresh chives and serve immediately.


Source: Adapted from Williams-Sonoma.


April 25, 2011 - 5:54 am

Gwenevere - I haven’t been reading your blog long enough to know what “guinea pigs” are…never mind, I just got it….I’m a little slow. These look terrific. I think my kiddos would go for these. Since my kids get out of school so lat (they don’t get home until 4:00) It is a challenge getting them an after school snack that isn’t going to kill their appetite for dinner. My solution…I serve appetizers. This will be great addition.

April 25, 2011 - 8:00 am

Blog is the New Black - Great recipe! I can’t wait to make this for company!

April 25, 2011 - 11:07 am

Yuri - I love crostinis too! Great recipe 🙂

April 25, 2011 - 11:39 am

Marianne - Try Old Bay instead of salt and cayenne. Old Bay is the original crab seasoning.

April 25, 2011 - 12:23 pm

Delicious Links! « Chef Pandita - […] beatiful appetizer: Crab Crostinis by […]

April 25, 2011 - 1:17 pm

An Alaskan Cooks | Alaska Food and Wine - These look delicious – quick, easy, and elegant – and you can’t beat that trifecta. I can’t wait to try these crostini made with Alaskan crab.

April 25, 2011 - 2:44 pm

Jen of My Tiny Oven - All I can say is YUM! I am going to be making these asap! Thanks!

April 25, 2011 - 11:00 pm

Jennifer - These look delicious. What sort of dinner did you serve them with? Me and my girlfriends do a monthly dinner night and I have been on the lookout for different recipes. This is going on my list. I don’t host until June so please share more of your dinner party ideas! Thanks!

April 25, 2011 - 11:45 pm

srlacy - Hi Jennifer!

I actually served these with an Onion Riesling soup (post will come soon, I promise!)…which also happened to have some garlicky crostini in the soup itself. It was a little bit of crostini overkill-but I actually used up all of my French bread for once! (And it was very simple to make, as well)

Shanon

April 27, 2011 - 5:48 am

Adriana - Crab and cheese are one of my favorite combinations; these are fantastic! I also agree with the Old Bay recommendation.

April 27, 2011 - 10:26 am

Dee - These are so pretty. Congrats on top 9!

April 27, 2011 - 12:44 pm

anna - oo these are very pretty! mmm the crab and chives look wonderful together. thanks for sharing!

http://www.icyviolets.com

April 27, 2011 - 1:45 pm

alyce - Yum. Love crab.

May 1, 2011 - 12:01 pm

Annie - I’ve been wanting to make crab crostini for so long. These look great!

Brownie Buttons

I find it very ironic that the day I posted the tuna salad from Kelli’s shower, she has her baby.  Welcome to the world, Natalie Elizabeth!

It’s amazing to see one of your best friends become a mother for the first time.  I have known Kelli for about 12 years now.  We laugh because we say we were both destined to become great friends. Growing up, we lived less than 10 miles apart, but it wasn’t until we were freshmen in college that we met each other for the first time.  She says that she knew she would be great friends with me because I was “the long-haired hippie girl who blasted Tori Amos and the Beatles in her dorm room down the hallway”, and I knew that she would be great friends with me when I found out what a huge animal lover she is (and that we also had silly voices for our pets….which is completely normal. 🙂 )

Anyways, Kelli and I have been through a lot together over the years.  Lately, she has been a rock for me, a voice of reason, and a huge source of support.  She tells me I am doing the right thing when I question myself, she tells me to stay away from the people who hurt me, and she is one of the first ones to pull me up when I fall down.  In the past two days, I have seen her go through the biggest change in her life: becoming a mom to a beautiful dark-haired baby girl.  To see the excitement in the eyes of both Jason and Kelli, to hear Jason describe how strong and amazing she was during the whole process, to hear Jason reading a text Kelli sent him in the middle of the night (thanking him for all he does for her and how much she loves him): that’s pure love.  That’s how marriage and life and all that comes with it should be.  It reminds me of how beautiful life can be, and I am so happy to be a peripheral part of their new little family.

I made these little treats for Jason and Kelli before I went to visit them in the hospital.  Kelli loves chocolate, and I figured she needed a little boost after such a big day.  I stuck with Dorie Greenspan’s standard recipe for brownie buttons, and then I simply added my desired colors to the white chocolate with my food coloring gels.  I piped them in random and crazy (albeit messy) squiggles over each white chocolate top for some extra color.  They seemed to like them.  🙂

Brownie Buttons

Servings: 12 buttons

Ingredients

For the brownies:

1/4 cup plus 2 tablespoons all-purpose flour

Pinch of salt

1/2 stick (4 tablespoons) unsalted butter, cut into 4 pieces

1/3 cup (heaping) bittersweet chocolate chips

1/3 cup packed light brown sugar

1/2 teaspoon pure vanilla extract

1 large egg

For the white chocolate glaze:

2 and 1/2 cups white chocolate (chopped) or white candy melts

Food gel colorings of your choice

Instructions

1. For the brownies: Preheat the oven to 350 degrees.

2. Line a 12-cup mini muffin pan with mini paper liners.

3. In a small bowl, whisk together the flour and the salt; set aside.

4. In a medium saucepan over low heat, melt the butter, bittersweet chocolate, and brown sugar, stirring constantly with a rubber spatula, until melted and smooth.

5. Once the mixture is melted, remove from the heat and let cook for 1-2 minutes.

6. Add the vanilla and egg, mixing well.

7. Add the flour to the chocolate mixture, and stir until just incorporated.

8. Distribute the batter evenly among the lined muffin pan.  ***You may have leftover batter-if you want to make 1-2 more brownie bites, feel free.

9. Bake for 14-16 minutes, or until the tops of the brownies spring back when touched.

10. Let the brownies cool to room temperature.

11. For the white chocolate glaze: In a heatproof bowl over simmering water, slowly melt the white chocolate pieces, stirring frequently until smooth.

12.  Once melted, lightly spoon about 1/2 teaspoon of white chocolate over the tops of each cooled brownie.

13. Using your gel food colorings, divide and tint the remaining melted white chocolate (reheat in the microwave as needed to maintain a smooth consistency).

14. Lightly drizzle the colored chocolate over the top of each brownie with a small pastry bag fitted with a coupler and decorating tip (I used Wilton #1).  Alternatively, just drizzle the chocolate over the tops of the brownies by gently swinging a fork over each one.  Decorate as desired.


We love you, Natalie Elizabeth!


Source: Adapted from Baking: From My Home To Yours by Dorie Greenspan


April 23, 2011 - 7:26 am

Gwenevere - My kids will flip over these. Brownies are great, but add frosting…heaven doesn’t get any closer…unless I let them do them frosting and/or sprinkling of sprinkles.

April 23, 2011 - 8:07 am

Lauren at Keep It Sweet - These are adorable! I can see why they’d be a huge hit.

April 23, 2011 - 10:49 am

Ang - It’s wonderful to have a friend like that. The brownie buttons look adorable, and very appropriate for the occasion:)

April 23, 2011 - 11:50 am

DessertForTwo - Such a sweet post! I really enjoyed reading it. Blessings to the new family 🙂

April 23, 2011 - 11:19 pm

Jenn@eatcakefordinner - Congratulations to your friend! She is so blessed to have a beautiful baby girl and a friend like you to bring her yummy brownie buttons!

April 24, 2011 - 1:47 am

Kelli - We love you, Shan! Thank you so much for your thoughtfulness, your sweet post, and the delicious brownie buttons! You are an important part of our extended family! xo

April 24, 2011 - 4:07 pm

Audrey Ellen @ My Scene and Herd - I love anything in miniature sizes, although that wouldn’t stop me from taking down about 7 of those.

April 25, 2011 - 4:24 pm

natalie (the sweets life) - what a great treat for a new mom…or anyone, i’d take one..or 10! 🙂

btw your friend named her baby a great name!

April 25, 2011 - 5:53 pm

Happy When Not Hungry - What a cute treat!!! I’m sure your friend who had the baby really appreciate them. They look delicious!