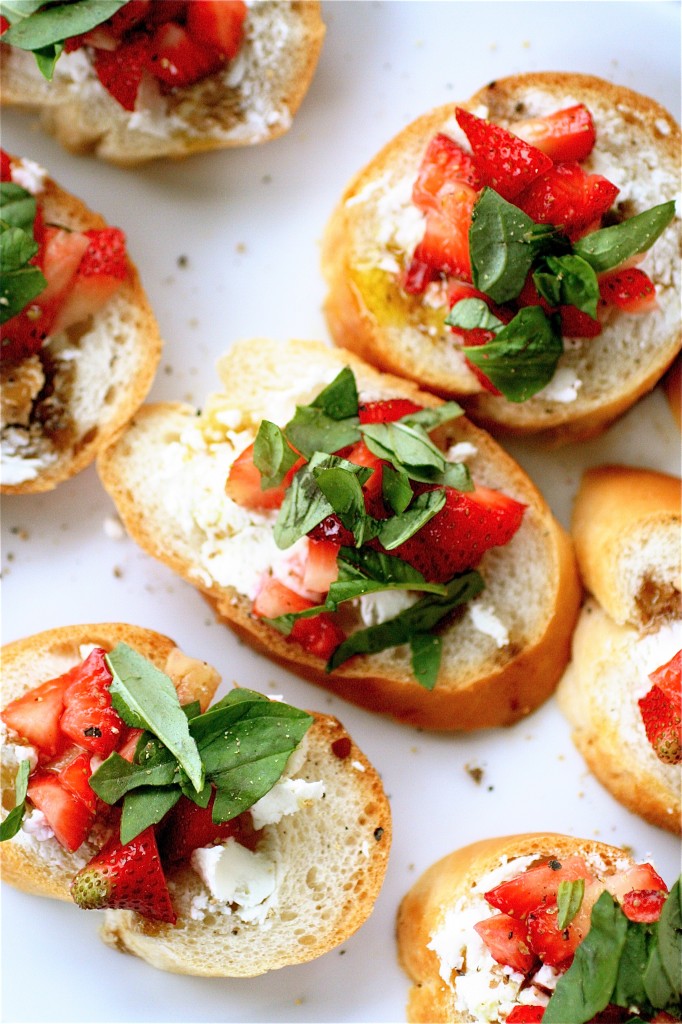
Strawberry Bruschetta

It’s strawberry season, ladies and gentlemen!  I love seeing these bright red and juicy gems out and about, signifying the long days of sunny weather ahead.  When I was a kid, we would always go strawberry picking at a local farm near my hometown.  There was something incredibly special about being outdoors, picking the ripe strawberries from the plants, and learning how to appreciate real produce from a real farm.

When I saw this recipe, I knew I needed to give it a whirl.  Another strawberry recipe?  OK! And, since tomatoes are not in their prime yet in my part of the country, I could settle for a sweeter version of the traditional Italian finger food.  The instructions seemed straightforward, the ingredients fresh and healthy, and the flavors seemed like they would be divine.  I made this for a brunch line-up, but you could make it for a light lunch alongside a nice salad, or, you could even up the sweet factor and serve as a healthier dessert option.  Add the balsamic and olive oil at the very end to avoid soggy bread.  I let the strawberries macerate for about 3 hours or so before assembling the bruschetta to make it a little sweeter, but if you prefer more tart strawberries, omit the sugar.

Let your taste buds rejoice with this one!
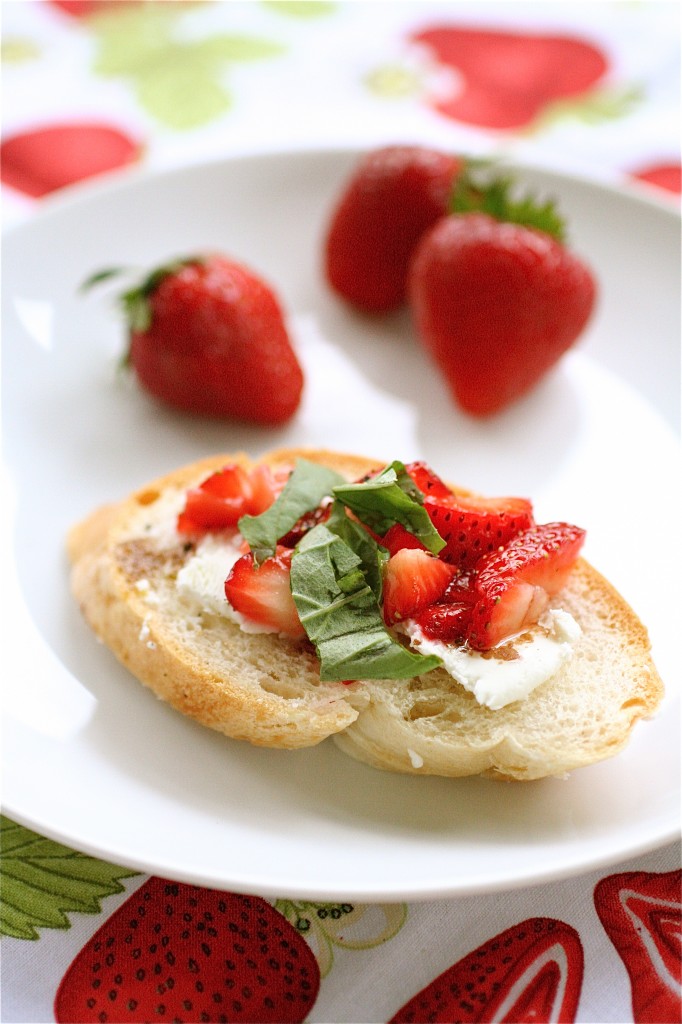
Strawberry Bruschetta

Servings: about 12 portions

Ingredients

1 French baguette, sliced diagonally, about 1/2-inch thick

1 cup diced strawberries, about 10 large strawberries

1 tablespoon granulated sugar

4 ounces goat cheese, room temperature

1 tablespoon extra-virgin olive oil

2 teaspoons balsamic vinegar

1/4 cup fresh basil leaves, torn

Freshly ground black pepper
Instructions

1. Combine the tablespoon of sugar and strawberries in a small bowl.  Cover, and refrigerate for about 2-3 hours, or until strawberries have slightly softened.

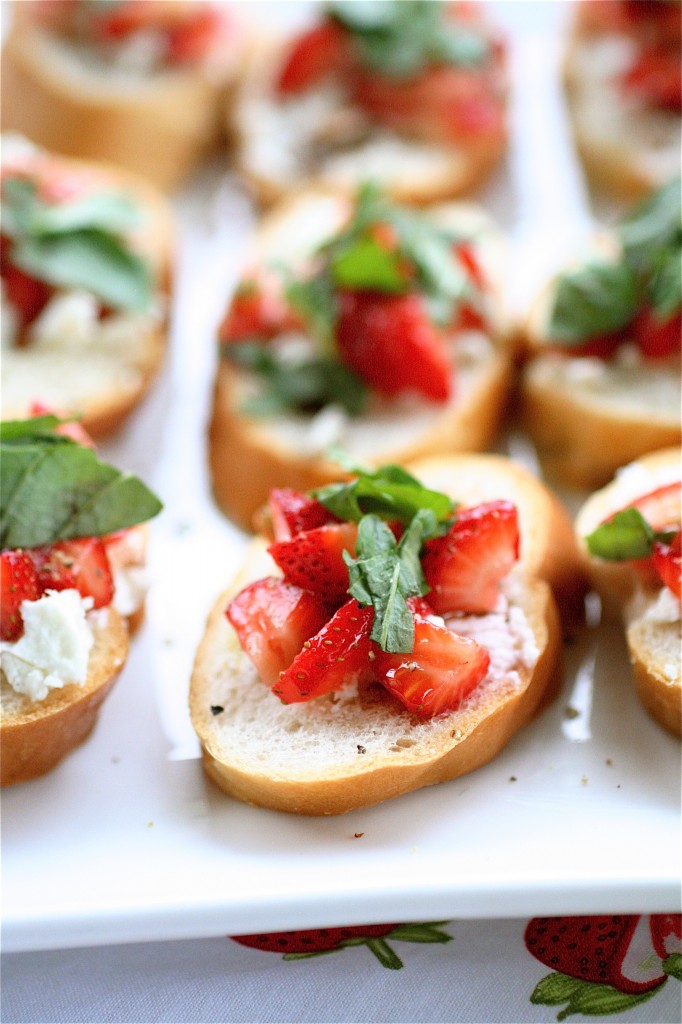
2. Spread the goat cheese evenly over the slices of bread, followed by spoonfuls of the strawberry mixture.

3. Drizzle with the olive oil and balsamic vinegar.

4. Top each bruschetta with basil.

5. Season with freshly ground black pepper.

Source: Adapted from Whole Foods Market.


May 9, 2011 - 5:18 am

Blog is the New Black - What a simple but elegant recipe, I can’t wait to try this!

May 9, 2011 - 6:22 am

Lauren at Keep It Sweet - I love this! It’s almost a gourmet cream cheese and jelly:-)

May 9, 2011 - 10:25 am

Shawnda - Goat cheese + strawberries is an incredibly underrated and underused combo! The bruschetta look beautiful!

May 9, 2011 - 6:11 pm

Sara - Yum, yum, yum! 🙂

May 10, 2011 - 9:13 am

Foodies on the Fly - These look fantastic! We’ll have to try these soon.

May 10, 2011 - 11:44 am

Sophia - I love the idea of pairing strawberries and goat cheese together! And bruschetta is pretty much one of the best appetizers out there! Awesome job! So yummy!

May 10, 2011 - 3:40 pm

Mary @ Delightful Bitefuls - Oh yum! This is brilliant and looks fantastic!!

Mary xo
Delightful Bitefuls

May 10, 2011 - 4:57 pm

natalie (the sweets life) - i dont think it gets much better than bread, strawberries, and goat cheese!

May 12, 2011 - 7:45 pm

Kelli - Holy melloli, Shan! This is absolutely beautiful and sounds delicious! I was already salivating when I saw the bruschetta, and then looked closer to see the lovely strawberry surprise… decadent! Hope your studying is going well. Love and miss ya! Pick a night next week to come over for a dinner break. xo

May 13, 2011 - 10:59 am

Kelsey - This looks incredible!

May 13, 2011 - 3:58 pm

Dani - wow, love the combination – how simple yet genius! Will definitely try this.

May 13, 2011 - 5:14 pm

Krissy - I swoon at anything with goat cheese, yum!

June 13, 2011 - 4:32 am

Strawberry Bruschetta » Annie's Eats - […] Source: slightly adapted from Whole Foods via The Curvy Carrot […]

June 15, 2011 - 8:09 pm

Kristin - Wow, this was amazingly delicious! Perfectly refreshing for a summer night 🙂

February 1, 2012 - 12:27 pm

alex wu - i want to know whiter the bread need heated?

February 1, 2012 - 12:56 pm

srlacy - You don’t have to. You can choose to toast if it you want.

May 24, 2012 - 11:50 pm

Strawberry Bruschetta | agirlacatandakitchen - […] Source: The Curvy Carrot […]

June 27, 2012 - 9:38 pm

Andrea - Do you think this would work using frozen strawberries? I’m guessing fresh would be better, but all I have right now are frozen. Thanks!

June 28, 2012 - 7:56 am

srlacy - Hi Andrea-

Frozen strawberries should be just fine-I would just make sure to let them drain (or even blot them with towels) to get a lot of the excess moisture out.

July 25, 2012 - 2:46 pm

On Deck: Strawberry Bruschetta from The Curvy Carrot | The Crafty Collaborative - […] Join us tomorrow for our review of Strawberry Bruschetta from The Curvy Carrot! […]

July 26, 2012 - 8:00 am

Strawberry Bruschetta | The Crafty Collaborative - […] The Curvy Carrot has shared a delicious recipe for Strawberry Bruschetta that looks a delicious as it is easy on the eyes! […]

August 14, 2012 - 8:04 am

Strawberry Bruschetta « Fork Lore - […] slice with the basil leaves and cracked pepper, to taste. Slightly adapted from Whole Foods via The Curvy Carrot and via annies-eats.com Rate this:Share this:SharePrintEmailLike this:LikeBe the first to like […]

February 19, 2013 - 1:16 pm
March 15, 2013 - 3:23 am

Strawberry Bruschetta | Spoonful of Flavor - […] Source Annie’s Eats, originally from Whole Foods via The Curvy Carrot […]

August 7, 2013 - 5:27 am

Strawberry Bruschetta | Foods, Drinks & Recipes - […] Read all the details and the full recipe on thecurvycarrot.com […]

October 19, 2013 - 4:05 pm

Bruschetta de Morango | Delícias 1001Delícias 1001 - […] Encontrei a ideia passeando pela internet, mas devo confessar que, com as mudanças que fiz, a receita original  (salgada!) ficou bem longe, totalmente diferente da minha… ‘Nos finalmentes’, […]

May 19, 2014 - 6:28 pm

Instagram-holic #55 | Dj Matioka Blog - […] with my mama We ended up ordering 2 of these!!  Hope, my sister-in-law made this awesome strawberry bruschetta  at my baby shower. I loved it so much and she emailed me the recipe. It was so easy to make […]

Baked Doughnuts

Oh, yes.  I am totally going there.

So, if I haven’t talked about it enough already, I am taking a ginormhugegantous (I know that’s not a real word-I am just being overly dramatic) test in less than 2 weeks.  Like, a 2-day, 16-hour total-long test for which I have to fly across the country and stay in an overpriced hotel for three days.  I’m finally taking my grown-up doctor boards.  I’ve taken all my medical school boards, but now this test is the mac-daddy of them all.  The one that costs $$$$ to take (better not fail…..) and will allow me to get a job someday.  Not only is the price of the test high, but I am subjecting myself to hours upon hours of studying to pay that much to take a test.  Am I bitter?  Of course not! 😉  Am I thankful to FINALLY be at this point in my training?  Absolutely!  I am ready to start fellowship and move on, people!  And hopefully this test will prove that I am ready to do so.

A few of my friends have suggested that during my study breaks, I bake.  And, I definitely have.  The nice thing about working with yeast is the built-in “rising time”.  So, I have an excuse to work a little bit, study while the dough is rising, and then take another break when I knead it or get it ready for baking.  And since there’s always a component of punching down the dough at some point in the recipe, I find it particularly cathartic during these study breaks.

So I might be stressed.  But these doughnuts made it all better.  I stuck very closely to the original recipe here.  I had never baked doughnuts before, so I was a little nervous about straying too much.  What can I say about these?  They are definitely at their prime immediately after baking.  They are still really good the same day, although I would recommend warming them in the microwave before eating-just a few seconds.  I took some over for a get-together with my girlfriends the other day, and we all heated them up again.  They were a little hard on the second day, so if you are planning on only eating a few, I would recommend making a half batch.  And the glaze?  Oh, yes. That glaze is amazing. I couldn’t get enough of it.  And, of course, there had to be sprinkles.

And, if you’ll excuse me, I must get back to the books now.

Baked Doughnuts

Servings:  approximately 16 doughnuts

Ingredients

For the doughnuts:

1 and 1/3 cups warm milk (I used whole milk, because that is what I had on hand)

2 and 1/4 teaspoons active dry yeast (or one packet)

2 tablespoons unsalted butter

2/3 cup granulated sugar

2 eggs

5 cups all-purpose flour

1 teaspoon salt

For the chocolate glaze:

5 tablespoons unsalted butter

4 ounces semisweet chocolate chips

2 cups confectioners’ sugar

1 and 1/2 teaspoons vanilla extract

1/4 cup hot water

Sprinkles, for garnish


Instructions

1. For the doughnuts: In the bowl of your standing mixer fitted with the dough hook attachment, combine 1/3 cup of the warm milk and the yeast.  Let sit until foamy, about 5 minutes.

2. In a separate small bowl, combine the butter and sugar with the remaining 1 cup of warm milk, mixing well.

3. Add the butter/sugar mixture to the yeast mixture.

4. With your mixer running on the lowest speed, add the eggs, flour, and salt to the mixture until just combined.

5. Increase your mixer speed to medium and knead the until the sides of the dough pull away easily from the sides of the bowl, about 5 minutes or so. **Add more flour or milk as needed to get the proper consistency.

6. Place the dough on a floured surface and knead a few times.

7. Shape the dough into a ball and place in a lightly oiled bowl. Cover the bowl and let sit in a warm place until doubled in size, about 1 hour.

8. Once risen, punch down the dough and roll it out into a 1/2-inch-thick rectangle.

9.  Using a doughnut cutter (or two cookie cutters of differing sizes), cut out your doughnut shapes and place on a parchment-lined baking sheet.

10.  Cover the baking sheet(s) with a clean towel and let rise for another 45 minutes or so.

11. Preheat the oven to 375 degrees.

12. Bake the doughnuts until the bottoms are lightly golden, about 8-10 minutes, depending on your oven. *Meanwhile, start making your glaze.  See below.

13. Remove the doughnuts from the oven and let cool for a few minutes before glazing.

14. For the glaze: In a heatproof bowl over simmering water, melt the butter and chocolate chips.

15. Remove the bowl from the heat and whisk in the confectioners’ sugar, vanilla, and hot water until smooth.

16. To glaze the doughnuts, dip each one face-down into the glaze, immediately garnish with sprinkles, and let cool on a wire rack (right side up, of course!)

Source: Doughnuts barely adapted from 101Cookbooks and Chocolate Glaze directly from Williams-Sonoma.


May 7, 2011 - 7:08 am

Lauren at Keep It Sweet - These donuts look like a pretty amazing study break! Good luck!!

May 7, 2011 - 9:13 am

Apron Appeal - Yeasted baked donuts? My interest has been piqued. The best part about donuts is that even if they don’t turn out exactly like I think they should…my kids will still eat ’em.

May 7, 2011 - 9:15 am

Blog is the New Black - I bought a donut pan so long ago and have yet to try baking any! These look wonderful. Good study break idea! 😉

May 7, 2011 - 10:02 am

Meighan @ Cooking With Abandon - Ugh. I feel your pain. My boards are June 12th, two day,have to fly across the country and stay in a hotel. I too am studying like a crazy person. It’s not fun! Good luck! I should try the donuts for a study break. Just need a donut pan!

May 7, 2011 - 10:53 am

branny - You’ll do fine!
I remember when I’d take major tests I’d always eventually come to the mentality “If I don’t know it now, I’ll never know it.” I was never a fan of all nighters or cramming. I’m sure you’ll do great. Good luck.

May 7, 2011 - 1:29 pm

Jen of My Tiny Oven - I have no words for how good these look! I could eat a dozen or so! you rock!
Good luck on your tests!

May 7, 2011 - 2:32 pm

DessertForTwo - Oh yum!

I wish you a ginormous amount of luck! 🙂

May 8, 2011 - 1:20 am

Chelsea - Wooow, these look so yummy! I definitely agree that baking is the perfect stress release. Good luck on your test! I don’t envy you.

May 8, 2011 - 8:48 pm

Lee Hock - These look just like the fried ones from a donut shop, amazing. I can’t wait to try and make these! I am going to make the dough in my bread machine.
My kids are going to go crazy!

May 9, 2011 - 12:05 am

Shawnda - Beautiful donuts! And best of luck on your tests!

May 9, 2011 - 8:12 am

Annie - These look like a wonderful study break treat! Also, I’m very glad you didn’t use a stinking donut pan to make these. Those sort of unitasker pans drive me nuts when you can use cookie or biscuit cutters to do the same thing. Go you!

May 9, 2011 - 9:34 am

Julia - I’ve been wanting to try baked donuts for a long time. I just need to do it, you inspired me, I’m doing it!

May 9, 2011 - 6:00 pm

Happy When Not Hungry - I have seen so many wonderful recipes for doughnuts and have yet to make them. I really need to make these because yours are making my mouth water. Yum!

May 12, 2011 - 1:24 pm

Katy - So, so delicious!!!

May 16, 2011 - 2:37 pm

Hannah - Where have these been my whole life? Looks like a great one to try for the next brunch…or as an excuse to use up last year’s supply of sprinkles. Thanks!

September 20, 2011 - 3:11 am

Tamar - These came out flawless! I think I had a little bit of a rising problem, because I used instant yeast instead of active dry (I can’t find any here!) but boy oh boy, they were still delicious. And the glaze is absolutely to die for. I received many compliments, and will definitely be making these again!

October 18, 2011 - 8:13 am

stella - Hi there
these look so yummy and just what I was looking for, I had a craving this morning and said I was gonna google “baked donuts” and see what came up….I am curious though do you think I could make these without a mixer? I don’t have one yet (although I dream of having one some day!)

I am gonna food shop and try it after work….hopefully I will be able to pull it off without a mixer…..

Thanks for posting this!

October 18, 2011 - 9:59 am

srlacy - Hi Stella. I would totally try it without a mixer. Your arms might be tired, though! I hope they turn out for
You!

February 14, 2012 - 12:16 pm

Lyndsey - These look delicious! Is there a printable version of the recipe?

February 14, 2012 - 12:25 pm

srlacy - Hi Lyndsey-

Currently there is no printable option-the website will be undergoing renovation soon and this will be a new feature. I recommend cutting and pasting into Word for the time being.

Shanon

August 27, 2013 - 2:40 pm

Recipe: Copycat Easy Homemade Donut Holes {Baked} - […] Recipe adapted from The Curvy Carrot […]

August 28, 2014 - 3:02 pm

Donuts und Löcher | sabo (tage) buch - […] sind gebackene Donuts (das Rezept hab ich bei CurvyCarrots gefunden, nur bei den Überzügen hab ich andere Rezepte verwendet ) die ihre Konsistenz und den […]

August 28, 2014 - 3:31 pm

sabo - OMG!
I loved it – and my kids loved them – I adapted your recipe to german and have it on my blog now.
Thx for sharing!
http://www.sabotagebuch.de/wordpress/2014/08/28/donuts-und-loecher/

Sandra

Bean and Tortilla “Pie”


Happy Cinco de Mayo!  (or, as I have been seeing lately in the blogosphere…Cinco de Drinko!)  Ha!

I had to pull through with one more Mexican-inspired dish to celebrate the day.  This was one recipe that had caught my eye a long time ago, and I was dying to try it.  Now, it’s messy.  It’s oooey and gooey.  It’s not meant to be a pretty or graceful dish.  It’s like a tostada on crack.  It’s in-your-face, over-the-top, and deliciously satisfying.  And, it was another excuse to make the refried beans, since I had eaten all my previous leftovers.

Although it may seem to be a hard-to-assemble dish, it’s really not.  If you have a springform pan, then you will be completely fine with the assembly.  The refried beans, which I added from the original recipe, may ooze out the sides.  (But, seriously, what is Mexican food without some oozing of beans and cheese?  That’s what makes it so good!).  Get creative here!  You could add red bell pepper for more color, layer some fresh salsa in the middle, or add black olives to the mix (which, I ran out of beforehand and was very saddened to realize that I didn’t have a spare can in the depths of the pantry.)

And, if you are looking for some quick Cinco de Mayo recipes, try these:

Vegetarian Refried Beans

Cheese Enchiladas

Fresh Garden Salsa

Guacamole

Churro Cupcakes

Black Bean Soup

Wherever you are today, Happy Cinco de Mayo!

Bean and Tortilla “Pie”

Servings: approximately 6

Ingredients

Four 9-inch flour tortillas***if you can only find 10-inch tortillas, use your springform pan to trace and trim the tortillas to a 9-inch diameter

2 tablespoons canola oil

1 large onion, diced

1 jalapeno chile, minced

2 garlic cloves, minced

1/2 teaspoon ground cumin

1/2 teaspoon chili powder

Salt and pepper, to taste

One 29-ounce can of black beans, drained and rinsed

12 ounces (1 can) of beer…or use 1 and 1/2 cups water.  I liked the beer flavor. 🙂

One 10-ounce package frozen corn

1 and 1/2 cups refried beans, warmed (or more, depending on how much you like refried beans)

4 scallions, thinly sliced, plus more for garnish

2 and 1/2 cups shredded cheese**I used a mixture of Monterey Jack and cheddar

For garnish: tomatoes, sour cream, black olives, etc.

Instructions

1. Preheat the oven to 400 degrees.

2. Heat the oil in a large saucepan over medium heat until shimmering.

3. Add the onion, jalapeno, garlic, cumin, and chili powder, mixing well.

4. Season with salt and pepper, to taste.

5. Cook the mixture over medium heat until softened, about 5-7 minutes.

6. Add the black beans and beer (0r water, if using), and bring to a gentle boil over medium-high heat.

7. Once boiling, reduce the heat to medium and let simmer until almost all of the liquid has evaporated, about 10-12 minutes, stirring frequently.

8. Add the frozen corn and scallions, and remove the pan from the heat.

9. Fit a flour tortilla in the bottom of the springform pan and gently spread about 3-4 tablespoons (make it your own desired thickness) of refried beans.

10.  Layer this with about 3/4 cup of the black bean/corn mixture, followed by about 1/2 cup of cheese.

11. Repeat this three times with the remaining flour tortillas, black bean mixture, and cheese.

12.  Top the final layer with the remaining cheese. (Seriously, do not let good cheese go to waste.)

13.  Bake the “pie” for about 20-25 minutes, or until the cheese is nicely melted.

14.  Remove the “pie” from the oven, let cool for a few minutes, and remove the sides of the springform pan.

15. Sprinkle the top of the “pie” with your garnishes of choice, and slice into wedges.


Enjoy!

Source:  Adapted from Martha Stewart Recipes.

May 5, 2011 - 8:17 am

Blog is the New Black - A pie I can get behind!

May 5, 2011 - 1:03 pm

Kelsey - I’ve had a similar recipe bookmarked for years and have waffled on whether or not to make it. You’ve sold me!

May 5, 2011 - 2:10 pm

natalie (the sweets life) - Haven’t made this in awhile but it’s one of my favorites! I’ve never before made in a springform—duh!

May 5, 2011 - 2:38 pm

Jen of My Tiny Oven - This looks DE-LISH!!

May 5, 2011 - 4:04 pm

Yuri - I would definitely use beer and not water. This looks amazing!

July 19, 2011 - 8:25 am

Bean and Tortilla Pie « Spice Is Nice - […] Slightly Adapted from  The Curvy Carrot […]

November 9, 2011 - 3:44 am

Chriss - I found this recipe through Pintrest and I just wanted to thank you for your recipe. I’ve made it a few times and it is now family favourite. Many thanks. I look forward to trying many more of your recipes.

February 14, 2013 - 7:41 pm

Lara - This looks so yummy. I am going to try it for sure. Thanks!

March 19, 2013 - 11:26 am

Nina - I love tortillas. I’ve never tried something like this but I am very curious about it now!

June 12, 2013 - 8:14 am

about Pineapple and Black Bean Enchilada Pie | food - […] I right? PINEAPPLE AND BLACK BEAN ENCHILADA PIE Adapted from Branny Boils Over & The Curvy Carrot […]

July 11, 2013 - 7:40 pm

Caitlyn - This pie was AWESOME! I had all the ingredient on hand and it was supe simple! My whole family LOVED it. You really cannot go wrong with this recipe. Thank you so much for posting this awesome recipe. What a cheap and delicious dinner for the family (:

February 27, 2014 - 11:08 am

18 Savory Pie Recipes - Fit Foodie Finds - […] Credits: Joanne Eats Well with Others | How Sweet Eats | The Curvy Carrot | Martha […]

March 1, 2014 - 9:37 am

32 Must Have Pie Recipes | The First Year Blog - […] Bean and Tortilla Pie via The Curvy Carrot […]

April 29, 2014 - 9:15 am

Cinco De Mayo Fabulous Fiesta Foods - The Cottage Market - […] Enchiladas I bet you would love these on your plate. Can’t go wrong with Bean and Tortilla Pie by The Curvy Carrot Edible Perspecitive has something fabulous on the menu… […]