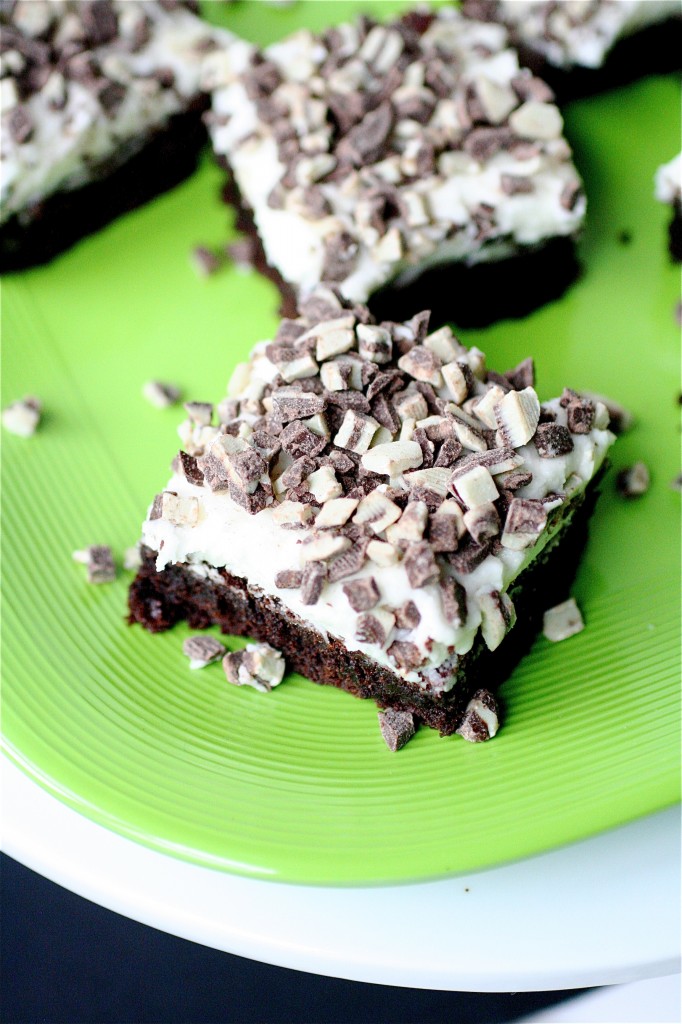
Chocolate Mint Brownies


Yes, yes, yes.  Yes, I know I posted a dessert last time.  I know. I am hanging my head in shame.  I’ve been trying to post a wider variety of dishes lately.

But, sometimes, a girl seriously needs some chocolate.

This is an impromptu post.  In fact, it was an impromptu recipe.  I was in the baking aisle of my local grocery, saw the bag of Andes mints, and I decided that I would be making mint brownies when I got home.  It was that easy.  When I got home, within a half hour I had the aroma of chocolate and mint wafting through the kitchen.  I made the glaze while the brownies were baking and took care of some other important things while the brownies cooled.  I chilled them in the fridge after a bit to help speed the process.  And, boy, was I glad that I made these.  Sometimes the most spontaneous decisions can be the best ones, in my opinion.

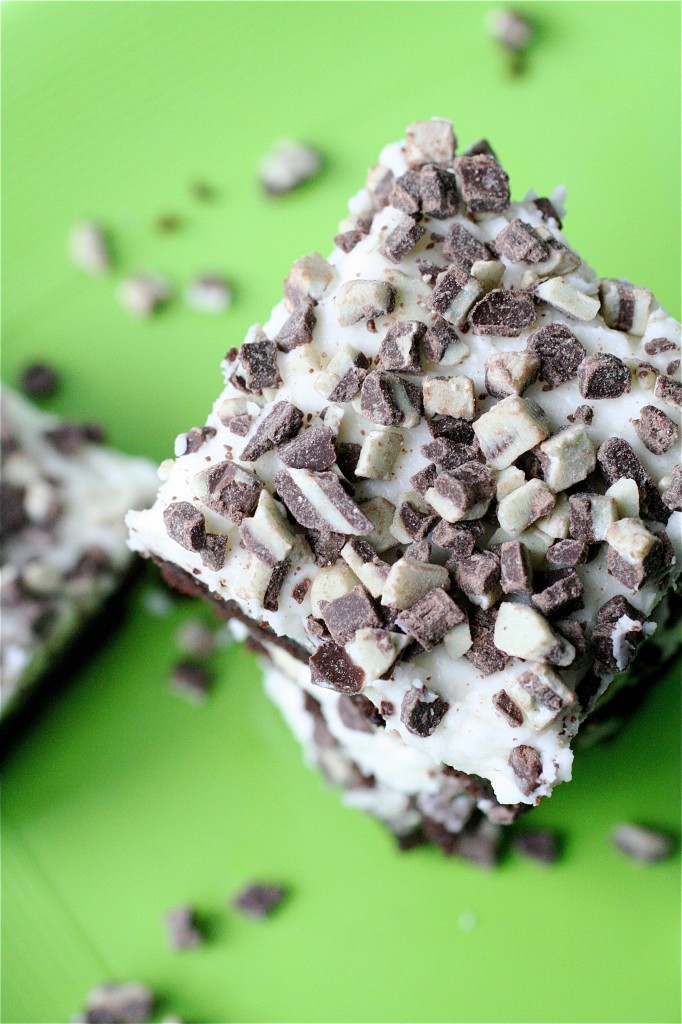
These brownies are moist, thick, chewy, and rich.  The peppermint is not overwhelming.  The original recipe says that you can add more peppermint oil to your taste, but, frankly, I found them to be minty enough, especially with the peppermint glaze.  And, can we talk about the peppermint glaze for a second?  It’s powdered sugar, butter, half and half, and peppermint oil.  How can four ingredients combine to form such a heavenly new concoction?  The sprinkled Andes mints on top add just a little bit more sweet mint flavor.  Fantastic!
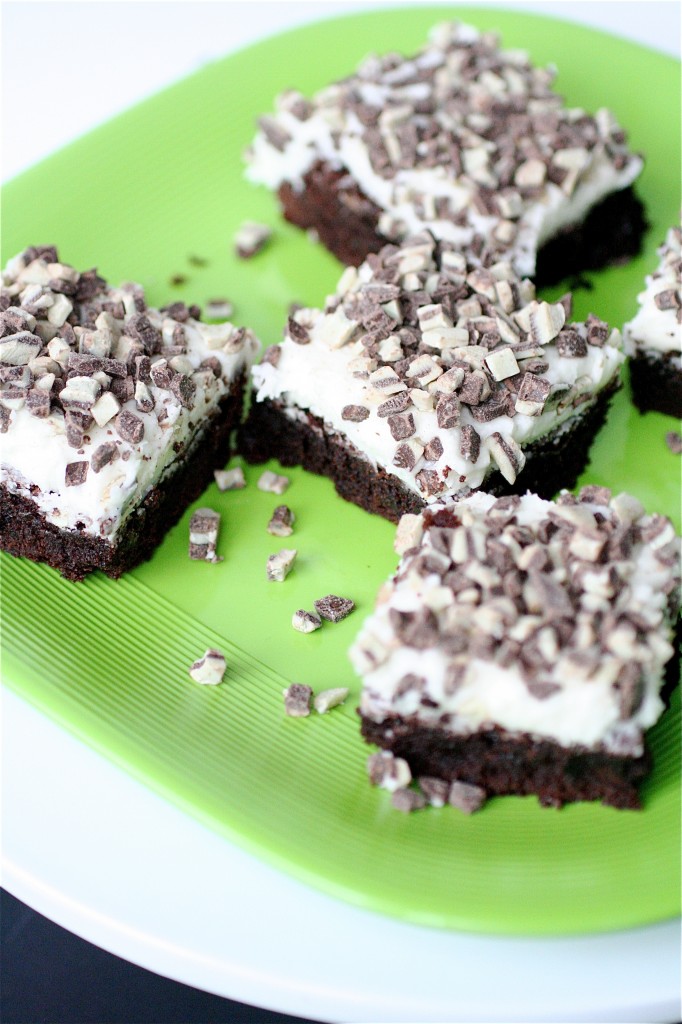
Chocolate Mint Brownies

Servings: approximately 24 2-inch brownies

Ingredients

For the brownies:

3/4 cup (1 and 1/2 sticks) unsalted butter, melted

1 and 1/2 cups granulated sugar

1/2 teaspoon salt

3/4 cup Dutch-processed cocoa

3 large eggs

3/4 cup all-purpose flour

1/2 teaspoon baking powder

1/8 teaspoon peppermint oil


For the glaze:

3 cups confectioners’ sugar

6 tablespoons unsalted butter, melted

3 tablespoons half and half

1/8 teaspoon peppermint oil


Andes mints, chopped (for topping**I used about half of an 11-ounce bag)
Instructions

1. For the brownies: Preheat the oven to 350 degrees.

2. Line a 9 x 13-inch baking pan with parchment paper and spray generously with cooking spray.

3. In the bowl of your standing mixer fitted with the paddle attachment, combine the melted butter, sugar, and salt.

4.  On low speed, add the cocoa powder, mixing until smooth.

5.  Add the eggs, one at a time, mixing well after each addition.

6. Still on low speed, add the flour and baking powder.

7. Add the peppermint oil and mix until combined.

8. Pour the batter into the prepared pan and spread evenly with a rubber spatula.

9.  Bake the brownies until a cake tester inserted in the middle comes out clean, about 20 minutes.****My oven took about 30 minutes.  Check them frequently.

10. Remove the brownies from the oven and let cool to room temperature.

11. For the glaze: In the bowl of your standing mixer fitted with the paddle attachment, mix the melted butter, powdered sugar (aka confectioners’ sugar), half and half, and peppermint oil until smooth.

12. Spread the glaze evenly over the cooled brownies.

13.  Top with Andes mints.

Source:  adapted from King Arthur Flour Company.

May 27, 2011 - 5:04 pm

Lauren at Keep It Sweet - I’m always happy to see more desserts so keep them coming:-) These look delicious, I love chocolate and mint!

May 29, 2011 - 12:16 am

Jenn@eatcakefordinner - I love Andes Mints. Chocolate and mint are a match made in heaven! Great photos.

July 2, 2011 - 8:39 pm

robin - Thanks for posting. My supermarket didn’t have Andes mints (still trying to wrap my head around that one), so I improvised with Peppermint Patty pieces (the kind that are like M&Ms). It worked out well and added some festive 4th of July color for my brownies.

June 14, 2012 - 4:06 pm

Becca Bakes » Chocolate Mint Brownies - […] Chocolate Mint Brownies From: The Curvy Carrot […]

Snickers Black Bottom Peanut Butter Mousse Pie

Oh, no, I didn’t.

I promised you dessert with chocolate.  A dessert that I dream about making.  A dessert that provides an opportunity to snatch up that bag of mini Snickers at the grocery store so I can nibble on them while I am making the dish. A dessert that makes me cover it up in the fridge or freezer so I eat my salad first before eating a piece for dinner.  Oh, yeah.  This is one of THOSE desserts.

So, this dessert has an awfully long name.  But, it’s a great name because it describes everything that is going on with it.  And, yes, there are a whole lot of awesome things going on with it.  A buttery graham cracker crust?  Check.  A chocolate ganache bottom layer?  Check.  A light and whipped peanut butter mousse?  Check.  Chopped bite-sized bits of Snickers bars on top?  Oh yeah.  And…don’t forget an extra drizzle of chocolate ganache on top.  I stared at this dessert when it was done and embarrassingly said, “Booyah!”

But I have an admission:  I may have not whipped my mousse enough.  After it chilled in the fridge a bit, it firmed up but not as much as I liked.  So, I turned this culinary mistake into an “exploratory opportunity”.  I decided to freeze the mousse instead.  Best. Mistake. Ever.  It turned into an ice cream pie (almost).  Everything happens for a reason, right?

Snickers Black Bottom Peanut Butter Mousse Pie

Servings: approximately 8 pieces

Ingredients

For the crust:

Nonstick cooking spray

7 graham crackers, coarsely broken (I used honey flavor…oh my goodness)

4 tablespoons (1/2 stick) unsalted butter, melted

2 tablespoons sugar

For the “black bottom”:

1 and 1/3 cups semisweet chocolate chips

2/3 cup chilled whipping cream

2 tablespoons light corn syrup

1 teaspoon vanilla extract

For the peanut butter mousse:

1 and 3/4 cups chilled whipping cream, divided

1 cup peanut butter chips

2 tablespoons creamy peanut butter

1 teaspoon vanilla extract

2 tablespoons sugar

For the topping:

1 11.5 ounce bag of mini Snickers candy bars, coarsely chopped (or less, if you prefer to eat them while chopping, as I do)

Leftover “black bottom” ganache for drizzling (just reheat in the microwave if it hardens), if desired

Instructions

1. For the crust: Preheat the oven to 350 degrees.

2. Spray a 9-inch glass pie pan with cooking spray.

3. Using your food processor, pulse the graham crackers until coarse crumbs form.

4. Add the melted butter and 2 tablespoons of the sugar, and pulse until the mixture resembles moist sand.

5. Using your fingers, press the crumb mixture into the pie pan.

6. Bake until lightly browned, about 12-15 minutes. Set aside to cool.

7. For the “black bottom”: In a large microwave-safe bowl, combine the chocolate chips, 2/3 cup whipping cream, corn syrup, and 1 teaspoon of vanilla for about 3 minutes, whisking occasionally to smooth out the chocolate.

8. Spread the chocolate (don’t use all of it, keep some extra for the leftover chocolate ganache drizzle if you desire) over the bottom of the crust and smooth with a rubber spatula.  Freeze the pie crust for about 10 minutes to harden the chocolate.

9. For the peanut butter mousse: In a separate microwave-safe bowl, microwave the peanut butter chips and 3/4 cup whipping cream at 15-second intervals, stirring occasionally until the chips soften.

10. Once the chips have melted, whisk in the peanut butter and 1 teaspoon vanilla extract.  Set aside to let cool, about 10-15 minutes.

11.  In a separate bowl, beat the remaining 1 cup of whipping cream and 2 tablespoons of sugar until thickened “but not yet holding peaks” (**this is where I went a little too easy on it.)

12. Gently fold in the peanut butter mixture into the whipped cream.

13. Pour and spread the peanut butter mousse over the prepared crust, spreading gently with a rubber spatula. **I did not use all of mine.

14. Freeze or chill the mousse until firmed, about 10 minutes.

15. Once firm, top with the chopped Snickers pieces and drizzle with re-heated leftover chocolate ganache.

Source: Adapted from Bon Appétit, via Epicurious.


May 25, 2011 - 5:23 am

Apron Appeal - Snickers is my favorite candy bar. I can’t eat it fight now because my nursing son is WAY allergic to nuts and milk (and other things). I’ve stopped bookmarking and reading all “snickers” related posts. This post made me break that rule. I think this will be my celebratory dessert once I can eat regular food again.

May 25, 2011 - 6:11 am

srlacy - Oh no! Poor little guy. That does not sound like fun. This is definitely a celebratory dessert. Being a mom is worth a billion of these. 🙂

May 25, 2011 - 7:34 am

Blog is the New Black - Looks terrible! 😉

May 25, 2011 - 8:32 am

Liz Parker - You should have seen my sons face when I showed him this picture – priceless! I will be making this pie for the holiday weekend. I am so thankful I found your blog. Thanks!

May 25, 2011 - 8:55 am

Josie - OMG. I NEED this. Like, now.

May 25, 2011 - 9:29 am

Patricia Scarpin - I am in total awe that you had just one slice of this beauty. 😉

May 25, 2011 - 9:30 am

srlacy - Hahaha! Oh no-it’s more like one slice per day. Or per half-day. 🙂

May 25, 2011 - 9:39 am

sweetsugarbean - I love all things peanut butter and pie. Oh my!!!

May 25, 2011 - 10:26 am

Heather - Those look dangerous. Very dangerous.

May 25, 2011 - 11:15 am

Lauren at Keep It Sweet - This looks heavenly… there is no way I’d be able to share this!

May 25, 2011 - 1:07 pm

Pretty. Good. Food. - I would like you to deliver a slice to my home asap!!!!! 🙂

May 25, 2011 - 4:47 pm

Kellie - Holy cow, Shanon. I am drooling at work. Thanks. 🙂

May 25, 2011 - 6:27 pm

Caroline @ chocolate and carrots - Oh. My. Goodness. This looks incredible! 🙂

May 25, 2011 - 7:53 pm

Koko - This looks INSANELY good! Can’t wait to try it

May 25, 2011 - 8:28 pm

Happy When Not Hungry - This pie looks amazing!!! WOW!

May 26, 2011 - 3:29 am

Yeah Bars Peanut Butter - […] The Curvy Carrot » Snickers Black Bottom Peanut Butter Mousse Pie A buttery graham cracker crust? Check. A chocolate ganache bottom layer? Check. A light and whipped peanut butter mousse? Check. Chopped bite-sized bits of Snickers bars on top? Oh yeah And…don't forget an extra drizzle […]

May 26, 2011 - 6:14 am

Jennifer @ Oh Sweet Day! - Out.Of.this.World!!!!!!! My father has a birthday coming up and I can just see his face now serving this!!

May 26, 2011 - 10:43 am

megan {a dash of megnut} - this looks AMAZING!!! i can make this for breakfast right now, right? that wouldn’t be wrong.

May 26, 2011 - 6:23 pm

Dorothy @ Crazy for Crust - Wow…all I can say is…wow. I needed to go get a glass of milk just reading the title. 🙂 YUM!

May 27, 2011 - 9:11 am

Katie - Hey- I’m going to make this tonight for a cook-out tomorrow. So do you think the pie is better frozen, or just refrigerated?

May 27, 2011 - 9:18 am

srlacy - Hi Katie-
I only had it frozen due to my goof. I think it would be good either way (although refrigeration would probably be easier!) I hope it turns out for you 🙂

May 27, 2011 - 2:49 pm

natalie (the sweets life) - looooove it! I’ve made similar desserts and frozen them instead of refrigerated them because they always turn out better that way!! 🙂

May 28, 2011 - 1:34 pm

Laura - Going to be filed in my cookbook under “guilty pleasures”

May 29, 2011 - 12:37 am

Casey - This is like torture, looking at these. Why oh why do i do this to myself you evil lady! :p

July 25, 2011 - 11:03 am

Small Plate: Candy Desserts - […] The Curvy Carrot: Snickers Black Bottom Peanut Butter Mousse Pie […]

November 5, 2011 - 12:49 pm

Snickers Black Bottom Peanut Butter Mousse Pie « i FinD Recipes Online - […] Recipe Link Share this:ShareFacebookTwitterDiggEmailPrintLike this:LikeBe the first to like this post. […]

May 6, 2013 - 1:08 am

youmen - hi.what is peanut butter chips?

May 6, 2013 - 8:01 pm

srlacy - Hi-
In the US, peanut butter chips are like traditional chocolate chips, just made with peanut butter instead. A common brand is Reese’s.

Pasta Caprese


It’s no secret that I love anything having to do with mozzarella, basil, and tomatoes (in combination).  In my opinion, they make up one of the best flavor combinations in the world.  Fresh flavors, bright colors, and basic simplicity.  So it was only a matter of time before I decided to post about a pasta with these flavors.

I made this recipe via the long way (which I am posting here) because I wanted to stay as true to it as possible.  Plus, I honestly wanted to see if the long way actually added more flavor to the end product.  My honest opinion is: yes.  But if you don’t have time to peel and dice your own fresh tomatoes, feel free to use a large 28-ounce can of peeled tomatoes.  The long way seemed to give this dish a little added boost of freshness, which was my favorite part.  Letting the tomatoes sit in the olive oil mixture (although it added an extra 20 minutes to the recipe time) really did make a huge difference in taste.  I even heated up the leftovers for lunch the next day, and the little bit of olive oil kept the pasta from drying out.  I was surprised by how well the flavors still held together after two days in the refrigerator.  This is another keeper recipe for me.

Pasta Caprese

Servings: 4

Ingredients

5 large tomatoes, peeled, seeded, and diced.***To do this, cut a shallow “X” on the bottom of each tomato.  Bring a large pot of water to a rolling boil, and place the tomatoes in the water for about 15 seconds or so.  Immediately remove the tomatoes with a slotted spoon and place into an ice water bath.  This will stop the tomatoes from cooking.  At this point, the skins should be easy to remove, and the tomatoes can be easily de-seeded and diced at this point.

1/2 cup extra-virgin olive oil

1 teaspoon balsamic vinegar

2 cloves garlic, minced

1 teaspoon salt

Fresh ground pepper, to taste

Pinch cayenne pepper

1 pound rigatoni

8 ounces mozzarella cheese, sliced or cubed as desired

Approximately 15-20 fresh basil leaves, finely shredded


Instructions

1. Place the peeled and diced tomatoes in a colander for about 15 minutes to remove excess juices.

2. In a medium bowl, combine the drained tomatoes, olive oil, vinegar, garlic, cayenne pepper, and salt and pepper.  Mix the ingredients well and let sit for 20 minutes at room temperature.

3. Meanwhile, bring a pot of water to a boil over medium-high heat.

4.  Cook the pasta according to package directions until al dente.

5. Drain the pasta and return it to the pot.

6. Add the tomato mixture, mozzarella, and basil.  Toss gently, and serve immediately.

Source: Williams-Sonoma’s Pasta.

May 23, 2011 - 6:30 am

Apron Appeal - I don’t think I will be able to get my kids to eat this with the tomato chunks. I think I may try it with a tomato sauce instead. I have to try it because it looks too good not to.

May 23, 2011 - 8:07 am

Blog is the New Black - One of my fav ones to enjoy pasta salad! Love this combo.

May 23, 2011 - 8:56 am

grace garden - Can’t wait to try this with fresh heirlooms and basil from the garden this summer! Beautiful photos, as usual!

May 23, 2011 - 10:07 am

mom - YES! this is a keeper!

May 23, 2011 - 11:07 am

Tracey - This looks phenomenal! It’s such a pretty dish with the red, white & green colors.

May 23, 2011 - 2:04 pm

sweetsugarbean - I love anything with tomatoes, basil and mozzarella too! Must try this when my tomatoes are ready to be picked. Oh how I love summer food!

May 23, 2011 - 7:07 pm

Lindsay @ Pinch of Yum - I made something similar recently, but mine was warm, so the cheese melted all over everything (which I loved…) but it’s good to know it can be done cold/room temp as well! I will probably make it A LOT this summer. 🙂

May 24, 2011 - 6:42 pm

Christina @ This Woman Cooks! - I loooove caprese anything, this looks perfect, I hope to make it soon. 🙂

May 25, 2011 - 7:52 am

Kim (Feed Me, Seymour) - I made something similar to this a few weeks ago, but your recipe blows mine out of the water! I definitely have to try your recipe this week for sure. It looks beyond tasty.

May 25, 2011 - 5:16 pm

alyce - this looks so fresh and delicious.

May 25, 2011 - 9:56 pm

Laura Wallan - I learned a neat trick when making this recipe several years ago. Cube the mozzerella and put it on a plate in the freezer for 15 minutes. When you fold it into the pasta it doesn’t melt into a gooey mess. I stays where it is and comes to room temperature.

This is a great dish to serve on the patio during the Summer months with wine and sourdough bread.

May 28, 2011 - 9:16 pm

Night in | callmepatricia - […] Caprese; recipe from The Curvy […]

June 7, 2011 - 9:06 am

qq:) - i love the penne so much~!
fresh tomato is refreshing in summer~!

June 8, 2011 - 2:16 am

Paula at Dishing The Divine - My tomatoes about the size of ping pong balls, but surely they will be huge someday soon and then red someday after that and *then* I can make delicious looking pasta like this! (Your photos are, again, gorgeous!)

June 21, 2011 - 5:25 pm

Kristine - I have been craving the flavor combination of fresh tomatoes, mozzarella, and basil, so I will be trying this recipe soon! It looks so fresh and delicious!

June 27, 2011 - 11:07 pm

April - This is a fantastic recipe – even when you discover the fresh basil in the fridge is actually quite far from fresh; and vastly underestimate the amount of pasta needed. Thank you for sharing it!

August 5, 2011 - 1:06 pm

wendy - Living in Sacra-tomato where tomatoes amd basil grow better than weeds most years, tis hard to go wrong combining these ingredients. This was wonderful hot with grated romano and, imho, even better the next day adding some toasted pine nuts. BTW, lemon EVOO added another layer of flavor. Thanks! YUM! Off to freeze basil today…..

August 14, 2011 - 5:58 pm

Melanie@Reasons to Skip the Housework - I found this on Pinterest and it looks so good. I’m featuring it on my blog tomorrow….stop on over and say hi!

Smiles,
Melanie

Reasons To Skip The Housework {The Blog}
Tinker B Boutique {The Shop}

{skipthehousework@hotmail.com}

September 1, 2011 - 3:22 am

Kathy - Refreshing & easy? So going into my ‘Recipes To Try’ board on Pinterest 😀

September 22, 2011 - 11:30 pm

Caprese Pasta « Roads are made by Traveling - […] got this recipe from this blog. Served good both hot and cold. Very light and very simple to make […]

January 25, 2012 - 1:58 am

Ashleysh22 - I think I might just try this with feta instead of mozzarella…

March 19, 2012 - 5:18 am

What we’re eating this week « mccobbfamily - […] Pasta Caprese with 5 minute […]

March 7, 2013 - 7:30 am
August 20, 2013 - 3:48 pm

Summer Eats | - […] {pasta caprese, recipe here} […]