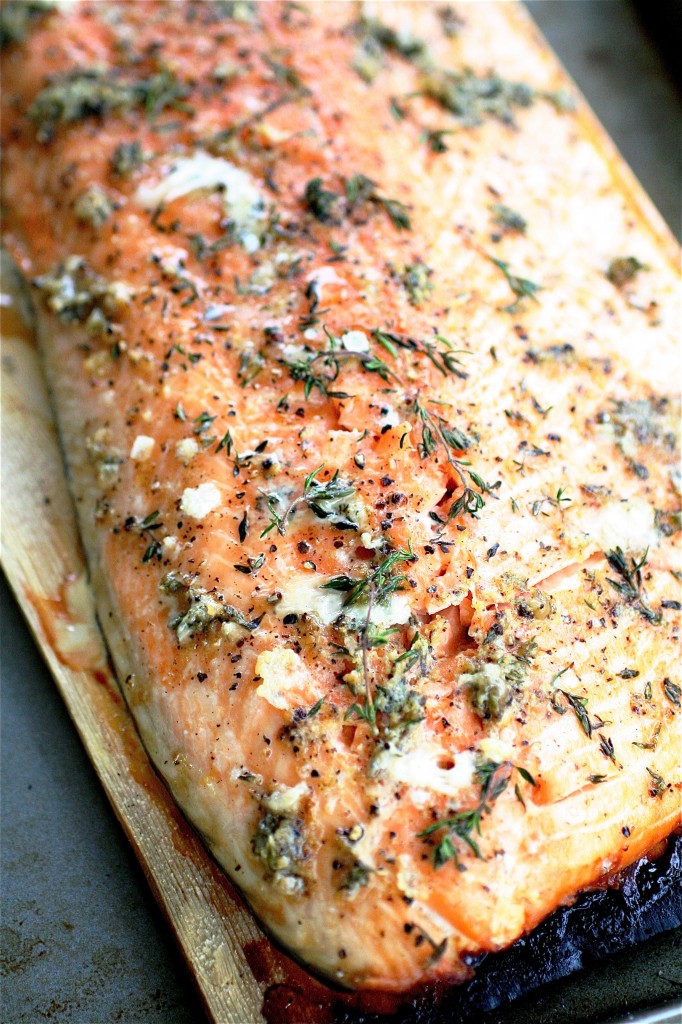
Cedar-Planked Salmon with Horseradish-Chive Sauce

I found another goldmine magazine issue.  It happens to be the June/July 2011 issue of Fine Cooking.  Usually when I get my food magazines in the mail, I hoard them for a later time so I can curl up with them in peace (usually with a glass of good wine) and read them from cover to cover. It’s my own personal heaven.  Really.  I know some of you can totally relate.

This didn’t happen to be the case with this particular issue.  I recently took my Anatomical and Clinical Pathology Board Examination in Tampa, Florida.  After a two-day, 16 hour (plus) marathon with a microscope and a computer, I was ready to finally put the textbooks aside and pick up a food magazine to read on the flight home (either that, or a trashy, girly, gossipy magazine…whatever I could find first-as long as it didn’t allow me to think too much. 🙂 )  As soon as the test was over, a co-worker and I celebrated with a drink at the hotel lobby before we took the shuttle to catch our flight home.  After my ginormous and very strong martini, I was feeling quite relaxed and chatty as we passed through security.  A few of us stopped at an airport restaurant to eat some food since we had 45 minutes before we had to board.  So, of course, the service was incredibly slow, the computer system broke, and we ended up throwing wads of cash to our server as they were calling our names over the intercom in the airport (telling us we had less than 5 minutes to catch our flight).  Thankfully, in a break before getting our food and frantically throwing the money at our server, I had meandered (feeling very relaxed) over to the magazine stand to pick up whatever non-textbook reading material I could find.  And there it was, the green Fine Cooking with the strawberry shortcake on its cover, beaming at me.

So, after running to the gate, martini-buzz still in effect, I boarded the plane on time and probably let out the biggest sigh of relief in my life.  I opened the magazine and was thrilled (martini anyone?) to see at least 10 recipes that I had to try, including a whole section on grilling.  This cedar-planked salmon was one of them.

I’m not a big griller-but I would love to learn.  I knew my dad had some cedar planks in the basement, still wrapped in the packaging from who knows when.  I also knew that he wouldn’t mind if I used one to experiment with salmon, especially if I was making him dinner with it.  So that’s what I did.  I cut this recipe in half, fed big meals to three people, and had enough leftovers to make salmon burgers (post coming soon).  One 2-lb fillet was more than enough for this recipe.  I stayed very true to the directions because I was a little nervous about possibly catching the plank on fire (thankfully that didn’t happen), and it paid off.  Since my mom has two giant chive plants in her garden, I decided to make the accompanying horseradish-chive sauce.  If you don’t have crème fraîche on hand, just use sour cream.  This is another keeper.
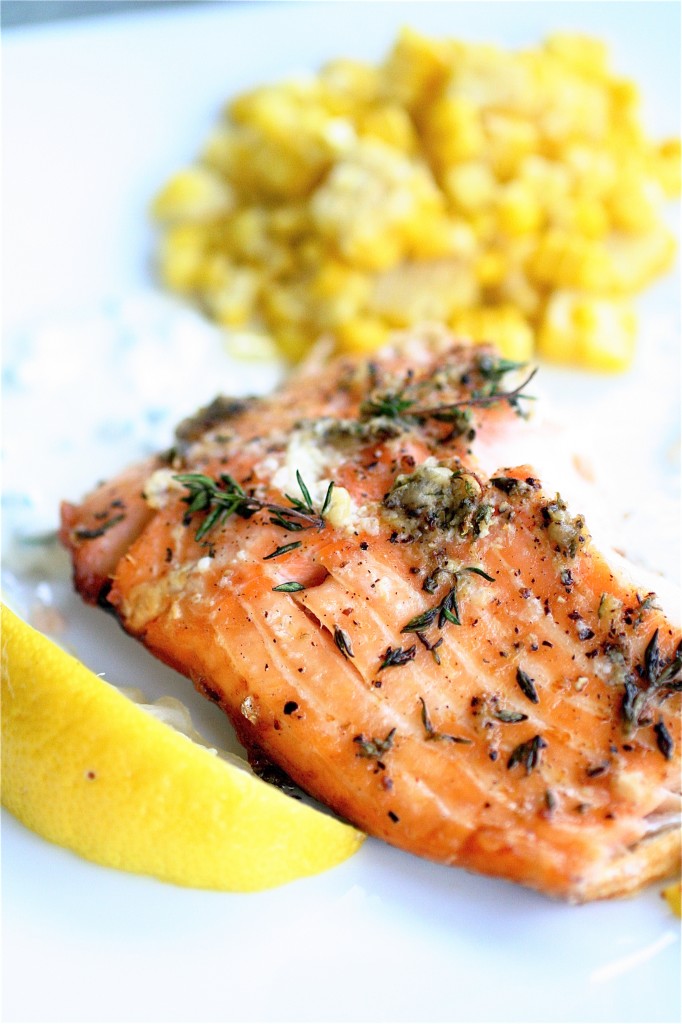
Cedar-Planked Salmon with Horseradish-Chive Sauce

Servings: 4 (with leftovers!)

Ingredients

For the salmon:

1 2-lb boneless, skin-on salmon fillet

1 tablespoon grated lemon zest

2 teaspoons fresh thyme, chopped

1/2 teaspoon granulated sugar

Salt and pepper, to taste

2 tablespoons extra-virgin olive oil
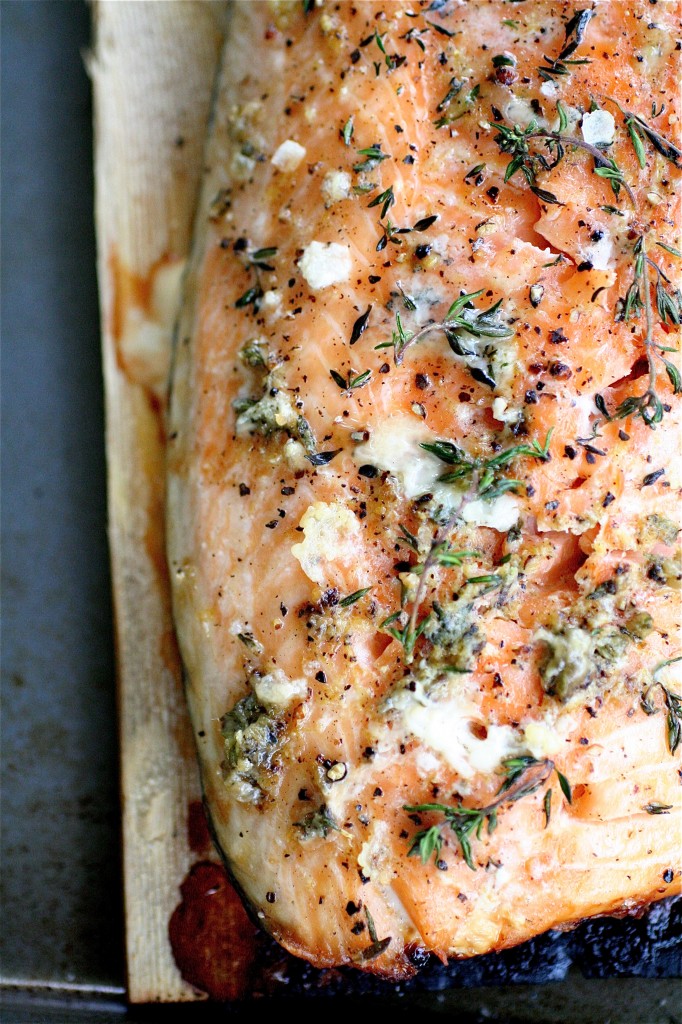
For the Horseradish-Chive Sauce:

1/2 cup crème fraîche (or sour cream)

3 tablespoons fresh chives, minced

1 and 1/2 tablespoons prepared horseradish

Salt and pepper, to taste

Special equipment:

1 15×7-inch untreated cedar plank***look for these in specialty food stores

Instructions

1. To prep the cedar plank: Fully submerge and soak the cedar plank in a pan of water (I put bowls or cups on mine to keep it submerged) for at least one hour. **This prevents it from catching on fire and helps create a smoking effect.

2. For the salmon: In a small bowl, combine the lemon zest, thyme, sugar, salt and pepper, mixing well with a fork.

3. Generously brush both sides of the salmon with olive oil.

4. Place the salmon fillet skin side down onto the cedar plank.

5. Using your fingers, crush the lemon mixture between your fingers to evenly distribute the lemon zest, and then rub the mixture onto the top of the salmon.  Set aside.

6. Meanwhile, prepare your gas grill by setting all the burners to high heat.  Let it remain this way until you are just ready to grill the salmon.

7. Turn off all but one of the burners, and place the cedar plank over the cooler part of the grill, making sure to place the thickest part of the salmon fillet closest to the heat source.

8.  Cover the grill and cook the salmon until completely cooked through and it easily flakes with a fork (a meat thermometer should read 135 degrees), about 20-35 minutes, depending on your grill heat.

9. Remove the plank carefully from the grill and let rest for 5-10 minutes before serving in individual portions.

10. For the Horseradish-Chive Sauce: Combine all the ingredients in a small bowl, and season to taste with salt and pepper.  Refrigerate until time to serve.

Source: Barely adapted from June/July 2011 issue of Fine Cooking.

June 8, 2011 - 5:55 am

Apron Appeal - I’m always a little timid to try a new variation of a family favorite – especially when I know my kids will eat the favorite version, but I’m thinking I can do this if i wean them off the old and introduce the new slowly…you know like switching brands of anti-depressant meds…terrible analogy I know but I figure, you’re a doctor, you might know what I’m talking about.

June 8, 2011 - 1:47 pm

Paula at Dishing The Divine - I want this for dinner. Tonight.

June 9, 2011 - 10:56 am

Cindy - Do you think I could do this in the oven? I don’t have a grill….

June 9, 2011 - 11:06 am

srlacy - You could definitely bake it using the same seasonings without the plank.

June 9, 2011 - 11:17 pm

Donna - This looks wonderful! I, too, love to curl up with a good food magazine! Also, how do you stay so thin?

June 10, 2011 - 12:44 am

srlacy - Donna-
You are too nice!
I think it’s more of a “strategically placed clothing” thing more than a “thin” thing. 🙂

June 16, 2011 - 5:02 am

The Curvy Carrot » Asian Burgers with Miso Dressing - […] a whole section about leftovers.  And what I liked the most was that they took something like the Cedar Planked Salmon (awesome) and then gave suggestions about what to do with the leftovers…probably for people […]

July 7, 2011 - 9:47 am

Wild Salmon with Basil Aioli and Quinoa Recipe: Healthy Lean Diet Food — Family Fresh Cooking - […] Cedar Planked Salmon with Horseradish Chive Sauce The Curvy Carrot Family Fresh Cooking Disclosure: I was sent a package of various fish from Anderson Seafoods. This is a sponsored blog post. The experiences I speak of are my own. I only share products and ingredients on Family Fresh Cooking that I stand behind and love. Please contact us if you would like your brand to be featured here at ads at familyfreshcooking dot com […]

July 10, 2011 - 3:38 pm

Lea Ann - I’m getting ready to prepare this tonight, couldn’t remember which magazine I had seen it in, so googled a few words and found your blog. Great photos! I’m really enjoying Fine Cooking and think this sounds delicious.

October 31, 2011 - 12:03 am

Shanon’s Chocolate Cupcake Tops - […] Shanon still enjoys cooking up some fish every once in awhile and she has shared some wonderful seafood dishes with her readers in the past.  Of course, when one has a love of chocolate and sweets like […]

October 2, 2012 - 3:30 am

Cedar-Planked Salmon with Horseradish-Cream Sauce « Look at what's cookin - […] this recipe calls for the sauce to have chives in it. I made it that way the first time, but have since […]

Rosebud’s Sticky Buns


It’s been awhile since I have posted another one of my late grandmother’s homemade recipes.  Last time I posted her butter-topped white bread and her cinnamon rolls, so I figured this time I would share her sticky buns.

I don’t know how she did it.  Raising six children, running a home, and still having enough time to make almost all the meals from scratch, including these sticky buns, seems almost impossible to me.  My mom and her sisters have great childhood memories of helping Grandma make all these wonderful sweet breads.  And, again (like her other recipes), they certainly do not disappoint.

These rolls (being a yeast bread) do take a little time to prepare due to the kneading and rising processes.  But they are simple to make and quite straightforward-even to someone like me who still has some issues with trying to make sweets look pretty.  The sticky bun glaze is almost like a caramel sauce, and the rolls basically “self-baste” during the baking process.  We traditionally use walnuts in the rolls themselves, but feel free to use almonds or pecans.  Once the rolls come out of the oven, serve them immediately (they are pretty heavenly while still warm), or simply reheat them for a few seconds in the microwave before eating to melt the glaze a little.

I can’t wait for you to smell these baking.  It might be one of my favorite baking aromas in the whole world.

Rosebud’s Sticky Buns

Servings: approximately 12 buns

Ingredients

For the sweet dough:

1 cup hot milk (I used skim milk, microwaved for about 45 seconds)-do not boil.

1/4 cup unsalted butter

1/2 cup granulated sugar

1 teaspoon salt

1/4 cup warm water (105-115 degrees)

2 packages active dry yeast (4 and 1/2 teaspoons)

2 eggs, slightly beaten

5 cups all-purpose flour

For the cinnamon-swirl:

2 tablespoons unsalted butter, melted

3/4 cups walnuts, finely chopped

1/2 cup granulated sugar

1 and 1/2 teaspoons cinnamon

For the sticky glaze:

1 cup packed light brown sugar

1/2 cup (1 stick) unsalted butter, melted

2 tablespoons light corn syrup

Instructions

1. For the sweet dough:  In the bowl of your standing mixer fitted with the hook attachment, combine the milk, butter, sugar and salt.  Set aside to let cool to lukewarm.

2. Meanwhile, in a separate small bowl, combine the warm water and yeast, stir to dissolve and let sit for about 5 minutes.

3. With the mixer speed on low, add the yeast/water mixture to the milk/butter mixture and stir to combine.

4. Add the eggs and 3 cups of the flour, mixing until combined (the mixture will look a little shaggy).

5. Add the remaining 2 cups of flour and knead the dough until elastic and smooth on low speed, about 10 minutes.

6. Once kneaded, shape the dough into a ball and place in a lightly oiled bowl.  Cover and let the dough rise until doubled, about 1 hour.

7. Once risen, punch down the dough and roll it out onto a lightly floured surface in a 12 x 17-inch rectangle.

8. For the cinnamon-swirl: In a small bowl, combine the cinnamon and sugar.

9. Brush the melted butter onto the dough, making sure to cover the entire surface.

10. Lightly and evenly sprinkle the cinnamon-sugar mixture onto the dough.

11.  Sprinkle the walnuts evenly onto the dough.

12. Carefully roll the dough into a cylinder, making sure to keep the roll tight, set aside for a few minutes.

13. Meanwhile, lightly grease or butter a 9 x 13-inch baking pan.

14. For the sticky glaze: Combine the melted butter, brown sugar, and corn syrup in a small bowl, and mix until smooth.

15.  Pour the glaze onto the prepared baking pan and smooth with a spatula.

16. Cut the rolled sweet dough into 1-inch thick sections, and place face-down into the glazed pan, spacing the rolls about 1/2-inch apart.

17. Cover the rolls and let rise again until doubled in size, about 1 more hour.

18. Meanwhile, preheat the oven to 375 degrees.

19.  Once risen, bake the sticky buns for about 25-30 minutes, covering the buns with foil as needed to prevent over-browning.  ***I usually cover them with foil with about 5-6 minutes left in the baking process to get that golden brown color.

20.  Remove the sticky buns from the oven and let sit for about 5 minutes.

21.  After 5 minutes, invert the sticky buns onto a rimmed baking sheet, and serve immediately.

Source:  my grandmother’s recipe

June 6, 2011 - 7:49 pm

Casey - oh boy these look like quite the indulgence, I must contain myself lol

June 6, 2011 - 9:29 pm

Lauren at Keep It Sweet - These look delicious! Your grandmother sure knew her way around the kitchen!

June 6, 2011 - 10:30 pm

Jenn (Cookies Cupcakes Cardio) - Wow…these look delicious! I’m scared to tackle anything with yeast in it…but maybe I’ll be brave and try these.

June 8, 2011 - 5:24 pm

natalie (the sweets life) - these are picture perfect–they look like they belong in a bakery!

February 6, 2013 - 3:11 pm

Nessa @ Rainyday Kitchen - Delicious recipe. Just whipped up a batch of these, the end results with the sweet, caramely taste were definitely worth the wait!

July 8, 2013 - 8:39 am

Whole Wheat Blueberry Cinnamon Rolls (a Rosebud Remix) » The Curvy Carrot - […] Rosebud, the mother of my mother, was the bread-maker.  I’ve got her sticky buns, her white bread (one of the best things about life, I think), and her wheat bread.  And her […]

March 4, 2014 - 12:12 am

April - I was wondering the nutritional information for this recipe

March 4, 2014 - 11:19 am

srlacy - Hi April-

Unfortunately I do not provide nutritional information for the recipes on my blog. My advice would be to use an online calculator using the specific ingredients that you will be using for this recipe, including accounting for any adaptations. That way it will be the most accurate and helpful for you.

Strawberry Salad with Candied Almond Brittle

Are you ready for a fresh, healthy, and slightly tangy/sweet summer salad?  Here it is, my friends.

I’ve been meaning to put more greens on the blog.  More salads.  More light and colorful posts that are easy to prepare and don’t leave you feeling like you are in sugar shock afterwards.  Everything in moderation, right?  After all, bathing suit season is upon us, and I have some summer sundresses that need to fit.  The simple truth is: I really do feel better when I eat healthier.  I sleep better, my work-outs are more intense, and I have more energy throughout the day.  Granted, I am a total sucker for sweets (particularly chocolate), but when I eat better, I find that I don’t crave the sweets (and carbonated drinks!) as much.  Is that true for anyone else out there?

I am also a sucker for fruits on salads…in particular spinach salads.  My mother thought I was an oddity as a child because of my love for spinach.  I requested it at age 5.  I like it fresh, steamed, lightly sautéed-you name it, I will probably like it.  So I try to use spinach as a base green for most of my salads due to the increased nutrient factor.  I’m looking for some other salad green leafy add-in alternatives…what’s your favorite?

So, let me tell you about this salad.  The strawberries add sweetness, the goat cheese adds a savory tanginess, the pomegranate vinaigrette adds a little kick, and the candied almond brittle is just about the most tasty thing I have ever put into a salad.  True, the candied almond brittle preparation takes a little more time than simply prepping the other salad ingredients and throwing them together, but it’s definitely worth the extra effort.  And the nice thing is that you will most likely have a lot of leftover almond brittle (that is, unless you start munching on it nonstop during the salad preparation and realize you have almost eaten the entirety of it before you even take a bite of your salad, like me), so you can have it at your fingertips for leftovers.  This has to be one of my favorite salads in a long time.

Strawberry Salad with Candied Almond Brittle

Servings: approximately 4 starter salads or 2 large salads

Ingredients

For the salad:

4 cups fresh spinach, washed

1 cup strawberries, thinly sliced (about 4-5 large strawberries)

2 ounces goat cheese, crumbled

For the candied almond brittle:

1 cup granulated sugar

1/4 cup water

1 and 1/2 cups sliced almonds, lightly toasted

For the pomegranate vinaigrette:***This yields about 3/4 cup of dressing.

1/2 cup pomegranate vinegar (feel free to substitute another flavor)

1/4 cup extra-virgin olive oil

Pinch granulated sugar

Pinch sea salt

Instructions

1. For the candied almond brittle: In a medium saucepan over low heat, combine the sugar and water and continuously stir until the sugar is completely dissolved. ***Using a silicone or wet pastry brush, brush the sides of the saucepan to dissolve any sugar that adheres to the sides of the pan.

2. Increase the heat to high and bring the mixture to a boil, continuing to brush down the sides of the saucepan as needed.

3.  Continue to boil the mixture, swirling the saucepan occasionally, until the mixture is amber (a golden brown color), about 8-9 minutes. In the meantime, lay a large sheet of aluminum foil onto a flat counter top or surface.

4.  Turn off the heat and quickly add the sliced almonds, stirring to thoroughly coat.

5.  Pour the mixture onto the foil, breaking up the almond pieces gently with a fork.  Let cool completely.

6. For the pomegranate vinaigrette: Combine the vinegar and olive oil in a small bowl and whisk to emulsify.

7. Add the sugar and salt, to taste.

8. Once the candied almond brittle has hardened and cooled completely, distribute the spinach evenly in the serving bowls and assemble with the strawberries, goat cheese, candied almond brittle, and vinaigrette (to your liking!)

Source:  Candied Almond Brittle from Bon Appétit via Epicurious. Remaining salad a Curvy Carrot original.


June 4, 2011 - 7:10 am

Lauren at Keep It Sweet - I love tat almond brittle, looks like a great topping for any salad!

June 4, 2011 - 8:40 am

rita in mi - I like using spinach for salads, too, instead of lettuce. I’ve also started using arugula alot too. It has a bit more flavor than spinach, but is still very healthful.

And, I’m thinking that almond brittle would be awesome for just munching on. Yum!

June 4, 2011 - 9:48 am

Jacqueline - I’m so glad you posted this today! I’m in the middle of studying for my (1st) boards, and it’s just been a constant sugar overload around here – and then I wash it down with some soda (I’m surprised my teeth are rotten). I think I’ll have to make this tonight for dinner to get back on healthy tract.

June 4, 2011 - 10:59 am

srlacy - Good luck with studying! You can do it! 🙂

June 4, 2011 - 10:45 pm

Karla - Looks great! I posted a similar salad a few weeks ago–with candied walnuts instead of almonds. It is always one of my favorites!
http://fortycakes.com/2011/03/spinach-strawberry-salad-with-candied-walnuts/

June 5, 2011 - 10:49 am

Claire - Yay for strawberry season! I love the candied almond brittle touch! Vegetables, fruit, and protein in one…can’t go wrong there. 🙂

June 5, 2011 - 11:40 pm

Ellen - Red leaf lettuce is a nutrient rich alternative. I tend to look up food on Self’s nutritional database, so when I looked up varying types of greens, I discovered that red leaf is very nutritional. I like the website because its a good way to really see how nutritious foods are in a variety of different ways, and they make great use of visuals. Plus the sheer amount of information about a given food is astounding.

http://nutritiondata.self.com/facts/vegetables-and-vegetable-products/7361/2

June 6, 2011 - 1:46 pm

Sonia - Absolutely gorgeous! That salad is pure eye candy. I love the idea of mixing almonds with spinach, strawberries and goat cheese. What a beautiful combination. I will be making that soon for sure, with plain toasted almonds however. Or maybe with a little bit of honey?

Thanks for the inspiration!

June 6, 2011 - 2:00 pm

sensiblecooking - That really is a great way to eat your greens and include more of it in your diet. Love those greens with bright red strawberry.

June 6, 2011 - 6:28 pm

Adele Forbes - love it can’t wait to try it!

June 7, 2011 - 11:00 pm

Josie - I love strawberry and goat cheese salad, but this almond brittle and pomegranate vinegar put it over the edge for me – can’t wait to try it!

April 1, 2013 - 1:55 pm

Christine - Made this for Easter dinner yesterday. It was a wonderful spring salad! The brittle was so easy to make. I was worried about not spraying the foil first, but it was unnecessary. The brittle came off the foil very easy and what a tasty topping! I thought I purchased the pommegranite vinegar but when I went to use if, found I got fig instead! Guess what? Delicious! I wonder now how the pom vinegar tastes in comparison! Definitely a keeper salad!! Thanks!

May 10, 2013 - 9:37 am

Strawberry Salad with Candied Almond Brittle - […] source:  thecurvycarrot.com […]