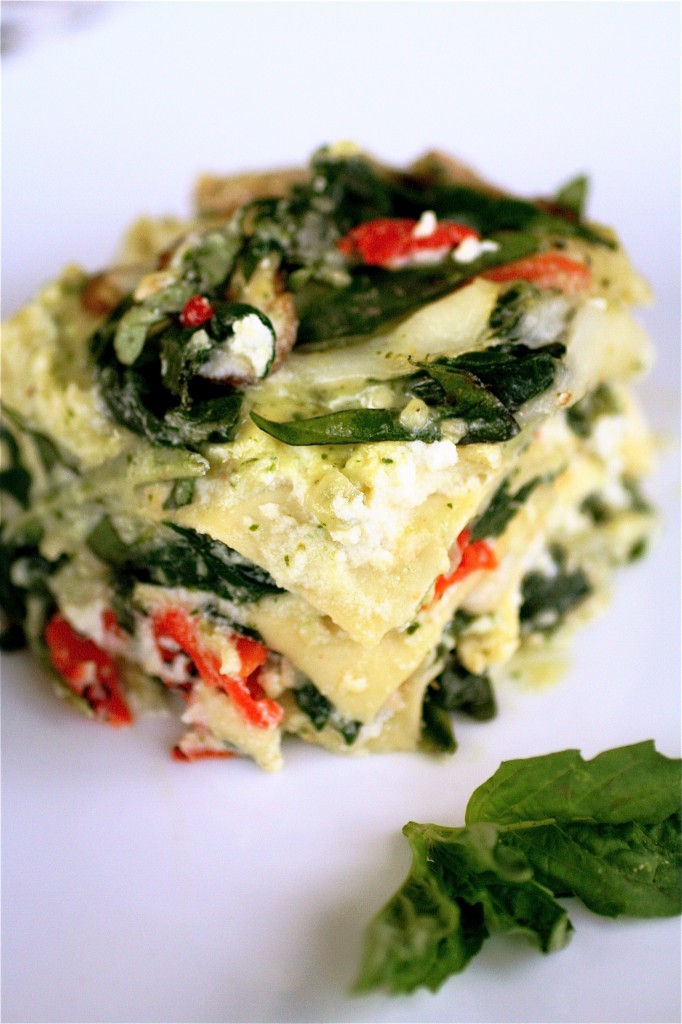
Garden Lasagna


I am always on the look-out for a great vegetarian lasagna.  I know they exist, but to me (a huge cheese lover), I need the perfect mix of veggies and cheese to make it worth the time to make.  This recipe caught my eye because of the liberty it allows in creating a great vegetarian dish with a variety of vegetable and add-in options.  The background sauce seemed like a great base to get creative with.  I am trying to “sneak” more vegetables into my meals, and a veggie lasagna is a great way to do it. I think you could use whatever vegetables you have access to: in the late summer/fall, I bet it would be terrific with different kinds of squashes.  It’s also probably really great without too many vegetables in it-the possibilities for this one are endless.

I will forewarn you, though.  It does take a little time to prepare, so it’s not the best option if you are looking for a quick weeknight meal.  I included a step in the instructions of how to blanch the spinach-make sure to have a bowl of cold water ready as soon as the spinach goes into the boiling water.  I made this on a Sunday afternoon, but the leftovers were great for re-heating the next couple of days.

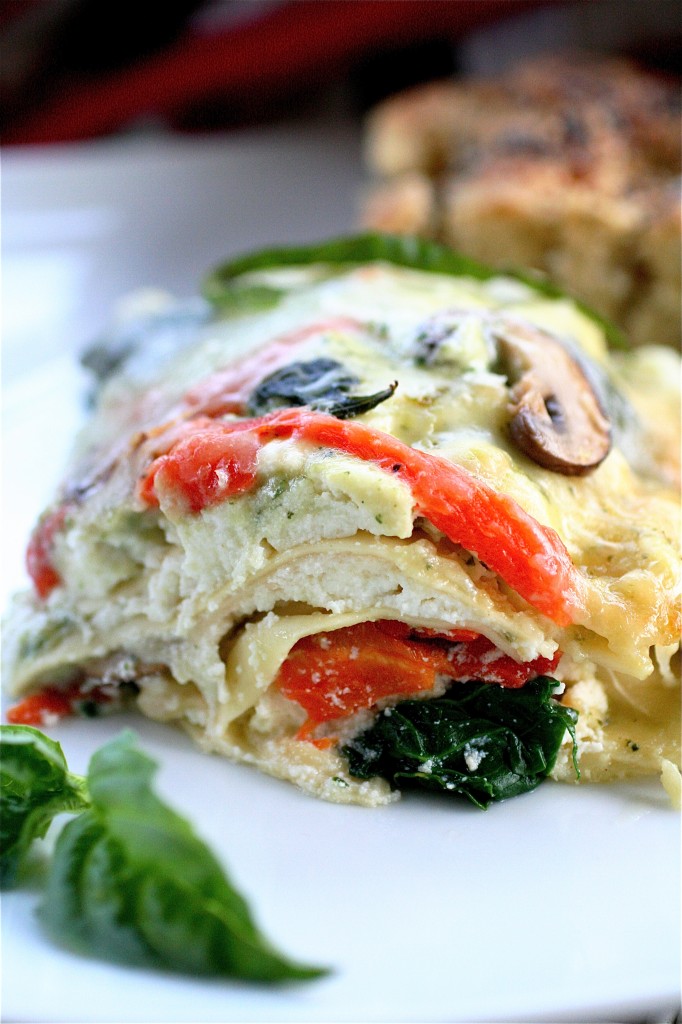
This veggie lasagna is packed with flavor, color, and (thankfully) cheese.  If you are looking to lighten it up a bit, omit some of the shredded mozzarella and use a part-skim ricotta.  The original recipe calls for the no-boil noodles to be broken into pieces-I wanted a more elegant presentation for my dinner so I chose to keep them intact, so feel free to play around a bit.  I also used a lasagna pan for this (thank you “free gifts with purchase!” at Bed, Bath, and Beyond!), but you could use a normal casserole dish for this one.
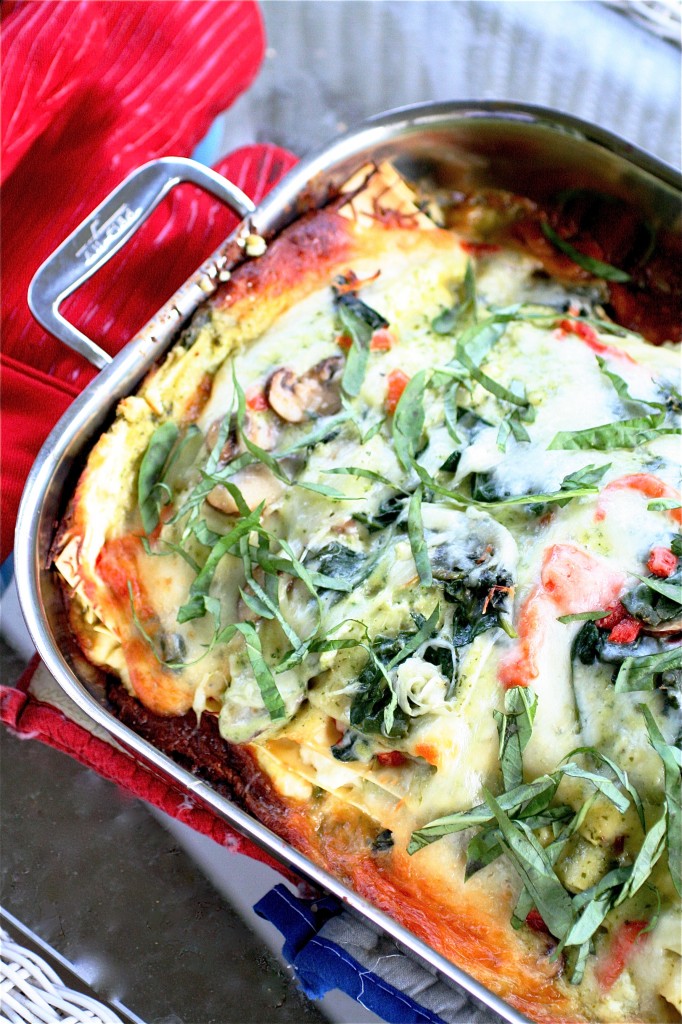
Garden Lasagna

Servings: about 8-10

Ingredients

For the basil puree:

1 cup packed fresh basil leaves

1/2 cup spinach leaves

2 teaspoons minced garlic

1/2 cup, plus 1 tablespoon extra-virgin olive oil

1/4 cup Parmigiano-Reggiano cheese (or Parmesan), grated

Salt and pepper, to taste

32 ounces ricotta cheese (One 2-pound container)

1 large egg

For the vegetables:

4 tablespoons (1/2 stick) unsalted butter

1/2 cup shallots, finely chopped

1/4 cup all-purpose flour

3 cups milk

8 ounces cremini mushrooms, sliced

1 8-ounce jar of roasted red bell peppers, drained

1 pound baby spinach

9 ounces of no-boil lasagna noodles

4 and 1/2 cups mozzarella cheese, shredded

For garnish:

1/4 cup fresh basil leaves, thinly sliced
 

Instructions

1. For the basil puree: In your food processor or blender, combine the basil, 1/2 cup spinach leaves, 1/2 teaspoon of the garlic and 1/2 cup of the olive oil, processing until a thick paste forms, a few seconds.

2. Add the Parmigiano-Reggiano and salt and pepper (to taste).  Set aside.

3. In a separate medium bowl, combine the ricotta cheese, the egg, and more salt and pepper (to taste).  Set aside.

4. To blanch the spinach:  In a large pot over high heat, bring about 8 cups of water to a boil.  Add the 1-pound of spinach to the water, and stir, until the spinach turns bright green, about 30 seconds.  Immediately plunge the spinach into another bowl full of cold water to stop the spinach from cooking.  Drain the spinach and pat dry with paper towels. Set aside.

5. For the sauce: In a sauté pan over medium heat, melt the butter.  Add the shallots and cook, stirring occasionally, until softened, about 3-4 minutes.

6. Add the remaining minced garlic and the flour and toss to coat, stirring constantly, for about 1 minute.

7. Slowly add the milk to the pan, and stir to remove any browned bits from the bottom of the pan.  Increase the heat to medium-high and cook, stirring occasionally, until thickened, about 7-10 minutes.

8. Transfer the roux to a separate bowl, and  let cool for about 15 minutes.

9. Once cooled, add the basil puree to the sauce and set aside.

10. For the vegetables:  Return the sauté pan to the heat and heat 1 tablespoon of the olive oil until shimmering.

11. Add the sliced mushrooms and cook until the excess moisture has evaporated and the mushrooms are lightly browned, stirring occasionally, about 8-10 minutes.

12.  Transfer the mushrooms to a medium bowl.

13. Add the bell peppers, blanched spinach, and salt and pepper to taste to the mushrooms, mixing well.

14. For the lasagna: Preheat the oven to 375 degrees.  Lightly spray your baking pan with cooking spray.

15. Assemble the lasagna by placing about 1/2 cup of the sauce on the bottom of the pan. Layer the noodles on top of this, followed by 1/2 cup of the ricotta, 1 cup of the vegetables, 1/2 cup of the sauce, and about 1 cup of the mozzarella.  Repeat this two more times.

16. Pour the remaining sauce over the lasagna and sprinkle with the rest of the mozzarella cheese.

17. Cover the pan with foil and bake until bubbling, about 45 minutes.

18. Uncover the pan, and bake for another 15-20 minutes or so, or until the cheese is lightly browned.

19.  Remove from the oven and let rest for about 15 minutes.

20. Garnish with the fresh basil and serve immediately.


Source: Adapted from Williams-Sonoma.


June 14, 2011 - 5:28 am

Blog is the New Black - Wow this looks amazing! I am a huge fan of the Amy’s brand spinach lasagna, as much as I hate to eat pre-packaged foods. This looks like it’s pretty similar. Yum!

June 14, 2011 - 6:53 am

Caroline @ chocolate and carrots - I think that anything that takes time to make is always worth it. It’s almost like you can taste that it took a lot of love. This veggie lasagna looks absolutely delicious! 🙂

June 14, 2011 - 9:21 am

Rachel @ Baked by Rachel - Beautiful! Definitely saving this for my brother. I always need ideas handy for when we have gatherings. And I’m totally jealous of your pan btw… I’m off to research price 🙂

June 14, 2011 - 9:51 am

sara - OH MY! This looks so delicious. I can’t wait for the zucs and peppers to get in season, so I can make a huge batch of this yumminess! Great pics!

June 14, 2011 - 10:42 am

Ang - I would definitely take the time to do this one. I looooove vegetarian dishes. As the summer veggies become more available, one could really have fun with this lasagna.

June 14, 2011 - 12:10 pm

Paula at Dishing The Divine - The way I look at it, any good lasagna will take forever to make, but will be worth it in every bite you take. Also, lasagna tends to make enough for us to eat several times, so I have to chalk up the “big cooking day” to two or three cooking days in my mind and then I’m okay with it. 🙂 These photos are gorgeous, by the way! 🙂

June 14, 2011 - 12:36 pm

Jill (JBean Cuisine) - This looks absolutely delicious. The is definitely the perfect lasagna for the summer entertaining season. Yumm. Can’t wait to make it.

June 14, 2011 - 1:32 pm

natalie (the sweets life) - I love everything about this dish–it looks fabulous!

June 14, 2011 - 5:57 pm

Anne Marie - This looks amazing! I love everything in it, and I especially like that it has shallots included. I’ll bet it tastes incredible.

June 15, 2011 - 9:39 pm

Claire - My doctor-to-be sister is a vegetarian and will be coming out to CO to live with me during one of her rotations… this recipe will be on the to-cook list! 🙂

June 16, 2011 - 9:21 am

Rivki Locker (Ordinary Blogger) - This looks amazing. Yes, the prep does look a bit much, but worth it for an awesome vegetarian lasagna.

June 16, 2011 - 12:42 pm

Alicia - I was looking for something special to make for my husband for Father’s Day so I made this veggie lasagna last night (only night able to cook due to other commitments the rest of the week)

As stated, definitely not a weeknight meal…started cooking around 5:45pm and we sat down to eat around 8:45pm. But the kids were down and the kitchen was clean so we had a nice semi-romantic meal.

To save a little time and reduce fat/calories a little I made a few subsitutions…used cooked wheat lasagna noodles vs. uncooked noodles, used ready made pesto sauce from gourmet section instead of using recipe above, 2% milk instead of whole milk, 2 cups of reduced fat mozzerella instead of 4 cups for regular mozzerella…and despite these substitutions I think its turned out great! I can’t wait to dig into the leftovers tonight now that the flavors have had time to set in!!

June 16, 2011 - 3:21 pm

srlacy - Hey Alicia-

I’m glad to hear it turned out well-the substitutions sound great. Next time I make it, I’ll be using some of your ideas to make it better for me!

June 19, 2011 - 1:37 pm

Audrey Ellen @ My Scene and Herd - This looks like exactly what I want to have for dinner!

August 29, 2011 - 7:39 pm

Lex's Life as a New Wife - I have been searching for a good vegetable lasagna and made this for my fiance and future father-in-law. As stated it definitely took a long time to prepare causing our dinner to be a little delayed. However, it was worth the effort and froze pretty well which meant left overs in the future.

September 27, 2011 - 2:16 pm

Lizzie - I made this lasagna last night, and it was fabulous – such good flavors and colors. Hubby loved it, and wants to have the leftovers for tonight. He helped in prepping all the stuff for me and I put it together. It was a breeze with team effort. This recipe is a keeper!

October 9, 2011 - 8:18 pm

Erika - I made this tonight — mine didn’t turn out as pretty and my sauce was really green/pesto color (had two little sous chefs), but it WAS SO GOOD!

I forgot to buy mushrooms, so I used artichoke hearts instead — delish!

January 12, 2012 - 11:51 am

72 Healthy Recipes to Jumpstart 2012 - […] Garden Lasagna […]

January 30, 2012 - 10:17 pm

Rachel - I made this tonight for dinner! Absolutely amazing! It definately is not a weeknight meal, as it took me like 2.5 hours to complete:) However, it is worth the labor! LOVE IT! Thanks again!

July 11, 2012 - 11:12 pm

Mary @ mary mary quite contrary - A year later and your fabulous Lasagna is posted on Pinterest ! So glad I found you…what a delicious and mouthwatering creation !

August 13, 2012 - 6:31 pm

ebb & flow :: fabulous finds & divine designs » Garden Lasagna - […] loves himself some lasagna but it’s not really my idea of a summer dish. When I spotted this garden version on my Pinterest today I thought it just might do the trick during these last warm months. A lighter […]

August 15, 2012 - 4:51 pm

Terry - wow!! FINALLY a delish dish of veggies and cheese that ISN’T all about Zucchini and other squashes! this really looks GREAT can’t wait to try it! Thank you!

September 8, 2012 - 6:32 pm

Lisa - I just put this fabulous-looking dish into the oven, but I wanted to make a couple comments. I did not see what to do with the mushrooms, after they were “transferred to a small bowl, so I just added them in with peppers and spinach. ? One other comment: I had about half of the 2 lbs of ricotta mixture leftover after following your layering instructions. I wondered why so much was called for, as usually I use 1 lb for recipes I have made in the past. Other than that, I can’t wait to take my first bite!

September 13, 2012 - 11:19 am

Eileen - I was curious to make it gluten free can I use almond flour? do i need to use a different ratio? I cant wait to make this! YUMMM!

September 13, 2012 - 11:57 am

srlacy - Hi Eileen-
I’m sure you could use your usual gluten-free substitutions here, but I am certainly no expert. I don’t want to steer you wrong. If you do end up trying it, I would be interested in hearing how it turns out for you!

September 24, 2012 - 6:21 pm

Garden Lasagna | The Wannabe Cooks - […] The Curvy Carrot) #gallery-1 { margin: auto; } #gallery-1 .gallery-item { float: left; margin-top: 10px; […]

October 8, 2012 - 8:41 pm

Julietta Fausnaught - Vegetarian dishes are not only healthy, they are also very tasty. i really love vegan dishes. ,,“’

Our personal web page
http://www.prettygoddess.com

December 23, 2012 - 1:55 pm

liz la rocca - I was wondering if anyone ever made this a day ahead and kept in fridge till time to cook the next day?

February 17, 2013 - 12:00 pm

Claudia - Thanx for this delicious recipe 🙂 My hubby and I cooked your lasagna for lunch today. We also added some dried tomatoes in oil…Really yummie 🙂 Claudia from Germany

March 28, 2013 - 9:10 am

Fantasy Menu Planning – Easter Dinner # 3 - […] third menu will satisfy some of our vegetarian readers beginning with a beautiful Garden Lasagna packed with spinach, mushrooms, roasted peppers and other good items, including a fair amount of […]

April 27, 2013 - 9:17 am

Shannon - This looks awesome! I am making homemade ricotta tomorrow..I am going to whip this up.

June 10, 2013 - 1:36 am

Tronesia - I discovered this on Pinterest Friday and had to make it for Sunday dinner. It was delicious! It took some time to make but it was so worth it…thanks for sharing 🙂

June 11, 2013 - 5:55 am

garden lasagna | annabellkyllonen - […] thecurvycarrot.com via Christine on […]

July 19, 2013 - 12:14 pm

Top 10 Best Italian Recipes - […] Recipe […]

August 1, 2013 - 5:17 am

6 Delicious Italian Recipes Everyone Should Try - Exquisite Girl - […] For the vegetarians, we have a wonderful recipe for lasagna. The ingredients are fresh basil leaves, half a cup of spinach leaves, 2 teaspoons of minced garlic, half a cup of olive oil, ¼ cup parmesan cheese, salt and pepper, a large egg and 32 oz. of ricotta cheese. With these you’ll be making the basil puree. For the vegetables you’ll need 4 tablespoons of butter, half a cup of shallots, ¼ cup of flour, 3 cups of milk, 8 oz. of mushrooms, roasted red bell peppers, 1 pound of baby spinach, 9 oz. of lasagna noodles and 4 and a half cups of mozzarella cheese. Garnish it with fresh basil leaves.{found on thecurvycarrot}. […]

August 20, 2013 - 2:21 pm

collette - OK…I live in Las Vegas and the last thing you want to do in the summer is cook…much less turn on the oven. So…I adapted it to cook in an oval slow cooker and it was delish! I get tired of pasta and tomatoey dishes. This was superb. I actually saw it on Pinterest. Thank you. I will make it again the same way.

September 18, 2013 - 6:04 pm

Tuesday Eats - […] Lasagna via curvy […]

October 6, 2013 - 5:02 pm
November 3, 2013 - 3:53 pm

gail - Omg! This is my sevond time making this dish…yummu…it takes do long to mske it…butbso worth it….I put more mushrooms in it…and used wine to cook thrm fown…thank uou gor sharing this…

November 6, 2013 - 1:09 pm
November 19, 2013 - 2:10 am

Vegetable Lasagna with Pesto Béchamel Sauce | The Pinspired Mama - […] Powered by Recipage Recipe inspired by the curvy carrot. […]

December 8, 2013 - 4:24 am
December 8, 2013 - 4:28 am
January 5, 2014 - 11:35 am

Garden Lasagna | Moments of life - […] the basil puree: In your food processor or blender, combine the basil, 1/2 cup spinach leaves, 1/2 teaspoon of the garlic and […]

January 17, 2014 - 3:31 pm
February 8, 2014 - 11:05 am

Check Out This Italian Food Recipes | Un - Complicate - […] & Photo credit to: TheCurvyCarrot […]

March 28, 2014 - 6:05 am

14 Lasagna Recipes | foodgio - […] Garden Lasagna from The Curvy Carrot […]

March 28, 2014 - 12:03 pm

Cup of Bloom A Celebration of Italian Food - It's Delicious » Cup of Bloom - […] Recipe & Photo credit to: TheCurvyCarrot […]

April 8, 2014 - 11:38 am

A Celebration of Italian Food. It's Delicious - The Lady Thing - […] Recipe & Photo credit to: TheCurvyCarrot […]

May 9, 2014 - 8:29 am

Garden Lasagna &raquo, The Curvy Carrot | Thrifty Mom - […] {Garden Lasagna} I thought this was SO good (DH – thought it was, ok …said it was too ‘pesto-y’. The sauce did turn out greener than what is in the picture (had 2 little sous chefs on that dish)…I forgot to buy mushrooms, which I didn’t miss b/c I don’t really like them —-and added artichoke hearts. Yummmmm — that was a great choice! I will make again, sans the help. Also — need to cut recipe in half — too much for just 2 adults and 2 little guys. Froze half — will update with how it froze.Leftovers were even better!Recipe link:thecurvycarrot.com […]

August 28, 2014 - 6:03 pm

Oklahoma Tomato Lasagna Gardening In Containers - […] Garden Lasagna | The Curvy Carrot – 6 Delicious Italian Recipes Everyone Should Try – Exquisite Girl-[…] For the vegetarians, we have a wonderful recipe for lasagna. The ingredients are fresh basil …… […]

September 19, 2014 - 1:01 pm

Best Italian Sausage Sandwich - Hhhmmmm Delicious garden lasagna, Thanks for the share 🙂

September 23, 2014 - 1:31 pm

Theresa @DearCreatives - Looks amazing. Can’t wait to try your recipe.

February 15, 2015 - 6:31 pm

Rachel - In the oven right now. So excited, it smells amazing! Not sure if we used enough basil, the store was almost out (it’s February)… and added in a blend of wild tomatoes (red, yellow, and darkish green) to the mushroom sautée… smells so good. Also adding the rest of the grated parmesan from the block we bought to the top to garnish! Thanks for making this Sunday a lot more awesome!

February 18, 2015 - 2:37 pm

Sara - This vegetable lasagne looks amazing! I hope to try it soon on the weekend and will be sure to mention your page in my blog when I share it for friends and family! Thanks!
http://www.ourfrontdoorlookingin.com

March 10, 2015 - 3:20 am

Top 10 Best Italian Recipes - […] Garden Lasagna […]

Strawberry-Rhubarb Shortcake

This week happens to be prime strawberry picking week here in Indy.  A group of my girlfriends are all getting together to go pick some berries and enjoy the day together.  It’s an event. I’m sad to be missing the time with them (I’m out of town for a beach wedding!)-I love being out there in the sun and picking my own berries.  The smell is heavenly, the atmosphere relaxes me, and the berries somehow taste a billion times better than the ones that are already packaged.

I also love the combination of cooked rhubarb with the berries.  When I was growing up, my mom had a huge rhubarb plant in her vegetable garden out back. I loved the bright red stalks and giant green leaves, but I never quite understood where the edible part was.  I thought it was like one of her zucchini or pumpkin plants, and I always looked for the flowering part.  It didn’t occur to me that rhubarb is very similar to celery, and the stalk is the actual part of the plant that we can eat.  All I know is that we would go strawberry picking, mom would get her rhubarb from the garden, and then she would make this heavenly strawberry-rhubarb jam that we would eat year-round.  (I’m hunting down that recipe before I leave so maybe one day I can share it with you, too!)

And, I am admitting to you now that this is another recipe adapted from the June/July issue of Fine Cooking.  I was drawn to the biscuits in this recipe because of the buttermilk-I had never made strawberry shortcake before with buttermilk, and I was tempted to try it.  I ended up cooking down some rhubarb and adding it into the mix as a tribute to that strawberry-rhubarb jam from my childhood.  I had a leftover vanilla bean, so I added that into the whipped cream and biscuits to make it a little more special (everything tastes better with real vanilla bean, in my opinion), but you could simply substitute in a teaspoon or two (to taste) of vanilla extract if you like a little more flavor to your whipped cream.

Strawberry-Rhubarb Shortcake

Servings: approximately 6

Ingredients:

For the strawberry-rhubarb mixture:

1 pound ripe strawberries, about 4 cups, cleaned

1 to about 1 and 1/2 pounds of rhubarb (about 7 stalks), leaves removed, stalks chopped into about 1/2-inch pieces

1/2 cup granulated sugar, plus 2 tablespoons sugar

For the biscuits:

2 cups all-purpose flour

1/3 cup plus 1 tablespoon granulated sugar

2 and 1/2 teaspoons baking powder

1/4 teaspoon baking soda

1/2 teaspoon salt

1/2 cup (1 stick) cold unsalted butter, cut into 1/2-inch pieces

1 large egg

1/2 vanilla bean**Slice it open and then pull your knife across the opening to remove about 1/2 the seeds.  Save the other half for the whipped cream!

1/4 cup heavy cream; plus more for brushing the tops of the biscuits

1/4 cup buttermilk

For the whipped cream:***Chill your mixing bowl, if possible first.

1 and 1/2 cups cold heavy whipping cream

2 tablespoons granulated sugar

1/2 vanilla bean


Instructions

1. For the strawberry-rhubarb mixture:  In a large sauté pan over low heat, combine the chopped rhubarb and 1/2 cup of granulated sugar.

2. Stir to coat the rhubarb thoroughly with the sugar, and let cook, stirring occasionally, until the rhubarb breaks down and becomes sticky and stringy, about 40 minutes to one hour.

3. Put 1/3 of the strawberries into a medium bowl and mash them until they are crushed.

4. Add the 2 tablespoons of granulated sugar to the bowl.

5. Slice the rest of the strawberries into your desired thickness and add them to the crushed strawberry mixture. Set aside at room temperature for at least 30 minutes.

6. Once the rhubarb is cooked, add this to the strawberry mixture and set aside.

7. For the biscuits: Position a rack in the center of the oven and preheat to 425 degrees.

8. In a large bowl, combine the flour, 1/3 cup of the sugar, baking powder, baking soda and salt.

9. Add the pieces of cold butter, and using a pastry cutter or your fingers, crush the butter into the dough until it is crumbly and resembles coarse sand.

10. In a separate small bowl, whisk together the egg and the heavy cream.

11. Add the buttermilk to the mixture and whisk to combine.

12.  Make a well in the center of the flour mixture and pour the egg mixture into the center.

13.  Mix the dough with a fork until just combined (**it will look shaggy).

14. On a lightly floured surface, knead the dough until softened and cohesive, adding more cream if necessary.

15.  Roll out the dough to a thickness of 3/4-inch, and using a biscuit cutter (I used a 2 and 1/2-inch diameter round cookie cutter), cut out the biscuits and place onto a parchment-lined baking sheet, re-rolling and cutting the dough as needed.  Fine Cooking stresses not to twist the biscuit cutter when making your cuts-simply push down and pull up the cutter vertically.  I did this, and it seemed to work like a charm!

16. Using a pastry brush, lightly brush the tops of the biscuits with cream and sprinkle the tops with the remaining granulated sugar.

17. Bake the biscuits until lightly golden brown, rotating the baking sheet halfway through the baking process, about 10-15 minutes total.

18. For the whipped cream: In your mixing bowl, combine the cream, sugar, and 1/2 vanilla bean seeds.  Mix on medium-high speed until soft peaks form.

19. Assemble the shortcakes with the biscuits, strawberry-rhubarb mixture, and top with the whipped cream.

Source: Adapted from Fine Cooking, June/July 2011 issue.


June 12, 2011 - 1:40 pm

Paula at Dishing The Divine - these look delicious! I just had someone hint to me the other day that she loves rhubarb. Maybe I should make her strawberry rhubarb shortcakes! 🙂

June 15, 2011 - 1:20 pm

Medifast Coupons - Very yummy looking shortcakes, love that you combined the strawberries and rhubarb. Look forward to trying.

June 21, 2011 - 3:43 pm

Dress and Dish - These look divine. I might try these for my wedding shower. Perfect for a tea party atmosphere! Yummy!!! xo

August 31, 2012 - 9:24 am

Diane - I made the biscuits and whip cream last night to go with peaches – delicious, BEST shortcake ever !!! Thanks.

June 14, 2013 - 2:07 pm

Misty - These look delicious!

June 15, 2013 - 3:03 am

Karen Simons - This looks so wonderful! I am looking forward to fixing this for my grown family, who remembers me taking them to pick strawberries and making jam! Yum! Love the touch of rhubarb !

Turtle Brownies


Warning:  This is a semi-sentimental post.


I’m sitting among half-packed boxes as I write this post.  My almost-4-year-old nephew has sweetly helped me by writing (as best as he can) “cookbooks” on a few boxes, and then he lovingly adds pictures of stick figures of his family on the box to remind me of who my family is, too.  In short, while I know this makes me smile now, I am pretty sure that in 8 days when I live 1000 miles away, it might make me cry a little.

The past couple of years have been a lot about goodbyes for me.  Goodbyes to an old and very naive me, goodbyes to former friends as we mature and realize life is carrying us in very different directions, and goodbyes to assuming the same patterns in life which appear to always land us in the same places.  I’m now attending graduation banquets, going away parties (I seriously have some of the best friends in the entire world), and I am planning out new adventures and opportunities for my next chapter in life.  I’m filling up every last minute before I leave with the people closest to me: going down slides at the park with my nephews, celebrating my little sister’s 21st birthday, traveling to my dear friends’ wedding halfway across the country, holding my friend’s baby, and chatting way too much with the co-workers I will severely miss. I am not sleeping that much because there’s too much fun yet to have.

And the funny thing is that I am not very good at goodbyes.  I kind of like to detach a little.  I kind of like to end it like it isn’t really ending.  Like, “hey, see you tomorrow!” when I am really moving far away the next day.  It seems a little smoother that way.

I am incredibly thankful for all of it.

But, I’m not a Debbie Downer here.  I am so excited to be starting fresh.  New faces, new places, and new food!  And, if you are a regular reader, hopefully you will be joining me on this blog as I make my way to a different part of the country to experience a non-Midwestern palate.  There will be culinary/baking classes for me, field trips to farms, and a great-many farmers’ markets and probably a lot of maple syrup and Ben & Jerry’s.  Are you ready?  I am.

Sentimentality over.  Unless you want to get sentimental about these brownies, which would be perfectly acceptable.  These are worth a little bit of sentimentality.  My friend, Jason Jacobs, has been one of my faithful taste-testers of recipes over the past year, and he has declared these as “definitely Jason approved.”  They are a little chewy, very rich, oozing with buttery homemade caramel (sidenote: yes, the caramel is surprisingly easy to make), and totally worth getting a little misty-eyed over. I used walnuts instead of pecans because that’s what I had on hand, but any kind of nut would be great!

Here’s to new hello’s.


Turtle Brownies

Servings: about 12 brownies

Ingredients

For the brownie:

3/4 cup all-purpose flour, plus an additional 2 tablespoons

1/4 teaspoon baking powder

1/2 teaspoon salt

4 ounces semisweet chocolate chips

1 ounce (1/4 of a 4 ounce baking bar) unsweetened chocolate, broken into pieces

1/2 cup (1 stick) unsalted butter

1 cup packed light brown sugar

1 teaspoon vanilla

2 large eggs


For the caramel topping:

3/4 cup granulated sugar

1/3 cup light corn syrup

3 tablespoons water

Pinch of salt

1/3 cup heavy whipping cream

1 teaspoon vanilla

1 and 1/2 cups walnuts, lightly toasted and coarsely chopped

For the garnish:

1/2 cup semisweet chocolate chips


Instructions

1. For the brownies: Preheat the oven to 350 degrees.

2. Prepare a 9×9-inch square pan by buttering it and lightly flouring the surfaces.

3. In a large, heavy saucepan over medium heat, melt the chocolate chips, unsweetened chocolate, and butter.

4. Stir the mixture until smooth, and then remove from the heat.

5.  While the chocolate mixture cools, combine the flour, baking powder, and salt in a separate bowl.

6. Add the brown sugar and vanilla to the chocolate mixture, mixing well.

7. Add the eggs, one at a time, mixing well after each addition.  ***The batter should look thick and smooth.

8. Add the flour mixture to the chocolate, and mix until just combined.

9. Pour the batter evenly into the prepared baking pan and bake until a cake tester inserted into the center comes out clean, about 30-35 minutes.  Let cool.

10. For the caramel topping:  In a heavy saucepan over medium-high heat, combine the sugar, corn syrup, water, and a pinch of salt and stir until the sugar is dissolved.

11. Bring the mixture to a boil and let boil without stirring until the color turns a light amber, about 10 minutes or so.

12. Remove the saucepan from the heat, and add the cream and vanilla, stirring until thick and smooth. **Be careful, it will bubble and splatter.

13. Pour the caramel evenly over the brownies.

14. Sprinkle the toasted walnuts on top of the caramel, and let the brownies cool completely. **I stuck mine in the fridge for about 20 minutes.

15. For the garnish: In a small bowl, microwave the chocolate chips at 10-second increments, stirring after each interval, until smooth.

16. Cut a very small piece off a corner of a plastic sandwich baggie, and spoon the chocolate into the bag. **Or use a pastry piping tip.

17. Use the open end to quickly drizzle the melted chocolate over the top of the brownies. Let cool.


Source: Barely adapted from Gourmet, via Epicurious.


June 10, 2011 - 5:44 am

apron Appeal - the brownies look really great but your sentimentality really struck me. I used to hate spring time because it meant that I would be saying goodbye to some beloved friend. Living in a college town is rough that way…but living away from a college town is harder. Bon Chance on your new adventure…where will you be heading?

June 10, 2011 - 6:53 am

Hilary - Hope your travels are safe and you get settled soon:) Makes me a little sad cause I had just found out what a great blogging community we have here in Indy and was looking forward to getting more involved through my blog:)

June 10, 2011 - 7:22 am

Caroline @ chocolate and carrots - I’m drooling. Look at that dripping caramel! Yum!!!

June 10, 2011 - 8:51 am

Josie - Ummm so you totally just made me cry this morning! Best of luck with your move, Shanon. I can’t wait to read all about your new adventures! And the brownies look awesome, of course 🙂

June 10, 2011 - 10:58 am

Nicole@HeatOvenTo350 - Good luck in your next adventure. I know the feeling of goodbyes all too well. Where are you headed? If it is Vermont, I have a friend for you. She is my sister and she is an awesome cook and even works for Ben and Jerrys. 🙂

June 10, 2011 - 12:49 pm

Paula at Dishing The Divine - good luck on your move! I *hate* moving and will surely never leave this area as a result. I’m just too lazy to pack all my crap into boxes. 🙂 That said, these photos of brownies oozing caramel are gorgeous!

June 10, 2011 - 12:54 pm

srlacy - Hey Nicole!

I am moving to the Vermont/New Hampshire border to do a fellowship at Dartmouth for the next year! It sounds like your sister and I would get along really well. 🙂

June 10, 2011 - 12:55 pm

srlacy - Hey Hilary!

I know, it seems like I am discovering more and more Indy food blogs-there are so many talented food bloggers here in the area. I am sad to be leaving. Maybe someday we could all get together and meet for dinner somewhere when I come back to visit!

June 10, 2011 - 2:53 pm

Kelsey - oh my gosh this look absolutely amazing. I am sitting at work and DYING because I want to eat a pan of these RIGHT NOW! Thanks for sharing!

June 10, 2011 - 2:54 pm

Kelsey - Gorgeous GORGEOUS photos!

June 10, 2011 - 3:54 pm

Heidi @ Food Doodles - Wow those brownies look amazing decadent. Yum 🙂 Good luck with your move and getting settled in your new place. I completely understand your sentimentality. I’ve moved so many times and hated it each and every time. But now that it’s in the past I see that it was always a good choice 🙂

June 10, 2011 - 4:28 pm

Kellie - Shan- These look AMAZING! Your post made me sad, but it also made me excited for all the adventures you are going to have. We are going to miss you so much, but know that we are always a phone call (or short flight) away! 🙂

Love,
Kellie

June 10, 2011 - 6:42 pm

Lauren at Keep It Sweet - Sounds like a really scary but exciting transition! I find that my friends and I are constantly going through goodbyes like that at this point in life and it is definitely hard. I also hate goodbyes, but starting new parts of life are so exciting.

June 10, 2011 - 9:16 pm

Claire - You can do it!! Best of luck and good luck moving!! Just think: you will be near the Kingdom of King Arthur Flour. 🙂

June 11, 2011 - 9:14 am

Lori - Welcome to the East Coast! I am sure you will love Boston! Thanks for posting these delicious brownies. The caramel did it for me!

June 11, 2011 - 12:35 pm

sweetsugarbean - My God woman! These look INSANE! Love love love chocolate and caramel. Good luck with the move – such an exciting time for you!

June 11, 2011 - 11:50 pm

Donna - These look amazing!

Good luck with your move. My husband and I went through all that, since he went to med school, internship, residency, position. Every move was challenging – but worth it! I wish you all the best…. and I’ll be following you along as I read your blog!

Donna

June 12, 2011 - 6:26 pm

geegee - yes these are amazing! one of my favorites!

June 12, 2011 - 8:51 pm

Raelyn - Just wanted to drop a note, I have been enjoying your blog for the last few months. Happy to hear you are coming to our region. You will LOVE King Arthur flour!!! And the Farmer’s Markets. Shelburne Farms in Burlington VT is a little bit of trek from the VT/NH border but a must see, they make their own cheese and super yummy bread. DHMC is an amazing hospital. Good luck to you on your move. I can’t wait to see the upcoming New England spin on your blog!

June 13, 2011 - 4:09 pm

Brooke @ Waiting to Rise - Hey there! So, I’m just catching up on my blog reader and I came across this post. What struck me more than the yummy brownies, was the comment about sentimentality….saying goodbye to the old you….I’ve been doing that recently and while its hard, I have to move on from my old, naive self into the mature woman I’ve become (the blog has been one of my ways to say goodbye as I would’ve never put myself out here like that). Thanks for reminding all of us that we are all human and we go through the cycles of life, saying goodbyes and hellos throughout……..

Good luck on your journey! Can’t wait to read more in the future!

August 8, 2011 - 12:09 am

Ashlee - I saw your brownies via Pinterest. They looked amazing! I saved them to my board and decided to make them today. They were pretty good (I’m not really a brownie fan). I’m excited to browse your blog more this week when I have the time. I put your brownie pic up and linked to your post. Here is my post if you are interested:

http://craftsparklepop.blogspot.com/2011/08/recipe-turtle-brownies.html

Have a wonderful day!
Ashlee

August 14, 2011 - 9:57 pm

Inspired? « mots de tous les jours - […] http://www.thecurvycarrot.com/2011/06/10/turtle-brownies/ Share this:TwitterFacebookLike this:LikeBe the first to like this post. […]

January 13, 2012 - 12:19 pm

Brownie Bonanza « Savvy Entertaining - […] Turtle Brownies from The Curvy Carrot. Advertisement GA_googleAddAttr("AdOpt", "1"); GA_googleAddAttr("Origin", "other"); GA_googleAddAttr("theme_bg", "ffffff"); GA_googleAddAttr("theme_text", "333333"); GA_googleAddAttr("theme_link", "265e15"); GA_googleAddAttr("theme_border", "ededed"); GA_googleAddAttr("theme_url", "996633"); GA_googleAddAttr("LangId", "1"); GA_googleAddAttr("Autotag", "cooking"); GA_googleAddAttr("Autotag", "food"); GA_googleAddAttr("Tag", "cookies-desserts"); GA_googleAddAttr("Tag", "desserts"); GA_googleAddAttr("Tag", "referrals"); GA_googleAddAttr("Tag", "brownies"); GA_googleAddAttr("Tag", "savvy-entertaining"); GA_googleAddAttr("Tag", "shanna-hatfield"); GA_googleFillSlot("wpcom_sharethrough"); Share this:TwitterDiggFacebookEmailStumbleUponLike this:LikeBe the first to like this post. […]

January 13, 2012 - 12:30 pm

Brownie Bonanza « Savvy Entertaining - […] Turtle Brownies from The Curvy Carrot. […]

May 18, 2012 - 7:48 pm

squiggles2007 - Made these and LOVED them!! I almost ate the whole pan before my husband could try any haha I actually added the carmel topping before putting them in the oven and they were fantastic that way also! Thanks for a great recipe!

July 4, 2012 - 1:04 pm

Andrea - These are delicious and absolutely decadent!!! Will be making these for a lot of parties! Chocolate,caramel, nuts-what’s not to love!

September 30, 2012 - 2:43 pm

Turtle Brownies / «Черепаховый» брауниз « arishai's blog - […] от рисунка, который образуется сверху на этом брауниз. Оригинал. На 12 штук (форму 22х22 см): Тесто: 3/4 чашки + 2 ст.л. муки (130 […]

January 29, 2013 - 4:21 pm

Ingrid - GREAT recipe…made these a couple nights ago…and I am still dreaming of that yummy sticky caramel! Big hit here…{imagine a pack of wolves at feeding time} Definitely a keeper! 😉

Hugs,
Ingrid

April 2, 2013 - 4:41 pm

Delicious Things to Cook in April | 96.7 CHYM FM - […]     Turtle Brownie Seriously decadent recipe here: http://www.thecurvycarrot.com/2011/06/10/turtle-brownies/ […]

April 9, 2013 - 9:59 pm

Turtle Brownie Bars - […] slightly adapted this amazing recipe from The Curvy Carrot. Filed Under: […]

June 27, 2013 - 5:44 pm

Treat Your Taste Buds to My Favorite Dessert Recipes - […] Turtle Brownies – The Curvy Carrot […]

June 10, 2014 - 3:00 am

Joy is summer… - […] and scoped out the perfect recipe to make for our nephew’s birthday treats. Who does not LOVE turtle brownies? Really…moist gooey brownies with homemade caramel and loads of pecans. Delish! I adjusted […]