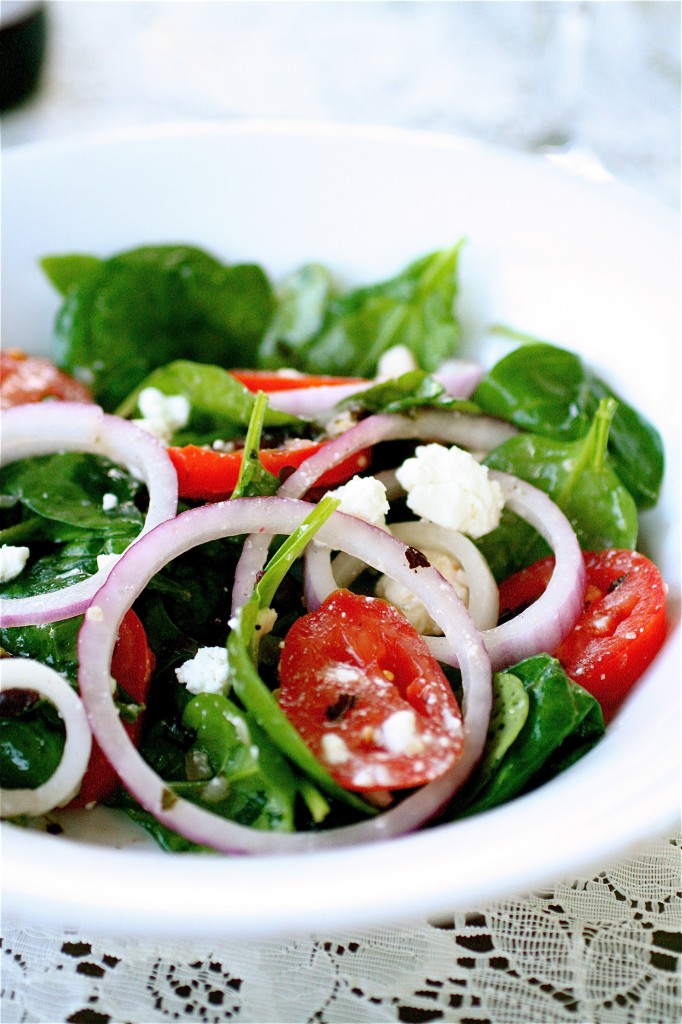
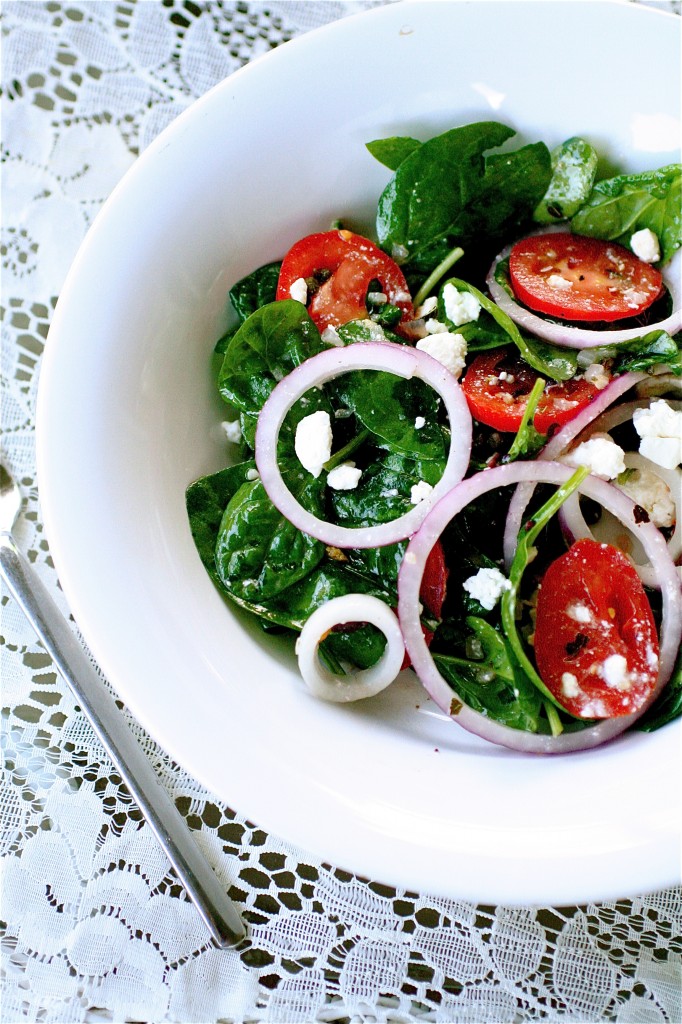
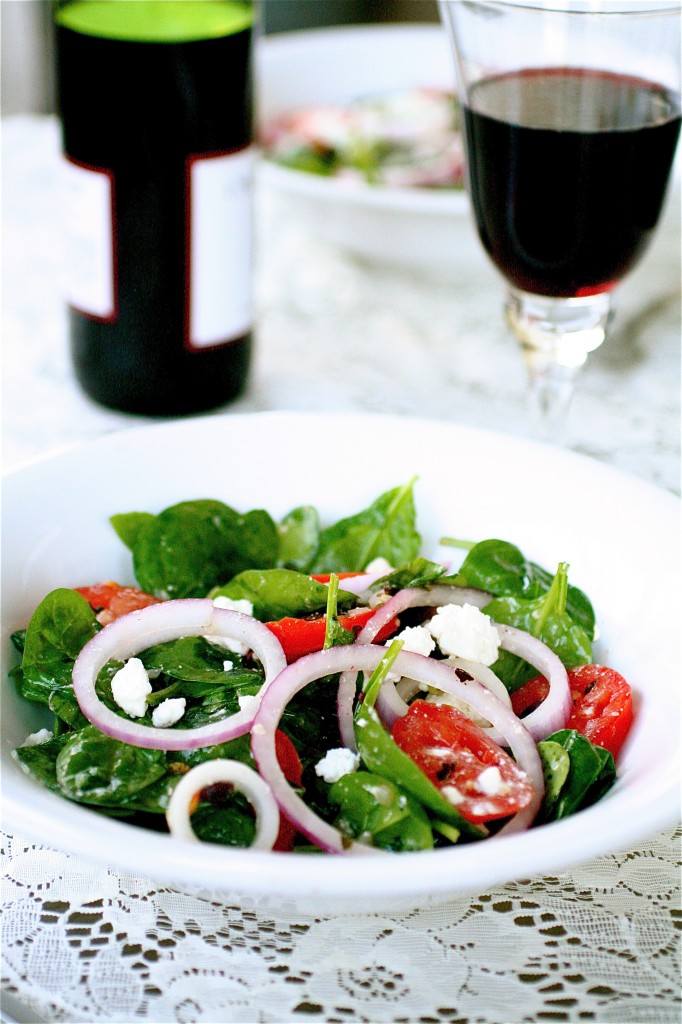
Wilted Greek Salad

I don’t know about you, but I’m in need for some healthy salads.  Spinach salads.  Wilted spinach salads with lots of flavor.  Actually, to be plainly honest with you, since I was getting ready for my move, I needed to clean out my fridge-you know, getting rid of the random capers, random kalamata olives of different varieties, a couple of lemons.  I saw this recipe and figured that this would be a great combination to allow me to do just that.

This recipe is really easy to make.  And it’s not too time-consuming to prepare, either.  Chopping the onion, tomato, and shallot is the most time-consuming part.  And if you happen to have a partner in the kitchen that evening like I did, then you are golden.  And, it’s pretty healthy as well.  Be creative with this salad.  I called it a Greek salad because of the kalamata olives and the feta, but the warm salad dressing could be amenable to almost any kind of other salad add-in.  I will definitely be making this dressing again.  I increased the amount of lemon juice to add more flavor, so next time I am thinking I could adapt this to a more citrus-y summer salad.


Wilted Greek Salad

Servings: 8 small salads, or 4 large main course salads


Ingredients

5 ounces fresh spinach leaves

3 tablespoons extra-virgin olive oil

2 tablespoons shallot, minced (1 medium shallot)

1 teaspoon garlic, minced (1 clove)

1 teaspoon dried oregano

Salt, to taste

Pepper, to taste

Pinch granulated sugar

2 tablespoons lemon juice

3 ounces feta cheese, crumbled

1/2 red onion, sliced thinly or as desired

2 teaspoons capers

1/2 cup kalamata olives, sliced

1 small tomato, sliced

Instructions

1. In a sauté pan over medium heat, combine the oil, garlic, oregano, and sugar and season as desired with salt and pepper, stirring frequently, until the shallot is softened, about 2-3 minutes.

2. Add the lemon juice to the sauté pan and lightly stir to combine (the mixture will look slightly separated).

3. Place the spinach in a separate large bowl, and slowly pour the dressing over the spinach and toss to coat thoroughly.

4. Add the feta, red onion, capers, tomato, and kalamata olives and toss lightly to combine.  Serve immediately.


Source: Adapted from Cook’s Illustrated.


June 20, 2011 - 9:30 am

Blog is the New Black - I’m ready for some healthy salads, too! This looks yummy & refreshing!

June 20, 2011 - 1:39 pm

Paula at Dishing The Divine - I’m with you! I need salads during the summer time. Most often I get tired of lettuce salads, though, so I end up leaning toward tomato salads and corn salads and the like. I figure as long as I’m pumping lots of veggies into my body it still counts. 🙂

May 9, 2013 - 8:15 am

Wilted Greek Salad - […] For recipe visit:   thecurvycarrot.com […]

Butterbeer Cupcakes

I saw my first preview for the last Harry Potter movie the other day.  I was trying to think back to when the first movie came out…I think I was at some point in my college education, and I think my little brother was in second grade or so.  My, how times have changed.

Ironically enough, I made these cupcakes about a month ago…for my baby brother…who is now 18 years old.  Which makes me feel old because my sister and I pretty much raised him.  He’s a huge fan of Harry Potter (we sometimes almost exclusively speak in British accents to one another, and I may or may not have bought him a Harry Potter cookbook to take back to college as a gift somewhere along the way….).  He loves the whole culture behind the movie, and I have to admit, even though I have entered my 30’s-I’ll still be seeing this movie when it comes out in a few weeks.

Ben (my brother) requested these cupcakes for his 18th birthday during a quick trip home from college, and I was happy to oblige.  I had bookmarked these cupcakes when AmyBite’s initially posted her recipe…and I saw it remade all over the blogosphere with rave reviews, so I knew I needed to try it for myself.  As a giant fan of butterscotch, I did not change the recipe one bit because the recipe seemed too good to be true.  Let me tell you, these cupcakes are fantastic if you love butterscotch.  They are a tad on the sweet side, but they are one of my favorite cupcakes I have ever made.  I took the leftovers to a cook-out later that weekend where they were quickly devoured.

So if you love Harry Potter or butterscotch, I urge you to get your witch and wizarding on with these sweet treats.

Butterbeer Cupcakes

Servings: about 18 cupcakes

Ingredients

For the cupcakes:

2 cups all-purpose flour

1 and 1/2 teaspoons baking powder

1/2 teaspoon baking soda

1/4 teaspoon salt

1/2 cup (1 stick) unsalted butter, at room temperature

1/2 cup granulated sugar

1/2 cup dark brown sugar

3 large eggs, room temperature

1 and 1/2 teaspoons vanilla

1 teaspoon butter flavoring ***You can find this in the spice aisle in your grocery store next to the other extracts.

1/2 cup buttermilk

1/2 cup cream soda, room temperature


For the buttercream frosting:

1/2 cup (1 stick) unsalted butter, room temperature

1/3 cup butterscotch ganache (see below)

1 teaspoon vanilla

1 teaspoon butter flavoring

Pinch salt

1 16-oz package (about 3 cups) powdered sugar

Milk or cream, as needed **just a few drops


For the butterscotch ganache:

1 11-ounce bag of butterscotch chips

1 cup heavy whipping cream


For garnish:

18 butterscotch hard candies, if desired

Instructions

1. For the cupcakes:  Preheat the oven to 350 degrees.

2. Prepare a cupcake pan with the liners of your choosing.

3. In a large bowl, whisk together the flour, baking soda, baking powder, and salt.

4. In the bowl of your standing mixer fitted with the paddle attachment, cream the butter until light, about 2 minutes.

5. Add the granulated and dark brown sugars to the butter and continue to mix at medium-high speed until light and fluffy, about 2 minutes.

6. Add in the eggs, one at a time, mixing well after each addition.

7. Add the vanilla and butter flavorings until combined.

8. Add about one-third of your buttermilk, followed by one-third of the cream soda, and then one-third of the flour mixture.

9. Alternate adding the remaining buttermilk, cream soda, and flour in thirds until well-combined.

10. Evenly distribute the cupcake batter among your prepared baking pan and bake until a tester inserted in the center comes out clean, about 15-17 minutes, rotating the pan halfway through the baking time.  Cool the cupcakes completely before frosting.

11. For the butterscotch ganache: In a heat-proof bowl over a pot of simmering water, mix the butterscotch chips and heavy cream, stirring until smooth.  Let cool.

12. For the butterscotch frosting: In the bowl of your standing mixer fitted with the paddle attachment, cream the butter until light, about 2 minutes.

13.  Add the cooled butterscotch ganache to the butter, mixing well.

14.  Add the vanilla, butter flavoring, and salt to the frosting and mix well to combine.

15. Decrease the mixer speed to low and slowly add in the powdered sugar, scraping down the sides of the bowl as necessary.  (Add a few drops of cream or additional powdered sugar as necessary).

16.  Pipe the frosting on the cupcakes as desired, drizzle with the butterscotch ganache, and top with butterscotch candies.


Source:  Directly from AmyBites.  (Thank you, Amy!  My friends and family adore you now!)


June 19, 2011 - 2:37 pm

Amy @ amyBITES - These look great – love the addition of the butterscotch candy on top! So glad you and your friends and family enjoyed them. 🙂

April 28, 2013 - 8:42 pm

Butterbeer Cupcakes - […] Read all the details about the recipe on:  thecurvycarrot.com […]

May 20, 2013 - 12:01 pm
July 12, 2013 - 11:26 am

Nobody’s Gonna Lay a Finger on My Butterfinger - […] Butterfinger Cupcakes adapted from The Curvy Carrot […]

April 24, 2014 - 1:31 pm

Butterbeer Trifle: An Alison’s Wonderland Original Recipe © | Alison's Wonderland Recipes - […] ice cream all over Pinterest. My original plan was to make butterbeer cupcakes, like those made by The Curvy Carrot, but since I recently made cupcakes for Alice in Wonderland, I decided to try a different route. […]

June 25, 2014 - 12:11 pm

Erin - Mmm, these look delicious! And that frosting…swoon.

Asian Burgers with Miso Dressing

I am not a fan of leftovers.  I think we have discussed this ad nauseum before, but leftovers give me the creeps a little.  Especially leftovers having anything to do with seafood. I’m ok with soups and stews (those taste better the next day in my opinion), but straight up meals?  Yes, I’m picky about it.  So, even though I have dissected and worn the pages raw in the latest issue of Fine Cooking (June/July 2011-if you don’t have it yet, please go get it), I was even more excited because there was a whole section about leftovers.  And what I liked the most was that they took something like the Cedar Planked Salmon (awesome) and then gave suggestions about what to do with the leftovers…probably for people specifically like me…who would probably have a lot of leftovers but were tired of obvious leftover options like a salmon salad or salmon patties.  I wanted something different this time.

And, believe me, this is an incredible leftover option. It’s extremely easy and straightforward to prepare, and the time for preparation and cooking was less than 25 minutes total, so it’s also great for a weeknight meal.  The Asian flavors are so fresh, tangy, and really give an extra oomph to “plain jane” salmon.  And, even if you don’t make the Cedar Planked Salmon to use as your source of leftovers, any kind of pre-cooked leftover (or canned!) salmon would do.  I felt pretty good that week-I was feeling a little more brave in my adventures into eating an animal source of protein (which is rare), and with this meal, I was able to consume decent portions of proteins and my omega-three’s in the span of a few days. I successfully finished off an entire “meal” by consuming all the leftovers…which amazingly tasted completely different from the original dish…and this meal was good for me.  YES!


Asian Burgers with Miso Dressing

Servings: 4


Ingredients

For the dressing:

1 2-inch piece of fresh ginger

3 tablespoons awase miso (or whatever type of miso that you like)

2 tablespoons rice vinegar

1 and 1/2 tablespoons Asian sesame oil

1 and 1/2 tablespoons canola oil

1 tablespoon granulated sugar

For the salmon burgers:

3/4 pound (about 2-3 cups) cooked salmon, skin removed, cut into large chunks

3 tablespoons chives, chopped

1 and 1/3 cups panko

3 tablespoons mayonnaise

1 large egg, beaten

1 tablespoon soy sauce

Salt and pepper, to taste

1/3 cup canola oil

For garnish:

2 cups watercress (or other green of your choice), trimmed

4 sesame seed rolls or other type of bun, lightly toasted and buttered

Mayonnaise as desired

Instructions

1. For the miso dressing:  Peel the ginger, and using a cheese grater, grate the ginger finely.

2. Wrap the grated ginger with a piece of paper towel, and firmly press the ginger between your fingers so that the juices drip into a small bowl (you will want a yield of about 1 and 1/2 teaspoons of ginger juice, more to taste if desired), discarding the solids.

3. Add the miso, rice vinegar, sesame and canola oils and the granulated sugar to the bowl with the ginger juice, whisking until the mixture is smooth.  Set aside.

4. For the salmon burgers:  In a large bowl, combine the chopped salmon and the chives.

5. Using a large rubber spatula, add 2/3 cup of the panko, the mayonnaise, egg, soy sauce, and salt and pepper (to taste), mixing well until the salmon is evenly distributed.

6.  Using your hands, shape the salmon into large patties (you can double this to 8 smaller portions if you want), packing them tightly together, adding more panko or mayonnaise if necessary.

7. In a large skillet over medium-high heat, heat the canola oil until shimmering.

8. As the oil is heating, place the remaining panko in a shallow dish or pie plate and lightly coat both surfaces of each salmon burger with additional panko, pressing the panko into the burgers.

9.  Add the burgers to the skillet and cook each burger until lightly crisped and browned on each side, about 8 to 10 minutes total.  Once cooked, transfer the burgers to a paper-towel lined plate to drain off the extra oils.

10. In a separate bowl, toss the watercress with the miso dressing lightly to coat.

11. To assemble the burgers: Lightly spread the sesame rolls with the mayonnaise and place your desired amount of watercress on each bun.  Add your salmon burger patty (or two patties, if you made smaller ones), and serve immediately.


Source:  Slightly adapted from Fine Cooking, June/July 2011 issue.

June 16, 2011 - 5:35 am

Apron Appeal - Changing leftovers into something other than what they were originally created for? I had no idea that was even an option. I think you just sold me on this little book of yours. I like foodie world-so much to learn.

June 16, 2011 - 5:36 am

Apron Appeal - reread…not a book, magazine…darn it – those are harder to get a hold of at the library.

June 16, 2011 - 7:40 am

Blog is the New Black - I don’t like seafood but these burgers make me wish I did!

June 16, 2011 - 10:38 am

Jessica - Came across your blog on foodbuzz & am your newest follower!!!
– Jessica @ http://cajunlicious.com

June 16, 2011 - 12:56 pm

Paula at Dishing The Divine - These pictures are delicious looking! 🙂

June 16, 2011 - 3:20 pm

srlacy - Thanks, Jessica! Nice to meet you!

January 12, 2012 - 3:27 pm

RadioGastronomy » Archive » Panko-Crusted Wild Salmon Burgers with Watercress Salad & Miso Dressing - […] lovely little recipe for salmon burgers would have fit both bills beautifully had I not decided that this miso dressing […]

May 13, 2013 - 6:00 pm

Asian Burgers with Miso Dressing - […] For recipe visit:  thecurvycarrot.com […]

February 12, 2014 - 9:41 am

Ali @ Inspiralized - What a great recipe! I love salmon burgers!

February 18, 2014 - 6:02 am

Link Love #24 | Barr & Table - […] Apricot Truffles with Himalayan Sea Salt – Fit Foodie Finds Asian Salmon Burgers with Miso Dressing – The Curvy Carrot Homemade Harissa (Spicy Red Pepper Sauce) – Half Baked Harvest […]

January 11, 2015 - 11:08 am

Salmon Burgers with Miso Dressing | Fuel Your Future with Tina Muir - […] stumbled upon this recipe for a salmon burger with Miso Dressing, but I decided to use a different recipe for the Salmon Burgers themselves. I finally purchased […]