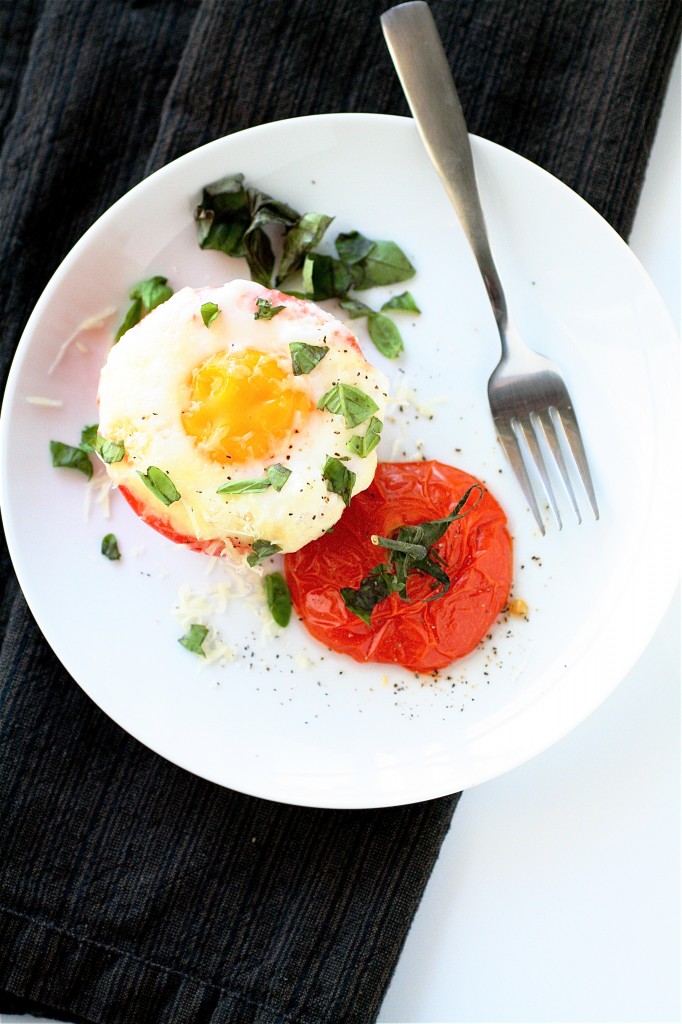
Baked Eggs in Tomato Cups


I should really rename this post “Baked Eggs in Tomato Cups and Sometimes Being Spontaneous Is Not A Good Idea”.


For some of you who may know, about a month ago I moved to the New England area to begin a new one-year fellowship.  And, while I absolutely loved the material I was working with and learning about from 6:45 am to 5 pm at night, going home was not fun.  Because, as I soon found out, my little 400 square-foot-ish apartment had a few unwelcome visitors…I had a mouse infestation.  My two cats, Cosmo and Jinxie, quickly became mouse-killing machines, even taking up their “posts” diligently each night (Cosmo took the couch area, and Jinxie took the area near the stove).  There were also several other major issues with this apartment as well, concerns about my safety (having people barge into your apartment unannounced can be a little unnerving to someone who lives alone) were at the top of the list.

I didn’t have the time or money to come out to the area to look at the apartment before I moved.  I found the apartment online and the person I contacted seemed all right.  I decided it was going to be a good lesson to me (as a Type A personality, moving someplace I had never seen almost seemed like a lesson in spontaneity.)  I figured I could handle the cards that were going to be dealt to me, since I had been through so much in the past.

But, as I went home everyday, I realized I wasn’t happy.  My gut instinct to grab my animals and re-center myself became all too defined when I had seen way too much.  I was finding that I hated cooking in the apartment-I was always on the look-out for bugs (there were plenty) and the mice (there were plenty).  And when you can’t enjoy the things that re-center and keep you challenged/inspired/fulfilled…it’s a sad thing.  And cooking/writing/taking pictures of food are what I love.  If I am not at work or reading on my material at night, then I am thinking about food.  What tastes good with what?  What can I make tonight with the tomatoes about to go bad (hence the recipe below)? How can I continue to challenge myself, not-so-great food and not-so-great pictures included?  And, how, how can I get better at baking/decorating?

I found an amazing new apartment and I couldn’t be happier.  My kitchen is beautiful.  I have a working stove/oven and even a dishwasher.  I have room for my mixer and places to store my baking sheets.  I am proud to say that I moved myself single-handedly, box by box, from the old apartment this past weekend, and I still had energy to get in that kitchen to start working again.  I found myself reading food magazines again during lunch.  I feel re-inspired, re-energized, and clean.  I hadn’t realized how stressful it had been for me for the past month.

I decided to use up those tomatoes (about to go bad) with the little food I had in my new fridge that I had packed up in the move.  I had this recipe bookmarked for a while, and I figured this would be the time to try it.  I always seem to have eggs and tomatoes on hand.  So here’s another egg recipe.  And another tomato recipe.  A lot of you seem to like these two ingredients 🙂 which is why I love you.

It’s a great breakfast/brunch or even light dinner option.  The eggs are ready in less than 20 minutes, and there’s lots of hands-off time, so I was able to unpack a lot while they cooked.  I cooked my eggs for a total of 17 minutes, and my whites were just set.  So, if you like your eggs a little bit more done that that, add a few minutes to the baking time.  The other nice thing is that you can use whatever kind of cheese you have on hand-I happened to have white cheddar and Parmesan, but feel free to mix and match.  I was very pleased with the way that they turned out.  I had expected the tomatoes to turn to mush, but they actually stood up quite well in the baking process.  Serve these with some toast or an English muffin on the side because they are a little bit messy.

So, I learned a lesson.  Sometimes being spontaneous isn’t always the best idea when you are moving halfway across the country.  Oh, and make sure you have two mouse-killing machine cats.  🙂
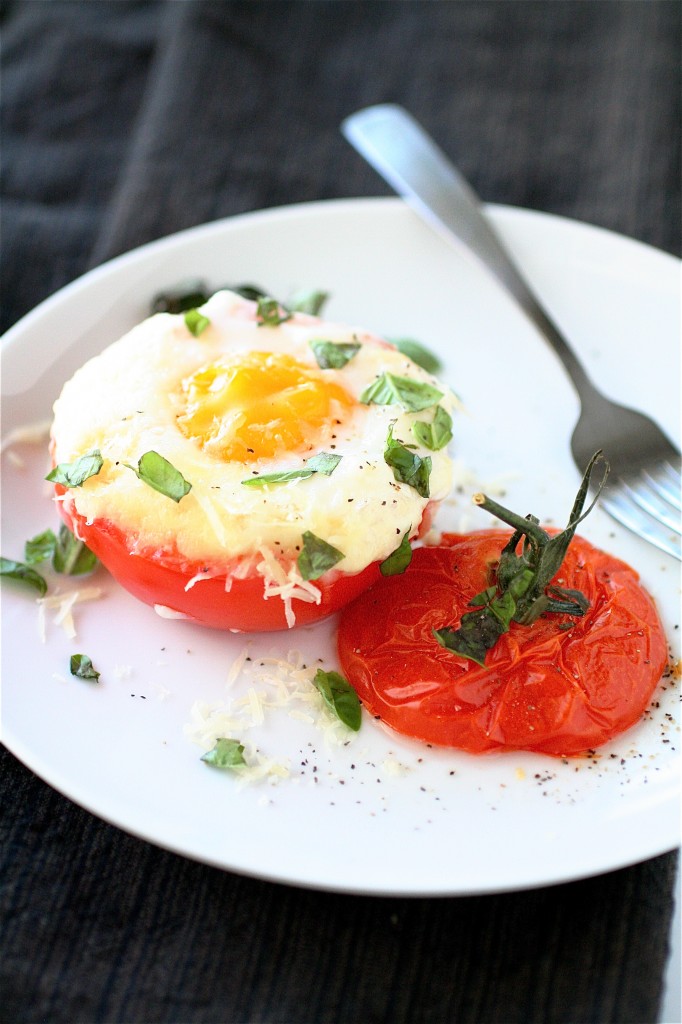
Baked Eggs in Tomato Cups

Servings: 2

Ingredients

2 large tomatoes (variety of your choice)

2 large eggs

1/2 cup white cheddar, shredded**You will probably have extra cheese

1/4 cup Parmesan cheese, finely grated

Sea salt and pepper, to taste

1 tablespoon fresh basil, shredded

Instructions

1. Preheat the oven to 425 degrees.

2. Slice off the tops of each tomato, and using a sharp knife, gently cut around the inside perimeter of each tomato and scoop out the seeds.

3. Place the tomatoes in an oven-proof baking dish, with the tops.  ***I sort of wedged my tomatoes up against the sides so that they would stay upright and the eggs would stay centered.

4.  Depending on the size of your tomatoes, place about 1-2 tablespoons of the white cheddar in the bottom of each, making a little well with your fingers so that the eggs will lay flat.

5. Break an egg into each tomato, trying as best as you can to keep all the whites inside the tomato.

6,  Bake the eggs for 10 minutes.  **They will just begin to set during this time.

7, After ten minutes, remove the eggs from the oven and sprinkle with the Parmesan cheese.

8.  Bake for another 7-10 minutes, until the eggs are set to your desired consistency.

9.  Remove the eggs from the oven and let sit for about 2 minutes.

10. Sprinkle with salt and pepper and garnish with the fresh basil.

Source:  Adapted from Epicurious.


July 26, 2011 - 6:17 am

Lauren at Keep It Sweet - I love this presentation, such a good idea!

July 26, 2011 - 8:00 am

Lori - Thanks for the posting. I think I will try that for a light dinner. You poor thing….I hope you didn’t move during that heatwave that hit the east coast. Glad to hear you are in a better apartment. Love your blog

July 26, 2011 - 9:18 am

sara - so glad you’re settled in a new, clean place! here’s to another fresh start 🙂

July 26, 2011 - 11:35 am

Tracey - Wow, I’m so glad you found a new place that makes you happy. The old place sounded like a total nightmare! Bugs and mice? Eeek!!

The dish looks great, I always seem to have tomatoes that need to be used immediately in the summer.

July 26, 2011 - 11:45 am

Nicole O - I’ve been wanting to try this as well! Bring on fresh tomato season!!

July 26, 2011 - 12:55 pm

Emily - I think i am going to eat this for lunch!

July 26, 2011 - 5:21 pm

Rachel - What an experience! Unpleasant living situations are the worse, especially when they interfere with cooking. At least your cats must have enjoyed your nasty apartment!

I’m drawn to anything with an egg in it but a juicy, baked tomato sounds extra fabulous right now. As you say, it bet this is great with a hunk of crusty bread to soak up the mess!

July 26, 2011 - 6:15 pm

Heidi @ Food Doodles - I’m so glad you’re in a nicer place! That must have been awful 🙁 Love the tomato cups! I’ve seen tomatoes stuffed with all kinds of things, but I don’t think I’ve ever seen eggs and it looks delicious! Will have to try once my tomatoes in my garden ripen!

July 26, 2011 - 7:17 pm

Marissa - Firstly, this is amazing, I like tomatoes, and having them stuffed is a culinary delight for me. I hope the critters are gone and leaving you alone!

July 27, 2011 - 6:20 am

Regan @ Cabot Creamery - There are few things that freak me out more than mice. Seriously. I would have packed my bags the first night. Yikes!

On a more positive note, these are stunningly beautiful! Love this idea. Seems so simple, but so tasty… and such a great way to add veggie to breakfast or an easy dinner.

July 27, 2011 - 8:38 am

Maureen - Wonderful to hear that a change of address has ended with a happiness boost. Nobody should live where they don’t feel safe or comfortable.

These eggs look amazingly good. That last photo begs me to make it.

July 27, 2011 - 11:15 am

Sara - These look SO good! Can’t wait to try them! 😉

July 27, 2011 - 10:15 pm

Alice - Congratulations on your new apartment! I tried this recipe tonight and it was super-yummy. Thank you! 🙂

August 2, 2011 - 10:00 am

Carrie - I love this idea! I eat eggs often for breakfast, but I have never tried them this way before. So pretty!

November 7, 2011 - 7:01 am

Indulgences | Runway Hippie - […] Baked Eggs in Tomato Cups via The Curvy Carrot […]

November 16, 2011 - 8:30 am

Emily - I just ate this and it was soooo good. LOVE IT.

January 29, 2012 - 3:02 am

Elbie - I’ll put my tomatoes in a big muffin pan to keep them standing up straight.

February 13, 2012 - 8:57 am

Random Crap – The Kitchen Edition | Hey Joob! - […] and I have been discussing vegetarian options. So far we’ve come up with bell pepper and tomato cups. ANDDDD for the really hungry…. a few eggs in half a squash bowl […]

February 18, 2012 - 9:24 am

Chris K - Tried the eggs this morning. I discovered I have to scoop out way more tomato than I did. I had hardly any white inside the tomato. I used an aluminum muffin pan, and tossed it after cooking. I sprinkled the inside of my tomato with Italian seasoning, and garlic powder before adding the egg. What a great flavor!

February 28, 2012 - 11:14 am

Baked Tomato, Egg, and Cheese | BROGAZM - […] The Curvy Carrot introduced me to this awesome idea for breakfast. I love eggs and tomatoes, so if you added bacon, this makes for the ultimate breakfast. The link above will show you how to make it. I made it myself (see picture) and it was just as excellent as I imagined. It was also less work than cooking eggs alone, although it takes a bit longer. If you get sick of your normal morning food, try this! […]

July 11, 2012 - 10:37 pm

Baked Egg in a Tomato Cup « The Little Bite - […] Egg in a Tomato Cup I can’t remember where I found this recipe, but The Curvy Carrot has one which is similar, so I’m pretty sure I’ve adapted it from there. serves […]

August 10, 2012 - 7:51 am

marla - Love ’em! Gotta try this ~ linking back to this recipe today 🙂

August 10, 2012 - 8:30 am
August 14, 2012 - 12:10 pm

Patsy Bell Hobson - Well, this dish has been on hold until too many tomstoes season arrived. Love it. For an herb gardener like me, I added, chives, basil, chervil – something different each time.

November 1, 2012 - 5:26 pm

Eggs in Tomato Cups | A Guiltless Glutton! - […] 1, 2012 by aguiltlessglutton So I was Pinterest-ing today (per usual) and I came across this recipe. It looked so so good so I had to try it! As I was making it, however, there were a few […]

November 20, 2012 - 5:20 am

Un buffet original II | wondercoses - […] The Curvy carrot: tomàquets farcits d’ou […]

December 7, 2012 - 11:31 am

Quick & Healthy… Eggcellent Muffins | Dietitian Drive - […] Baked Eggs in a Tomato Cup […]

December 29, 2012 - 12:19 pm

Baked Eggs in Tomato Cups | Good Stuff Only - […] December 29Food Recipes Tried the eggs this morning. I discovered I have to scoop out way more tomato than I did. I had hardly any white inside the tomato. I used an aluminum muffin pan, and tossed it after cooking. I sprinkled the inside of my tomato with Italian seasoning, and garlic powder before adding the egg. What a great flavor!For full recipe visit: the curvy carrot […]

January 22, 2013 - 10:08 pm

Amisy Food Machine - Such a great idea! I think I will eat it as my lunch!Thanks for your sharing…

July 14, 2013 - 6:46 am

Ruxandra - Loved this recipe! I featured it on my blog too in the 20 Healthy Egg Recipes for Breakfast post.

July 14, 2013 - 6:55 am
October 20, 2013 - 12:02 am

BASIC LIST / SUGGESTED ITEMS FOR LONG TERM SURVIVAL - Page 442 - ALIPAC - […] Food Fanatics Baked eggs in tomato cups Recipe: http://www.thecurvycarrot.com/2011/0…n-tomato-cups/ […]

November 10, 2013 - 11:54 am

Pinterest #2 | Life with Louie - […] naar lekkere snacks e.d. Zo kwam ik deze tegen. Baked eggs in Tomato cups ♥ Het recept vind je hier! Eet […]

January 29, 2014 - 1:39 pm

Easy Egg Breakfast Recipes | Un - ComplicateUn – Complicate - […] Recipe & Photo credit to: TheCurvyCarrot […]

April 17, 2014 - 5:24 pm

50 Egg Recipes | Pocket Change Gourmet - […] Baked Eggs in Tomato Cups from The Curvy Carrot […]

June 25, 2014 - 3:01 am

10 Protein-Packed Egg Recipes – GleamItUp - […] via thecurvycarrot.com […]

August 10, 2014 - 11:44 pm

Baked Eggs in Tomatoes | Homemade food - […] for a way to brighten your morning?  Try out this recipe: http://www.thecurvycarrot.com/2011/07/26/baked-eggs-in-tomato-cups/.  It sure gives a boring egg dish a twist by baking it in tomato cups.  Very easy to make […]

October 9, 2014 - 7:42 pm

10 Delicious Breakfast Ideas With Eggs! | Looky KC - […] tutorial via The Curvy Carrot […]

November 17, 2014 - 4:08 pm

10 Delicious Breakfast Ideas With Eggs! | LookyLocal - […] tutorial via The Curvy Carrot […]

Elliott’s Wacky Spiral Cookies

Today is my nephew Elliott’s 4th birthday.  Today this post is to him.


Dear Elliott:


I love you so much.  You are growing into a little boy right before my eyes.  I remember the day your Mommy told me that you were growing in her belly.  I couldn’t believe how much love I felt for you at that moment, especially because I didn’t even know you yet!

You are getting into the phase of liking to tease and trick people, which is very funny to the rest of us.  The whole time you were in your mommy’s belly, we thought you were a little girl..so we called you Caroline the whole time and even bought you lots of pretty girl clothes.  I was there the minute you were born; I was holding your mommy’s hand and your daddy was holding her other hand.  When you came out and the doctor said you were a boy, we all just looked at one another.  Your daddy was so excited to show you cars and trucks and all sorts of things.  We went out into the waiting room to tell GiGi and Papa and the rest of the family that you were here and you were a BOY…and everybody was laughing.  You tricked us then!  🙂

Since the day you were born, every day I love you even more and more.  You never cease to amaze me and to teach me how wonderful being alive can be.  You are incredibly observant and smart, and I am so proud of you.  I love that you can tell me every make and model of the cars/trucks/construction equipment on the road.  I love that you know what all the dinosaurs are called.  And I also love that you teach me Spanish words.  Aunt Sammy and I laugh when you tell us to slow down when we drive or that we are silly girls.  I love taking you to the movies and eating popcorn together.  I also love that some of the books and movies I loved as a child are now your favorites, too.   I love how you are a wonderful big brother to Oliver and you are teaching him how to do things now.  You are a fantastic big brother! I love it when you make your silly faces to me, and shhhh, (don’t tell anyone), but I also secretly love it when I say “I love you” to you and you sometimes say back “I DON’T love you.”  But I know you do because sometimes you will come up to me and whisper in my ear that you really do love me…and no one knows that.

I’m missing your pirate birthday party today and I am so sad that I am not there to see you blow out the candles on the treasure chest cake your mommy is making you. I know that you will have so much fun.  I hope you liked these cookies that I made for you (and the rest of your birthday surprises!).  I wanted them to be wacky and silly and just like the zebras we saw at the zoo.

I love you, Elliott.  I miss you very much.  Happy 4th birthday.


Love,

Aunt Shanon

Elliott’s Wacky Spiral Cookies

Servings:  Approximately 24 cookies


Ingredients

2 cups cake flour

1/2 teaspoon baking powder

1/4 teaspoon salt

2/3 cup powdered sugar

1/4 cup granulated sugar

2 and 1/2 sticks unsalted butter, cut into 1-tablespoon portions

1 teaspoon vanilla

1/2 teaspoon almond extract***Or any other flavor

Few drops black food color gel, to your desired tint

2 tablespoons cake flour

Approximately 1 to 1 and 1/2 cups colored sprinkles of your choice


****Note:  Please check out the fantastic tutorial on SprinkleBakes website (see the link below at the end of this post).  Hers are perfect.  Mine, on the other hand, are far from it.  I would not advise making these in an apartment without air conditioning on a 90-degree day like I did (even though I chilled them for super long!).  In the end, I loved the imperfections of the cookies because I really was reminded of the zebras at the zoo, but if you want a perfect roll, crank up your AC and work as quickly as possible to avoid the doughs melting and not holding a solid consistency.


Instructions

1. In the bowl of your food processor, combine the cake flour, baking powder, salt, powdered sugar, and granulated sugar.

2. Pulse the mixture a few times.

3. Add the butter, one piece at a time, to the mixture and pulse after each one (or put them through the feed tube while the motor is running) until the dough looks like wet sand.

4. Add the vanilla and mix to combine.  The dough should form a soft ball at this point.

5. Remove the dough from the processor and divide it into two equal portions.

6. Place one half back into the food processor.

7. Add the almond extract, the black food coloring gel, and the 2 tablespoons of cake flour to the dough in the food processor.  Pulse the mixture until the food coloring is evenly distributed throughout the dough.

8. On a clean surface, place the uncolored dough between two sheets of wax or parchment paper.  Using a rolling pin, roll the dough (between the papers) to an 11 x 8 and 1/2-inch rectangle, about 1/8-inch thick.

9.  Immediately place the dough on a baking sheet and chill in the refrigerator.

10.  Repeat the rolling process with the black dough, and refrigerate both doughs until firm, at least 2 or 3 hours.

11.  Once firm, remove the top piece of parchment paper from the tops of both of the doughs.

12. Using a silicone or pastry brush, lightly brush the top of the uncolored dough with water (so the doughs will stick together!)

13.  Using the parchment paper,  lift the almond dough and flip it, face down, on top of the uncolored, or vanilla, dough.

14. Using your fingertips or lightly with a rolling pin, firmly press the black dough on top of the vanilla dough to seal the edges and remove air bubbles.

15. Remove the top piece of the parchment paper.

16. Using a sharp knife, carefully trim the edges of the doughs so that they are even.

17. At this point, begin to roll the doughs in a rolling fashion, starting at the closest long edge to you, making sure to keep the rolls as tight together as possible.  **I found this part to be incredibly hard because my dough was ripping due to the heat.  Chilling it a little bit longer seemed to help with this.

18. Once you have a complete roll, pour the sprinkles into a shallow, wide pan and roll the cookie dough into the sprinkles, pressing gently to get them to adhere tightly.

19. Wrap the cookie dough tightly with plastic wrap and chill until firm, at least 4 hours.

20.  Once chilled, pre-heat your oven to 325 degrees.

21. Slice the cookie dough log into 1/4-inch thick slices and place the cookies onto a parchment-lined baking sheet.

22.  Bake the cookies until the edges are lightly golden brown, about 16 minutes or so.

Source:  Barely adapted from SprinkleBakes.  Please check out her fantastic tutorial with pictures.


July 24, 2011 - 7:30 am

Lauren at Keep It Sweet - Such a cute post- happy birthday to your nephew!

July 24, 2011 - 7:39 am

Tina@flourtrader - Happy birthday, Elliott! He is so lucky to have an amazing aunt like you bake these, tasty cookies just for him. The lovely colors are unforgettable. Yum!

July 24, 2011 - 7:42 am

Mom - Awww, Shanon what a wonderful letter for Elliott. The cookies are so cute! we will be thinking of you today and take alot of pictures for you! Love you

July 24, 2011 - 8:34 am

Sara - So sweet. In tears right now. He loved his letter and was smiling the whole time I was reading it!! Thank you so much!

July 24, 2011 - 10:07 am

Barefeet In The Kitchen - These are adorable cookies. What a sweet post for your nephew.

July 24, 2011 - 10:23 am

Notyet100 - Can imagine how u must be feeling

July 24, 2011 - 10:58 am

Claire - How very thoughtful! Your cookies look just adorable. I think these would be great fun for Christmas with red and white! Thank you!

July 24, 2011 - 12:56 pm

miri leigh - These are so creative! Great post!

July 24, 2011 - 7:57 pm

Lori - What a sweet post….I have tears too. He is so lucky to have an aunt in his corner that loves him so much.

July 25, 2011 - 2:24 am

Paula at Dishing The Divine - these look super festive! I’m not usually a fan of these kinds of cookies, but they’re SO CUTE that I may have to try them anyway 🙂

July 25, 2011 - 11:38 am

penandra - Happy Birthday to Elliott — what a lucky young man he is to have an auntie like you — and how lucky you are to have such a delightful young man (and his baby brother) in your life! Like the cookies . . . but love the blog entry more!

Thank you for sharing this slice of your life (and Elliott’s).

July 25, 2011 - 3:21 pm

the little kimchi pierogi - Shanon, I have a brand-new nephew and your post made me tear up! What a wonderful post.

July 28, 2011 - 12:11 pm

Tara - This was the sweetest post! I have a 4-yr old son so it especially hit home. Elliott’s a lucky little man to have you as his aunt!! (cookies look adorable, too!)

November 19, 2013 - 2:54 pm

Pentru cei 200 de prieteni ai blogului ~ Biscuiti fragezi spiralati (For my 200 followers- Spiral sugar cookies)Cooking with my soul - […] vazut saptamana trecuta pe un blog foarte dragut, The curvy carrotsi m-am indragostit de ei.  Arata atat de bine si sunt foarte usor de facut, dar e bine sa fie […]

February 27, 2014 - 8:27 pm

Cyclone Cookies | Alison's Wonderland Recipes - […] love me a good cookie, and I’ve had my eye on these spirally angels from The Curvy Carrot for quite some time. To me, they look just like the cyclone that picked up Dorothy, and the […]

Mini Fudge Cupcakes

I have to admit that I find mini baked goods as completely irresistible.  What’s not to love about a bite-sized piece of dessert that, at least in my case, I can always find a reason of why it’s completely justifiable?  Ever since I bought a mini muffin pan a few years back, I have loved making these miniature treats every so often…you know…just because.  The down side for me is that I always end up eating, like three or four of the mini desserts, so it’s never like I am doing myself a dietary favor.  Oh well.

I wanted something super rich, thick, and fudgy to take to a cookout here.  I wasn’t sure how many people would be there, so I figured making the mini cupcakes would be a little more manageable…because of the reason I listed above:  no matter what, mini desserts always tend to be eaten, unlike their larger regular-sized counterparts.  There’s always room for one more mini cupcake, in my opinion.  This recipe ends up making 48 (or more) mini cupcakes, depending on the size of mini liner you use.  I used Martha Stewart’s Mini Treat Wrappers as my liners, which I personally think are a little bit smaller than normal mini-sized wrappers, so I ended up with a few more than 48 cupcakes. I added bittersweet chocolate chunks to the cupcakes to add to the fudgy flavor as well as to prevent too much of an oversweet taste because I knew the frosting I chose would end up being a little on the sweet side.  As far as the frosting goes, I will be honest with you here.  As far as run-of-the-mill chocolate frostings go, this one is just ok.  I was hoping for a thick and rich fudge frosting like the name implies, but it was a little too much on the light side for me.  If you have a favorite thick chocolate fudge frosting recipe and you don’t mind sharing, I would love to try it out. The cupcakes seemed to be a hit with everyone at the cookout, so apparently this was not a big issue for them.  And I still ended up eating about 10 of them, so it wasn’t an issue for me, either.  😉

Mini Fudge Cupcakes

Servings: at least 48 mini cupcakes


Ingredients

For the cupcakes:

1 cup Dutch processed cocoa

2 and 1/3 cups all-purpose flour

1 and 2/3 cups brown sugar

1 and 1/2 teaspoons baking powder

1 teaspoon espresso powder

1 teaspoon salt

1 and 1/2 cups bittersweet chocolate chips

3 large eggs

1 and 1/2 cups milk

1 tablespoon vanilla extract

1 tablespoon white vinegar

1/2 cup unsalted butter, melted

For the frosting:

1/2 cup unsalted butter

3 (1-ounce) squares of unsweetened chocolate

1 pound confectioners’ sugar

1/2 teaspoon vanilla extract

3/4 cup milk

Chocolate jimmies, for garnish

Instructions

1. For the cupcakes:  Preheat the oven to 350 degrees.

2. Meanwhile, line two mini cupcake pans with the mini liners of your choice.

3. In the bowl of your standing mixer fitted with the paddle attachment, combine the cocoa, flour, brown sugar, baking powder, espresso powder, salt, and chocolate chips, mixing until combined.

4. In a separate bowl, combine the eggs, milk, and vanilla extract together.

5.  Pour the wet ingredients into the dry ingredients and mix until just combined.

6. Add the vinegar and melted butter to the mixture and mix until combined.

7. Using a teaspoon, gently place enough batter to fill the liners about 3/4’s full.

8.  Bake the cupcakes until the tops spring back when tapped-mine took about 18 minutes total.  I switched and rotated the pans halfway through the baking time.

9. Remove the cupcakes from the oven and let cool completely before frosting.

10.  For the frosting: In a microwave safe bowl, melt the butter and unsweetened chocolate in 10-second intervals until melted and smooth.

11. In a separate bowl, combine the confectioners’ sugar, vanilla, and 1/2 cup of the milk.

12. Add the melted chocolate/butter mixture to the dry ingredients, mixing well.

13. Add the remaining milk, if necessary, to reach your desired consistency.

14. Let the frosting sit at room temperature (or chill in the fridge if you are in a hurry)-it will thicken up as it cools.

15. Pipe as desired onto the cupcakes and decorate with chocolate sprinkles.


Sources:  Cupcakes directly from King Arthur Flour and frosting directly from All Recipes.


July 22, 2011 - 5:45 am

Lauren at Keep It Sweet - I also love mini desserts! Maybe a ganache would have been better for the rich frosting effect? These still look great!

July 22, 2011 - 6:07 am

srlacy - Hey Lauren-
Yes-you are totally right…I should have gone for the ganache. (always! Ganache is so good!) 🙂

July 22, 2011 - 7:16 am

Notyet100 - Ummm this looks so delicious

July 22, 2011 - 9:17 am

Blog is the New Black - These look incredible and I love anything in mini form because you can eat more! 😉

July 22, 2011 - 12:12 pm

Lila Lacy - Yum! I may just have to try these!

July 22, 2011 - 12:18 pm

Paula at Dishing The Divine - Agreed about eating things that are mini. They’re so fun and cute and you can definitely justify eating 4 times as many because we all know that they’re so small that the calories don’t count!

July 22, 2011 - 10:49 pm

Maureen - I love mini cupcakes. They have 1/3 the calories of a regular cupcake so you can eat 3 times as many. right? These look delicious.

July 31, 2011 - 10:09 pm

Des - I was so excited when you posted this cupcake recipe, because it was just what I was looking for to make for a church cookout this weekend! They are delicious and all of them were eaten at the cookout (good thing I saved a few at home for us….). I used a chocolate frosting found on Annie’s Eats (the one used on her Triple Chocolate Cupcakes) and thought it was a wonderful fudgy compliment to the cupcakes.