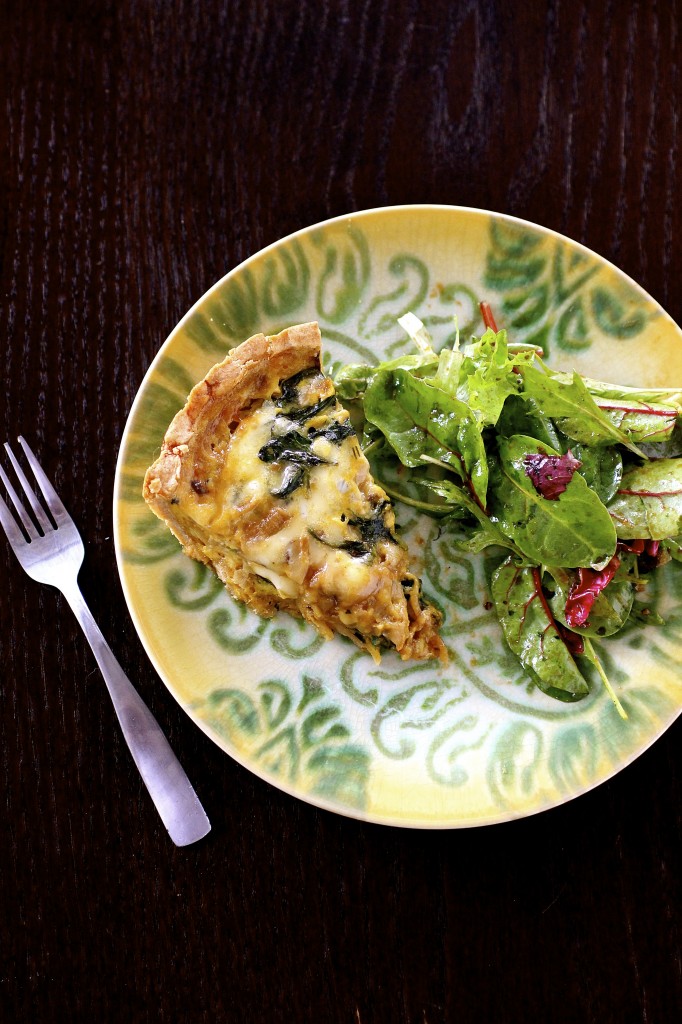
Spinach, Mushroom and Truffled Gouda Quiche

The Curvy Carrot-Quiche

Saying “no” can sometimes be a really hard thing for me.  For a really long time, I said “yes” to everyone and everything: over-committing, over-pleasing, and over-extending.  Which eventually would horrendously backfire, of course.  Because then, inevitably, I would grow resentful, not only of the person/obligation/duty that I had tried to please, but also of myself.

And resenting yourself is probably one of the worst feelings in the world.

And trying to find balance (or sanity) in this over-connected, over-stimulated, and sometimes over-involved world can be a really hard thing (I can simultaneously post to Instagram/Facebook/Twitter my random pictures to ensure that you have seen them at least twice!)  I cannot even imagine the busy lives of my friends who have children, have jobs, but also involve themselves in other activities.  I’m astonished and inspired by these people and wonder how they get enough sleep.   I honestly think I have a much lower threshold for being able to “do it all”.

So I’ve been cutting back on saying “yes” to some of the things that make me feel obligated to others.  At first it was really hard and I felt really guilty, especially if those people continued to want or ask for more committments, even after I had said “no, and this is why….”.  Sometimes even a valid healthy reason to someone isn’t enough, and that’s when it’s time to cut the strings.

I had felt this odd sense of pressure and unbalance for a while, and then I realized that I was letting things get out of control.  I need my days to clean my apartment, fold laundry, and vaccuum instead of feeling pressure to go out to dinner again.  As much as those are “my chores”, I need them-because if my apartment is cluttered and messy, I start feeling angry and pressured to clean it.  I need time to randomly take a bubble bath or maybe read a bit before going to bed each night instead of feeling obligated to run out the door again.  I need time to decompress each night after work before diving in to working on something else.  I need time to Facetime with my family members out of state or have long phone calls with friends from out of town.  In order to do all these things, I have to say “no” sometimes to other things.  And, I’m realizing that not only is it ok, but I feel way better when I do this.  It’s a good feeling.  I kind of have to wonder if this is why so many people are so angry all the time.  Because, believe me, I can totally relate to that sometimes.

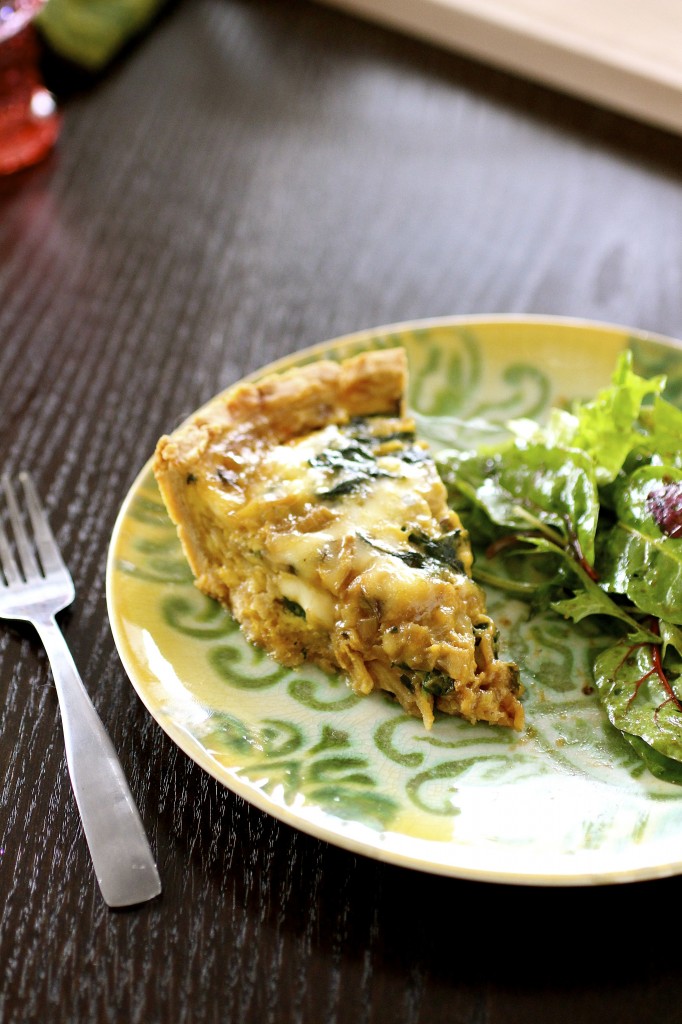
One thing that I will say “yes” to, however, would be a quiche like this.  It’s relatively simple to make, freezes extremely well, and also reheats nicely for work week leftover lunches.  And, like all quiches, your creative liberty with ingredients is generous.  Add in what you like, omit what you don’t: it’s all good.   I used a gouda that I found on sale that was truffle-flavored, but you could use whatever kind of cheese you like. Breakfast, brunch, lunch, or dinner:  a quiche is a mighty good thing.
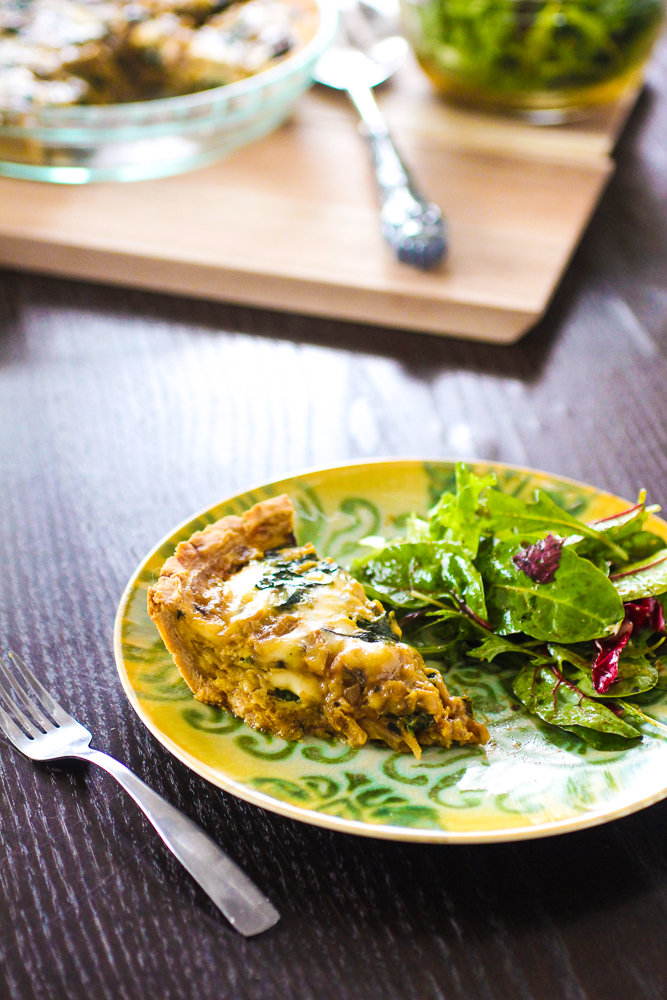
 Quiche1 The Curvy Carrot


Spinach, Mushroom, and Truffled Gouda Quiche

Servings: about 6-8


For the crust:

6 tablespoons unsalted butter, softened

2 tablespoons milk (I used skim.)

1/4 teaspoon salt

1 large egg yolk

1 and 1/4 cups whole wheat pastry flour

For the filling:

1 tablespoon extra-virgin olive oil

1/2 cup yellow onion, thinly sliced

8 ounces mushrooms, sliced (I used baby bellas.)

One 5-ounce package of Earthbound Farm baby spinach

1 cup milk

3/4 cup (3 ounces) grated Gouda cheese

3/4 teaspoon salt

Pinch of grated nutmeg

3 large eggs
IMG_5700

Instructions


1. For the crust:  In the bowl of your standing mixer fitted with the paddle attachment (or in a medium bowl using an electric hand mixer)  beat the butter at medium speed until light and fluffy, about 2-3 minutes.

2. In a separate bowl, whisk together the milk, salt, and egg yolk.

3.  Add the milk mixture to  the butter, 1 tablespoon at a time, beating well after each addition.

4. Reduce the mixer speed to low and slowly add the flour; beat just until combined.

5. Press the dough into a 4-inch circle on plastic wrap; cover. Chill for at least 1 hour.

6. Preheat the oven to 350 degrees.

7. Unwrap and place  the chilled dough on a lightly floured surface. Roll the dough into a 10-inch circle.

8.  Using your fingers, gently press the dough into a 9-inch pie plate, and freeze for about 15 minutes.

9. Bake the crust at 350 degrees for 25 minutes or until lightly browned. Cool.

10. For the filling:  heat the olive oil in a large skillet over medium heat until shimmering.

11.  Add the onion; sauté for about 15 minutes or until golden brown and caramelized.

12. Add the mushrooms and cook, stirring frequently, until the mushrooms lose some of their moisture, about 4-5 minutes.

13.  In batches, add the spinach;  cooking until the spinach wilts, another 5 minutes or so.  Transfer the mixture to a large bowl.

14.  In a small bowl, whisk together the 1 cup milk, Gouda, salt, nutmeg, and eggs.

15. Add the egg mixture to the cooked spinach, stirring to thoroughly combine.

16. Pour filling into the prepare crust and bake at 350 degrees for 35 minutes, or until the custard is thoroughly set.


Source:  Adapted from Cooking Light, as part of my monthly contribution to the Cooking Light Bloggers’ Connection.

February 27, 2014 - 1:36 pm

Katrina @ WVS - Starting to say “no” is hands down the reason why I have any inch of sanity. It’s the piece of advice I would give to any girl in her late twenties!! Also, this quiche? I’m all over it!

February 27, 2014 - 11:24 pm

Shannon - Oh, goodness! I can totally relate to everything you just said. My “me” time is SO necessary to my sanity–even if it consists of not-so-fun household chores. Take the time to do these little things away from me, and I turn into a crazy person! Thanks for sharing this AND that amazing looking quiche 🙂

March 1, 2014 - 3:41 pm

Joanne - I am pretty bad at saying no also, even though I do need a pretty serious amount of alone time in order to feel balanced and okay…and then even when I DO say no, I’m often double guessing myself. I need to own my decisions! And not care so much whether other people will be disappointed.

I love a good quiche…you can always stuff so much cheese and veggies in, and know it will taste good!

Roasted Banana Bars with Browned Butter Frosting

 Banana Bars4


Does anyone else out there freeze bananas?  The reason I ask is because I sometimes have a hard time “timing” bananas right, and I’m finding that freezing bananas is a pretty awesome thing.

I like to hit the grocery store right after work on Fridays-it’s not too busy, the aisles aren’t packed, and I can get in and out in a decent amount of time.  (Compare that to the time I decided to just go on a Saturday morning-twice the amount of time, a severe lack of parking in the garage, and a loss of great baking/cooking time.)  This is because I tend to do all my baking and cooking for this blog on the weekends since I work full time during the weekdays.  Which means a lengthy list, a meal plan in place, and a full 48 hours of pacing myself in the kitchen.

So I try to buy a bunch of the greenest bananas in the section to last for the next work week. (They are my favorite go-to work snack since they are portable, don’t require a pre-eating wash, and make me full for the busy mornings.)  But, inevitably, I’ll occasionally end up with some pretty ripe bananas which I would definitely crush somehow in my work bag (wiping banana off my Ipad cover is not very fun).  So I’ve been freezing them when they get like this for future use in a bread or cookies..or bars, like these.  I’ll just let them thaw and bake away.  It gives me a sense of accomplishment, knowing that I’m not throwing them away.   And then I always have an excuse to make something like these bars..oh, and an excuse to make some browned butter frosting.


Banana Bars3

Roasted Banana Bars with Browned Butter Frosting

Servings: about 24 bars (depends on how you cut them)

Ingredients

 
 For the bars:
2 cups sliced ripe banana (about 3 medium)
1/3 cup packed dark brown sugar
1 tablespoon unsalted butter, chilled and cut into small pieces
2 and 1/4 cups flour (the original recipe calls for cake flour; I used all-purpose flour because that’s what I had on hand)
3/4 teaspoon baking soda
1/2 teaspoon baking powder
1/4 cup buttermilk
1 teaspoon vanilla extract
1 stick (8 tablespoons) unsalted butter, softened
1 and 1/4 cups granulated sugar
2 large eggs
For the frosting:
1/4 cup  (4 tablespoons) unsalted butter
2 cups powdered sugar
1/3 cup  reduced-fat cream cheese, softened
1 teaspoon vanilla extract
1/4 cup chopped pecans, toasted

Banana Bars1


Instructions

1. For the bars:  preheat the oven to 400 degrees.

2.   In an 8-inch square baking dish, combine the bananas, brown sugar, and 1 tablespoon butter. Bake for 35 minutes, stirring about halfway through. Cool slightly.

3. Reduce the oven temperature to 375 degrees.

4. In a medium bowl, whisk together the flour,  baking soda, and baking powder.

5. In a separate medium bowl, combine the banana mixture, buttermilk, and 1 teaspoon vanilla, stirring until combined.

6. In the bowl of your standing mixer fitted with the paddle attachment, beat together  1/2 cup of the butter and granulated sugar  on medium-high speed until light and fluffy, about 2 minutes.

7. Add the eggs to butter/sugar mixture; mixing well.

8. Reduce the mixer speed to low and slowly add the flour mixture alternating with the banana mixture, beginning and ending with flour mixture.

9. Spray a 13 x 9–inch baking pan  with cooking spray and evenly pour the batter into the pan.

10. Bake at 375 degrees for 20 minutes or until a tester inserted in the center comes out clean. Cool.

11. For the frosting: melt 1/4 cup butter in a small saucepan over medium heat; cook 4 minutes or until lightly browned. Cool slightly.

12. In a medium bowl (using an electric hand mixer) or in the bowl of your standing mixer fitted with the paddle attachment, combine the browned butter, powdered sugar, cream cheese, and 1 teaspoon vanilla; beat in medium speed until smooth. Spread frosting over cooled bars. Sprinkle with pecans.


Source: Directly from Cooking Light, as part of my monthly contribution to the Cooking Light Bloggers’ Connection.

February 25, 2014 - 2:08 pm

Katrina @ WVS - I am the biggest banana freezer ever!! This is totally the recipe to use them up with!

February 25, 2014 - 6:51 pm

Joanne - Yes! Freezing bananas is the best. I only like to eat them when they’re just past green, so I end up freezing a ton of them. Can’t wait to use some of them up in these bars. That browned butter frosting is genius!

February 28, 2014 - 6:00 pm

Kaitie - This looks so good! I have a questions about the frozen bananas though- whenever I freeze bananas and then thaw them later, they come out pretty mushy and liquidy. Is this okay for the roasting step? I figure I’ll just peel them and let the banana mush slide out into the pan…

February 28, 2014 - 11:32 pm

srlacy - Hi Kaitie-
They should still be ok. They will be really mushy after roasting anyways.

March 3, 2014 - 5:42 am

Helen @ Scrummy Lane - Hello! Fabulous idea to freeze ripe bananas. I knew this, but had forgotten all about this little gem of a trick. So thanks for the reminder and the bars look fabulous, too! I just made a similar frosting with cream cheese for a banana loaf I made yesterday (all ready to ice very soon!)and added some white chocolate. It’s my first attempt at a frosting so I hope it’s OK!

March 3, 2014 - 6:12 am

Elizabeth - Hi Shannon,

Great blog you have here. I was pretty excited to “stumble” across it.
Unfortunately, I cant seem to find the subscribe button. Is it just me or is it hiding somewhere?

Ever your fan,
Elizabeth

March 3, 2014 - 4:22 pm

srlacy - Hi Elizabeth-

I don’t have a subscribe function via email for the blog, but I usually update twice a week. If you use social media, you can also find me on Facebook, Pinterest, Twitter, or Feedly.

Broken Yolk Sandwiches with Garlicky Kale

IMG_6624


Sometimes you just have to dive, face-first, into some real comfort food.

Some people find solace in a giant bowl of ice cream or a huge dish of creamy, cheesy macaroni and cheese.  Others like anything with chocolate in it while some prefer some home-cooked mashed potatoes.  Yes, I love all of these things and pretty much find an excuse to eat them any time I can.

But, sometimes a nice cheesy, drippy, runny egg sandwich is just something that makes me feel better.  Maybe it’s because I have fond memories of my dad making egg sandwiches all the time as a kid or maybe because when I was doing my emergency medicine rotation in medical school, I would sometimes zip through a Starbuck’s drive-thru for an after-overnight shift comfort food run after a particularly grueling shift (not such warm fuzzy memories of the rotation itself…..)..which somehow made me feel a bit better (also it helped me sleep during the day).

Regardless, a few years back in the early days of this blog, I made this version of a Broken Yolk Sandwich.  Since times have changed a bit and my need for comfort food has seemingly increased exponentially, I decided to come up with another version which would incorporate a bit more nutrition in the way of healthy greens.   Be creative here.  I love sourdough bread when it comes to breakfast sandwiches, but use whatever kind of bread you like here.  Also, feel free to throw in some mushrooms or onions to the greens to make this more veggie-friendly.

Bring on the comfort food.


IMG_6646


Broken Yolk Sandwiches with Garlicky Kale

Servings: 2 sandwiches


Ingredients

For the greens:

1 tablespoon extra-virgin olive oil

1 head lacinato kale, leaves torn and stems discarded

1 garlic clove, minced

Red pepper flakes, to taste

Salt and pepper, to taste

For the sandwiches:

Sourdough bread, sliced and toasted

2 eggs, prepared the way of your choosing.  I prefer mine fried, over easy. (Gotta have that drippy yolk!)

Cheese, type of your choice


Instructions

1. In a large sauté pan over medium heat, add the olive oil until shimmering.

2. Add the kale and cook, stirring frequently, until the kale has softened, about 4-5 minutes.

3. Add the garlic and red pepper flakes, and cook for an additional 30 seconds or so.

4. Season to taste with salt and pepper.

5. Assemble the sandwiches as desired.


Source:  A Curvy Carrot original.


February 20, 2014 - 8:08 am

Christina - I am crazy for broken yoke anything lately. I’ve even created an amazing rice and bean dish made with farro instead of beans and topped with eggs ready and waiting for their yokes to be broken. I agree, it’s comfort food all the way. I can’t wait to try your sandwich!

February 20, 2014 - 9:48 am

Joanne - I would only ever get egg sandwiches with my dad, so they definitely hold some serious nostalgia for me now! The runny yolk is definitely an added bonus! As are all those great greens.

February 20, 2014 - 12:21 pm

Hannah @ CleanEatingVeggieGirl - Um, yum!! I totally need to start pairing kale with dippy eggs..and on a sandwich? Even better!

February 20, 2014 - 7:40 pm

Katrina @ Warm Vanilla Sugar - Eggs are my comfort food too – had them for dinner tonight! Now I just need some kale and some sourdough and I’m off to the races!

February 23, 2014 - 5:01 pm

Christina @ but i'm hungry - Now THIS is my idea of a breakfast sandwich! I’m a sucker for a good runny-yolked egg… yummmmm.

March 24, 2014 - 1:31 pm

Monday Munchies: Breakfast! | Captivated by Cooking - […] And these broken yolk sandwiches with garlicky kale, especially now that I know I love […]

April 15, 2014 - 12:07 pm

Fun Combos I’m loving | Captivated by Cooking - […] I discussed breakfast foods recently I mentioned a few breakfasts I wanted to try, including these broken yolk sandwiches with garlicky kale. Well I tried them, and they are WONDERFUL! I made some modifications that really make my tastebuds […]

September 24, 2014 - 5:44 pm

The Curvy Carrot | Blogeats - […] Broken Yolk Sandwiches with Garlicky Kale: The assertive yolk takes the edge off the kale’s aggressive greenness. […]