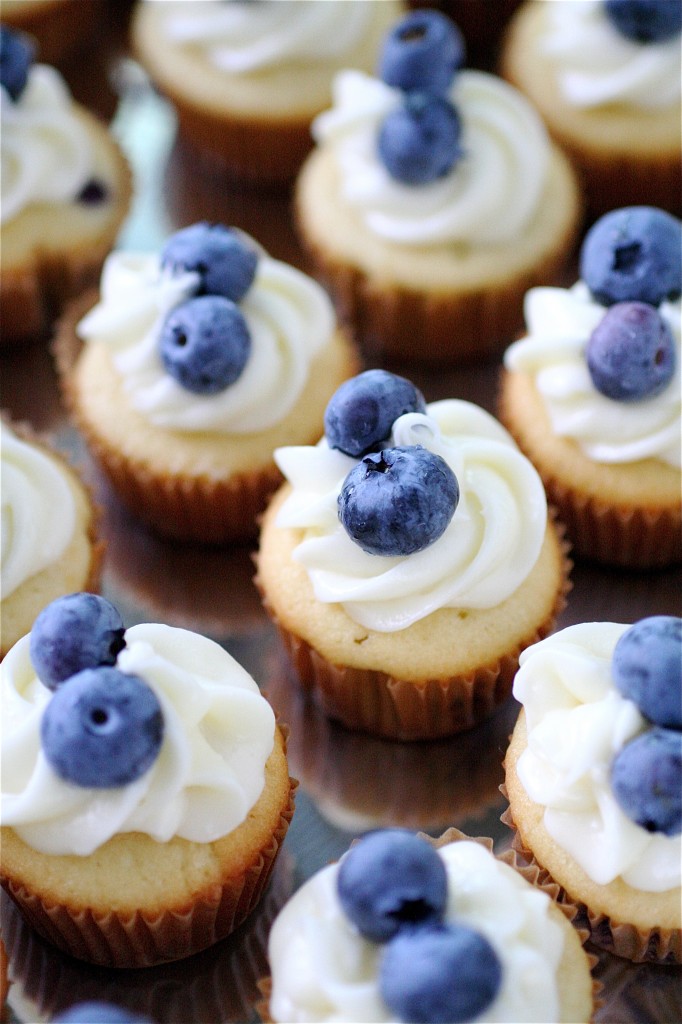
Blueberry Cupcakes

This was one of those recipes that I couldn’t wait to post.  I have others in the line-up, ready to go, but this one takes the cake (no pun intended) and got booted to first in line.

It’s starting to be blueberry season here.  The farmer’s markets have them, people here are picking them…it’s a really good time of year.  I found some blueberries here that were picked on a farm nearby, and I couldn’t help but buy three pints of them.  And, so, after eating a whole pint on my own, I decided I wanted to use the rest up for some sweet treats I was taking to a party.  Again, since I knew there would be a ton of people there, I opted for mini cupcakes to have a higher yield.  You can adapt this recipe easily for a full-sized cupcake, too (just bake the cupcakes for about 24-25 minutes instead of 15 minutes). The flavor of the cupcake was very muffin-like (remember those mini Hostess blueberry muffins that came out in the late 1990’s in the white plastic bags? I don’t know if they still exist, but the taste of these cupcakes quickly took me back to the days of high school where we would sneak those little muffins into calculus class and snack while we were supposed to be doing homework….)

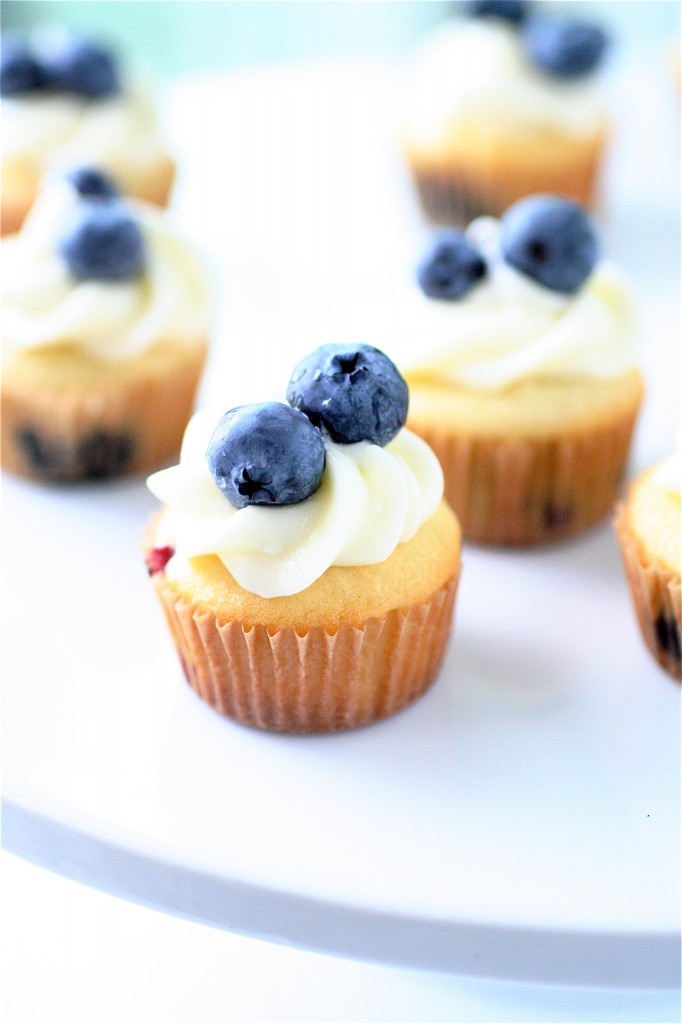
I made up a quick cream cheese frosting to top the cupcakes…because, well, it’s cream cheese frosting.  And I love cream cheese frosting. I thought the tanginess of the cream cheese might balance out a little of the blueberry sweetness.  I also thought about rolling the blueberries in sugar before placing them on top of the cupcakes, but I opted against it because I didn’t want to cover up that gorgeous navy blue color.

I think blueberries are incredibly beautiful…they are one of the only naturally blue foods out there, and I also find them to be one of the most delicious foods out there.  Good thing they are good for us, right? Even in cream-cheese frosted cupcakes.

Blueberry Cupcakes

Servings:  Approximately 60 mini cupcakes


Ingredients

For the cupcakes:

1 and 1/2 cups all-purpose flour

1 and 1/2 cups cake flour

1 tablespoon baking powder

1/2 teaspoon salt

1 cup (2 sticks) unsalted butter, room temperature

1 and 3/4 cups granulated sugar

4 large eggs, room temperature

2 teaspoons vanilla extract

1 and 1/4 cups milk, room temperature

2 cups fresh blueberries, plus more for garnish

For the cream cheese frosting:

1 cup (2 sticks) unsalted butter, room temperature

12 ounces (1 and 1/2 bricks) of cream cheese, room temperature

1 pound (4 cups) confectioners’ sugar

3/4 teaspoon vanilla extract
Instructions

1. For the cupcakes:  Preheat the oven to 350 degrees.

2. Line your mini muffin pan with mini paper liners of your choosing.

3. In a large bowl, combine the all-purpose flour, the cake flour, the baking powder, and the salt.

4. In the bowl of your standing mixer fitted with the paddle attachment, combine the butter and the sugar, mixing on medium-high speed for about two minutes.

5. Reduce the mixer speed to medium and add the eggs, one at a time, thoroughly mixing after each one and scraping down the sides of the bowl as needed.

6. Add the vanilla and mix until combined.

7. Reduce the mixer speed to low, alternately add the flour mixture (in three batches) and the milk, starting with and ending with the flour mixture.

8. Using a rubber spatula, gently add the blueberries and mix until just incorporated.

9. Divide the cupcake batter evenly among your prepared liners, filling each liner about 3/4’s full.

10.  Bake the cupcakes, rotating and switching the pans halfway through the baking time, until the tops are springy and a cake tester inserted into the center comes out clean, about 15 minutes.

11.  Transfer the cupcakes to a wire rack to cool completely before frosting.

12. For the cream cheese frosting: In the bowl of your standing mixer fitted with the paddle attachment on medium speed, cream the butter and cream cheese together until smooth and light, about 2 minutes.

13. Reduce the mixer speed to low and add the confectioners’ sugar, 1/2 cup at a time, until combined, scraping down the sides of the bowl as needed.

14. Add the vanilla and mix until combined and smooth.

15. Pipe as desired (I used my Wilton 1M) onto the cooled cupcakes.

16. Garnish each cupcake with fresh blueberries, if desired.

Source:  Cupcakes and frosting directly from Martha Stewart’s Cupcakes.


August 1, 2011 - 7:45 am

Lauren at Keep It Sweet - I love any excuse to stock up on blueberries and these look perfect!

August 1, 2011 - 10:43 am

Mommyof2Girlz/StephD - I know what I am baking today. I just loaded up on local blueberries, thanks for sharing!

August 1, 2011 - 12:59 pm

Tracey - Too funny, I made this recipe over the weekend! I added lime zest and juice to the cupcakes and cream cheese frosting – so delicious 🙂 Your minis are too cute!

August 1, 2011 - 3:22 pm

Feeling Blue?! Make Blueberry Cupcakes With Cream Cheese Frosting | Delicious Recipes - […] to Facebook Send Gmail Post to LinkedIn Ping This Post Stumble This Post Post to Technorati The Curvy Carrot  uses Martha Stewart’s recipe to make about 60 mini […]

August 1, 2011 - 3:26 pm

Sasha @ The Procrastobaker - Blueberries really are beautiful i agree, such unique little things, and your cupcakes are just the cutest! Summery gorgeousness 🙂

August 1, 2011 - 5:58 pm

Heidi @ Food Doodles - Those are the cutest little things 😀 Blueberries are my favorite berries and I love that they’re in the cupcake and on top. Yummy 😀

August 2, 2011 - 11:00 am

natalie (the sweets life) - I love that they’re mini! Adorable!

August 3, 2011 - 3:42 pm

sherri lynn @ life of a wife - These are so pretty! I was just looking through her cupcake cookbook and saw these and wanted to make them. Yours turned out perfectly!

January 16, 2012 - 4:19 pm

Cupcakes! by rachealpatrolia - Pearltrees - […] And, so, after eating a whole pint on my own, I decided I wanted to use the rest up for some sweet treats I was taking to a party. Again, since I knew there would be a ton of people there, I opted for mini cupcakes to have a higher yield. You can adapt this recipe easily for a full-sized cupcake, too (just bake the cupcakes for about 24-25 minutes instead of 15 minutes). The Curvy Carrot » Blueberry Cupcakes […]

January 27, 2012 - 6:17 pm

Clarissa - These are okay i just think they’re a little caky… there’s definitely no wow factor. but overall it’s good.

January 31, 2012 - 9:05 am

Blueberry Cupcakes « Kristine's Kitchen - […] slightly adapted from The Curvy Carrot, originally from Martha Stewart’s Cupcakes. Advertisement GA_googleAddAttr("AdOpt", "1"); […]

November 7, 2012 - 6:38 pm

Mini Blueberry Cupcakes - […] the recipe at :  http://www.thecurvycarrot.com var addthis_config = […]

November 7, 2012 - 6:46 pm

Vera Zecevic – Cupcakes Garden - These mini cupcakes are so cute and delicious. I like these cupcakes very much so I’ve featured this recipes on my blog! I hope you don’t mind! If you don’t agree with that please contact me and I will remove it. All the best.

Baked Camembert with Honey and Thyme


This is an oldie, but goodie.  I was going through my photo archives the other night, and I realized that I had never posted this recipe.  I made it (I think) for Mother’s Day weekend as part of my marathon of appetizers/brunch for my mom.  We are a family that (obviously) loves cheese in any form, especially ooey gooey, melty and buttery baked cheese.

I had made Baked Brie before (and the Baked Brie Bites!), but I had never tried Camembert, a very close sister of Brie.  While the tastes are subtly different (I tend to think Camembert has more of a distinct taste than mellow Brie), they both consist of a soft cheese inside a sturdy rind-which is perfect, in my opinion, for baking.  I had paired the Baked Brie with fruit preserves for that creamy, sweet taste, but I was drawn to this recipe for the combination of sweet and savory flavors. And, of course, the garlic.

I loved the simplicity of not only the ingredients here, but the ease of preparation and elegant presentation.  You could pair anything you want with this:  fruit, crackers, or bread.  I simply chose a baguette, which I decided to leave untoasted (I’m a sucker for soft breads that don’t kill the roof of my mouth.)  I just remember having to get the photos very quickly, as I had two or three family members (patiently) waiting over my shoulder for this treat…and it was gone in less than 10 minutes.

I love baked cheese.


Baked Camembert with Honey and Thyme

Servings: Approximately 4, as an appetizer


Ingredients

One 9-ounce wheel of Camembert, removed from the box and the plastic wrapping***Keep the box.  You will bake the cheese in it.

1 garlic clove, minced (about 1 teaspoon)

1 teaspoon fresh thyme leaves

2 tablespoons honey

Sea salt, to taste

For serving: baguette, crackers, fruit, etc.

Instructions

1. Preheat the oven to 400 degrees.

2.  Cut a 10-inch square portion of aluminum foil and place it in the wooden box from the Camembert.

3.  Gently lay the cheese on top of the foil, and using a sharp knife, cut a slit directly across the top of the cheese.

4. Using a spoon or your fingers, tuck the garlic as best you can into the slit (If you cannot get it all in, that’s ok.  Just leave the extra garlic on top of the cheese).

5.  Sprinkle the top of the cheese with the fresh thyme and drizzle the top with the honey.  Sprinkle with salt to taste, if desired.

6. Lightly fold the aluminum foil around the cheese, sealing it.

7. Place the aluminum foil-wrapped cheese (and the box) on a lined baking sheet and bake for approximately 10 to 12 minutes, until the cheese is melted.

8. Remove from the oven and serve immediately.


Source:  Slightly adapted from James Tanner of Epicurious.


July 30, 2011 - 9:10 am

Barefeet In The Kitchen - I adore baked brie with jam. This looks amazing as well!

July 30, 2011 - 9:24 am

Notyet100 - Feel like picking one 🙂

July 31, 2011 - 9:48 am

PaleoRunnerGirl - Goodness Gracious! I just recently discovered your blog and I am totally transfixed. Everything looks so yummy! Your pictures are divine! I literally feel like I can smell these dishes through my computer!

August 1, 2011 - 12:34 pm

Curt - Don’t those look tasty! I like the addition of the honey in it.

August 2, 2011 - 8:25 am

Josie - Oooooh I want this!

August 3, 2011 - 5:52 pm

Peggy - No wonder it was gone so quick! This looks amazing =)

December 19, 2012 - 12:54 pm

Karen H - I’m doing this as a starter for our Christmas lunch this year – it just sounds so delicious I cant wait.

Halloumi and Watermelon Bites with Basil-Mint Oil


Yes, it’s a long name, isn’t it?  But I urge you to give this one a chance.  It’s watermelon season, and unless you have an army to feed, you may run into the issue of having lots of leftover watermelon in your fridge (if you buy a whole melon, of course).  And while bits of ice cold watermelon with maybe a little red pepper flakes and sea salt are extremely delicious, a girl needs more options when it comes to watermelon dishes.

I had this recipe bookmarked for several reasons.  1).  Watermelon-it’s the classic summer fruit.  2).  Halloumi.  Please don’t even get me started on Halloumi.  I think it might just be my favorite food in the whole world.  For those of you who may not be familiar with it, it’s a sheep/goat milk cheese, and it’s touted as a “cheese that can be fried.”  It’s very popular in Greece.  I tend to always have a container of it in my fridge because it’s ready in minutes, and it’s a great addition to salads, sandwiches, or even plain on its own as a guilty pleasure.  It crisps up nicely on the outside, leaving a warm, buttery and salty inside.  Ah, Halloumi.  3). Basil.  I love basil, considering most of the recipes on this blog this summer have contained it.  Why not?  It’s easy to grow, abundant, and adds such a crisp, clean flavor.  4).  Mint.  I love cooking with mint-I love the color, the aroma, the soft leaves.  (Maybe I think about this a little too much, I now realize).

Anyways, I figured I would give this recipe a go.  It can be easily served as an appetizer, but I just ate it as a weeknight meal…because it is ready in less than 20 minutes.  The basil-mint oil adds a light refreshing sweet taste to the cheese, so it has that great mix of salty sweet that I love so much.  I ended up grilling the watermelon as an experiment, and I think it turned out just fine, but if you want the nice contrast between the warm cheese and the cold watermelon, I would advice skipping that part.  I also don’t have a grill, so I just used a grill pan on my stove to grill both the cheese and the watermelon.

I will definitely be making this again.  I could picture serving it at a nice outdoor cocktail party with some sangria or chilled white wine.  Mmmm.

Halloumi and Watermelon Bites with Basil-Mint Oil

Servings: Approximately 10 2-inch pieces (I halved the original recipe)

Ingredients

1/4 cup fresh basil, chopped

2 tablespoons fresh mint, chopped

1 garlic clove, chopped (1 clove)

1/4 cup extra-virgin olive oil

4-5 ounces Halloumi cheese, in 1/2-inch thick slices **I cut the slices into halves so that they would be bite-size

Approximately 1-pound watermelon, rinds removed and sliced into bite-sized portions

Sea salt and pepper, to taste, if desired

Fresh mint, for garnish


Instructions

1. In your food processor, combine the basil, mint and the garlic and pulse until finely chopped.

2. Very slowly, pour the olive oil into the feed tube with the blade running.  Puree until the mixture is smooth. **There will still be a few bits of basil and mint present.

3.  Place the basil-mint oil in a strainer over a bowl and press to remove all the liquid.  Discard the solids, and set the oil aside.

4. Meanwhile, preheat a grill pan over medium heat (or use an outdoor charcoal or gas grill).

5. Lightly brush the cheese pieces with the basil-mint oil, and grill, about 3 minutes each side, flipping as needed and brushing with the basil-mint oil as desired.  Grill until the sides are lightly browned and crispy.

6.  Remove the cheese pieces from the grill and lightly grill the watermelon (if desired), about 1 minute on each side.

7.  Assemble each piece by placing some Halloumi on top of each watermelon slice and garnish with salt, pepper, and fresh mint.

Source:  Adapted from Bon Appétit, via Epicurious.


July 28, 2011 - 6:56 am

Lauren at Keep It Sweet - I absolutely love halloumi, what a great way to use it!

July 28, 2011 - 7:54 am

Blog is the New Black - Such a fun presentaton and a unique treat! I love watermelon so much. looks awesome!

July 28, 2011 - 9:58 am

DessertForTwo - I’ve been wanting to try Halloumi! Thanks for this 🙂

July 28, 2011 - 4:51 pm

Jessica - I love the combination of watermelon and salty cheese like halloumi and feta. This looks like a delicious recipe and that is a beautiful photo!

July 28, 2011 - 4:54 pm

Kimberly - I just returned from a study abroad trip to Cyprus, which is where halloumi comes from. We filmed a documentary there on the meze, and for part of it we went to visit a woman who makes halloumi the traditional way at her own house. We got to eat some fresh and ohhh my goodness, it was so good! I’m not sure if I’ll be able to find it anywhere near to me here in Tennessee, but I LOVED it when I was back in Cyprus. I just had to leave you a comment when I saw this on foodgawker. 🙂 🙂

July 28, 2011 - 5:31 pm

julia - mmmmYUM

July 28, 2011 - 5:47 pm

Elizabeth - Oh Halloumi, SO delicious. I love it grilled on the BBQ, but this looks like a great little canapé for a party. Beautiful!

July 28, 2011 - 5:50 pm

srlacy - Oh my goodness, Kimberly. I am so jealous. That sounds like my dream trip. I cannot even imagine eating fresh halloumi in Cyprus. DROOL.

July 28, 2011 - 7:28 pm

bhavani@ameanderingamango - Looks absolutely delicious – wonderful combination of sweet and salty flavours. Thanks for sharing!

July 28, 2011 - 9:15 pm

Kelly - I love this!! Gorgeous presentation and perfect little bites 🙂

July 30, 2011 - 8:23 pm

Kim Bee - All I can is wow. This is amazing.

July 31, 2011 - 9:17 pm

Kelsey - Oh yum! This has so many of my husband’s favorite ingredients. We must make it!

August 17, 2012 - 1:43 pm

Samantha - This made me drool on my keyboard. Stunning.

September 20, 2012 - 8:21 am

Baked Orzo with Eggplant « We are not Martha - […] and I almost forgot about the appetizer. Also Mediterranean inspired, we made Grilled Watermelon and Halloumi with Basil Mint Oil. Both the watermelon and the halloumi were grilled and these bites were […]

July 2, 2014 - 11:17 am

34 Ways to Eat Watermelon at Every Meal - Perfect Your Lifestyle - […] Halloumi and Watermelon Bites Who doesn’t like to get decadent every now and again? Thin slices of halloumi (a mixture of […]

July 15, 2014 - 6:32 am

Top 10 Genius Watermelon Summer Refreshers - […] via thecurvycarrot.com  […]

July 16, 2014 - 8:42 pm

34 Ways to Eat Watermelon at Every Meal | - […] 24. Halloumi and Watermelon Bites Who doesn’t like to get decadent every now and again? Thin slices of halloumi (a mixture of sheep- and goat- milk cheese) crisp up perfectly on the outside and melt wonderfully on the inside. They’re then layered atop thick slices of watermelon—and the contrast between the warm cheese and the cold watermelon is to die for! […]