French Onion Hot Dogs

One of the best parts about the food blogging world is getting to know other food bloggers out there.  We all share a major love for food-we all love cookbooks-we all love taking pictures of our food-and we all love sharing our tips/ideas/tricks with one another.  We have a pretty awesome community out here in the blogosphere.

I was very excited to meet Karen, from Inspired Art of Cooking a few months ago.  She and I have a lot in common in our personal lives, but, even more so, she recently put together a cookbook and asked if I would review it on my blog.  After emailing back and forth about some of our similarities, I knew I would have a great time picking a recipe from her cookbook, Be Your Own Chef.  But I didn’t realize that I would have such a hard time picking just one recipe.

Her cookbook is great-lots of down-to-earth and homemade comfort foods, but what I love the most about her cookbook is the endless alternative options she puts in her recipes.  Are you a vegetarian?  No problem-she’ll tell you what to substitute for the meat.  Are you a vegan?  Even better-she tells you what to sub to make the recipes 100% vegan friendly.  On top of that, she gives little tricks of the trade along the way: how to store certain ingredients, how to remove the garlic smell from your hands, what cooking with alcohol actually does to the food-it’s a wonderful resource to have alongside you in the kitchen.

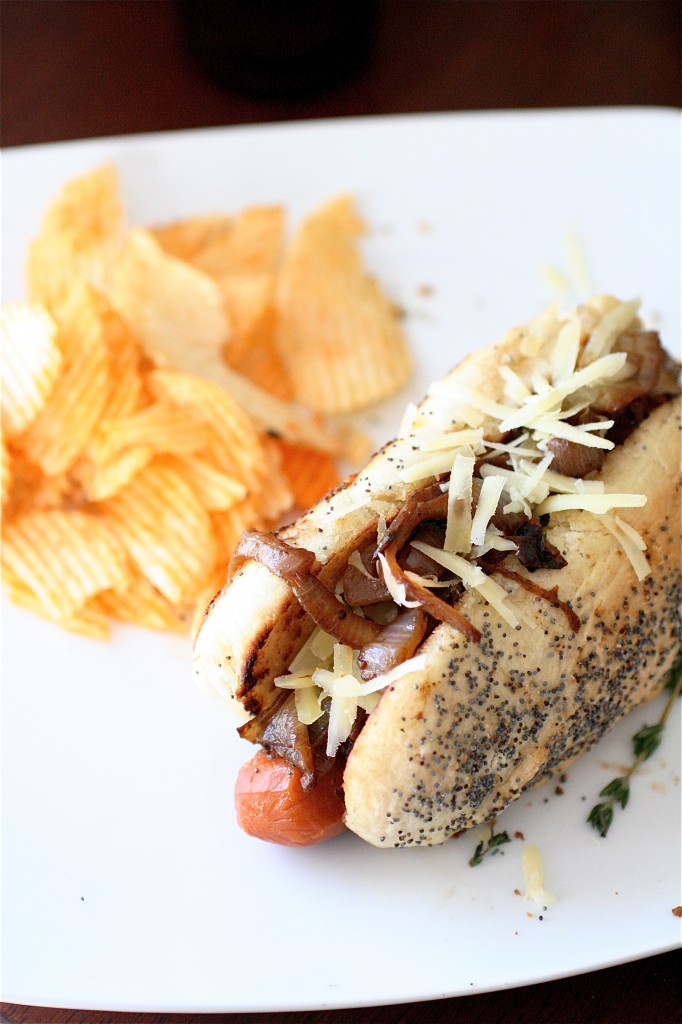
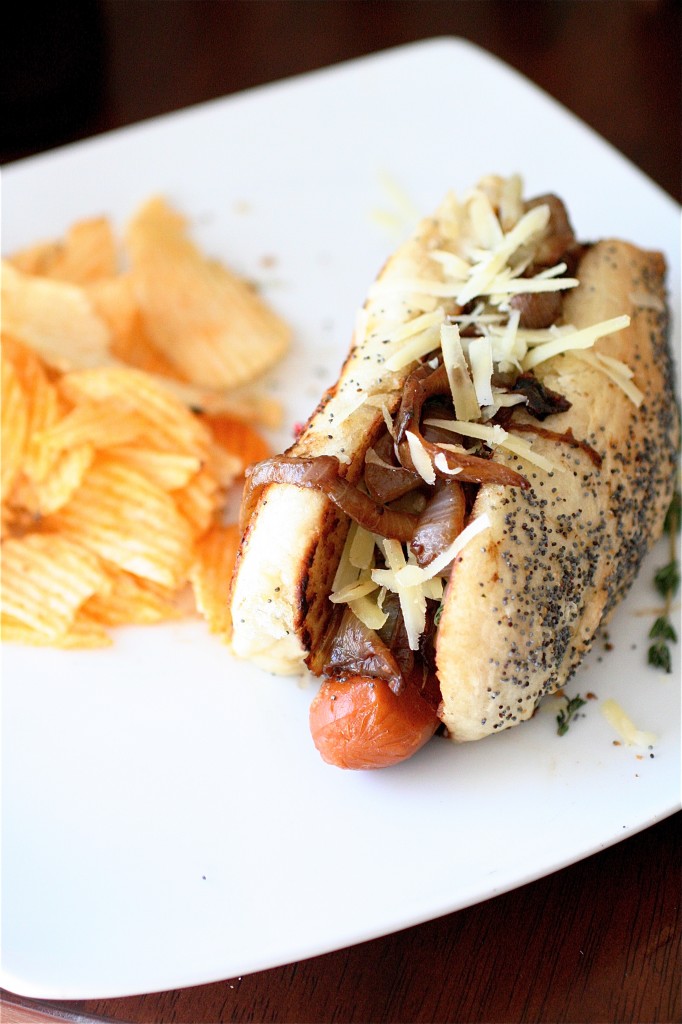
I ended up choosing her French Onion Hot Dogs to make.  It’s obvious that I love anything with the name “French Onion” in it, and the smell of caramelized onions alone in my kitchen is enough to make me get hungry.  Her recipe was straightforward, easy to follow, and totally delicious.  I loved the combination of the traditional French onion flavors with my veggie dog.  I ate two they were so good and then ate another one the following night for dinner (on top of my freshly baked hot dog buns!).  This is, in my opinion, a fancier way to enjoy your summer hot dog.

Thank you, Karen, for the opportunity to try out your cookbook and to meet you!
French Onion Hot Dogs

Servings: 4

Ingredients

1 tablespoon extra-virgin olive oil

3 small yellow onions, sliced thin

2 tablespoons balsamic vinegar

1 tablespoon fresh thyme, chopped, plus more for garnish if desired

2 tablespoons Dijon mustard

3 cloves garlic, minced (about 3 teaspoons)

Salt and pepper, to taste

4 veggie hot dogs **I used the jumbo size

2 cups Gruyere cheese, shredded

4 hot dog buns, buttered and toasted


Instructions

1. In a large sauté pan over medium heat, heat the olive oil until shimmering.

2. Add the onions and cook, stirring occasionally, for about 10 minutes, until the onions are lightly browned and softened.

3. Add the balsamic vinegar, the thyme, the mustard, garlic and salt and pepper, stirring until well-mixed.

4. Cook for another 10 minutes or so, until the onions are golden brown and completely soft.

5. Prepare your hot dogs as desired (I used a grill pan on the stove, but feel free to use a gas grill outside).

6. Place your cooked hot dog on the toasted bun and place a thick layer of Gruyere cheese over the hot dog.

7. Spoon the caramelized onion mixture over each hot dog, covering the cheese and hot dog completely.

8. Sprinkle with additional cheese and fresh thyme, if desired.  Enjoy!


Source: Adapted from Be Your Own Chef, by Karen Blake Peek from Inspired Art of Cooking.


August 7, 2011 - 5:28 am

Mary Margaret - These look amazing! I’m a complete sucker for French Onion soup, so these are definitely going in my to-cook file. Thanks for the recipe- especially the inclusion of the homemade hot-dog buns!

August 7, 2011 - 12:55 pm

Inspired Art of Cooking » Blog Archive » Great cookbook review by The Curvy Carrot - […] Here is a great book review of my cookbook Be Your Own Chef written by The Curvy Carrot.  She took my recipe French Onion Dog and adapted it to her own taste.  Click on the this link to read.  http://www.thecurvycarrot.com/2011/08/07/french-onion-hot-dogs/ […]

August 7, 2011 - 3:07 pm

Peachie - These look so delish!! Have already loved the hot dog + onions combination!

August 8, 2011 - 1:35 pm

DessertForTwo - This looks like a perfect lunch!

August 9, 2011 - 5:06 pm

Karen Blake Peek - I want tot hank you for the wonderful review you did for my book. I love what you did to make it your own. Your picture looks so tasty. Thank you again for your kind words and I hope you will enjoy the rest of the book. Thanks again and let me know if I can do anything for you in return.

June 15, 2012 - 5:01 pm

Food Trend: 4th of July Grilling Recipes | RecipeLionBlog - […] French Onion Hotdogs from the Curvy Carrot […]

June 21, 2012 - 7:05 pm

Grilling Recipes for the 4th of July | - […] French Onion Hotdogs from the Curvy Carrot […]

August 30, 2012 - 5:00 am

The Curvy Carrot » Black Bean Sliders - […] French Onion Hot Dogs […]

May 10, 2013 - 9:32 am

French Onion Hot Dogs - […] source:  thecurvycarrot.com […]

July 23, 2014 - 1:52 pm
November 6, 2014 - 4:16 pm
February 17, 2015 - 11:23 am

25 Hot Dogs That Went Above And Beyond - […] thecurvycarrot.com […]

Hazelnut Nutella Thumbprints

How have I not posted a recipe containing Nutella yet?  I mean, it’s only one of the best indulgences out there.  Which is why I try not to buy it too often-because it can quickly be a downward spiral that inevitably ends with me having sticky hands and a Nutella mustache.  You see, I can get a little out of control.

I have to thank my new nursing friends for reintroducing me to my long-lost love.  One day, there suddenly appeared  a jar of Nutella in the work room…and a box of graham crackers.  And that was the end of me.  I had to contain myself in an effort not to become a complete Nutella hog, but my resolution was made.  During the next trip to the store, I would purchase my own jar of Nutella.  And so I did.  That night, I laid in bed, watching girly TV, with apple slices and Nutella (and sticky hands and a Nutella mustache).

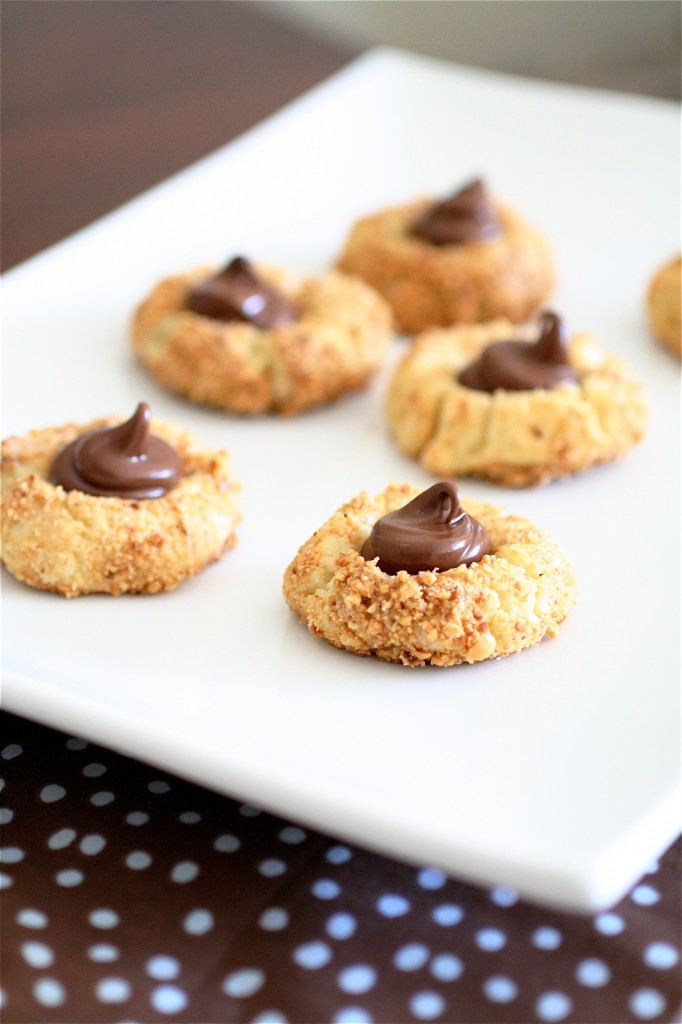
These cookies are great.  They are tiny and cute as a button with a big dollop of Nutella in the middle.  I loved the sugar cookie base, and the toasted hazelnuts actually brought a little savoriness to the cookies.  And, the Nutella just made it even better.

Hazelnut Nutella Thumbprints

Servings:  approximately 18-20 cookies

Ingredients

1/2 cup (1 stick) unsalted butter, at room temperature

1/2 cup plus two tablespoons sugar

1 large egg, separated***Throw the whites in the fridge-you won’t use them for a while.

1 teaspoon vanilla extract

1 and 1/4 cups all-purpose flour

1/8 teaspoon salt

1/2 cup skinned hazelnuts, toasted and chopped finely **  To toast them, place them on a baking sheet at 350 degrees for about 10 minutes. I used my food processor to quickly pulse the hazelnuts a few times.

1/2 cup Nutella

Instructions

1. In the bowl of your stand mixer fitted with the paddle attachment, combine the butter and 1/2 cup of the sugar and cream on medium speed for about 2-3 minutes.

2. With the mixer still running, add the egg yolk and the vanilla.

3. Reduce the mixer speed to low and add the flour and salt, scraping down the sides of the mixing bowl as necessary.

4. Gently form the dough into a ball and wrap tightly in plastic wrap.  Refrigerate for at least 2 hours.

5. Preheat the oven to 325 degrees.

6.  In a small bowl, combine the finely chopped hazelnuts and the remaining two tablespoons of sugar.

7.  Using your hands, roll the dough into 18 or so round 1-inch balls.

8. Dip the balls in the egg whites, using a fork to cover the balls completely.

9. Dip each ball into the chopped hazelnuts, coating completely.

10. Place the dough balls on a parchment paper-lined baking sheet.

11. Using your thumb, or the end of a wooden spoon, gently press the center of each cookie in to form a central well.

12. Bake the cookies for 10 minutes.

13. Remove the cookies from the oven and gently press down the centers of the cookies again (I also re-shaped them slightly if they cracked at all).

14.  Return the cookies to the oven and continue to bake for another 8 to 10 minutes, or until golden brown.

15. Remove the cookies from the oven and let cool slightly on a wire rack.

16. Using a piping bag or a small melon baller, scoop Nutella into the centers of each cookie.  **You may not use all of the Nutella.  So enjoy the leftovers.  🙂

Source: Adapted from Martha Stewart’s Cookies.


August 5, 2011 - 8:39 am

Kate@FudgyGoodness - Oh my, this looks absolutely delightful! I am new to your site but absolutely loving it here! Thanks for sharing this 🙂

August 5, 2011 - 10:12 am

Kelley - I take a dozen please. Shall I send you my a dress? Delicious!

August 5, 2011 - 11:02 am

DessertForTwo - I believe people who leave jars of Nutella and boxes of graham crackers around me should be arrested. I will eat the.entire.jar.
Love these cookies 🙂

August 5, 2011 - 8:45 pm

Tina@flourtrader - These cookies are so wonderful. The fact that you have used hazelnuts and nutella have changed my mind about thumbprint cookies. The traditional uses jam in the print, which does not keep well. The addition of the new flavors are inspiring. Thanks for sharing.

August 11, 2011 - 1:16 am

Koko @ KokoLikes - These pictures are so beautiful. I don’t know how you do it!! Just gorgeous

November 12, 2011 - 11:58 am

Chai Pumpkin Spice Thumbprints | Pass The Sushi! - […] adapted from The Curvy Carrot […]

January 18, 2012 - 5:00 am

The Curvy Carrot » Chocolate-Hazelnut Tartlets - […] for some more hazelnut love?  Try these.  Or […]

February 13, 2014 - 11:10 am

Fall is in the Air | Warm Heart Bears by Carolyn Robbins-Blog - […] adapted from The Curvy Carrot […]

October 17, 2014 - 12:31 pm

Fall is in the Air | At Home with Warm Heart Bears - […] adapted from The Curvy Carrot […]

Homemade Hot Dog Buns

I suppose I should post a homemade hot dog bun recipe, right?  I mean, it’s only the middle of the summer already, and hot dogs are one of the classic summer cookout foods, right?

Being a vegetarian doesn’t stop me from participating in the summer festivities, contrary to my initial thoughts when I went back to being meat-free almost two years ago.  Nope.  It’s awesome because my friends back home would just naturally have veggie burgers and soy dogs waiting for me at any backyard barbecue, and the best part is that sometimes they would opt for the veggie dishes along side me, often surprising themselves with how much they enjoyed a meat-free BBQ.  It can be done, my friends.

I have a post to share with you in the coming days that I think you will like.  But first things first.  You need a solid hot dog foundation before you build any kind of hot dog monstrosity, veggie or not.  I’m talking about a solid hot dog bun.  One with soft, sweet flavor…maybe a little garlic and poppy seeds to give it some oomph (also to remind me of Portillo’s in Chicago)…and definitely lacking that white starchy stuff that the store-bought buns come with.

So, if you have a couple of hours (don’t worry, these have a lot of hands-off time so you can get other things done) and some room in your freezer (you can just wrap them in plastic wrap and stick them in a freezer bag for future use), these are a solid investment for your summer cook-out success!


Homemade Hot Dog Buns

Servings:  12-15 hot dog buns (I made mine larger for jumbo dogs, so my yield was 12).


Ingredients

2 tablespoons granulated sugar

2 tablespoons active dry yeast

1/2 cup warm water

2 cups warm milk

2 tablespoons vegetable oil

2 teaspoons salt

6 cups (plus more if needed) all-purpose flour

1 egg

1 tablespoon of cold water

2 tablespoons poppy seeds

1 tablespoon garlic salt


Instructions

1. In the bowl of your standing mixer fitted with the paddle attachment, combine the sugar, yeast, and warm water.

2. Let this mixture sit for about 5 minutes, until it is bubbly/foamy.

3. Add the warm milk, vegetable oil, salt, and three cups of the flour.

4. With the mixer on medium-high speed, mix the dough for two minutes.

5. Switch to the dough hook and reduce the mixer speed to low.

6. Add the remaining flour, about 1/4 cup at a time, until the dough holds together and pulls away from the sides of the mixing bowl.

7. Using your mixer, knead the dough on low speed until the dough is elastic, about 8-10 minutes.

8. Shape the dough into a ball, and place the dough into a well-oiled bowl, turning once to completely cover the dough with oil.

9. Cover the bowl with a light cloth and let rise until doubled in size, about 1 hour.

10.  Once risen, punch the dough down on a lightly oiled flat surface and divide the dough into 12 (or however many rolls you want) portions.  KAF suggests dividing the dough into thirds, then halves, and then halves again.

11.  Using your hands, gently roll the dough into oblong rolls, about 4 and 1/2 inches in length, and flatten each one slightly using the palms of your hands.

12. In a small bowl, combine the poppy seeds and garlic salt together.  Lightly sprinkle a baking sheet with the poppy seed mixture.

13. Place the rolls on the seasoned baking sheet and coat the undersides of each roll lightly with the poppy seed mixture (I just lightly rolled mine back and forth on the baking sheet to pick up the seasonings.)

14. Cover the rolls with a light cloth and let rise again, for about 45 minutes or so.

15. Preheat the oven to 400 degrees.

16.  In a small bowl, whisk together the egg and the cold water to prepare an egg wash.

17. Lightly brush each roll with the egg wash.

18. Lightly sprinkle the rolls with the remaining poppy seed mixture (you may not use it all) to completely cover each roll.

19. Bake the rolls for 20 minutes or until lightly golden.

20.  Remove the rolls from the baking sheet and let cool completely on a wire rack.


Source: Adapted from King Arthur Flour.


August 3, 2011 - 9:29 am

DessertForTwo - Absolutely beautiful! I just made my own hamburger buns (using the King Arthur recipe), I’m anxious to try hot dog buns!

August 3, 2011 - 10:29 am

Notyet100 - Bookmarked 🙂

August 7, 2011 - 5:02 am

The Curvy Carrot » French Onion Hot Dogs - […]  I ate two they were so good and then ate another one the following night for dinner (on top of my freshly baked hot dog buns!).  This is, in my opinion, a fancier way to enjoy your summer hot […]

August 11, 2011 - 5:27 pm

Jen - These are lovely. Is there really no salt?

August 11, 2011 - 6:24 pm

srlacy - Oh, Jen-thank you so much for catching that mistake. There are two teaspoons of salt. I have fixed the recipe. 🙂

August 11, 2011 - 11:57 pm

Jen - Just wished I had caught it before I made them…and a double batch at that 😉

August 12, 2011 - 5:35 am

srlacy - I’m so sorry-I had it in the instructions but forgot to add it to the ingredient list. Did you try one? I wonder if it makes that much of a difference.

August 17, 2011 - 3:25 pm

Jen - It’s totally not your fault. Who makes a double batch of a recipe without trying it? Seriously? 🙂 Yes I tried them…huge difference…not good. The buns are squirrel food 🙂

June 24, 2013 - 8:18 am

Homemade Hot Dog Buns - […] Source- Adapted slightly from Curvy Carrot […]