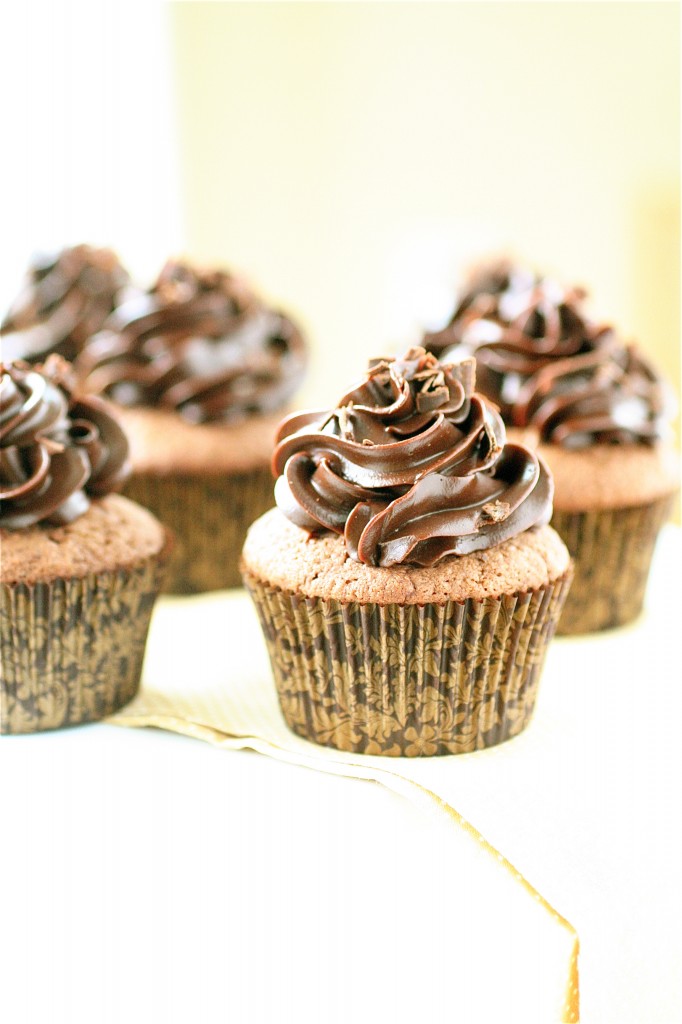
Death by Chocolate Cupcakes

I love birthdays.  I don’t know why.  I just do.  I know a lot of people dread them each year for the pure sake of being yet another year older, but I look at them as another year of life spent in the wonderful thing that is you and no one else.  Granted, I know I might not feel the same way in a few years, but right now I’m rolling on a wave of optimism and I kind of like the feeling.

Because I enjoy birthdays so much, I have adopted Annie’s idea of making cupcakes (or any kind of personalized dessert, for that matter) for my new co-workers and friends.  I like to leave the flavor options open-ended because part of what I love the most is hearing what kinds of desserts people.  For some, it’s all about vanilla.  For some, it’s all about cookies.  And for some, it’s all about the chocolate.  Being a chocoholic myself, I was completely excited when a friend at work requested something as chocolate-y as I could make it.  Forget boozy add-ins.  Forget any add-in at all, for that matter.  Straight up offensive chocolate.  Death by chocolate, to be exact.

I didn’t know what death by chocolate actually meant, but I knew I wanted to achieve something with different textures and flavors to highlight the amazing entity that is chocolate.  I ended up choosing a dark chocolate cupcake with a chocolate mousse filling topped with a chocolate buttercream frosting and bits of bittersweet chocolate.  These cupcakes were met with rave reviews and I was very pleased with the end product.  The birthday boy was too, so that made it even better.

Death by chocolate.  Are you in?
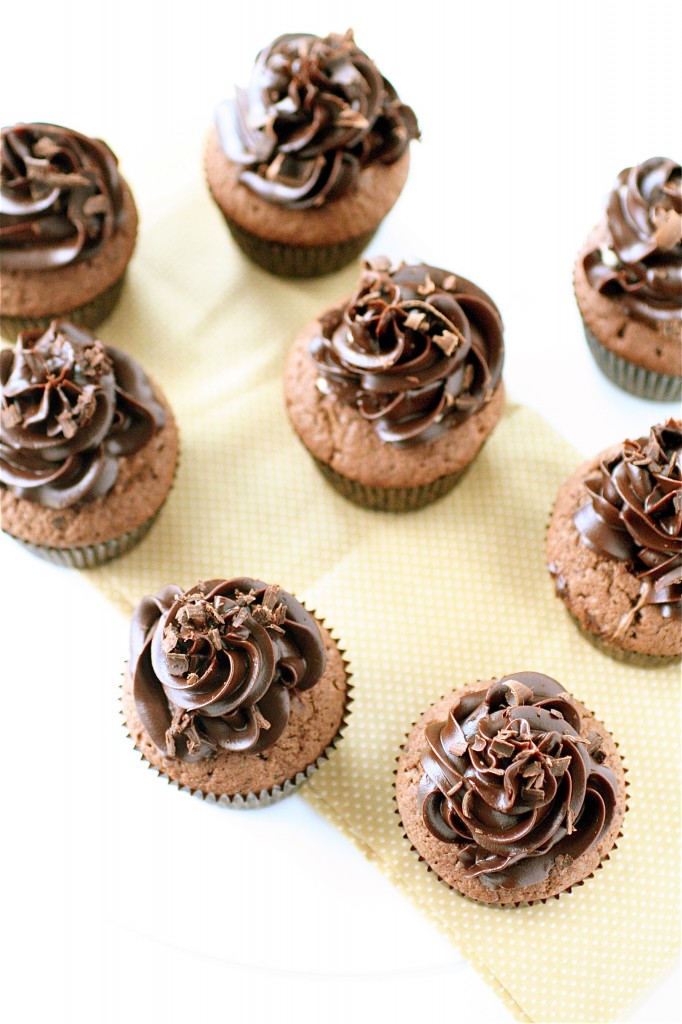
Death by Chocolate Cupcakes

Servings:  approximately 18 cupcakes

Ingredients

For the cupcakes:

2 cups all-purpose flour

1/2 cup unsweetened cocoa powder

1/2 teaspoon baking powder

1/2 teaspoon baking soda

1/2 teaspoon salt

16 tablespoons (2 sticks) unsalted butter, at room temperature

1 and 1/2 cups sugar

2 eggs

2 egg yolks

1 teaspoon vanilla extract

1 cup buttermilk

4 ounces bittersweet chocolate, melted and cooled

For the mousse:

4 eggs, separated

1 cup milk

1 and 1/2 cups semisweet chocolate chips

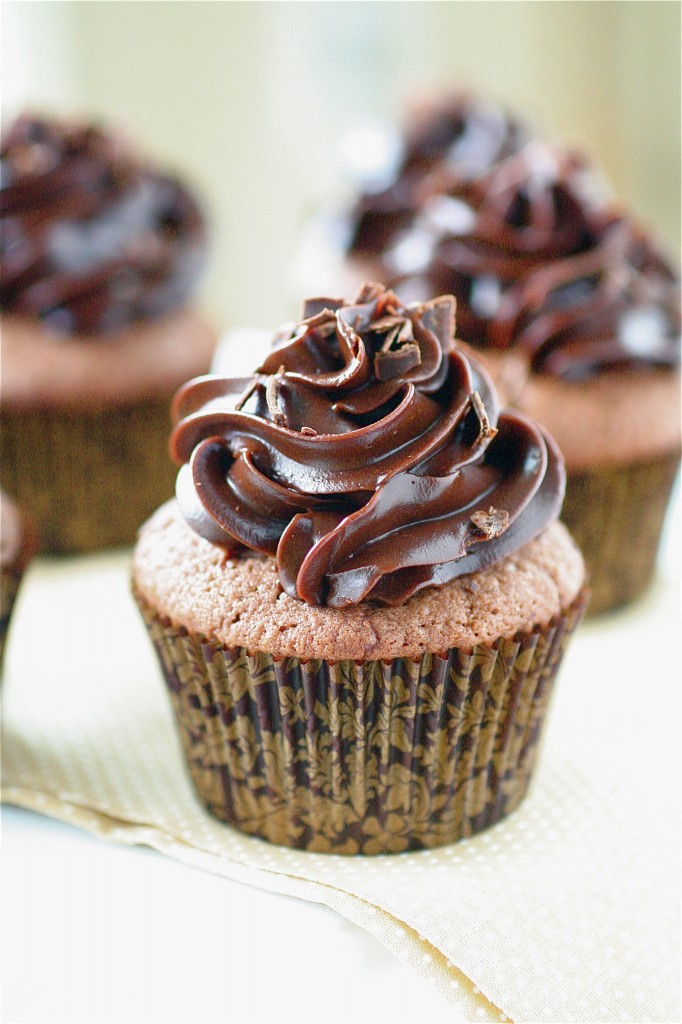
1 teaspoon vanilla extract

1 cup heavy whipped cream**Just use 1 cup of heavy cream and beat at high speed until soft peaks form.

For the frosting:

1/4 cup plus 2 tablespoons unsweetened Dutch process cocoa powder

1/4 cup plus 2 tablespoons boiling water

1 and 1/2 cups (3 sticks) unsalted butter, at room temperature

1/2 cup confectioners’ sugar

Pinch of salt

1 pound high-quality semi-sweet chocolate, melted and cooled

For garnish:

Bittersweet chocolate curls, optional
Instructions

1. For the cupcakes: With a rack in the center of the oven, preheat the oven to 350 degrees.

2. Line two cupcake pans with the liners of your choice.

3. In a large bowl, combine the flour, cocoa, baking powder, baking soda, and salt, mixing until combined.

4. In the bowl of your standing mixer fitted with the paddle attachment, cream the butter until it is light and fluffy, about 2 minutes.

5. Add the sugar and beat, at medium speed, for about 2 more minutes.

6. Add the eggs and the egg yolks, one at a time, beating well after each addition, scraping down the sides of the bowl as necessary.

7. Add the vanilla, mixing well.

8. Reduce the mixer speed to low and add half of the dry ingredients, mixing until they are just combined.

9. Add the buttermilk and then the remaining dry ingredients, mixing until just incorporated.

10. Add the melted chocolate and gently fold it into the batter with a rubber spatula.

11. Divide the batter evenly among your prepared cupcake liners and bake until the tops spring back, about 22-25 minutes.

12. Transfer the cupcakes to a wire rack and let cool completely.

13. For the chocolate mousse: In a medium saucepan over low heat, combine the egg yolks and milk, stirring constantly until thickened (do not let it boil), about 10 minutes or so.

14. Remove the saucepan from the heat and stir in the chocolate chips and vanilla, mixing well.

15. Cool the mixture to room temperature.

16. In a separate bowl, beat the egg whites at high speed until firm peaks form.

17. Using a rubber spatula, gently fold the egg whites into the cooled egg/milk mixture.

18. Fold in the whipped cream and refrigerate until ready to use.

19. For the frosting:  In a small bowl, combine the cocoa and boiling water, mixing well until dissolved.

20. With your standing mixer fitted with the paddle attachment,  combine the butter, confectioners’ sugar and salt on medium high speed until light and fluffy.

21. Reduce the mixer speed to low and add the melted (and cooled) chocolate, scraping down the sides of the bowl as necessary.

22. Add the cocoa mixture to the frosting, mixing well.

23. For assembly: Using a small paring knife, gently cut a cone-shaped piece of cake out of the top of each cupcake.

24. Using a small spoon or a pastry bag fitted with a plain round tip, lightly pipe in about 1-2 teaspoons of chocolate mousse into each cupcake.

25. Pipe (as desired) your frosting onto the top of each cupcake, garnishing with bittersweet chocolate pieces, as desired.

Sources: Cupcakes adapted from Baking-From My Home to Yours by Dorie Greenspan, chocolate mousse adapted from Wilton, and frosting from Martha Stewart’s Cupcakes.


August 13, 2011 - 12:47 pm

Benthe - They look delicious!

August 13, 2011 - 3:09 pm

Lila Lacy - Oh yum!

August 13, 2011 - 6:23 pm

Sasha @ The Procrastobaker - If youve actively sought after death by chocolate and this is the recipe you came up with, then i am SO going to try it as that sounds like just my cuppa tea 🙂 what a gorgeous recipe, that mousse especially i just want to make and eat by the spoonful, craving something chronic now!

August 13, 2011 - 11:11 pm

Jo@jocooks - That frosting looks like nutella, so I love anything that looks or tastes like nutella. Gorgeous cupcakes.

August 14, 2011 - 10:52 am

Cassandra at FrillyFabulous - I just celebrate a birthday last week and was super bummed about turning another year older, but then I realized, it’s another year of knowledge, wisdom, and memories and that I should embrace birthdays! Your cupcakes are making my taste buds dance! They look SO yummy, I will definitely need to whip up a batch soon! Thanks for sharing!

August 14, 2011 - 10:50 pm

Russell at Chasing Delicious - Beautiful cupcakes! I love celebrating birthdays too, mine or friends. It’s such a fun reason to celebrate. This recipe looks scrumptious! Anything death by chocolate sounds fantastic. Do you think using dark or bittersweet chocolate in the mousse would be too much? I’m a sucker for dark chocolates.

August 15, 2011 - 6:16 am

srlacy - Absolutely! I thought the semisweet chocolate would help cut the darkness of the rest of the cupcake, but there’s enough sugar and sweetness there to balance with more bittersweet. It might be incredibly rich, but if you are going for death by chocolate, that’s the point, right? 😉

August 15, 2011 - 12:18 pm

Annie - They look and sound fab. Have fun playing cupcake fairy!

August 15, 2011 - 12:33 pm

Jamie - Oh my sweet heaven. It’s a good thing I dont have buttermilk in the house, or I’d have these for breakfast 😀 can’t wait to make them!

August 24, 2011 - 2:16 pm

Lauren - Three words:

OM

NOM

NOM.

They look positively sinful =)

September 4, 2011 - 11:14 pm

Tyler - Can I just say – I adore your attitude to birthdays! And your entire blog, actually.

September 7, 2011 - 10:53 am

KiKi - hi, i’m a french student, i love your cupcakes, there are so cute !

October 11, 2012 - 12:59 pm

Kaylee Monton - I really love to eat chocolates specially dark chocolate because they taste sweet and special. ”.,”

Find out about our personal blog as well
http://www.foodsupplementdigest.com/spirulina-benefits/

November 30, 2012 - 9:31 am
February 19, 2013 - 11:17 am

Death by Chocolate Cupcakes - […] Find the recipe at : http://www.thecurvycarrot.com […]

May 27, 2013 - 5:04 am

Death by Chocolate Cupcakes | Pale Yellow - […] by Chocolate Cupcakes Cake & Ganache adapted from Bakingdom Frosting adapted from The Curvy Carrot via Martha Stewart Yield – 18 […]

August 2, 2013 - 2:03 am

Death By Chocolate Cupcakes | Chocolate Cupcake Recipes | The Cupcake Daily Blog - […] Death By Chocolate Cupcakes via The Curvy Carrot […]

December 7, 2013 - 11:27 am

Natasha - Hi, these cupcakes looks really delicious! i want to make them for New Year’s eve. Can I make them the day before? Are they good to be eaten the day after they are made? Thanks!

December 7, 2013 - 12:29 pm

srlacy - Hi Natasha-

As long as you store them in an airtight container, you should be ok. If you plan on frosting them the day before, I would also recommend storing the frosted cupcakes in the fridge.

December 13, 2013 - 11:57 am

Natasha - Hey, thanks for the advice. The recipe says it serves 18 cupcakes. Were they normal size or the mini ones? I want to make like 24 standard size and I’m not sure how much to increase the amount of the ingredients. This is my second time I make cupcakes and I don’t want to mess things up 😀

December 13, 2013 - 2:12 pm

srlacy - Hi Natasha-

They were normal (standard) sized cupcakes. You can always just double the recipe for a yield of 36 (give or take) to be on the safe side.

May 6, 2014 - 1:58 pm

Susan - What brand of bittersweet chocolate & semi-sweet chocolate did you use? (Or if you have one to recommend please?) I’m excited to make these! Thanks!

May 6, 2014 - 2:37 pm

srlacy - Hi Susan-

I love using Ghiradelli chocolate when I can get my hands on it! Enjoy 🙂

October 23, 2014 - 4:19 pm

Death By Chocolate Halloween Cookie Cake | Flavor the Moments - […] Death by Chocolate Cupcakes by The Curvy Carrot […]

Rosebud’s Whole Wheat Bread

The past few weeks, I have been thinking a lot about family.  Last week, especially. Last week we lost my Great Aunt Jack (short for Jacklyn) very suddenly.  She was the sister of my baker-extraordinaire grandmother, Rosebud.  You might remember Rosebud’s Butter-Topped White Bread, Cinnamon Rolls, or her Sticky Buns.  Baking has always been something that my mother’s side of the family has shared, so in tribute to Aunt Jack this past weekend, I decided to make my grandmother’s Whole Wheat Bread.  I know that this hasn’t been an incredibly easy week for my mom’s side of the family, so this is my contribution to the celebration of my grandmother’s, and now my Great Aunt’s, lives.

My grandmother’s whole wheat bread is almost heavenly.  I only made one loaf this weekend (I realized I only packed one bread pan with me during my move out here), but I am posting the full recipe here, which makes two loaves.  It definitely has a heavier consistency than her white bread, but it still has a lightness about it that is a little hard to explain.  I don’t eat bread all that often, but I’ve been enjoying sandwiches all week on this bread (My dog, Scout, has been getting a little piece of it each day as a treat this week, too!).  Since it’s completely free of preservatives, it will harden up within a day or two, so I recommend keeping it covered tightly at room temperature to prevent it from becoming stale prematurely.  If you keep it covered this way, it should last for about 5-6 days (and it’s freezer-friendly, too).  I also splurged a little and brushed it with butter when it came out of the oven, so it has a bit of that buttery taste to it.  Feel free to skip this step if you want.

I hope you enjoy this bread.  It’s made with a lot of love.

Rosebud’s Whole Wheat Bread

Servings: 2 loaves

Ingredients

1/4 cup warm water

4 and 1/2 teaspoons active dry yeast

2 and 1/2 cups warm water

2 teaspoons salt

1/2 stick unsalted butter, melted

1/4 cup sugar

1 tablespoon honey

6 cups whole wheat flour

1 and 1/2 cups all-purpose flour

1/2 stick unsalted butter, divided, to brush onto warm bread, if desired

Instructions

1. In a small bowl, combine the 1/4 cup warm water and the yeast, stirring slightly to dissolve.  Set aside for 5 minutes.

2. Meanwhile, in the bowl of your standing mixer fitted with the paddle attachment, combine the 2 and 1/2 cups of warm water, salt, melted butter, sugar, and honey.  Mix until combined.

3. Add the yeast mixture to stand mixer and stir to combine.

4. With the mixer speed on low, add 2 cups of whole wheat flour and the all-purpose flour until just combined.

5. Switch to the dough hook, and with the mixer speed on low, add the remaining whole wheat flour.

6. Knead the dough until elastic, about 10 minutes or so.

7. Remove the dough from the mixer and shape it into a ball.

8. Place the dough into a well-oiled bowl and gently roll the dough around to coat completely with oil.

9. Cover the bowl with a light cloth and set aside in a warm place to rise until doubled, about 1 hour.

10. After the dough has doubled in size, punch it down and gently roll it out onto a lightly floured surface.

11. Divide the dough into two loaves and place each into a lightly greased (or oiled) bread pan.

12. Cover the bread pans with the cloth and return them to a warm place to rise again until doubled, about another hour.

13. Preheat the oven to 375 degrees.

14. Bake the bread until lightly golden, about 25 minutes or so.

15. Remove the bread from the oven and brush with the butter.  Let cool for about 10 minutes, and then invert the loaves onto a wire rack to cool completely.

Source:  Rosebud Curbey, my grandmother.


August 11, 2011 - 5:21 am

Blog is the New Black - I’m sorry for your loss. What a nice tribute, though! Looks wonderful.

August 11, 2011 - 12:11 pm

Tes - This is really a recipe to treasure. It looks beautiful!

August 11, 2011 - 1:07 pm

Emily - I’m sorry you lost some one so dear! But love the idea of baking something in her memory! This looks heavenly. Thanks for sharing this family recipe!

August 11, 2011 - 5:23 pm

Barefeet In The Kitchen - Amazing looking bread. I’m saving this recipe. Thanks!

August 12, 2011 - 12:47 pm

Liz @ Tip Top Shape - I’m sorry to hear about your Uncle. I agree with the others, though, about this being a lovely tribute. Wonderful recipe!

August 12, 2011 - 12:48 pm

Liz @ Tip Top Shape - I’m sorry– I meant you Aunt. My head is apparently not screwed on properly this morning.

August 15, 2011 - 12:17 pm

Annie - Sorry to hear about your great aunt. This bread looks so, so fabulous. It makes me want to make a really good sandwich right now!

August 15, 2011 - 1:07 pm

Kelli - Sorry to hear about G.A. Jacklyn. This is a lovely tribute! Sounds delicious and I love the pictures! So beautiful!

October 2, 2011 - 10:05 am

Casey Lauren - I made this bread a couple of weeks ago and it was by far the most successful of all of my loaves! It rose perfectly-which never happens. I make all of my bread by hand so its always a bit harder to get it just right without the bread machine. Anyway, Rosebud was a genius. 🙂

February 10, 2012 - 4:42 pm

Mom Photographer (@MomPhotographer) - That sounds and looks great!

June 13, 2012 - 5:28 pm

White Whole Wheat Olive Oil Bread (and Smashed Berries) « The Pancake Princess and the Protein Prince - […] So I had a delicious-looking option, a puffy-looking, perfect-results-promised video option, a King Arthur option, an […]

September 4, 2012 - 11:28 pm

Daniele - Your grandmother must have been an amazing woman! And your are too for carrying on your family legacy through sharing these delicious recipes. I found rosebuds butter topped white bread through pinterest. As I was trying to decide if I could substitute some whole wheat into it, I saw this recipe. I made it tonight and needless to say, I’m hooked! I ate 3 slice in 1 night! It is heavenly! Many thanks to you and your grandmother!

February 27, 2013 - 5:32 pm

J. - Sounds delicious! What size load pan do you use? I have a regular bread pan, but it seems like this recipe might need something larger…

February 27, 2013 - 5:42 pm

srlacy - Hi J.
I believe I used a standard 9-inch loaf pan.

July 8, 2013 - 5:01 am

Whole Wheat Blueberry Cinnamon Rolls (a Rosebud Remix) » The Curvy Carrot - […] got her sticky buns, her white bread (one of the best things about life, I think), and her wheat bread.  And her original cinnamon rolls (which was one of my earliest […]

Maple Blueberry Parfaits

Want another blueberry recipe?  Well, you got one!

I’m a huge fan of yogurt.  Greek yogurt?  Yes.  Yogurt from goat’s milk?  Yes.  Regular, straight from grass-fed cows yogurt?  Absolutely. I eat yogurt at least once a day, which is why I am always looking for fun ways to spruce up one of my already-favorite foods.  And this recipe does just that.

Seeing that I live in the maple syrup capital of the United States, I was definitely hoping to try this one out.  I have never been a fan of maple syrup, but that was until I tasted the real stuff.  The real stuff out here is thick, sweet and definitely has a more substantial flavor than the bottled brand I would buy back in the Midwest.  I would highly recommend using the best quality maple syrup you can for this recipe-it truly makes a difference in the flavor, and I find that a little goes an incredibly long way.  And, of course, you can use those in-season blueberries for another healthy breakfast option.

I decided to go with a granola instead of the cookies that the original recipe called for.  I also decided to use up some vanilla yogurt in the fridge in lieu of whipped cream.  With only 5 ingredients and less than 10 minutes of prep/cook time, this was a great on-the-go breakfast treat. Feel free to add whatever add-ins you like: nuts, flax seed, or other fresh berries.

This is how to start your day off right!

Maple Blueberry Parfaits

Servings: 2


Ingredients

1 cup fresh blueberries, plus another 1/2 cup

1/4 cup high-quality maple syrup

1/2 teaspoon fresh lemon juice

1/2 cup granola, homemade if you have it

1 cup vanilla yogurt


Instructions

1. In a medium saucepan over medium heat, combine 1 cup of the blueberries with the maple syrup.  Cook, stirring occasionally, until the blueberries have burst, about 5-8 minutes or so.

2. Remove the saucepan from the heat and set the pan in a prepared ice bath to cool down the mixture slightly.

3. Add the remaining 1/2 cup of fresh blueberries and the lemon juice, stirring to combine.

4. Layer the vanilla yogurt, granola, and blueberry mixture, one at a time, so that nice layers form.  Top with some granola and enjoy.

Source:  Adapted from Gourmet, July 2009 via Epicurious.


August 9, 2011 - 5:51 am

Blog is the New Black - Delicious and beautiful!

August 9, 2011 - 8:00 am

Caroline @ chocolate and carrots - What a delicious treat! 🙂

August 9, 2011 - 8:01 am

Mary Margaret - Looks delicious! I have some blueberries left over from a trip to the farmer’s market that will be perfect for this recipe.

August 9, 2011 - 10:45 am

DessertForTwo - Normally, I’d feel guilty eating something so sweet for breakfast (since I eat desserts the rest of the day), but if you say it’s a great breakfast, I’m in! 🙂

August 9, 2011 - 1:41 pm

natalie (the sweets life) - Looks like we both have blueberry parfaits on the brain today 🙂 Granted, yours fare better at breakfast time!

August 18, 2011 - 12:05 pm

Meg's Everyday Indulgence - This sounds absolutely heavenly! My little guy loves blueberries and yogurt so he would just flip over this recipe! Thanks for sharing!