Lentil Tacos

The other day at work, a friend and I were discussing different kinds of food (because, usually, if I am not actively talking about work, I am very actively talking about food-my favorite topic in the whole world. If you work with me, you know this.)  We got on the topic of lentils.  She figured that I, as a non-meat eater, would have ample experience in the land of this particular legume.  Sadly, I sheepishly admitted that I hadn’t tried too many dishes highlighting the major protein powerhouse called the lentil.  Found in a variety of colors, these little guys are packed full of protein, essential amino acids, and tons of vitamins, including vitamin B12 (something all vegetarians should make sure to get enough of in their diets, right?).

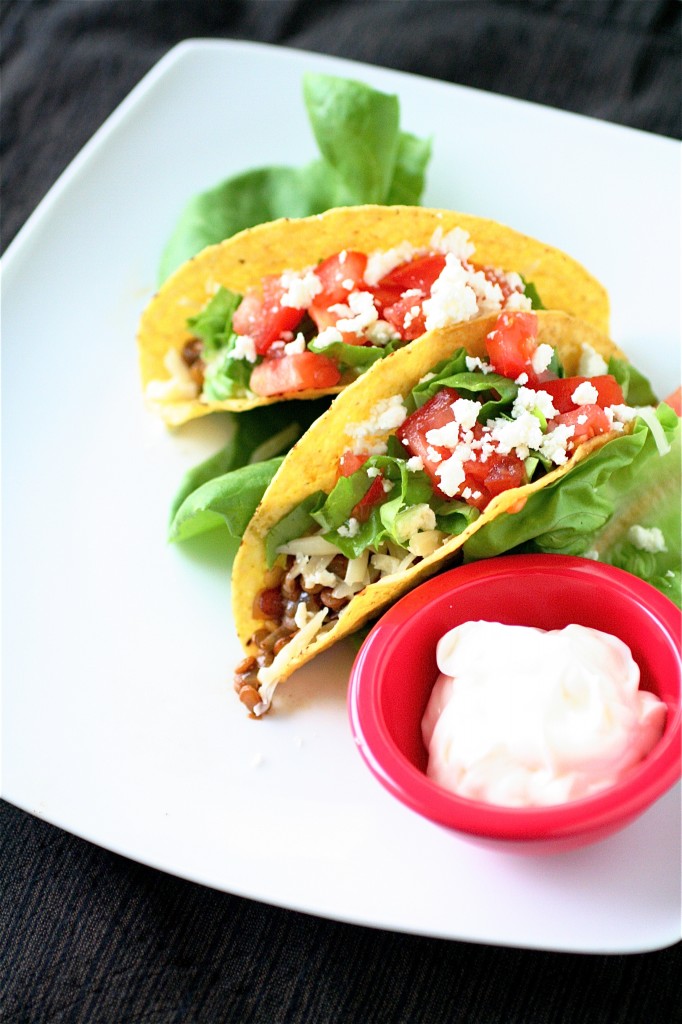
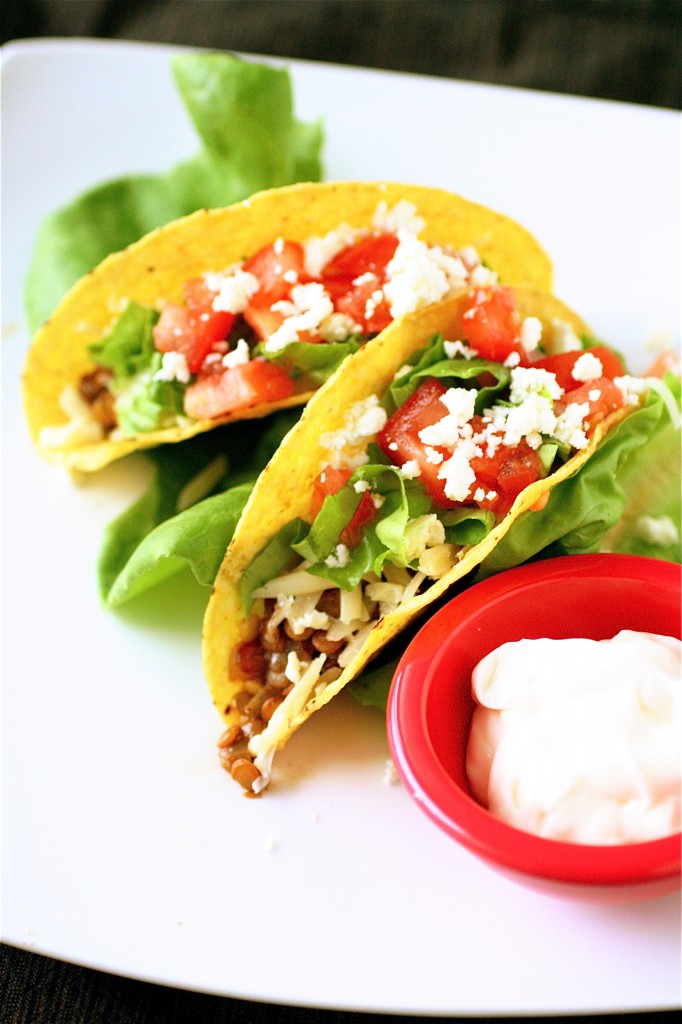
So, I was intrigued (and craving Mexican food, as usual.)  I came across this recipe coincidentally that same day, and I knew I had to try it.  Lentils are super cheap, healthy, and would satisfy my desire to experiment in the kitchen.  Let me tell you, I was very pleasantly surprised with this recipe-I liked it so much I ate every single leftover.  Texture-wise, lentils definitely don’t stand up to the traditional ground beef or soy crumbles, but I know a few of the readers here aren’t fans of soy crumbles, so this is definitely worth a trip into the land of legumes.  After they cook down, they soften up quite a bit and when mixed with taco seasoning, that flavor that I so desperately craved was there.  I topped my tacos with queso fresco, Monterey Jack, lettuce, and tomatoes, but feel free to dress yours up any way you like.  Without cheese, you can enjoy a vegan version of the taco.

Yep.  I can still eat tacos and be meat-free.  And I can’t wait for the next one.


Lentil Tacos

Servings: 4

Ingredients

1 tablespoon extra-virgin olive oil

1/2 cup yellow onion, chopped finely

1 clove garlic, minced (1 teaspoon)

Salt, to taste

1 cup dried brown lentils, rinsed well

One 2.25 ounce taco seasoning

2 and 1/2 cups vegetable broth

8 taco shells

For garnish:

Lettuce, tomato, Monterey Jack cheese, queso fresco, sour cream, etc.


Instructions

1. In a saute pan over medium heat, heat the olive oil until shimmering.

2. Add the onion, garlic, and salt, and cook, stirring frequently, until the onion is softened and translucent, about 4 minutes.

3. Add the lentils and taco seasoning, mixing well until heated through, about one minute.

4. Add the vegetable broth to the lentil mixture and mix well, scraping up any browned bits on the bottom of the pan.

5.  Reduce the heat and cover the lentils, allowing them to simmer.  Make sure to check on the lentils and stir occasionally to avoid burning the bottom of the pan, until the lentils are tender, about 20-25 minutes or so.

6. Remove the cover and allow the lentils to cook until the mixture thickens, about 5-6 minutes or so.

7. Transfer the lentils to a large bowl and let sit for a minute or two to slightly cool.

8. Using a potato masher, gently mash the lentils to your desired consistency.

9. Assemble the tacos by placing a few tablespoons of the lentils in each taco shell and garnishing as desired.


Source: Barely adapted from Self Magazine via Epicurious.


August 30, 2011 - 9:28 am

DessertForTwo - When I was a strict vegetarian in college, I discovered lentil enchiladas. Since then, I’ve always loved lentils w/ taco seasoning!

August 30, 2011 - 12:27 pm

Rachel - Oh yeah, lentils are a vegetarian’s best friend. I’ve made lentil tacos before but I’ve since forgotten about them. Time for a come back! My husband loves tacos and would eat them every other night, alternating with pasta, if I served them.
Lentils are also awesome in a vegetarian “bolognese” sauce : )

August 30, 2011 - 12:28 pm

Caroline @ chocolate and carrots - I’m pretty sure that I would absolutely love this. Yum!

August 30, 2011 - 1:23 pm

natalie (the sweets life) - I’ve made sloppy joes with lentils and was a big fan…now I need to try these!

August 30, 2011 - 3:35 pm

Megan - This is such a smart idea! I love tacos and their flavor, but I’m not always in the mood for beef and I definitely don’t enjoy soy crumbles. So tasty looking!

August 30, 2011 - 5:20 pm

Sarah - Beautiful. As a taco of any sort lover, this looks delicious :]

August 30, 2011 - 9:44 pm

Happy When Not Hungry - What a great recipe! Would’ve never thought to use lentils in tacos. Yum!

August 31, 2011 - 10:20 am

Kim (Feed Me, Seymour) - Hmm… I’d never think to put lentils in a taco! But this looks yummy and is a really interesting twist on the standard taco! I’ll definitely be putting this on my “to try” list.

September 2, 2011 - 9:14 pm

Lauren @ hey, who cut the cheese? - I never would have thought to do this, but what a great idea! If only I could convince my husband that tacos do not necessarily have to contain meat… Thanks for sharing this!

September 21, 2011 - 10:35 pm

Emily - My entire family loved these! My kids went for seconds, and that is saying something! Thank you for sharing your delicious recipes!

September 22, 2011 - 3:15 pm

Jen - My son became a vegetarian last year (I’ve been one for 20 years), and tacos are one of those foods that he’s really missed. We’re not a fan of the crumbles, and hadn’t found any other good substitute. I made these last night, and they totally hit the spot (even for the omnivores in the family) – they’ve got a spot in the regular rotation now. Thank you!

January 7, 2012 - 11:05 pm

Marian Barton - Made these tonight, very yummy, however I think the recipe would have served 12, not 4. We had a lot left over. Next time I would use just a half cup of lentils.

April 12, 2012 - 8:31 pm

Five Ways to Make Meat-Free Tacos | GoodVeg powered by Squidoo - […] 2.) Lentil Tacos. No meat is needed in these hearty tacos that stand on their own. Dried brown lentils are combined with sauteed onions, garlic, and taco seasoning and then simmered in vegetable broth. Check out the recipe and garnish suggestions at The Curvy Carrot. […]

May 23, 2012 - 10:39 pm

What’s cookin- vegetarian « ctcarra - […] Lentil tacos- never know the difference […]

June 1, 2012 - 3:42 pm

Nicole - I’ve done something very similar with barley & it turned out great! I didn’t even miss the meat as it had great texture. Will have to try with lentils now 🙂

September 10, 2012 - 8:36 pm

Stephanie - I found you on Pinterest (I’m trying to eat a more vegan diet) and pinned the recipe. Made these for dinner tonight and these were AMAZING. I ate mine with fresh spinach, fat free vegetarian refried beans, avocado, and salsa, and they were so, so good. My 10 year old son said that they were better than meat tacos, and could I please make these again? TOTAL WIN. I was worried that I’d never get to enjoy tacos again- they’re pretty much my favorite dish, but these were fabulous and I couldn’t at all tell the difference (except I feel better knowing these are much better for me!). Thank you so much! These will be going into my regular dinner rotation. 🙂

March 16, 2013 - 8:19 am

Lentil Tacos | The Healthy Junky - […] From: The Curvy Carrot […]

May 9, 2013 - 7:55 am

Lentil Tacos - […] source:  thecurvycarrot.com […]

June 18, 2013 - 1:05 pm

Whitney - This is my go-to recipe for taco night! Love it!

June 18, 2013 - 2:22 pm

srlacy - Yay! I am so glad you like them!

December 18, 2014 - 9:05 pm

Sam G - This has become a staple at my house. I served these to my in laws a few weeks ago and they were surprised that these were made with lentils. So yummy, and you can keep all the ingredients in the pantry. I have the ingredients for 2-3 lentil taco dinners in the house at all times for last minute dinners.

Caprese Skewers

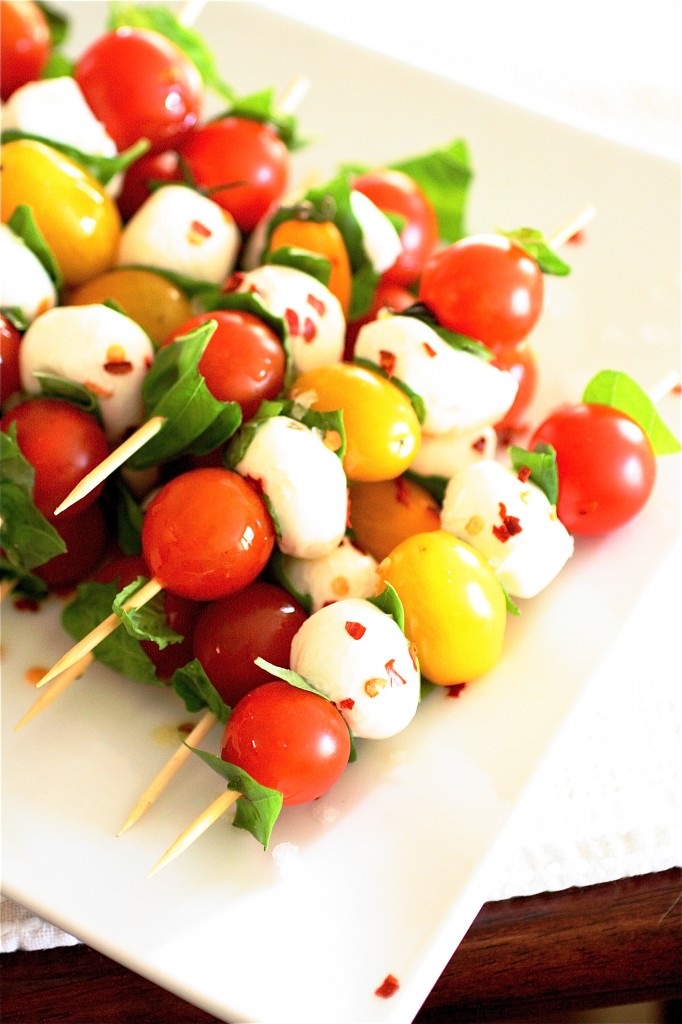
This might be the simplest recipe I have ever posted.  And probably one of my favorite recipes to post, too.  It’s no secret I love anything caprese-nothing beats fresh mozzarella and good basil.  Recently the local farmer who I buy my basil from had a serious issue with his basil plants-all of them withered and browned, so he wasn’t selling for a couple of weeks.  I was in serious withdrawal, folks.  So much so, that when I saw that he was once again producing the vibrant green and leafy herb (with that heavenly smell….), I bought three big plants.  So, then, of course, I bought some of the fresh yellow and cherry tomatoes to go with it….and then I headed to the local cheese stand where I knew I could find mozzarella from my favorite dairy farmer out here.  I ended up picking up a few containers of fresh ciliegine mozzarella (tiny balls of fresh mozzarella…smaller than bocconcini), but if you don’t have access to this type of mozzarella, just use the regular stuff, chopped.

It’s starting to get a little colder out here, and I am dreading the winter months…not so much for the impending snow but for the lack of fresh produce. I’m buying as many fruits and veggies as possible right now.  Because nothing beats a simple summer meal like this (or as an appetizer, which is what I did-I brought this dish over to a dinner party) with a nice glass of good wine and some deep breaths, taking in how great life can be.  Sometimes simpler is better, as I have found.  This little recipe proves it.

For other caprese-inspired recipes (and to prove how obsessive I am about the heavenly trio of basil, mozzarella, and tomato), check these links out:

Caprese Eggs Benedict

Pasta Caprese

Cherry Tomato Salad with Basil and Mozzarella

Grilled Smoked Mozzarella and Basil Pesto Sandwich

Caprese Skewers

Servings: Approximately 4-6

Ingredients

1 pint cherry tomatoes

1 pint yellow tomatoes

1 pound fresh ciliegine or other type of mozzarella cheese, fresh

1 cup fresh basil leaves, gently torn into 1/2-inch pieces

Pinch red pepper flakes, to taste

Sea salt, to taste

Extra-virgin olive oil, for drizzling

Wooden skewers, for serving

Instructions

1. Beginning with a fresh basil leaf, spear the basil, followed by a cherry tomato, mozzarella piece, and yellow tomato, as desired. Repeat with each additional skewer.

2. Lightly drizzle the assembled skewers with extra-virgin olive and sprinkle with red pepper flakes and sea salt, if using.


Source: Williams-Sonoma.


August 28, 2011 - 5:45 am

Tina@flourtrader - These caprese skewers look so tasty and colorful. Nothing like fresh ingredients. Thanks for sharing.

August 29, 2011 - 4:06 pm

anna maria - i love the picture of all the skewers lined up in a row! looks like a delicious recipe

August 29, 2011 - 5:24 pm

Alli - What a beautiful and tasty appetizer. I love finger foods on a stick.

August 29, 2011 - 5:26 pm

Christina - Just letting you know I stopped by 🙂 Your blog is beautiful – love the recipes and the photography. Connections between bloggers are great – I’ve been following Annie for awhile, nice to meet her friends. Inspiring work, keep it up. Christina

August 29, 2011 - 8:45 pm

Kelsey - Caprese is one of the best things about summer!

August 31, 2011 - 5:23 pm

Renee@Nana's Empty Nest - I can’t seem to get enough Caprese this summer! Sounds like you are the same way. I look forward to following your blog to get some vegetarian ideas for when my daughter is home.

February 5, 2012 - 5:01 am
April 10, 2012 - 9:03 am

Caprese Skewers | Gourmet Beauty - […] owns Nothing Bundt Cakes in Albuquerque…the most delicious cake in the universe). I found this recipe on The Curvy Carrot and I knew it would make the perfect appetizer for […]

October 7, 2012 - 10:32 pm

Weekend Meal: « Yow Yow! - […] [Caprese Skewers] Share this:Like this:LikeBe the first to like this. Tagged Food, Life, ME, Nomz, Pinterest […]

May 7, 2013 - 11:07 am

Caprese Skewers - […] source:  thecurvycarrot.com […]

December 29, 2014 - 9:07 pm

patty - what would be a good main dish with the caprese skewers?

Black and White Cookies


If you haven’t caught on to it lately, baking and cooking are pretty important things in my life.  I find it a cathartic release to create something with my own hands.  As a child, I wished I had the artistic talents that run in my mother’s side of the family; there you can find carpenters, artists, cake builders/decorators, seamstresses, etc.  I have tried most of these things, never finding something that tested my patience enough to actually become decent at it.  Some people may run ten miles each day or unwind with a good book to relax.  True, while I do enjoy doing these things, cooking is what releases me.  I find that an afternoon in the kitchen (while listening to my favorite music, of course) refuels me: I am never happier than when I am piping frosting onto two dozen cupcakes, throwing garlic into a well-oiled (and heated) pan, or sharing what I make with family and friends (always trying at least a little bit first myself, of course).

So, finding a friend with as much passion (and probably a million times more) as me was a complete blessing.  I was going through a pretty hard time when I met Annie.  They say everything happens for a reason, and I know that sounds cliché, but Annie’s friendship and support during that time in my life enabled me to find the bits and pieces of me that were left after being in an abusive relationship for almost nine years.  When I lived in Indianapolis, Annie and I frequently had “baking days” where I would spend the whole day there, constructing cupcakes, pies, breads, etc.  Some of my best memories from the past four years are in Annie’s kitchen.  One day there were four of us, cooking together, and there were three KitchenAid mixers going at the same time, each of us making a different thing. We kept laughing because, to us, three KitchenAids running at one time is pretty much like our own personal heavens.

I was sad when I left Indy (for many reasons, of course), but one of them was because I knew that the proximity of Annie’s amazing kitchen (and Andrew’s help in making all the treats) was a luxury that would no longer be within my reach.  She decided to substitute physical baking days with “virtual baking days” instead.  That way, she and I could still get to bake together in spirit, even though we are now almost a thousand miles away.  Because of my move across the country, she picked the first baking task: these black and white cookies.  We both had been wanting to make them, so it was an easy decision.  Made with cake flour, these cookies are extremely cake-like and chewy, just like the ones in the Big Apple itself.  Now, while I am not an expert glazer (obviously), I found that I got the hang of glazing each cookie after a couple tries.  And, man, were they good.

So, call your best friend up and tell them thank you for being such an important part of your life.  Or give them a Black and White Cookie instead.  Thanks, Annie.

Black and White Cookies

Servings: approximately 24 cookies

Ingredients

For the cookies:

4 cups plain cake flour

1/2 teaspoon baking powder

1/2 teaspoon salt

16 tablespoons (2 sticks) unsalted butter, softened but still cool

1 and 3/4 cups granulated sugar

2 large eggs, at room temperature

1/2 teaspoon vanilla extract

1/4 teaspoon lemon extract

1 cup milk

For the glazes:

2 ounces bittersweet chocolate, chopped (or use chocolate chips)

1/4 cup light corn syrup

1/3 cup water

5 cups confectioners’ sugar

1/2 teaspoon vanilla extract

Instructions

1. For the cookies: Preheat the oven to 375 degrees.

2. Line two baking sheets with parchment paper; set aside.

3. In a large bowl, combine the flour, baking powder, and salt, whisking well until combined.

4. In the bowl of your standing mixer fitted with the paddle attachment, beat the butter on medium speed until light and fluffy, about 30 seconds or so.

5. In a slow and steady stream, gradually add the granulated sugar, increasing the mixer speed to medium-high, until the sugar is fully incorporated and the mixture is pale yellow and creamy, about three minutes, scraping down the sides of the bowl as necessary.

6. Add the eggs, vanilla, and lemon extract and beat until thoroughly combined, about an additional 30 seconds or so.

7. On low speed and beginning and ending with the flour mixture, alternately add the flour mixture with the milk in about three additions until just combined.

8. Using a 1/4-cup measuring cup, place the cookie dough in mounds of dough about 2 inches apart on your baking sheets.

9. With moistened fingers or the back of a soup spoon, gently flatten each  mound of dough into a disk about 2 and 1/2-inches wide and 3/8-inches thick.  Shape each mound of dough into a circle.

10. Bake the cookies until the edges turn light golden brown, about 14 minutes or so, rotating the pans halfway through the baking time. ***Watch them-the original recipes calls for 20 minutes total, but mine were done before that.

11. Remove the cookies from the oven and let cool slightly, then transfer to a wire cooling rack to cool completely.

12. For the glazes: In a heatproof bowl set over simmering water, melt the chocolate, stirring occasionally, until smooth.

13. Remove the chocolate from the heat; set aside.

14. In a medium saucepan set over medium-high heat, combine the corn syrup and the water, stirring until the mixture comes to a boil.

15.  Remove the saucepan from the heat and add the confectioners’ sugar and vanilla, mixing well until combined.***This is your vanilla glaze.

16.  Transfer 3/4-cup of the vanilla glaze to the bowl with the melted chocolate and mix thoroughly to combine. ***This is your chocolate glaze.

17. To glaze:  Using an offset spatula, spread about 1-2 tablespoons of the vanilla glaze on each half of each cookie, tilting the cookie slightly and scraping the edge of each cookie to prevent the glaze from dripping off the edge. **It helps to do this step over some parchment paper to catch the drips. If your glaze hardens too quickly, just add a little hot water to thin it out; conversely, if it’s too runny, add a little bit of confectioners’ sugar to help it thicken a bit.

18. Place the cookies back on the wire racks and let set for 15 minutes or so, or until the glaze is hardened.

19.  Repeat this step with the chocolate glaze.

20. Let the cookies sit at room temperature for at least one hour to allow the glazes to harden.


Source: Directly from Baking Illustrated.
 

August 26, 2011 - 5:39 am

Tina@flourtrader - I really enjoyed reading this post-well written. The cookies are a timeless classic and yours look amazing. Have a great weekend.

August 26, 2011 - 8:12 am

Blog is the New Black - Very sweet post, Shanon. 🙂

August 26, 2011 - 8:32 am

Liz - What a beautiful tribute to your friend and I understand how important they are when dealing with something so incredibly emotional and painful (been there done that with an EX-husband for 10 years). Cheers to you, Annie and those awesome looking cookies that I WILL be making this weekend.

August 26, 2011 - 9:30 am

Rachel M. - A great post. Where would we be without great friends?

I lost my grandmother recently and this made me think of her since black and whites were a staple in her kitchen and were a favorite of mine growing up.

I have been looking for a recipe to make these a home, in her memory. Thanks for sharing.

August 26, 2011 - 12:36 pm

Annie - As if I didn’t already miss you enough, this just made me cry. Thank God I’m seeing you in a week. Love you babe.

August 26, 2011 - 12:43 pm

Paula @ Dishing the Divine - I tried following a similar recipe years ago to thank some folks for being refs for our kickball tournament. Needless to say, I did not follow this recipe as my cookies were about as ugly as you get. 🙁 I should have researched different recipes before starting that hellish project. 🙂

August 26, 2011 - 8:08 pm

Claire - This is such a sweet post! You and Annie are my favorite food bloggers, and both of you constantly inspire me–beyond the kitchen–with your heart-warming posts. My sister is currently in Denver doing her surgical rotation, so she gets to live with me. She is on call this week end, so I am going to whip some of these up to bring to her at the hospital. Thank you for sharing.

October 16, 2011 - 2:35 pm

Black and White Cookies « Spice Is Nice - […] Slightly adapted from The Curvy Carrot and Annie’s Eats, originally from Baking Illustrated LD_AddCustomAttr("AdOpt", "1"); […]

October 31, 2011 - 12:03 am

Shanon’s Chocolate Cupcake Tops - […] baking.  Since moving, they still continue that tradition only now these two BFF’s do their bake-togethers virtually.  The Curvy Carrot’s beautiful photographs serve to compliment  the well-written […]